
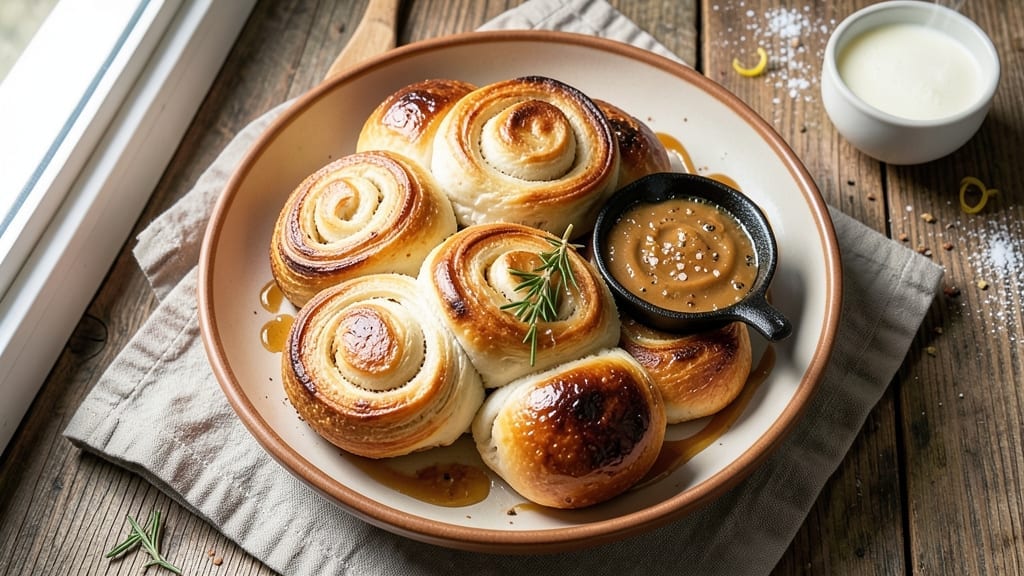
Nothing beats the aroma of warm, homemade dinner rolls fresh from the oven—especially when you can have them ready in just 90 minutes. This recipe delivers soft, pillowy buns with a crispy golden crust, perfect for soaking up soups or sandwiches.
The secret lies in proper kneading, proofing, and baking techniques that guarantee restaurant-quality results at home.
What sets these dinner rolls apart is their foolproof method—no complicated steps or professional equipment required. You’ll work with a simple dough of flour, yeast, sugar, and butter, shaped into classic rolls that rise beautifully.
The key to achieving that signature tender texture is letting the dough proof twice, allowing the gluten to relax and develop fully.
By the time you pull these rolls from the oven, you’ll have a batch of golden, fragrant buns with a soft interior that melts in your mouth. Each roll is perfectly proportioned, making them ideal for serving alongside roasted meats, soups, or as a side for any meal.
The best part? They stay warm and fresh for hours, so you can enjoy them at your leisure.
Whether you’re hosting a dinner party or simply craving homemade comfort food, these rolls will elevate your table. Ready to bake? Let’s get started with the ingredients and step-by-step instructions to create the perfect batch.
Ingredients for 90 minute dinner roll
Twelve perfect rolls in 90 minutes—just flour, yeast, butter, and patience.
| Ingredient | Amount | Notes |
|---|---|---|
| All-Purpose Flour 🌾 | 4 ½ cups | Sifted for light texture |
| Active Dry Yeast 🍄 | 2 ¼ tsp | One packet (2¼ tsp) |
| Granulated Sugar 🍚 | 1 tbsp | Feeds yeast for rise |
| Unsalted Butter 🧈 | ½ cup | Cold, cubed for texture |
| Large Eggs 🥚 | 1 whole | Room temperature |
| Warm Whole Milk 🥛 | ¾ cup | 110°F for yeast activation |
| Diamond Crystal Kosher Salt 🧂 | 1 ½ tsp | Adjust to taste |
| Granulated White Sugar 🍚 | 1 tbsp | For dough enrichment |
| Extra-Virgin Olive Oil 🫒 | 1 tbsp | For dough softness |
The yeast is your secret weapon—Bob’s Red Mill active dry yeast works best, but any brand will do. Store it in the fridge to keep it fresh longer. The butter? Use cold, cubed butter—room temperature butter makes the dough too soft. Warm the milk to 110°F (just warm to the touch) to activate the yeast without killing it. King Arthur flour is my go-to for bakery-style results, but any all-purpose flour works. If you’re in a pinch, substitute 1 tbsp melted butter for the olive oil, but you’ll lose that tender crumb.
No yeast? Instant yeast works 1:1, but active dry needs proofing first. Short on butter? Vegetable shortening keeps the same structure, though flavor suffers. The sugar amounts might seem small, but they’re crucial—1 tbsp granulated sugar feeds the yeast, while the 1 tbsp white sugar in the dough enriches flavor. Eggs should be room temperature for even mixing. Whole milk adds richness, but 2% works too. For a vegan version, use flax eggs and dairy-free butter.
Dough doubles best in a lightly oiled bowl covered with a damp towel. Keep it at 75°F for optimal rise—too cold slows fermentation, too warm kills yeast. After shaping, let rolls proof 20-30 minutes before baking. Store baked rolls in an airtight container at room temperature for 2 days, or freeze for 3 months. For reheating, wrap in foil and warm at 350°F for 10 minutes—they’ll taste fresh out of the oven.
Why You’ll Love This Recipe
- No-Knead Magic: I’ll admit, I was skeptical about letting dough rise without a single turn on the counter. But the yeast in this recipe works its charm while I’m making dinner—no fuss, no waiting around. That buttery richness from the softened butter? It’s all there, even if I forget to knead.
- Buttery Pillow Soft: The secret’s in the butter—cold cubes worked into the flour until it looks like coarse sand, then melted into warm eggs and sugar. That’s the magic: flaky, golden layers with a melt-in-your-mouth center. My husband steals them before they even hit the plate.
- Weeknight Workhorse: Freeze half the batch after baking, and you’ve got instant dinner rolls for soup night or sandwiches. Or pull them straight from the fridge for garlic butter toast—no one will guess they’re not fresh. Honestly, I make this twice a month just to have backup.
- Pantry Staple Power: Four ingredients you already own: flour, yeast, sugar, and butter. That’s it. No specialty flours or odd spices to track down. I’ve made this on grocery-store budgets, and it’s still the most reliable roll I’ve ever baked—no matter what else is happening in the kitchen.
Step-by-step instructions for soft pillowy dinner rolls
Here’s how to make light, airy dinner rolls that stay soft for hours—no shortcuts, just perfect technique.
Activate the Yeast for Maximum Rise
In a small bowl, whisk together the 0.75 cup warm whole milk (it should feel like bathwater, around 110°F) with the 1 tbsp granulated sugar and 2.25 tsp active dry yeast. Let this sit for 5-10 minutes until it becomes frothy and bubbly—this tells you your yeast is alive and ready to work its magic.
If it doesn’t bubble, your yeast might be dead. Start fresh with a new packet. The yeast is the secret weapon here, creating that signature pillowy texture we’re after. Don’t skip this step—it’s where all the flavor and rise begin.
Mix the Dough for Smooth Texture
In the bowl of a stand mixer fitted with the dough hook, combine the 4.5 cups all-purpose flour and 1.5 tsp diamond crystal kosher salt. Add the yeast mixture, 1 whole large egg, 1 tbsp granulated white sugar, 1 tbsp extra-virgin olive oil, and the 0.5 cup cold unsalted butter (cut into cubes).
Mix on low speed for 2 minutes until the dough starts to come together, then increase to medium speed for another 5-7 minutes until the dough pulls away from the sides of the bowl and forms a smooth, elastic ball. The dough should be slightly tacky but not sticky—if it’s too wet, add 1 tablespoon of flour at a time until it reaches the right consistency.
Knead for Gluten Development
Continue kneading on medium speed for 3-5 minutes until the dough is smooth and elastic. You’ll know it’s ready when you poke it with your finger and it springs back slowly. This kneading step develops gluten, which gives the rolls their structure and that irresistible chew.
For a quick test, stretch a small piece of dough—if it resists tearing and holds its shape, you’re good to go. If it tears easily, knead for another minute or two. Once done, shape the dough into a ball, lightly oil a large bowl, and place the dough inside. Cover with a damp towel and let it rise in a warm place for 1 hour or until doubled in size.
Shape and Proof for Perfect Rolls
Punch down the risen dough to release air, then divide it into 12 equal pieces (about 2 ounces each). Roll each piece into a ball, then gently flatten into a 1-inch thick disc and roll it up tightly to form a log. Pinch the seam to seal and place the rolls seam-side down on a parchment-lined baking sheet, leaving 1 inch between each.
Cover the baking sheet with a damp towel and let the rolls proof for 30-45 minutes until they’ve puffed up noticeably. They should look soft and slightly domed—this is your cue that they’re ready for the oven. The proofing stage is crucial; it’s what gives these rolls their signature softness and height.
Bake to Golden Perfection
Preheat your oven to 375°F. Bake the rolls for 15-18 minutes until they’re golden brown on top. The edges should look set, but the centers should still feel slightly soft to the touch. If they brown too quickly, tent the baking sheet with foil to prevent over-browning.
For extra shine, brush the warm rolls with a little melted butter while they’re still in the pan. Let them cool for 5 minutes before serving—this helps them set slightly, making them easier to handle. The aroma filling your kitchen will make your mouth water, and the first bite will be worth every minute of the 90-minute wait.
Pro Tips For Making 90 Minute Dinner Roll
- Test Yeast First: Drop a pinch of yeast and sugar into warm water (about 110°F) for 5 minutes—if it bubbles, you’re good to go. I learned this the hard way after wasting dough on dead yeast that sat too long in the pantry.
- Chill the Dough: After kneading, let the dough rise twice—once at room temp, then a second rise in the fridge overnight. The cold slows fermentation, deepens flavor, and makes rolling easier. Yes, even if you’re impatient like me.
- Butter at Room Temp: Cut the cold butter into tiny cubes before mixing—it melts faster and creates flaky layers. I used to use straight-from-the-fridge butter, and the rolls turned out dense. (Your future self will thank you.)
- Egg Wash Matters: Brush the tops with beaten egg and sprinkle coarse sugar before baking. The sugar caramelizes into a glossy crust, not just a plain, dry finish. Skip this, and you’ll miss the best part.
Serving suggestions for leftovers
Soup Pairings
These pillowy dinner rolls are absolute magic with creamy soups like roasted tomato basil or classic chicken noodle. The soft interior soaks up the broth beautifully, while the golden crust adds satisfying texture.
I like to serve them warm alongside a homemade bisque or even a rich beef barley soup for a hearty meal. 🥄
Sandwich Starters
Transform these rolls into gourmet sandwiches by splitting them open and filling with your favorite ingredients. Try sharp cheddar and smoked turkey, prosciutto and mozzarella, or grilled chicken with pesto.
The soft, buttery texture makes them perfect for holding fillings without falling apart. For a quick lunch, add a side of arugula salad with lemon vinaigrette.
Breakfast Serving
Elevate your breakfast game by serving these rolls with scrambled eggs, crispy bacon, and sautéed mushrooms. The warm, fluffy texture pairs perfectly with savory breakfast dishes.
I also love adding a drizzle of honey butter on top for a sweet-savory twist. This combo makes weekend brunches feel like a restaurant experience. 🍳
Holiday Feast Sides
These rolls are a crowd-pleaser at holiday meals. Serve them alongside roasted turkey, ham, or prime rib for a classic touch. For a festive twist, add herb butter (mix softened butter with fresh rosemary and garlic) and serve with gravy for dipping.
They also make a great addition to Christmas morning breakfast with sausage and eggs.
Dinner Party Presentation
Arrange the rolls on a wooden board with fresh herbs like rosemary or thyme for a rustic, elegant look. Serve them warm in a cast-iron skillet with a side of whipped honey butter for dipping.
For a fancier touch, sprinkle with flaky sea salt right before serving. This presentation makes your dinner table look like it belongs in a magazine. ✨
Make-Ahead Serving
Bake a batch ahead of time and store them in an airtight container at room temperature for up to 2 days. Reheat in a 350°F oven for 10 minutes to restore their softness.
They’re perfect for weeknight dinners when you want fresh rolls without the effort. I often prep a batch on Sunday to enjoy all week long with soups or sandwiches. 💡
Nutrition facts
Frequently asked questions
Can I make these dinner rolls without a stand mixer?
You can mix the dough by hand in a large bowl using a wooden spoon or dough whisk. Knead for 8-10 minutes until the dough is smooth and elastic. The key is to work it vigorously—press, fold, and turn the dough to develop the gluten properly. Just be prepared for a bit more arm work than with a mixer.
Why did my rolls turn out dense instead of pillowy?
Dense rolls usually happen when the dough isn’t kneaded enough or proofed properly. Make sure you knead until the dough springs back when poked, and let it rise in a warm spot until it doubles in size. Also, check your yeast—if it didn’t bubble when activated, it may have been dead. For extra fluffiness, try adding 1 extra tablespoon of butter or letting the dough proof for 10 extra minutes.
How can I make these rolls sweeter or savory?
For sweeter rolls, add 1 tbsp honey or maple syrup to the dough or brush the tops with melted butter mixed with cinnamon sugar before baking. For savory rolls, mix 1 tsp garlic powder or dried herbs into the dough. You can also add ½ cup shredded cheese (like cheddar or mozzarella) for a cheesy twist. The flavor options are endless!
Can I freeze the dough before baking?
Yes! Shape the rolls as directed, then place them on a baking sheet, cover with plastic wrap, and freeze for 1 hour. Transfer to an airtight container or freezer bag and store for up to 3 months. To bake, remove rolls from the freezer and let them thaw at room temperature for 30 minutes before baking as usual. Add 2-3 extra minutes to the baking time.
What’s the best way to reheat leftover rolls?
Wrap rolls in a damp paper towel and microwave for 10-15 seconds to restore softness, or reheat in a 350°F oven for 5-7 minutes until warm. For extra crispiness, broil for 1-2 minutes at the end. Avoid the microwave if the rolls are dry—it can make them rubbery.

- 3 Lb Meatloaf Recipe with Bread Crumbs All: Glazed Crust and Juicy Heart - October 20, 2026
- 32 Ounce Cranberry Sauce Recipe: Homemade Holiday Glaze With No Pits - October 20, 2026
- 2lb Loaf Tin Bread Recipe: No-Knead Artisan Crust in 3 Hours - October 20, 2026