
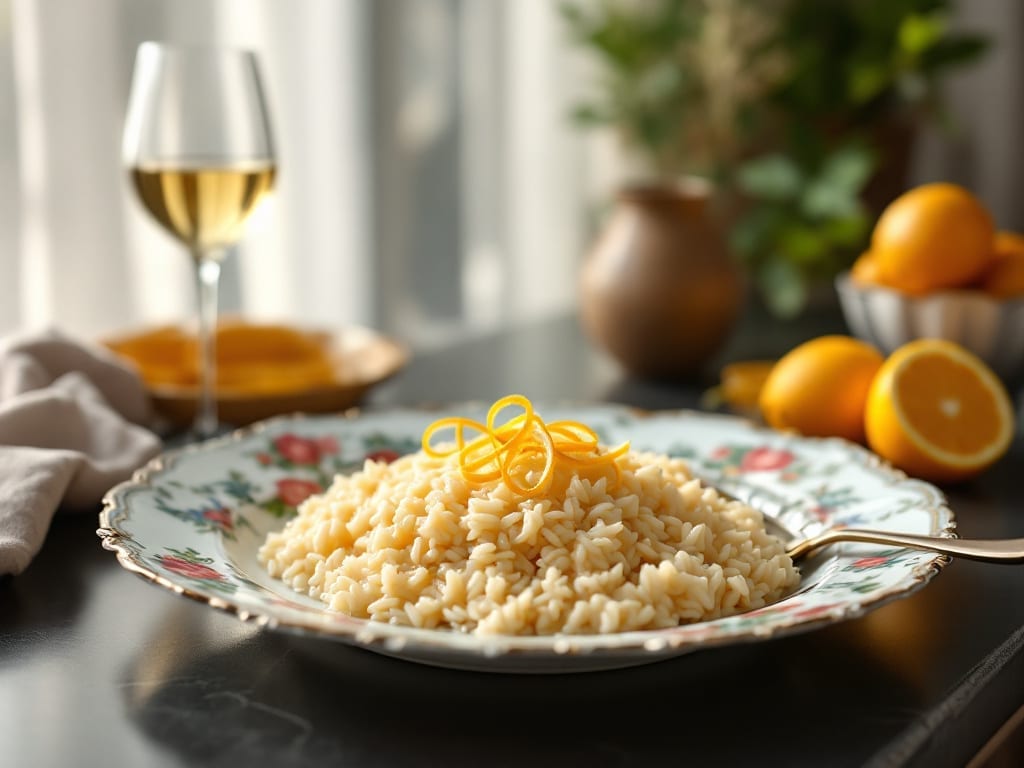
Transforming traditional arroz con leche into a 30-minute Instant Pot dessert means creamy, cinnamon-kissed rice pudding without the hours of stovetop waiting. The key lies in precise rice-to-liquid ratios and controlled pressure cooking, which develops that signature velvety texture while keeping the process foolproof for home cooks.
I’ve refined this method over countless batches—each time perfecting the balance between tender rice and rich, spiced milk.
What sets this Instant Pot version apart is how it preserves the dish’s comforting essence while cutting cooking time dramatically. The secret?
A natural release after pressure cooking allows flavors to meld without overcooking the rice, while a touch of cornstarch in the milk mixture ensures that signature creamy, pudding-like consistency. No special equipment beyond your Instant Pot is needed—just a few simple ingredients and a patient 20-minute cook time.
The result is a dessert that tastes like a warm embrace: golden-hued, fragrant with cinnamon, and just sweet enough to satisfy.
The rice absorbs the spiced milk completely, leaving you with a texture that’s neither too soft nor grainy—perfect for serving warm with a sprinkle of cinnamon or chilled for a refreshing twist. This recipe delivers restaurant-quality comfort in a fraction of the time.
For those who love customization, variations like adding raisins, vanilla extract, or even a hint of nutmeg can elevate the flavor profile further. Whether you’re preparing it for a family gathering or a quiet night-in treat, this Instant Pot arroz con leche is designed to impress without the fuss.
Let’s get started on creating your perfect batch.
Ingredients for arroz con leche instant pot
Simple pantry staples transform into restaurant-style arroz con leche in minutes.
| Ingredient | Amount | Notes |
|---|---|---|
| Long-Grain White Rice 🍚 | 1 cup | Uncooked, medium grain preferred |
| Whole Milk 🥛 | 2 cups | Full-fat for creaminess |
| Granulated Sugar 🍬 | ½ cup | Adjust to taste, fine grain |
| Ground Cinnamon 🌿 | 1 ½ tsp | Freshly ground preferred |
| Vanilla Extract 🍃 | 1 tsp | Pure vanilla, no imitation |
| Cornstarch 🌾 | 1 tbsp | For silky texture |
| Salt 🧂 | ½ tsp | Diamond Crystal preferred |
| Unsalted Butter 🧈 | 2 tbsp | Cold, cubed for melting |
| Raisins 🍇 | ¼ cup | Optional, plump variety |
| Ground Nutmeg 🌿 | ¼ tsp | Freshly grated preferred |
| Lemon Zest 🍋 | ½ tsp | Brightens flavor profile |
The rice is the foundation—medium-grain absorbs liquid perfectly without turning mushy. Bob’s Red Mill or Lundberg are my go-to brands for consistent results. For the milk, whole milk is non-negotiable here—it delivers that signature velvety texture. If you’re using dried raisins, soak them in warm water for 10 minutes first. The cinnamon should be freshly ground; pre-ground loses potency quickly. For the vanilla, Nielsen-Massey or McCormick pure extract adds depth without artificial aftertaste.
No vanilla extract? Vanilla bean paste at half the amount works beautifully. Short on cinnamon? Cassia cinnamon is a perfect substitute. The cornstarch is key for that pudding-like consistency—don’t skip it. For the sugar, turbinado sugar adds subtle caramel notes if you’re feeling fancy. The lemon zest might seem unusual, but it cuts through the richness and brightens the entire dish. If you’re making this ahead, add the lemon zest and raisins during reheating to preserve their freshness.
This dessert keeps beautifully—5 days refrigerated or 3 months frozen. For freezing, portion into airtight containers and thaw overnight in the fridge. The texture actually improves after chilling, so it’s perfect for making ahead. I like to sprinkle extra cinnamon on top right before serving—freshly toasted if you’re feeling extra. The raisins can be added anytime, but they’re best when plump, so add them during the last 5 minutes of cooking if you’re reheating.
Why You’ll Love This Recipe
- One-Pot Magic: I swear by this recipe—just dump the rice, milk, and cinnamon into the Instant Pot, press a button, and walk away. No stirring, no watching, no stress. The milk thickens into that dreamy, pudding-like texture all on its own.
- Cinnamon-Sugar Bliss: That first spoonful of warm rice drenched in vanilla-infused milk? Pure comfort. The cinnamon sticks to every grain, and the sugar caramelizes just enough to make it taste like dessert. Honestly, I’ve caught myself eating it straight from the pot.
- Weeknight & Holiday Hero: Make a big batch on Sunday—it reheats perfectly for breakfast all week. But also? This is my go-to for potlucks or when my mom visits. Serve it warm with a sprinkle of cinnamon, and suddenly you’re the star of the meal.
- Budget-Friendly Luxury: Whole milk and rice are cheap, but the flavor feels indulgent. Between us, this recipe costs me pennies per serving, yet it tastes like something you’d order at a café. Plus, leftovers? They only get better overnight.
Step-by-step instructions for arroz con leche Instant Pot recipe
Here’s how to transform simple pantry staples into velvety, spiced rice pudding with minimal effort.
Prepare the Instant Pot and Combine Base Ingredients
Rinse the 1 cup long-grain white rice thoroughly under cold water until the water runs clear. This removes excess starch that could make your pudding gummy. Add the rinsed rice to your Instant Pot along with the 2 cups whole milk, 0.5 cup granulated sugar, 0.5 tsp salt, 0.5 tsp lemon zest, and 0.25 tsp ground nutmeg. Stir gently to combine—you want the sugar to dissolve completely before cooking begins.
Here’s the thing—using full-fat milk creates that luxurious creaminess we’re after. The lemon zest might seem like an odd addition, but it brightens the warm cinnamon flavors beautifully. Give everything a quick stir after adding the zest so it distributes evenly throughout the mixture. The nutmeg adds depth, but don’t overdo it—just a pinch makes all the difference.
Cook the Rice Mixture
Secure the lid on your Instant Pot and set the valve to sealing. Cook on high pressure for 10 minutes. This shorter cook time compared to regular rice creates that signature creamy texture we want. When the cooking cycle completes, let the pressure release naturally for 10 minutes—this prevents the rice from becoming mushy.
Resist the urge to peek during cooking. The natural pressure release allows the rice to absorb all that milky goodness without turning into porridge. You’ll know it’s done when the pressure indicator drops completely and the float valve is down. The mixture should look thick and creamy, almost like a thick custard, with the rice fully tender.
Thicken and Flavor the Pudding
Once the pressure has released, remove the lid and stir in the 2 tablespoons unsalted butter and 1.5 teaspoons ground cinnamon. The butter adds richness while the cinnamon builds that signature warm spice profile. Mix well to distribute these ingredients evenly throughout the creamy base. Here’s where the magic happens—this is the moment that transforms basic rice pudding into something truly special.
In a small bowl, whisk together the 1 tablespoon cornstarch and 1 teaspoon vanilla extract with 2 tablespoons of the pudding mixture to create a smooth slurry. This prevents lumps from forming when we add it back. Slowly stir this slurry into the Instant Pot, mixing constantly for 1-2 minutes until the pudding thickens noticeably. You’re looking for a consistency that coats the back of a spoon but still flows smoothly—somewhere between thick custard and soft pudding.
Finish with Raisins and Rest
Gently fold in the 0.25 cup raisins using a silicone spatula. The raisins should be evenly distributed but still visible throughout the pudding. Let the mixture sit in the Instant Pot for 5 minutes to thicken slightly more. This resting period allows all the flavors to meld together perfectly. The pudding should now have that signature velvety texture with just the right amount of body.
For best results, serve the arroz con leche warm or at room temperature. The flavors develop beautifully as it cools, with the cinnamon aroma becoming even more pronounced. If you prefer it thicker, you can chill it for 1-2 hours before serving—it will firm up slightly in the refrigerator. This dish tastes even better the next day as the flavors continue to meld together.
Pro Tips For Making Arroz Con Leche Instant Pot
- Rinse the Rice First: Skip this and you’ll end up with grainy, chalky arroz con leche—no one wants that. Give your long-grain rice a quick 30-second rinse under cold water before adding it to the Instant Pot. Just enough to remove surface starch, not soak it. I learned this the hard way after making a batch that tasted like glue.
- Use Whole Milk, Not Evaporated: Evaporated milk makes the rice gummy—trust me, you’ll taste the difference. Whole milk gives a creamier, lighter texture, and it’s worth the extra trip to the fridge. If you’re out, a 50/50 mix of whole and heavy cream works in a pinch, but don’t skip the whole milk if you can avoid it.
- Stir Once, Then Stop: After the initial cook, resist the urge to poke or stir the arroz con leche. One quick stir at the very start (to distribute the cinnamon) is all you need. Lifting the lid mid-cook lets steam escape, which turns your creamy pudding into a sad, watery mess. I know, I know—it’s hard to resist peeking.
- Sweeten Gradually: Dump all the sugar in at once and you’ll risk burning the bottom. Start with half the sugar, let the rice cook for 10 minutes, then add the rest. This keeps the flavor balanced and prevents a bitter, caramelized crust. Sounds weird, but it works—your taste buds will notice the difference.
Pro cooking tips for perfect results
Pressure Control Secrets
The 10-minute high-pressure cook is non-negotiable for perfect texture—any longer risks overcooking the rice into mush. I always set the valve to sealing before starting, then let it release naturally for 10 minutes after cooking.
This gradual release prevents the rice from absorbing too much moisture too quickly, which is crucial for that signature creamy consistency. 🌡️
Cornstarch Slurry Magic
That 1 tbsp cornstarch mixed with 2 tbsp pudding creates a smooth slurry that thickens beautifully when stirred in. I whisk it vigorously first to eliminate any lumps, then slowly incorporate it while stirring constantly for 1-2 minutes.
This step transforms the pudding from custard-like to that perfect pudding texture—thick enough to coat a spoon but still silky. The key is patience here; rushing the stirring can create lumps that ruin the smooth finish.
Natural Release Timing
Never skip the 10-minute natural release—this is where the rice absorbs just the right amount of milk without turning gummy. I’ve learned this the hard way: quick releases often result in a watery pudding that lacks that velvety mouthfeel.
After the release, I always wait an additional 5 minutes before opening the lid to let any residual pressure dissipate completely. This extra precaution prevents steam burns and ensures the rice maintains its ideal texture.
Butter and Spice Layering
Adding the 2 tbsp butter and 1.5 tsp cinnamon right after pressure release is critical—the heat from the pudding melts the butter perfectly while the cinnamon infuses evenly. I stir vigorously for 30 seconds to create tiny butter droplets throughout the mixture, which adds incredible richness.
For extra depth, I sometimes add a pinch of cardamom here—it pairs beautifully with the cinnamon and adds a unique floral note.
Raisin Plumping Technique
If using raisins, I always add them last and stir gently to avoid breaking them. For even better results, I soak the raisins in warm water for 10 minutes before adding them to the pudding.
This ensures they’re plump and juicy rather than dry. The warm pudding will finish cooking them perfectly during the final 5-minute rest, creating that perfect balance of chewy and tender in every bite.
Temperature Testing
Before serving, I always check the internal temperature—it should be between 160-170°F for that ideal warm-but-not-hot serving temperature. If it’s too hot, I let it sit covered for another 5-10 minutes.
The pudding will continue thickening slightly as it cools, so I prefer it slightly warmer than room temperature when serving. This is where the magic happens—the flavors develop fully in these final minutes of resting. ✨
Nutrition facts
Frequently asked questions
Can I make this arroz con leche with almond milk instead of dairy?
The recipe works best with whole milk for that signature creamy texture, but you can substitute almond milk for a lighter version. Use 2 cups unsweetened almond milk and add 1 extra tablespoon cornstarch to compensate for the lower fat content. The flavor will be subtly different but still delicious. For extra richness, stir in 1 tablespoon coconut cream at the end.
Why does my Instant Pot arroz con leche turn out watery?
Watery texture usually happens when you skip the 10-minute natural release or undercook the cornstarch slurry. Always let the pressure release naturally after cooking, then stir the cornstarch mixture for full 1-2 minutes until it thickens completely. If it’s still too thin, reheat gently on the stovetop while stirring in 1 more teaspoon cornstarch mixed with 1 tablespoon milk.
How can I make this dessert nut-free for allergies?
This recipe is naturally nut-free, but if you’re concerned about cross-contamination, use a clean Instant Pot and avoid brands that process nuts. For extra safety, add 1 teaspoon xanthan gum with the cornstarch slurry to improve texture without nuts. The raisins are also typically nut-free, but always check packaging. You can substitute dried cranberries for raisins if preferred.
Can I double this recipe in my Instant Pot?
Yes, but you’ll need to adjust cooking times. Double the ingredients and cook for 12 minutes on high pressure, then do a 15-minute natural release. The larger volume requires more time to thicken properly. Use a 1.5 tbsp cornstarch slurry instead of 1 tbsp to ensure proper thickening. Stir frequently during the final thickening phase to prevent lumps.
What’s the best way to serve this dessert?
Serve warm with a sprinkle of toasted cinnamon and a dollop of whipped cream for a classic presentation. For a modern twist, chill it for 2 hours and serve with a drizzle of caramel sauce. It also makes a beautiful breakfast dish when topped with chopped almonds and a squeeze of lemon. The flavors develop even more after chilling, so it’s perfect for making ahead.

- Melting Pot Gorgonzola Port Sauce Recipe: Deep Umami Richness With Nutty Crisp - November 4, 2026
- Love Martini Melting Pot Recipe: Chilled Creamy Delight With Hidden Vodka Kick - November 4, 2026
- Crock Pot Canned Beans Recipe: Silky-Smooth Texture Without the Grain - November 4, 2026