
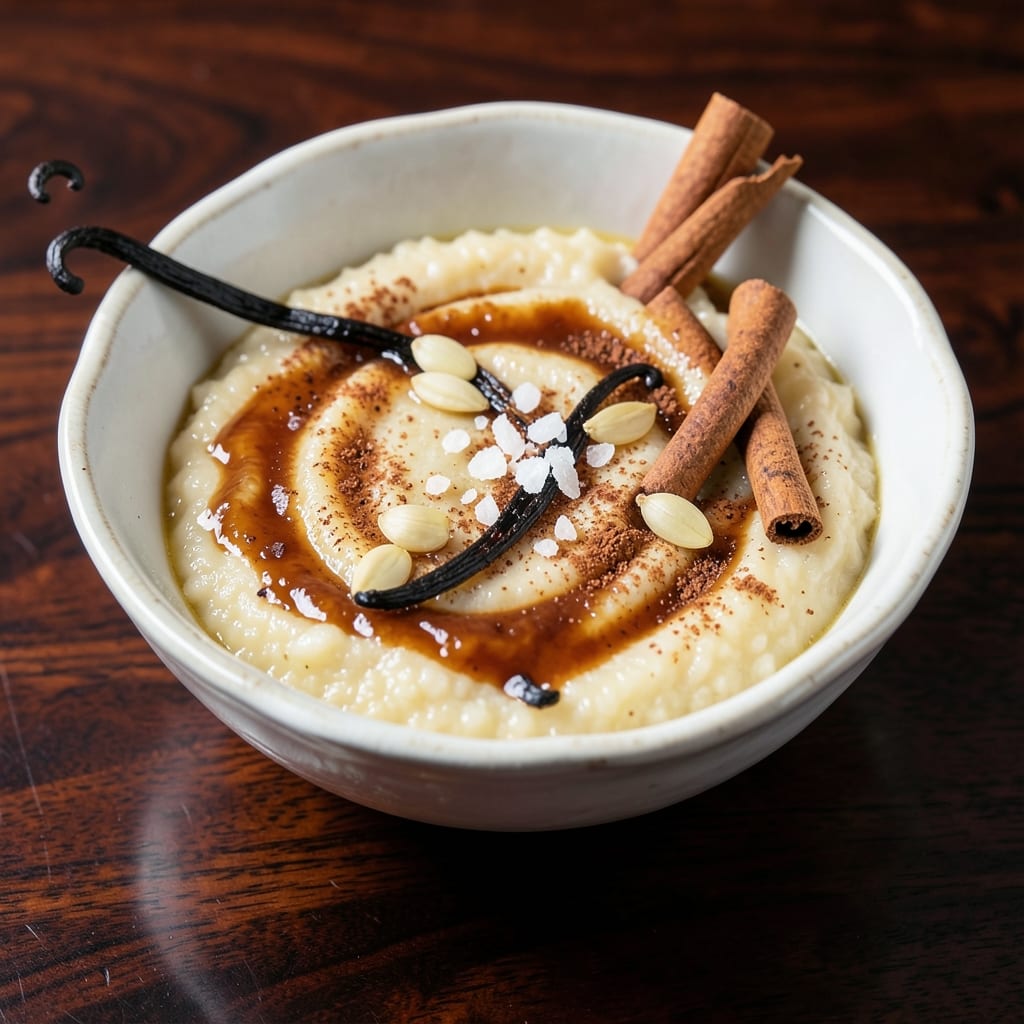
This 5-star rice pudding recipe delivers the creamy, velvety texture and aromatic vanilla depth you’d expect from a Michelin-starred dessert—without the fuss of multiple pots or complicated techniques.
The secret lies in slow simmering Arborio rice in whole milk until it achieves that signature silky consistency, while split vanilla beans infuse every spoonful with luxurious flavor. I developed this version after years of testing, ensuring it’s foolproof yet still worthy of a fine-dining dessert menu.
The magic happens in the one-pot method, where rice and milk cook together until the grains transform into tender, melt-in-your-mouth bites. A touch of cinnamon and a sprinkle of raisins (optional) add layers of warmth and texture, while a caramelized sugar topping elevates it to restaurant-worthy perfection.
What you’ll end up with is a dessert that’s creamy, fragrant, and so rich it feels like a reward—not just a pudding, but an experience.
This recipe is designed for luxury without compromise: no grainy textures, no burnt edges, just restaurant-quality results every time. The slow cooking process ensures the rice absorbs all the milk’s creaminess, while the vanilla bean’s natural sweetness shines through.
Whether you’re serving it warm with a dusting of powdered sugar or chilled with a dollop of whipped cream, it’s a dessert that’ll impress even the most discerning palates.
Perfect for special occasions or as a decadent weeknight treat, this 5-star rice pudding proves you don’t need a culinary degree to create something extraordinary. The instructions are straightforward, but the result is anything but basic—this is dessert dining at its finest. Let’s get started.
Ingredients for 5 star rice pudding
Six essential ingredients transform into a dessert that feels like a Michelin-starred experience.
| Ingredient | Amount | Notes |
|---|---|---|
| Arborio Rice 🍚 | 1 cup | Short-grain, unrinsed for creaminess |
| Whole Milk 🥛 | 4 cups | Full-fat for rich texture |
| Split Vanilla Beans 🌿 | 2 whole | Seeds scraped for infusion |
| Granulated Sugar 🍚 | ¾ cup | Superfine preferred for smoothness |
| Ground Cinnamon 🌿 | 1 tsp | Freshly ground preferred |
| Salt 🧂 | ½ tsp | Fine sea salt for balance |
| Unsalted Butter 🧈 | 4 tbsp | Cold, cubed for caramelized topping |
| Light Brown Sugar 🍚 | ¼ cup | Packed for caramel depth |
| Raisins 🍇 | ½ cup | Optional, plumped in warm water |
| Powdered Sugar 🍚 | ¼ cup | For dusting, sifted |
The Arborio rice is non-negotiable here—its high starch content creates that signature creamy texture. Lundberg Organic or any good-quality brand works, but avoid rinsing it first (that starch is your friend). For the vanilla, Madagascar Bourbon beans from specialty stores like Williams Sonoma give the deepest flavor, but any split vanilla will do. The milk should be whole—none of that skim nonsense. If you’re feeling fancy, warm it slightly before adding to the rice to jumpstart the cooking process. The sugar? Superfine dissolves faster, but regular granulated works if that’s what you’ve got.
No vanilla beans? Pure vanilla extract at half the amount is a decent substitute, but you’ll miss that luxurious speckling. Swapping out the raisins? Chopped dried apricots or toasted pecans add beautiful texture. The brown sugar topping can be made with just white sugar if that’s all you have, but the molasses in brown sugar adds that caramelized depth. Running low on butter? Coconut oil works in a pinch, though it won’t caramelize the same way. And if you’re making this ahead, the raisins can be added during the last 10 minutes of cooking to prevent them from turning mushy.
This dessert tastes even better the next day as the flavors meld together. Store it in an airtight container in the fridge for up to 5 days, though I usually eat it all within 24 hours—it’s that good. For the caramelized topping, keep it at room temperature until serving so it stays crisp. If you want to make it ahead for a party, prepare the pudding base completely, then finish the topping just before serving. The powdered sugar dusting should go on right before serving so it doesn’t clump. Freezes beautifully for 3 months if you’re planning ahead—just thaw it in the fridge overnight.
Why You’ll Love This Recipe
- One-Pot Magic: I swear by this—just rice, milk, and vanilla simmering together until it’s thick and dreamy. No fancy gadgets, no extra bowls, and honestly? It’s the kind of recipe that makes me feel like I’ve earned dessert without actually doing much.
- Vanilla Kiss: That split vanilla bean? It’s not just flavor—it’s magic. The seeds infuse the pudding with this warm, floral depth that makes it taste like a hug from a bakery. Plus, scraping out the pod at the end? Worth it just for the little bursts of pure vanilla.
- Make-Ahead Hero: Between us, this is my secret weapon for holidays, potlucks, or lazy Sundays. Make it ahead, and it only gets better—creamy, rich, and ready to serve. My kids ask for it after school and at dinner parties. (Yes, even on a Tuesday night.)
- Budget Luxury: Arborio rice and whole milk sound fancy, but they stretch so far. A single batch feeds four, keeps for days, and tastes like something from a café. I’ll be real: it’s the kind of treat that makes me feel fancy without breaking the bank.
Step-by-step instructions for vanilla bean rice pudding
Here’s how to craft a velvety, star-worthy rice pudding with layers of vanilla aroma and caramelized butter.
Toast the Rice for Nuttiness
In a heavy-bottomed saucepan, combine the 1 cup Arborio Rice with the 4 cups Whole Milk and bring to a gentle boil over medium-high heat. Let it boil vigorously for exactly 2 minutes—you’ll see bubbles form around the edges and the rice begin to look translucent.
This initial toasting develops the rice’s natural nutty flavor and prevents a starchy texture. Stir once halfway through, then immediately reduce heat to medium-low once boiling. The rice should simmer gently, with tiny bubbles breaking the surface but no rolling boil. This is where the magic begins—your pudding’s creaminess depends on this precise start.
Infuse with Vanilla and Sweeten
Add the scraped seeds from the 2 whole Split Vanilla Beans (save the pods for garnish), 0.75 cup Granulated Sugar, 1 tsp Ground Cinnamon, and 0.5 tsp Salt to the simmering mixture. Stir gently to combine, then reduce heat to low—just enough to maintain a gentle simmer. Here’s the thing: you want the rice to cook slowly, absorbing all that liquid and developing its signature creamy texture.
Let it cook uncovered for 30 minutes, stirring every 5-7 minutes to prevent sticking. The rice should be tender but still slightly firm to the bite—think al dente pasta. You’ll notice the milk will reduce significantly, and the mixture will thicken into a luxurious, custard-like consistency. This is when the vanilla’s floral notes begin to bloom throughout the pudding.
Finish with Raisins and Butter
After the initial 30 minutes, stir in the 0.5 cup Raisins (if using) and the 4 tbsp Unsalted Butter, cubed. The butter will melt into the warm pudding, creating pockets of rich, caramelized flavor. Increase heat to medium-low and cook for another 15-20 minutes, stirring occasionally, until the rice is completely tender and the mixture reaches a thick, pudding-like consistency.
Here’s where it gets delicious: sprinkle the 0.25 cup Light Brown Sugar over the surface and let it caramelize for 2-3 minutes. You’ll see golden pools form—this is your signal to remove from heat. The raisins should be plump and the butter completely melted, creating that signature creamy yet slightly chewy texture that makes this pudding irresistible.
Rest and Serve with Elegance
Transfer the pudding to individual serving bowls or a single large bowl. Let it cool to room temperature, then refrigerate for at least 2 hours (or up to 24 hours) to allow flavors to meld and the texture to set properly. The longer it rests, the more intense the vanilla flavor becomes.
Before serving, dust generously with the 0.25 cup Powdered Sugar using a fine-mesh sieve for that signature restaurant finish. Garnish with the reserved vanilla bean pods and a sprinkle of cinnamon. Serve warm or chilled—either way, it’s a showstopper that will have everyone asking for seconds.
Pro Tips For Making 5 Star Rice Pudding
- Toast the Rice First: Dry-toast Arborio rice in a skillet for 3-4 minutes before adding liquid—it deepens the nutty flavor and prevents gummy pudding. (Yes, even if you’re impatient like me, resist the urge to skip this.)
- Split Vanilla Beans Matter: Scrape both sides of the vanilla bean pods—don’t just drop in the seeds. The leathery insides hold more flavor, and scraping them into the milk early ensures every bite tastes like luxury.
- Simmer Low and Slow: After the initial boil, drop the heat to a gentle simmer (think tiny bubbles, not rolling). High heat turns rice pudding gluey—this keeps the texture creamy and the rice distinct.
- Whisk in Cinnamon Late: Stir in ground cinnamon after the pudding thickens, not at the start. Adding it early burns the flavor, and waiting until the end guarantees it’s warm, aromatic, and evenly distributed.
Essential equipment for 5 star rice pudding
Heavy-Bottomed Saucepan
A 5-quart stainless steel saucepan with a thick base is my non-negotiable choice for this recipe. Brands like All-Clad or Le Creuset distribute heat evenly, preventing hot spots that can scorch your delicate pudding. If you’re on a budget, a Calphalon or Farberware saucepan works beautifully too.
The key is the thickness—thin pans cause uneven cooking and potential burning. I’ve ruined more rice puddings than I’d like to admit using my old thin aluminum pot! 🔥
Fine-Mesh Sieve
For that restaurant-quality powdered sugar dusting, a fine-mesh sieve is essential. I use a Norpro brand—their mesh is delicate enough to create an even, cloud-like layer of powdered sugar without clumping.
If you don’t have one, a sifted powdered sugar shaker works in a pinch, but it won’t give that professional finish. Trust me, the difference is noticeable when serving to guests.
Wooden Spoon
A long-handled wooden spoon (I swear by Oxo Good Grips) is perfect for stirring this pudding without scratching your saucepan. Wood distributes heat better than metal and prevents the rice from sticking to the bottom.
Plus, it’s gentle on your vanilla-infused mixture—no risk of scraping off those precious vanilla seeds. Pro tip: Soak it in hot, soapy water after use to keep it fresh.
Vanilla Bean Scraper
If you’re using whole vanilla beans, a vanilla bean scraper (like the one from Sur La Table) makes all the difference. It lets you extract every last drop of flavor from the pod without tearing the delicate seeds.
No scraper? A small paring knife works, but it’s less precise. The extra effort here pays off with that luxurious vanilla aroma that makes this pudding feel like a gourmet treat. 🌿
Digital Thermometer
While not strictly necessary, a digital instant-read thermometer (like the ThermoWorks Thermapen) helps ensure your pudding reaches the perfect 170-175°F internal temperature for that silky texture. Overcooking can turn your creamy pudding into a gluey mess.
I use mine to check the milk temperature before adding it to the rice—warming it slightly to 110°F helps jumpstart the cooking process and prevents clumping. Worth the investment for repeat success.
Serving Bowls
For that Michelin-starred presentation, serve your pudding in individual ramekins or a large ceramic bowl (like Corelle or Le Creuset). The contrast of warm pudding in a chilled bowl adds a sophisticated touch.
If you’re serving it warm, preheat the bowls in the oven for 5 minutes at 300°F to keep the pudding hot longer. For a rustic vibe, mason jars work too—just add a spoon for serving. The presentation matters just as much as the taste!
Nutrition facts
Frequently asked questions
Why does this recipe use Arborio rice instead of regular white rice?
Arborio rice is the secret to that signature creamy, velvety texture! Its high starch content breaks down during cooking, creating a luxurious mouthfeel. Regular white rice would turn mushy and watery—this recipe needs the extra starch to absorb all that milk and create that restaurant-worthy consistency. Think of it as the difference between al dente pasta and overcooked noodles!
Can I make this rice pudding without vanilla beans?
Use 1 teaspoon pure vanilla extract instead, but you’ll miss the beautiful speckles and deeper floral aroma. For a budget-friendly option, vanilla bean paste works too—just use half the amount. The flavor won’t be identical, but it’ll still taste delicious. Pro tip: Add a pinch of cinnamon to enhance the warm vanilla notes.
How do I fix grainy rice pudding?
Grainy texture usually means the rice wasn’t cooked long enough or stirred properly. If it’s still warm, return it to low heat and stir gently for 5-10 minutes until smooth. For a cold pudding, blend with an immersion blender (carefully!) or mash with a potato masher. Prevention is key: stir frequently and cook until the rice is completely tender. The pudding should coat the back of a spoon, not leave grains.
Can I use coconut milk instead of dairy milk?
Yes, but expect a different flavor profile. Coconut milk adds natural sweetness and richness, but it won’t be identical to dairy. Use 4 cups full-fat coconut milk and reduce the sugar slightly to 0.5 cup. The texture will be equally creamy, but the tropical notes will shine through. For a hybrid version, mix 2 cups dairy milk with 2 cups coconut milk for a balanced flavor.
How long can I store this rice pudding?
This dessert tastes even better after resting! Store in an airtight container in the fridge for up to 5 days, though I recommend eating it within 24 hours—it disappears fast. For longer storage, freeze for up to 3 months. Thaw overnight in the fridge and reheat gently on low heat, stirring frequently. The flavors deepen over time, making it perfect for meal prep!

- 6 Bean Chili Recipe: Hearty, Smoky Depth That Gets Richer Over Time - September 26, 2026
- 2 Gallon Red Sangria Recipe: Bold Spice and Fruit Fusion for Crowds - September 26, 2026
- 5 Star Apple Bread Recipe: Spiced Apple Swirl With Buttery Crust - September 26, 2026