
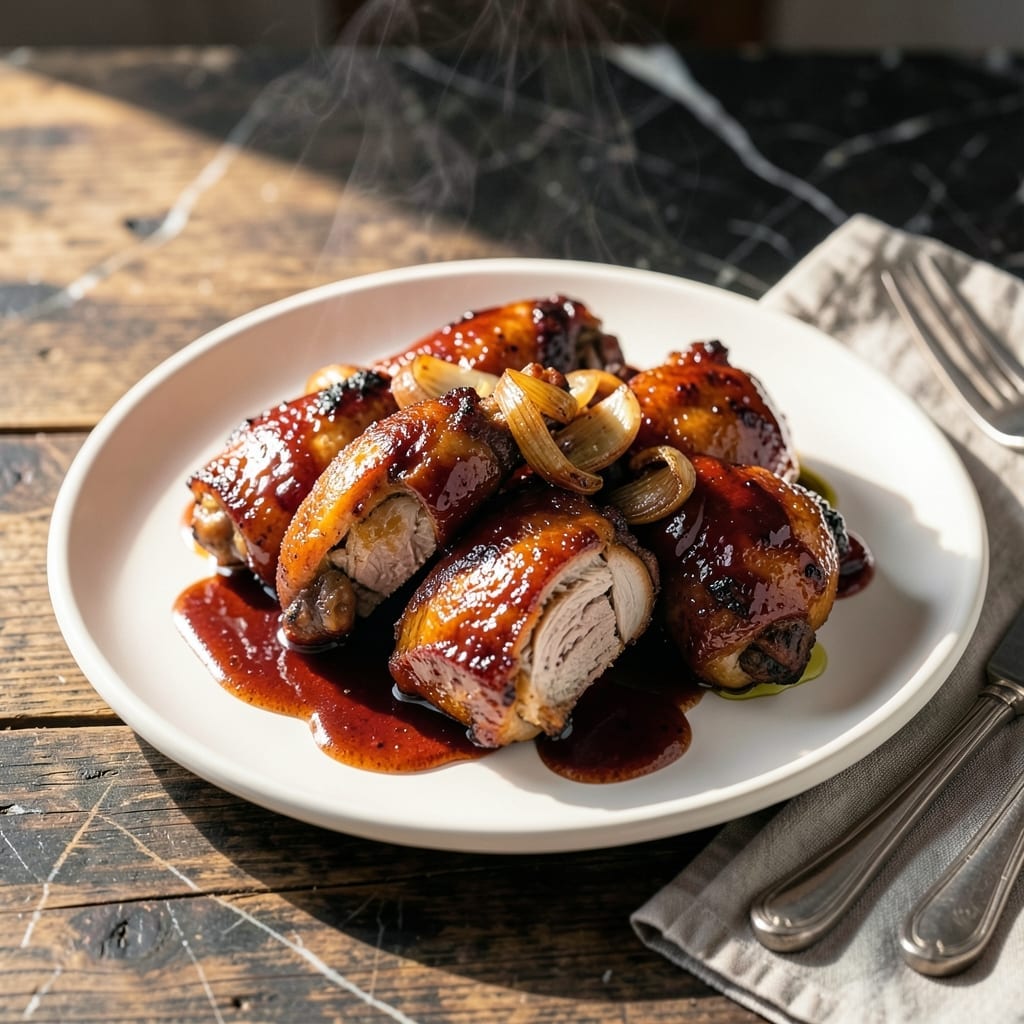
This Instant Pot barbecue chicken delivers tender, fall-off-the-bone results with minimal effort. The pressure cooker locks in moisture while infusing every bite with rich, smoky flavor. No outdoor grill required.
I developed this method to capture that classic barbecue taste in under an hour. The key is layering the sauce at just the right moment to prevent burning while maximizing caramelization.
You’ll end up with juicy chicken pieces coated in a thick, finger-licking glaze. The sauce reduces perfectly under pressure, creating a balance of sweet and tangy that clings to every piece.
Serve on buns, over rice, or straight from the pot. This technique works with any cut of chicken, making it a versatile weeknight solution.
Ingredients for Barbecue Chicken Instant Pot
Simple ingredients transform into smoky, saucy perfection with minimal effort.
| Ingredient | Amount | Notes |
|---|---|---|
| Chicken Thighs 🍗 | 2 lb | Boneless, skinless preferred |
| Barbecue Sauce 🍯 | 1 ½ cups | Sweet and smoky variety |
| Chicken Broth 🥣 | ½ cup | Low-sodium preferred |
| Apple Cider Vinegar 🍏 | 2 tbsp | Balances sweetness |
| Brown Sugar 🍚 | 2 tbsp | Light or dark works |
| Worcestershire Sauce 🍶 | 1 tbsp | Adds depth of flavor |
| Garlic Powder 🧄 | 1 tsp | Not garlic salt |
| Onion Powder 🧅 | 1 tsp | Enhances savory notes |
| Smoked Paprika 🌶️ | 1 tsp | For authentic smokiness |
| Salt 🧂 | ½ tsp | Kosher or sea salt |
| Black Pepper 🌶️ | ½ tsp | Freshly ground preferred |
| Olive Oil 🫒 | 1 tbsp | For searing chicken |
The chicken thighs are non-negotiable here—Costco has great pre-packaged boneless options, but any supermarket brand works. Look for skinless to avoid excess fat in the pot. The barbecue sauce is where the personality comes in: Sweet Baby Ray’s or Stubb’s are reliable, but any thick, smoky-sweet sauce will do. For the broth, Swanson low-sodium is my go-to (avoids over-salting).
No chicken thighs? Drumsticks or breasts work, but adjust cook time (breasts need less). Out of barbecue sauce? Mix ketchup with a touch of molasses and liquid smoke. The apple cider vinegar can be swapped for white vinegar in a pinch, though the flavor is milder. Smoked paprika is key—if you only have regular, add a drop of liquid smoke to compensate.
Leftovers keep beautifully in the fridge for 4 days or freeze for 3 months. The sauce thickens as it cools, so thin with a splash of broth when reheating. Perfect for meal prep—shred the chicken and pile onto buns or salads all week.
Why You’ll Love This Recipe
- Set and Forget: I toss everything in the Instant Pot, press a button, and walk away—no babysitting required.
- Sticky Sweet Goodness: The brown sugar caramelizes with the barbecue sauce, coating the chicken thighs in this ridiculously good glaze.
- Feeds My Crowd: Between us, I make a double batch and it disappears between dinner and next-day lunches.
- Budget-Friendly Win: Chicken thighs stay cheap, and a little barbecue sauce goes a long way here. Honestly, it’s my wallet’s favorite meal.
Step-by-Step Instructions for Barbecue Chicken Instant Pot
This method delivers tender, smoky-sweet chicken with minimal effort and maximum flavor.
Step 1: Season and Sear the Chicken Thighs
Pat the 2 lb Chicken Thighs dry with paper towels, then season both sides evenly with 1 tsp Smoked Paprika, 1 tsp Garlic Powder, 1 tsp Onion Powder, 0.5 tsp Salt, and 0.5 tsp Black Pepper. These spices create a flavor foundation that complements the barbecue sauce perfectly.
Set your Instant Pot to the Sauté function and add the 1 tbsp Olive Oil. Once hot, sear the chicken thighs for 3-4 minutes per side until golden brown. You’ll know it’s ready to flip when it releases easily from the pot. Remove and set aside.
Step 2: Build the Sauce Base
In the same Instant Pot, add the 0.5 cup Chicken Broth, 2 tbsp Apple Cider Vinegar, 2 tbsp Brown Sugar, and 1 tbsp Worcestershire Sauce. Use a wooden spoon to scrape up any browned bits from the bottom—this step ensures no flavor is wasted.
Stir until the Brown Sugar dissolves completely. The vinegar and Worcestershire balance the sweetness of the barbecue sauce, while the broth provides the liquid needed for pressure cooking. Bring this mixture to a gentle simmer.
Step 3: Pressure Cook the Chicken
Return the seared chicken to the Instant Pot, pouring the 1.5 cups Barbecue Sauce evenly over the top. Secure the lid, set the valve to Sealing, and cook on High Pressure for 8 minutes. The chicken will cook through while absorbing the rich, smoky flavors of the sauce.
Once the cooking time is complete, allow the pressure to release naturally for 5 minutes, then switch the valve to Venting for a quick release. This gradual pressure reduction prevents the chicken from drying out.
Step 4: Shred and Finish
Remove the lid and transfer the chicken to a cutting board. Using two forks, shred the chicken thighs into bite-sized pieces. The meat should pull apart effortlessly, a sign it’s perfectly tender.
Return the shredded chicken to the Instant Pot and stir it into the sauce. Let it sit for 2-3 minutes to soak up the flavors. Taste and adjust seasoning if needed, though the sauce should be well-balanced with a mix of sweet, tangy, and smoky notes.
Pro Tips For Making Barbecue Chicken Instant Pot
- Sear First: I learned this the hard way—browning the chicken thighs in the Instant Pot before pressure cooking adds depth to the flavor that skipping this step just can’t match. About 3-4 minutes per side on sauté mode does the trick.
- Thin the Sauce: After pressure cooking, remove the chicken and simmer the sauce for 5 minutes to thicken it up. Barbecue sauce can get watery with the broth, so this step guarantees it clings to the chicken.
- Use Bone-In Thighs: Sounds weird, but it works: bone-in thighs stay juicier under pressure and absorb the barbecue sauce better than boneless. Plus, they’re usually cheaper.
- Balance the Sweetness: If your barbecue sauce is already sweet, cut the brown sugar by half. I was skeptical until I tried it, but too much sugar can make the dish cloying instead of tangy.
Dietary Considerations for This Dish
Gluten-Free Adaptation
This recipe is naturally gluten-free as long as you use certified gluten-free barbecue sauce. Many popular brands like Sweet Baby Ray’s and Stubb’s offer gluten-free versions. Always check the label for hidden gluten in sauces and broths.
Keto-Friendly Version
For a keto approach, reduce the brown sugar to 1 tbsp or replace it with 1 tbsp monk fruit sweetener. Use a sugar-free barbecue sauce like G Hughes or Primal Kitchen. The chicken stays tender and flavorful without the carbs. 💪
Dairy-Free Naturally
There are no dairy ingredients in this dish, making it perfect for those avoiding lactose. Just ensure your barbecue sauce and broth are dairy-free—most commercial options are, but it’s always wise to verify. I love that this recipe works for so many dietary needs without any substitutions.
Low-Sodium Options
Use low-sodium chicken broth and low-sugar barbecue sauce to cut back on salt. Reduce the added salt to ¼ tsp or omit it entirely if your sauce and broth are already seasoned. The apple cider vinegar and spices will still pack plenty of flavor.
Diabetic Considerations
To make this diabetic-friendly, opt for a sugar-free barbecue sauce and replace the brown sugar with 1 tbsp erythritol or your preferred sugar substitute. The Worcestershire sauce adds depth without spiking blood sugar. 💡
Allergen Awareness
This recipe is free from the top allergens: dairy, eggs, nuts, and soy (if using soy-free sauce). Always check barbecue sauce labels for soy or other allergens. For nut allergies, ensure no cross-contamination in your cooking space.
Nutrition Facts
Frequently Asked Questions
Can I use chicken breasts instead of thighs?
Yes, but reduce pressure cook time to 6 minutes to prevent dryness. Thighs stay juicier, but breasts work in a pinch.
How do I thicken the sauce after cooking?
Set Instant Pot to Sauté mode and let it simmer uncovered for 5-7 minutes. Stir occasionally until it reaches your desired consistency.
Will the sauce burn during pressure cooking?
Avoid this by adding 0.5 cup broth first and scraping the pot. The liquid prevents burning while building flavor.
Can I make this ahead for meal prep?
It keeps well in the fridge for 4 days or freezes beautifully for 3 months. Reheat gently to maintain texture.

- 4C Bread Crumbs Meatballs Recipe: Crispy Crust and Juicy Centers - September 25, 2026
- 6 Oz Chocolate Chip Cookie Recipe: Perfectly Balanced Crispy Edges and Chewy Hearts - September 25, 2026
- 6-Inch Coffee Cake Recipe: Vanilla Bean Swirls and Buttery Streusel Topping - September 25, 2026