
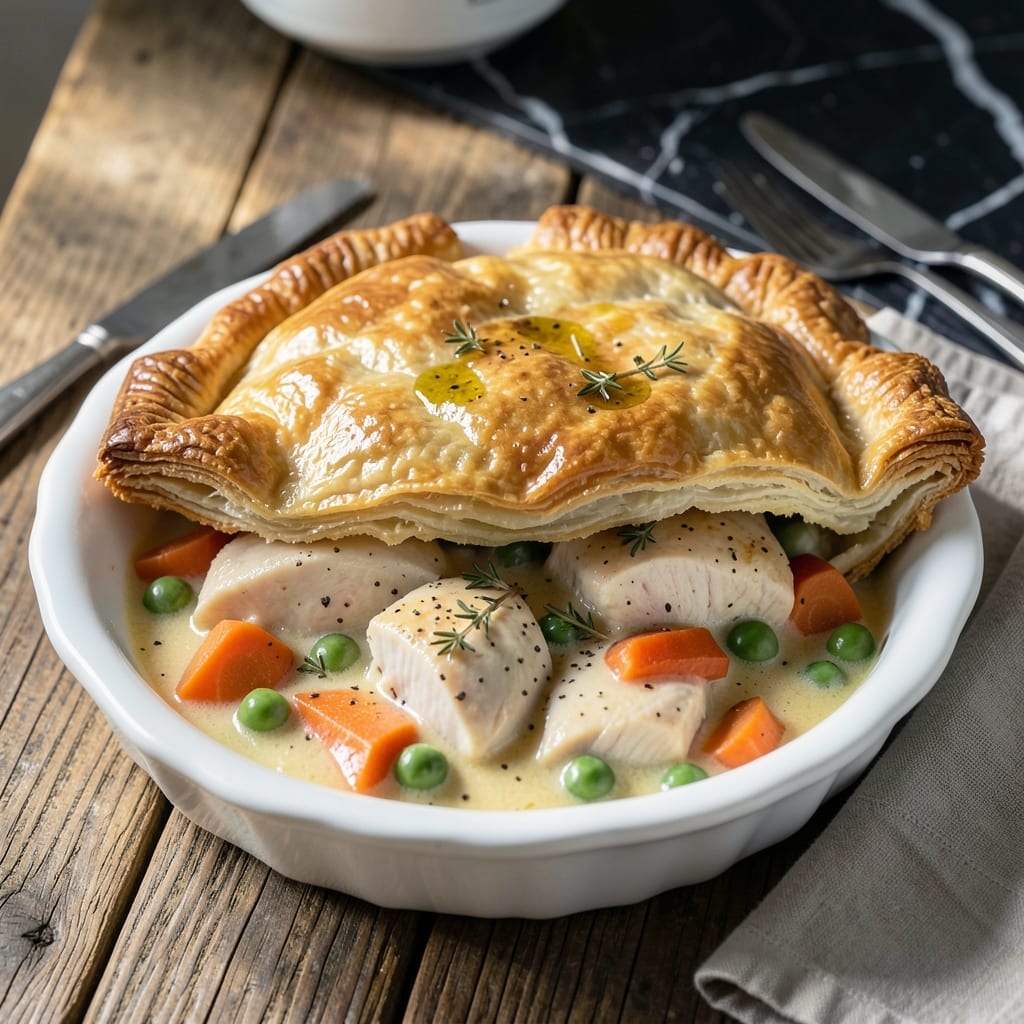
There’s nothing quite like a steaming chicken pot pie to bring classic comfort to your table. This dish combines tender chicken, hearty vegetables, and a creamy sauce all nestled under a golden crust.
I’ve refined this recipe to ensure every bite delivers that nostalgic warmth we all crave. The filling is rich and savory, while the crust bakes to a perfect, flaky finish.
What makes this version special is its simplicity—no fancy techniques, just straightforward steps that guarantee a delicious result. It’s the kind of meal that feels like a hug in food form.
Perfect for cozy dinners or family gatherings. Here’s how to make it.
Ingredients for Basic Chicken Pot Pie
Pantry staples and fresh veggies create that nostalgic comfort in every bite.
| Ingredient | Amount | Notes |
|---|---|---|
| Boneless Skinless Chicken Breasts 🍗 | 1 ½ lb | Diced into bite-sized pieces |
| All-Purpose Flour 🌾 | ½ cup | For thickening the filling |
| Unsalted Butter 🧈 | ½ cup | Cubed and chilled for crust |
| Chicken Broth 🥣 | 1 ½ cups | Low-sodium preferred for control |
| Whole Milk 🥛 | ¾ cup | Full-fat for creaminess |
| Carrots 🥕 | 2 whole | Peeled and diced |
| Celery Stalks 🌿 | 2 whole | Finely chopped |
| Yellow Onion 🧅 | 1 whole | Diced, about 1 cup |
| Frozen Peas 🌱 | 1 cup | No need to thaw |
| Garlic Cloves 🧄 | 2 cloves | Minced for depth of flavor |
| Fresh Thyme Leaves 🌿 | 1 tbsp | Or 1 tsp dried thyme |
| Salt 🧂 | 1 tsp | Kosher or sea salt |
| Black Pepper 🌶️ | ½ tsp | Freshly ground preferred |
| Pie Crust 🥧 | 2 sheets | Store-bought or homemade |
| Large Egg 🥚 | 1 whole | For egg wash on crust |
The chicken is the backbone here. Boneless, skinless breasts stay moist and tender—avoid pre-cooked or canned. I grab mine from Whole Foods for consistent quality, but any reputable grocery store works. For the crust, store-bought pie dough saves time without sacrificing flakiness (I swear by Pillsbury), but homemade is unbeatable if you’ve got the energy.
No fresh thyme? Dried thyme at one-third the amount works perfectly. Short on veggies? Frozen mixed vegetables can replace the peas, carrots, and celery in a pinch. For the milk, half-and-half makes it richer, or 2% milk if that’s what’s in your fridge. The broth can be swapped for vegetable broth if you’re in a bind (just add a pinch of poultry seasoning).
Leftovers keep 3-4 days in the fridge—reheat in the oven to keep the crust crisp. Freeze unbaked pies for up to 2 months (thaw overnight before baking). The filling thickens as it cools, so don’t stress if it seems runny at first.
Why You’ll Love This Recipe
- One Pan Magic: I love that everything comes together in a single skillet—no extra bowls, no mess.
- Buttery Comfort: That flaky crust made with butter and flour, soaking up the creamy chicken broth filling? Pure cozy.
- Weeknight Hero: Between us, this is my secret for busy evenings when I need something hearty and unfussy.
- Leftovers? Yes Please: Honestly, it tastes even better the next day—if there’s any left after dinner.
Step-by-Step Instructions for Chicken Pot Pie
This classic method delivers that golden crust and creamy filling you remember from childhood.
Step 1: Cook the Chicken and Vegetables
Start by dicing the 1.5 lb boneless skinless chicken breasts into bite-sized pieces. Heat a large skillet over medium-high heat and add the 0.5 cup unsalted butter, cubed. Once melted, add the chicken and cook for 5-6 minutes until no longer pink inside.
Remove the chicken with a slotted spoon and set aside. In the same skillet, add the diced yellow onion, peeled and diced carrots, and finely chopped celery stalks. Cook for 5 minutes until the vegetables start to soften. Add the minced garlic cloves and cook for 30 seconds until fragrant.
Step 2: Create the Creamy Filling
Sprinkle the 0.5 cup all-purpose flour over the vegetables and stir to coat evenly. Cook for 1-2 minutes to remove the raw flour taste. Gradually pour in the 1.5 cups chicken broth and 0.75 cup whole milk, whisking constantly to prevent lumps.
Bring the mixture to a simmer and cook for 3-4 minutes until it thickens enough to coat the back of a spoon. Stir in the 1 cup frozen peas, 1 tbsp fresh thyme leaves, 1 tsp salt, and 0.5 tsp black pepper. Return the cooked chicken to the skillet and stir to combine. Taste and adjust seasoning if needed.
Step 3: Assemble the Pot Pie
Preheat your oven to 375°F. Line a 9-inch pie dish with one sheet of pie crust, pressing it gently into the bottom and up the sides. Trim any excess dough hanging over the edge, leaving about ½ inch overhang.
Pour the chicken and vegetable filling into the crust-lined dish. The filling should be slightly mounded in the center. Top with the second sheet of pie crust, crimping the edges to seal. Trim any excess dough and cut a few small slits in the top crust to allow steam to escape.
Step 4: Bake to Golden Perfection
In a small bowl, beat the 1 whole large egg with 1 tablespoon of water. Brush the top crust evenly with the egg wash. This ensures a beautiful golden brown finish.
Place the pie dish on a baking sheet (to catch any spills) and bake for 35-40 minutes until the crust is deep golden brown and the filling is bubbling. If the edges start to brown too quickly, cover them with foil or a pie shield. Let the pot pie rest for 10 minutes before serving to allow the filling to set.
Pro Tips For Making Basic Chicken Pot Pie
- Poach the Chicken: Simmer the chicken breasts in the broth until just cooked through—about 12-15 minutes—then shred or cube. I learned this the hard way: boiling dries it out, while a gentle poach keeps the meat juicy for the filling.
- Chill the Dough: After mixing the butter and flour for the crust, refrigerate the dough for at least 30 minutes. Sounds tedious, but it prevents shrinking and ensures a flaky, golden top—my first few pot pies looked sad without this step.
- Thicken Before Baking: Cook the flour-butter roux with the broth and milk on the stovetop until it’s thick enough to coat a spoon. Resist the urge to skip this; a runny filling is the most common pot pie failure.
- Vent the Top: Cut 3-4 small slits in the crust before baking. After ruining a pie with a soggy, collapsed top, I now do this religiously—it lets steam escape so the crust stays crisp.
Storing and Reheating basic chicken pot pie
Refrigerator Storage
Let your pot pie cool completely before storing—this prevents soggy crusts. Transfer leftovers to an airtight container and refrigerate within 2 hours of baking. It’ll stay fresh for 3-4 days in the fridge. ❄️
Freezer Storage
For longer storage, freeze unbaked pot pies wrapped tightly in plastic wrap and aluminum foil. They’ll keep for up to 2 months. Thaw overnight in the fridge before baking as directed.
Oven Reheating
Preheat your oven to 350°F and place the pot pie on a baking sheet. Cover loosely with foil to prevent over-browning and heat for 20-25 minutes until the filling bubbles. This method keeps the crust crisp. 🔥
Microwave Reheating
For a quick meal, microwave individual portions on 70% power for 2-3 minutes, stirring halfway. The crust won’t be as crispy, but it’s a fast way to enjoy leftovers.
Make-Ahead Tip
Assemble the pot pie up to a day ahead and refrigerate before baking. Add 5-10 minutes to the baking time if starting from cold. I love this for stress-free dinner parties.
Filling Consistency
If the filling thickens too much after storage, stir in 2-3 tbsp milk or broth before reheating. This restores the creamy texture without watering it down.
Nutrition Facts
Frequently Asked Questions
Can I use store-bought pie crust?
Store-bought pie crust works perfectly and saves time. Just ensure it’s thawed if frozen and press it gently into the dish. Many cooks swear by Pillsbury for consistent results.
Why is my filling runny?
This usually means the filling didn’t thicken enough. Simmer it for 2-3 extra minutes before baking. If it’s still thin, mix 1 tbsp cornstarch with 1 tbsp cold water and stir in.
Can I add other vegetables?
Yes! Try diced potatoes, green beans, or mushrooms. Just keep the total volume similar to the original recipe to avoid a soggy crust.
How do I prevent a soggy bottom crust?
Pre-bake the bottom crust for 8-10 minutes before adding the filling. Also, ensure the filling is thick and not overly wet when assembling.

- 4C Bread Crumbs Meatballs Recipe: Crispy Crust and Juicy Centers - September 25, 2026
- 6 Oz Chocolate Chip Cookie Recipe: Perfectly Balanced Crispy Edges and Chewy Hearts - September 25, 2026
- 6-Inch Coffee Cake Recipe: Vanilla Bean Swirls and Buttery Streusel Topping - September 25, 2026