
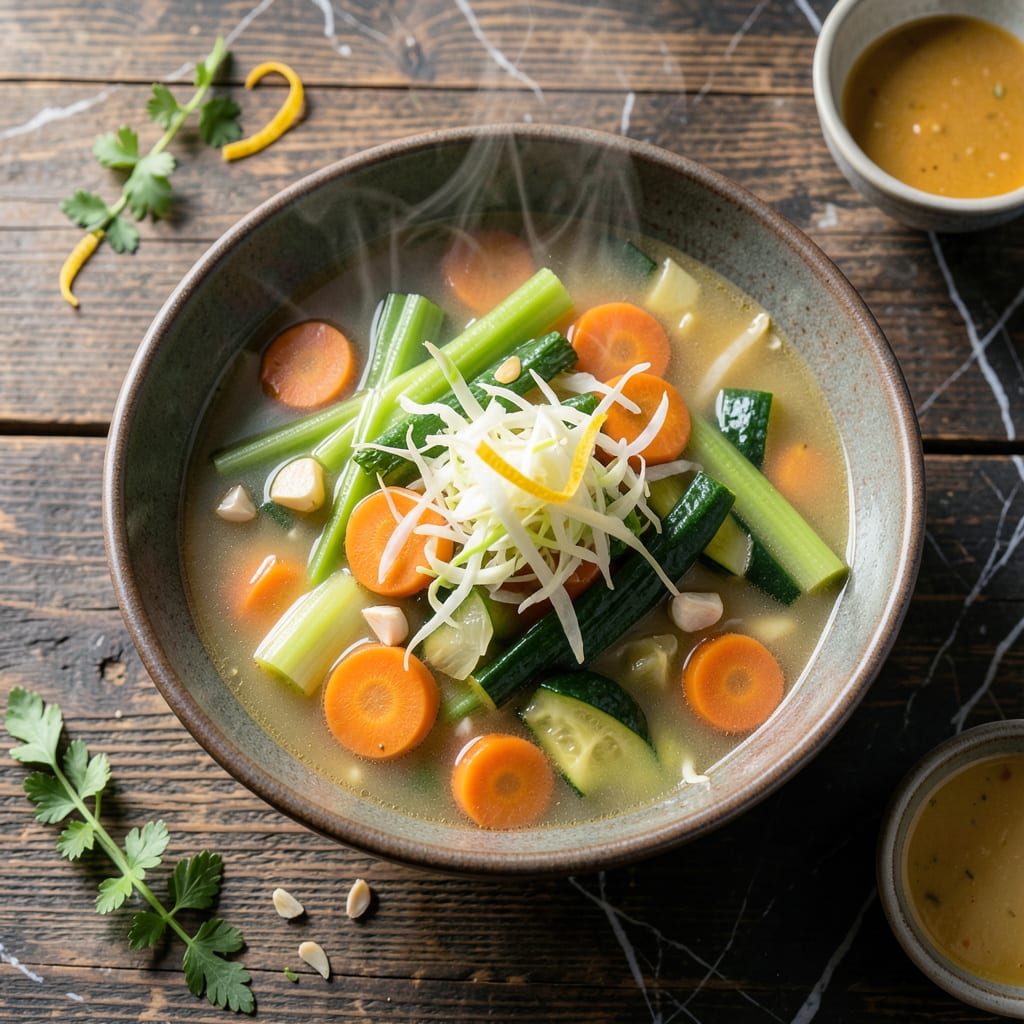
This veggie-packed soup delivers a simple way to support your metabolism with every spoonful. The blend of fresh vegetables and herbs creates a light yet satisfying dish.
Ready in under 30 minutes, it offers a nutrient-dense option that keeps you full without weighing you down. Perfect for a quick lunch or dinner.
Ingredients for Basic Fat Burning Soup
Fresh produce and warming spices create this light yet filling, metabolism-boosting bowl.
| Ingredient | Amount | Notes |
|---|---|---|
| Carrots 🥕 | 3 whole | Peeled and diced |
| Celery Stalks 🌿 | 3 whole | Trimmed and sliced |
| Yellow Onion 🧅 | 1 whole | Finely chopped |
| Garlic Cloves 🧄 | 4 cloves | Minced for depth |
| Cabbage 🥬 | 4 cups | Green or savoy, shredded |
| Zucchini 🥒 | 2 whole | Diced into bite-sized pieces |
| Diced Tomatoes 🍅 | 2 cups | Canned or fresh |
| Vegetable Broth 💧 | 6 cups | Low-sodium preferred |
| Fresh Parsley 🌿 | ¼ cup | Chopped, for garnish |
| Fresh Cilantro 🌿 | ¼ cup | Chopped, optional |
| Olive Oil 🫒 | 2 tbsp | Extra-virgin for sauteing |
| Ground Cumin 🌿 | 1 tsp | Toasted for warmth |
| Paprika 🌶️ | 1 tsp | Sweet or smoked |
| Salt 🧂 | 1 tsp | Kosher or sea salt |
| Black Pepper 🌶️ | ½ tsp | Freshly ground |
The cabbage and zucchini are key here—look for firm heads with vibrant leaves at your local farmers market or grocery store. I grab mine from Whole Foods since they always seem to have the freshest options. The tomatoes can be canned (San Marzano are great) or fresh if they’re in season. For the broth, low-sodium lets you control the salt level, which is important since we’re adding spices too.
No fresh parsley or cilantro? Dried herbs at one-third the amount work in a pinch. Swap zucchini for yellow squash if that’s what’s in your fridge. The cumin and paprika can be adjusted to taste—add more if you love heat. If you’re missing vegetable broth, water with a bouillon cube gets you close. The garlic can be pre-minced from a jar (I won’t tell).
This keeps well in the fridge for up to 5 days—actually tastes better the next day. Freeze portions for 3 months if you want to batch cook. I like to store mine in glass jars (easier to reheat and eco-friendly).
Why You’ll Love This Recipe
- One Pot Wonder: I just dump the carrots, celery, onion, garlic, and cabbage in a pot and let it simmer—no fancy techniques.
- Rich and Comforting: The garlic and onion give this soup a deep, savory base that makes it irresistibly cozy.
- Meal Prep Magic: I make a huge batch on Sunday and it keeps perfectly for lunches all week.
- Pennywise Favorite: Honestly, a head of cabbage and a few veggies stretch further than I expected for such a filling meal.
Step-by-Step Instructions for Metabolism-Boosting Veggie Blend
Here’s how I build layers of flavor while keeping this dish light and nourishing.
Step 1: Sauté the Aromatic Base
Heat the 2 tbsp olive oil in a large pot over medium heat. Add the 1 whole yellow onion and cook for 4-5 minutes until it becomes translucent and just begins to soften at the edges.
Stir in the 3 whole carrots and 3 whole celery stalks, cooking for another 3-4 minutes until the vegetables start to release their natural sweetness. This base develops the soup’s depth of flavor, so don’t rush the process.
Add the 4 cloves garlic cloves, 1 tsp ground cumin, and 1 tsp paprika, stirring constantly for 30 seconds until the garlic becomes fragrant. Be careful not to let it brown—burnt garlic turns bitter.
Step 2: Build the Vegetable Foundation
Increase the heat to medium-high and add the 4 cups cabbage and 2 whole zucchini. Stir well to combine with the aromatic base and cook for 5 minutes until the cabbage begins to wilt slightly.
The cabbage will reduce significantly as it cooks, which is normal. You want it to soften just enough to absorb the spices but still retain some texture. The zucchini should brighten in color and start to release its moisture.
Season with the 1 tsp salt and 0.5 tsp black pepper at this stage. This early seasoning allows the flavors to develop fully as the vegetables continue to cook.
Step 3: Simmer to Perfection
Pour in the 2 cups diced tomatoes and 6 cups vegetable broth. Stir to combine all ingredients, then bring the mixture to a boil. Once boiling, reduce the heat to medium-low to maintain a gentle simmer.
Partially cover the pot and let it simmer for 20-25 minutes until all the vegetables are tender. The soup is ready when the carrots can be easily pierced with a fork and the flavors have melded together beautifully.
Taste and adjust the seasoning if needed—remember that low-sodium broth may require additional salt. The liquid should be slightly reduced, with the vegetables submerged but still visible.
Step 4: Finish and Serve
Remove the pot from heat and stir in the 0.25 cup fresh parsley. The residual heat will wilt the parsley slightly while preserving its bright, fresh flavor. If using, add the 0.25 cup fresh cilantro as well.
Let the soup sit for 5 minutes before serving to allow the flavors to fully marry. This brief rest makes a noticeable difference in the depth of taste. The herbs should appear vibrant against the rich vegetable base.
Ladle into bowls while hot. Each serving should showcase a colorful variety of vegetables in a light but flavorful broth, with the herbs providing a fresh finish to every spoonful.
Pro Tips For Making Basic Fat Burning Soup
- Sauté the Aromatics: Cook the onion, garlic, and celery in a little oil for 5-7 minutes until soft and fragrant—this builds the flavor base that makes the soup taste rich, not flat.
- Shred the Cabbage: Skip the big chunks and slice the cabbage thin—it cooks faster, blends into every bite, and saves you from chewing through tough leaves.
- Skip the Peel: I learned this the hard way—don’t peel the carrots if they’re organic, just scrub them well; the skin holds nutrients and saves time.
- Simmer Low and Slow: After adding all the veggies and liquid, keep the heat low so it bubbles gently for 30-40 minutes—this draws out the sweetness without turning the veggies to mush.
Serving Suggestions for This basic fat burning soup
Bowl Presentation
Ladle this creation into wide, shallow bowls to showcase the colorful vegetables. I love using white or light-colored bowls to make the vibrant greens, oranges, and reds pop visually. Garnish with an extra sprinkle of fresh parsley or cilantro for that restaurant-quality touch. 💛
Herb Finishing
Right before serving, add a final drizzle of extra-virgin olive oil—about 1 tsp per bowl—to bring out the flavors. A squeeze of fresh lemon juice adds brightness that cuts through the richness of the vegetables.
Crunchy Toppings
For texture contrast, top each serving with 2 tbsp toasted pumpkin seeds or crushed whole-grain crackers. I keep a stash of Mary’s Gone Crackers for this purpose. The crunch elevates every spoonful.
Side Pairings
A slice of whole-grain bread or warm tortillas makes a perfect companion for soaking up the flavorful broth. For a lighter option, serve with a simple mixed greens salad dressed with lemon vinaigrette.
Temperature Tip
Serve this soup piping hot—around 165°F—to fully appreciate the aroma and depth of flavors. If reheating, add a splash of water or broth to restore the perfect consistency. 🔥
Portion Control
Each serving is about 1.5 cups, which is satisfying without being heavy. I find this portion size ideal for lunch or as a starter for dinner. The light broth keeps it refreshing while still being filling.
Nutrition Facts
Frequently Asked Questions
Can I use frozen vegetables instead of fresh?
Yes, frozen works fine! Thaw and drain them first to avoid excess liquid.
How long does this soup last in the fridge?
It stays fresh for 4-5 days in an airtight container. Reheat gently on the stove.
What if my soup tastes bland?
Add more salt, a pinch of cumin, or a splash of lemon juice to brighten the flavors.
Can I make this in a slow cooker?
Sauté veggies first, then cook on low for 6-7 hours or high for 3-4 hours.

- 8 Bean Soup Recipe Crock Pot: Hearty Vegetable Medley in One Pot - September 25, 2026
- 4C Bread Crumbs Meatballs Recipe: Crispy Crust and Juicy Centers - September 25, 2026
- 6 Oz Chocolate Chip Cookie Recipe: Perfectly Balanced Crispy Edges and Chewy Hearts - September 25, 2026