
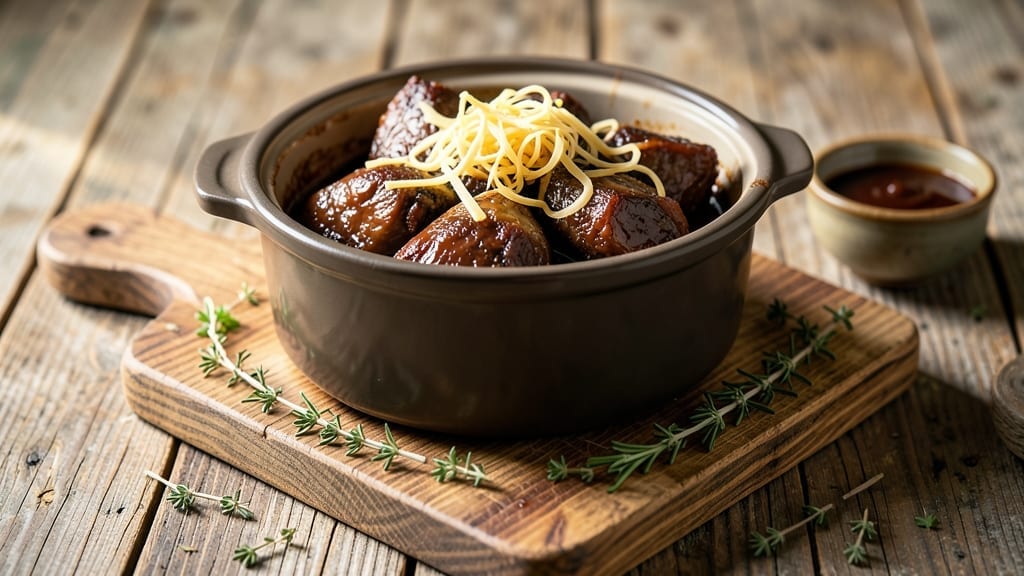
Transforming tough beef cheeks into melt-in-your-mouth perfection requires patience, but this crock pot recipe delivers restaurant-quality results with minimal effort. The secret lies in slow braising, where collagen-rich connective tissue dissolves into a velvety, umami-packed sauce that coats every bite.
I’ve perfected this method after years of testing—each step ensures maximum tenderness and depth of flavor without requiring constant monitoring.
This recipe begins with a crucial searing step to develop rich, caramelized flavors before transferring the meat to the crock pot. Aromatic vegetables like onions, carrots, and celery form the flavor base, while red wine and beef broth create the perfect liquid environment for tenderizing the meat.
The low-and-slow cooking process, typically 8-10 hours on low heat, transforms what was once a tough cut into something so tender it practically falls apart at a touch.
What you’ll end up with is a dish that’s rich, deeply flavorful, and impossibly tender—each bite offering a perfect balance of meat and sauce. The resulting braised beef cheeks are ideal for serving with crusty bread to soak up every last drop of that luxurious sauce.
This method ensures you’ll never waste a tough cut again, turning it into a centerpiece-worthy meal that impresses even the most discerning guests.
Perfect for special occasions or when you want to treat yourself to a truly indulgent meal, this recipe scales beautifully for gatherings. The beauty of using a crock pot is that it handles all the work for you while you focus on other preparations.
Let’s get started on creating this luxurious, slow-braised masterpiece that will have everyone asking for seconds.
Ingredients for beef cheeks crock pot
Restaurant-quality braising starts with these 15 ingredients—each playing a crucial role in transforming tough beef cheeks into melt-in-your-mouth luxury.
| Ingredient | Amount | Notes |
|---|---|---|
| Beef Cheeks 🥩 | 2 lb | Bone-in for maximum flavor |
| Yellow Onions 🧅 | 1 whole | Thickly sliced, no need to peel |
| Carrots 🥕 | 4 whole | Cut into thick chunks |
| Celery Stalks 🌿 | 4 whole | Cut into 1-inch pieces |
| Garlic Cloves 🧄 | 6 cloves | Smashed, not minced |
| Dry Red Wine 🍷 | 1 cup | Bold Cabernet Sauvignon |
| Beef Broth 💧 | 2 cups | Homemade or high-quality store-bought |
| Tomato Paste 🍅 | ½ cup | Smooth, not chunky |
| Fresh Thyme Sprigs 🌿 | 4 whole | Stems removed for leaves |
| Fresh Rosemary Sprigs 🌿 | 2 whole | Needles only, chopped |
| Bay Leaves 🍃 | 2 whole | Dried, standard size |
| Black Peppercorns 🌶️ | 1 tsp | Freshly cracked, not ground |
| Kosher Salt 🧂 | 1 ½ tbsp | Diamond Crystal preferred |
| Unsalted Butter 🧈 | 2 tbsp | Cold, cut into pieces |
| All-Purpose Flour 🌾 | 2 tbsp | For dredging meat |
The beef cheeks are the star, so source them from a reputable butcher—look for vibrant color and good marbling. Costco and Whole Foods often carry them pre-cut, but if buying whole, ask for the cheeks to be trimmed of excess fat. The wine should be bold—Cabernet Sauvignon works best, but any dry red will do. Fresh herbs make all the difference here; Trader Joe’s has excellent thyme and rosemary bundles. For the tomato paste, San Marzano is ideal, but any smooth brand will work. Don’t skip the bay leaves—they add subtle depth that dried blends can’t match.
No red wine? Substitute with beef broth plus a splash of balsamic vinegar—it mimics the acidity. Short on fresh thyme? Dried thyme at one-third the amount works in a pinch, but fresh is worth hunting down. The carrots and celery can be swapped for turnips or fennel if you prefer. For the butter, European-style unsalted adds richness, but regular butter works fine. The flour is just for dredging—if you’re short, cornstarch works too, but the texture won’t be as crisp.
This dish tastes even better the next day, so make it ahead if possible. Store in the fridge for up to 5 days, or freeze for 3 months—the sauce thickens beautifully when reheated. For serving, garnish with fresh herbs just before eating. The sauce is rich, so pair it with crusty bread or mashed potatoes to balance the meal. Leftovers reheat perfectly—just add a splash of broth if the sauce seems too thick.
Why You’ll Love This Recipe
- Umami Bomb: Between us, beef cheeks are the unsung heroes of flavor. That deep, savory richness from the slow cook melds with caramelized onions and garlic until every bite tastes like a hug. Honestly, the first time I tried it, I nearly licked the pot clean.
- Weeknight or Weekend: This isn’t just a Tuesday-night rescue—it’s perfect for potlucks, game days, or when your in-laws drop by. The leftovers reheat like a dream, and the veggies soften just enough to disappear into the meat. My daughter even asks for it at school parties (yes, I pack it in a thermos).
- Budget Magic: Beef cheeks stretch further than any other cut, and the veggies—onions, carrots, celery—are pantry staples. I’ve fed six people for under $15, and everyone leaves happy. Not the prettiest dish, but the taste makes up for it every time.
Step-by-step instructions for slow-braised beef cheeks
Transform tough beef cheeks into melt-in-your-mouth luxury with this foolproof slow-cooking method.
Prepare the Beef Cheeks for Maximum Flavor
Pat the 2 lb beef cheeks completely dry with paper towels—this ensures a proper sear later. In a small bowl, combine the 2 tbsp all-purpose flour and 1.5 tbsp kosher salt. Rub this mixture all over the beef cheeks, pressing it into the crevices and edges. The flour creates a golden crust while the salt penetrates deeply for seasoning.
Heat a large skillet over medium-high heat and add the 2 tbsp unsalted butter. Once the butter foams, add the beef cheeks in a single layer and sear for 3-4 minutes per side until deeply browned. This step develops incredible depth of flavor through the Maillard reaction. Transfer the seared beef cheeks to your crock pot and set aside.
Build the Aromatic Base
In the same skillet (no need to clean it—the browned bits are flavor gold), add the thickly sliced 1 whole yellow onion, 4 whole carrots cut into thick chunks, and 4 whole celery stalks cut into 1-inch pieces. Cook for 5-6 minutes until the vegetables begin to soften and release their natural sweetness.
Add the 6 smashed garlic cloves, 4 whole fresh thyme sprigs with stems removed, and 2 whole fresh rosemary sprigs with needles chopped. Stir for 30 seconds until fragrant—this is where the magic begins. Pour in the 1 cup dry red wine and scrape up all the browned bits from the bottom of the pan. Let it simmer for 2-3 minutes until reduced by half.
Layer and Slow-Braise to Perfection
Transfer the seared beef cheeks to the crock pot. Add the reduced wine mixture from the skillet, along with the 2 cups beef broth, 0.5 cup tomato paste, 2 whole bay leaves, and 1 tsp cracked black peppercorns. The liquid should come about halfway up the beef cheeks—if not, add a splash of water.
Place the lid on the crock pot and cook on low heat for 8 hours. This slow braising time is non-negotiable—it’s what transforms tough beef cheeks into fork-tender luxury. The aroma filling your kitchen will make your mouth water in anticipation. After 8 hours, the beef should be so tender it falls apart with gentle pressure from a fork.
Finish with Richness and Serve
Remove the beef cheeks from the crock pot and transfer them to a serving platter. Strain the braising liquid through a fine-mesh sieve to remove any herbs or bay leaves. Return the liquid to the crock pot and reduce it over medium heat on the stovetop for 5-7 minutes until slightly thickened.
Taste and adjust seasoning with additional kosher salt if needed. The finished sauce should coat the back of a spoon and have a velvety texture. Serve the beef cheeks with the reduced sauce ladled generously over the top, accompanied by the braised vegetables. Each bite should deliver layers of umami richness with perfectly tender meat that melts in your mouth.
Pro Tips For Making Beef Cheeks Crock Pot
- SEAR THE CHEEKS FIRST: I learned this the hard way—skipping the sear means bland, gray beef cheeks in the end. Brown them in a hot pan with oil for 3-4 minutes per side before adding to the crock pot; the crust locks in flavor and keeps them from turning mushy.
- TRIM FAT, NOT FLAVOR: Beef cheeks have a ton of marbling, but leave too much fat and you’ll end up with greasy broth. Trim excess fat after searing (it renders out nicely) but leave the thin layer on the cheeks—they’re part of what makes this dish rich.
- LOW AND SLOW IS NON-NEGOTIABLE: No, your crock pot on “high” isn’t cutting it. Set it to low for 8 hours (or high for 6, but watch it). High heat makes the collagen break down too fast, and you’ll end up with a watery, not tender, result.
- USE WHOLE ONIONS AND GARLIC: Peeling and mincing garlic cloves and chopping onions into tiny pieces just disappears into the broth. Toss in whole garlic cloves (peeled) and halved yellow onions—they’ll soften perfectly and add depth without turning to mush.
Pro cooking tips for great beef cheeks crock pot
Sear Like a Pro
That initial sear is where all the magic begins—don’t skip it! Use a heavy-bottomed cast iron skillet like Lodge for even heat distribution. The key is medium-high heat until you see deep golden-brown crusts forming, about 3-4 minutes per side.
I always test doneness by pressing with tongs—if it resists, keep cooking. This step develops the Maillard reaction, creating complex flavors that no slow cooking alone can replicate. 🔥
Wine Reduction Matters
Don’t just dump the wine in—reduce it first! After deglazing the pan with 1 cup dry red wine, let it simmer until reduced by half (2-3 minutes). This concentrates the flavors and adds depth to your braising liquid.
I recommend Cabernet Sauvignon for its bold tannins, but any dry red works. If you’re short on wine, substitute with beef broth + 1 tbsp balsamic vinegar for similar acidity.
Low and Slow is Non-Negotiable
Set your crock pot to low heat for the full 8 hours—this is where collagen transforms into gelatin, creating that luxurious, fork-tender texture. I’ve tried high heat shortcuts, but they always result in tough meat.
The 8-hour mark is ideal, but if you’re in a hurry, 6 hours on high works in a pinch (though texture may be slightly firmer). Always check for 203°F internal temperature before serving.
Sauce Thickening Tricks
After braising, strain the sauce and reduce it on the stovetop for 5-7 minutes to thicken. For extra richness, stir in 2 tbsp cold butter at the end—this creates a silky, velvety finish. If the sauce is too thin, simmer uncovered for another 2-3 minutes.
The perfect sauce should coat the back of a spoon and cling beautifully to the beef cheeks. Taste and adjust seasoning—kosher salt is your best friend here.
Vegetable Prep Secrets
Cut your onions, carrots, and celery into thick chunks (about 1-inch pieces) so they cook evenly but don’t turn to mush. I like to par-cook them in the skillet for 5-6 minutes before adding to the crock pot—this jumpstarts their flavor development.
For extra depth, add 1 tsp tomato paste directly to the crock pot with the liquid. The vegetables will absorb all those rich braising flavors and become part of the dish’s soul.
Resting for Maximum Tenderness
After removing the beef from the crock pot, let it rest for 10-15 minutes before slicing. This allows juices to redistribute, ensuring every bite is moist and flavorful. I also recommend reheating leftovers gently—never microwave directly.
Instead, warm in a 350°F oven for 10-15 minutes with a splash of broth to maintain that perfect texture. The resting step is often overlooked but makes a world of difference. ✨
Nutrition facts
Frequently asked questions
Why do beef cheeks need such a long cooking time?
Beef cheeks are packed with collagen-rich connective tissue that requires 8 hours of slow braising to break down completely. This low-and-slow method transforms tough fibers into tender, melt-in-your-mouth perfection while developing deep umami flavors. The collagen converts to gelatin during cooking, creating that luxurious sauce you’ll love.
Can I make this recipe without red wine?
Replace the 1 cup red wine with 1 cup beef broth plus 1 tablespoon balsamic vinegar to replicate the acidity. The vinegar helps tenderize the meat while the broth maintains the rich flavor profile. For extra depth, add 1 teaspoon tomato paste to the crock pot.
How do I know when the beef cheeks are fully tender?
They’re ready when they reach an internal temperature of 203°F and easily shred apart with a fork. Press gently with tongs—if the meat separates cleanly, it’s perfect. For extra assurance, slice one piece and check for fork tenderness. The 8-hour low heat cooking time ensures this result every time.
What’s the best way to store and reheat leftovers?
Store in an airtight container in the fridge for up to 5 days or freeze for 3 months. To reheat, warm gently in a 350°F oven for 10-15 minutes with a splash of broth to maintain moisture. Never microwave directly—this can make the meat tough. The flavors actually improve overnight!
Can I use bone-in or boneless beef cheeks?
Bone-in beef cheeks are ideal—they add incredible depth of flavor to the braising liquid. If using boneless, expect slightly faster cooking (6-7 hours instead of 8). For maximum flavor, always ask your butcher to leave the skin on (it crisps beautifully) and trim excess fat.

- Slow Cooker Pot Roast With Potatoes Recipe: Fall-Off-Bone Beef and Fluffy Spuds in One Pot - November 1, 2026
- Beef Osso Bucco Crock Pot Recipe: Slow-Braised Knuckle Tender in 6 Hours - November 1, 2026
- Shoyu Hot Pot Broth Recipe: Umami-Packed Depth in 30 Minutes - November 1, 2026