
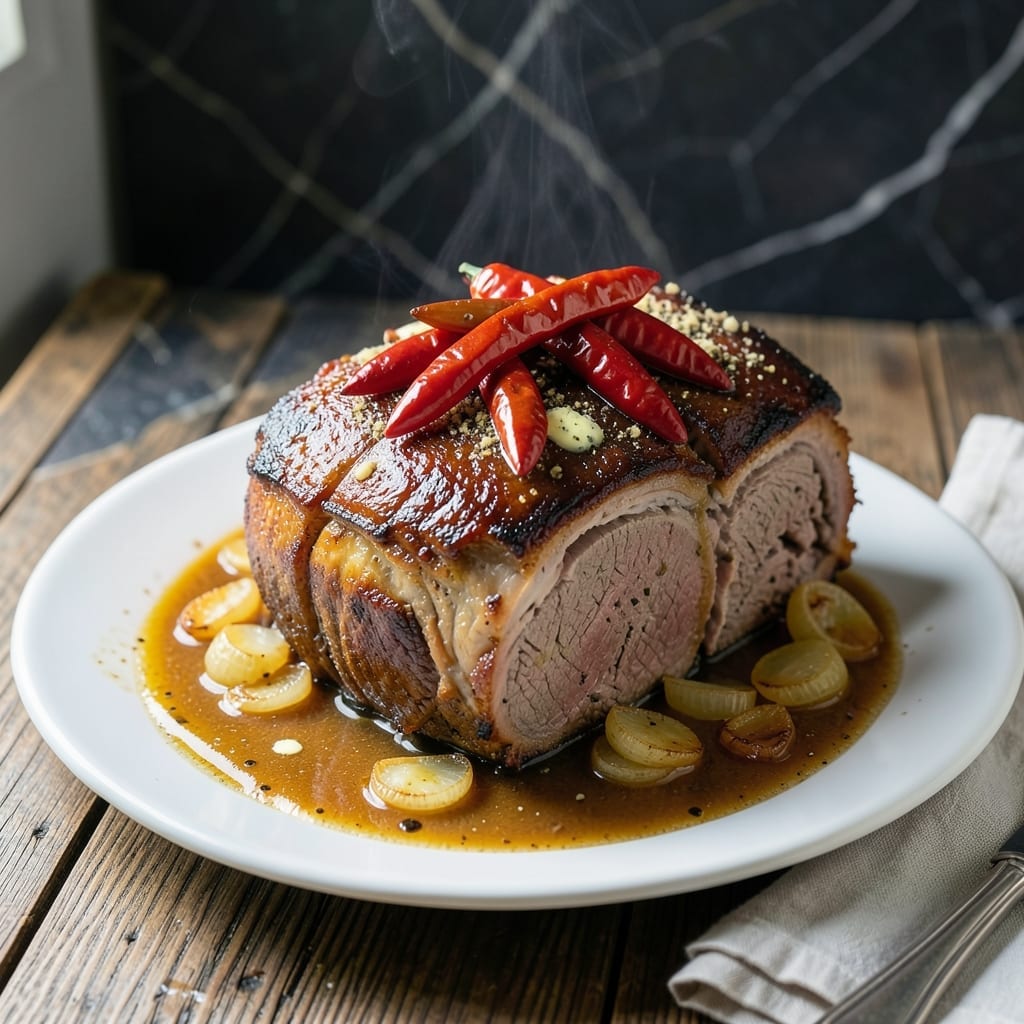
This Mississippi-style pot roast transforms tough beef chuck into fall-apart tender perfection through a slow, flavorful braise.
The secret lies in the pepperoncini and their tangy juice, which work with ranch seasoning to create a rich, slightly spicy sauce that penetrates every bite.
After searing the beef for a deep caramelized crust, it simmers for 3-4 hours until fork-tender, filling your kitchen with an irresistible aroma.
Serve this restaurant-quality dish with mashed potatoes or crusty bread to soak up every drop of the savory juices.
Ingredients for Beef Chuck Shoulder Pot Roast
Transform tough beef chuck into melt-in-your-mouth perfection with these everyday ingredients.
| Ingredient | Amount | Notes |
|---|---|---|
| Beef Chuck Roast 🥩 | 3 lb | Well-marbled, boneless preferred |
| Pepperoncini Peppers 🌶️ | 12 pieces | Sliced, plus 1/2 cup juice reserved |
| Ranch Seasoning Mix 🌿 | 1 package | 1 oz envelope, dry mix |
| Unsalted Butter 🧈 | 4 tbsp | Divided for searing and sauce |
| All-Purpose Flour 🌾 | ¼ cup | For dusting beef |
| Yellow Onion 🧅 | 1 whole | Large, sliced into wedges |
| Garlic Cloves 🧄 | 6 cloves | Minced for depth of flavor |
| Beef Broth 💧 | 1 cup | Low-sodium preferred for control |
| Worcestershire Sauce 🫒 | 2 tbsp | Adds umami depth |
| Dijon Mustard 🟡 | 1 tbsp | Smooth, not whole grain |
| Dried Thyme 🌿 | 1 tsp | Rubbed between fingers to release oils |
| Dried Rosemary 🌿 | 1 tsp | Crushed lightly before adding |
| Bay Leaves 🍃 | 2 pieces | Removed before serving |
| Kosher Salt 🧂 | 2 tsp | Diamond Crystal or Morton preferred |
| Black Pepper 🌶️ | 1 tsp | Freshly ground for best flavor |
The beef chuck is non-negotiable here—look for well-marbled pieces at Costco or your butcher. The fat renders down during that long braise, keeping the meat moist. I grab mine from Whole Foods when they have sales (usually Thursdays). For the pepperoncini, Mezzetta or Giardiniera brands have the best tangy kick. Don’t drain all the juice—you’ll need that briny liquid for the sauce (worth the extra minute to measure it out).
No ranch packets? Make your own mix with dried dill, parsley, garlic powder, and onion powder—about 2 tbsp total. Out of pepperoncini? Banana peppers work in a pinch, but add an extra splash of their juice for tang. The Worcestershire can be swapped for extra beef broth plus a dash of soy sauce. Butter alternatives? Olive oil works for searing, but the sauce won’t be as rich.
Leftovers keep beautifully—honestly taste better the next day. Store in an airtight container for up to 5 days in the fridge or freeze for 3 months. The sauce thickens as it cools, so reheat gently with a splash of broth (or water in a pinch).
Why You’ll Love This Recipe
- I’ll be real: this is my go-to for Sunday dinner, potlucks, or even meal prepping for the week. It stretches easily to feed 6-8.
- One Pot Wonder: I just sear the chuck roast, dump in the ranch mix and butter, and let the oven do the rest. Honestly, cleanup is just one dish.
- Tangy & Rich: The pepperoncini peppers and ranch seasoning give it this bold, zesty kick that makes the beef ridiculously tender and packed with flavor.
- Feeds a Crowd: I’ll be real: this is my go-to for Sunday dinner, potlucks, or even meal prepping for the week. It stretches easily to feed 6-8.
Step-by-Step Instructions for Mississippi-Style Pepperoncini Braise
This method transforms tough beef into fall-apart tender perfection with bold, tangy flavor.
Step 1: Season and Sear the Beef Chuck Roast
Pat the 3 lb Beef Chuck Roast dry with paper towels, then season it aggressively with the 2 tsp Kosher Salt and 1 tsp Black Pepper on all sides. Press the seasoning into the meat so it adheres well during searing.
Dust the roast lightly with the 0.25 cup All-Purpose Flour, tapping off any excess. This creates a thin coating that will help thicken the braising liquid later. Heat 2 tbsp Unsalted Butter in a heavy Dutch oven over medium-high heat until it stops foaming.
Sear the roast for 4-5 minutes per side until it develops a deep, dark brown crust. Don’t move it too soon—let it form a proper sear before flipping. Transfer the beef to a plate and set aside.
Step 2: Build the Flavor Base
In the same pot, melt the remaining 2 tbsp Unsalted Butter over medium heat. Add the 1 whole Yellow Onion (sliced into wedges) and cook for 3-4 minutes until it begins to soften and turn translucent at the edges.
Stir in the 6 cloves Garlic Cloves (minced) and cook for 30 seconds until fragrant. Add the 1 package Ranch Seasoning Mix, 1 tbsp Dijon Mustard, 2 tbsp Worcestershire Sauce, 1 tsp Dried Thyme, and 1 tsp Dried Rosemary, stirring constantly for 1 minute to toast the spices.
Pour in the 1 cup Beef Broth and use a wooden spoon to scrape up all the browned bits from the bottom of the pot. This deglazing step captures all that concentrated beef flavor.
Step 3: Braise with Pepperoncini
Return the seared roast to the pot along with any accumulated juices. Add the 12 pieces Pepperoncini Peppers (sliced, plus any reserved juice) and the 2 pieces Bay Leaves. The liquid should come about halfway up the side of the beef—add a splash of water if needed.
Bring the mixture to a gentle simmer, then reduce the heat to low. Cover the pot tightly and let it braise for 3 to 3½ hours. You’ll know it’s done when the beef shreds easily with a fork and the internal temperature reaches 195-200°F.
Check occasionally and add a little water if the liquid reduces too much. The pepperoncini will mellow and infuse the braising liquid with their tangy, slightly spicy flavor.
Step 4: Rest and Serve
Carefully remove the 2 pieces Bay Leaves from the pot—they’ve infused their flavor and should be discarded. Transfer the beef to a cutting board and let it rest for 10-15 minutes before shredding or slicing.
Skim any excess fat from the surface of the braising liquid if desired, then serve the beef with plenty of the pepperoncini and sauce spooned over the top. The sauce should be rich and slightly thickened from the flour, with a perfect balance of ranch seasoning and tangy pepperoncini.
Pro Tips For Making Beef Chuck Shoulder Pot Roast
- Sear the Chuck First: I learned this the hard way—browning the beef chuck in butter before slow cooking locks in flavor and gives that rich crust. About 3-4 minutes per side in a hot pan does the trick.
- Pat the Roast Dry: Sounds obvious, but a wet roast won’t sear properly. Use paper towels to dry the beef thoroughly before dusting with flour—it makes a real difference in texture.
- Don’t Skip the Rest: After searing, let the meat rest for 5-10 minutes before adding liquids. It redistributes the juices, so your pot roast stays tender instead of dry.
- Use Pepperoncini Juice: Instead of water or broth, pour in the juice from the pepperoncini jar—it adds tangy depth without extra effort. I was skeptical until I tried it.
Health Benefits of This Dish
Rich Protein Source
This dish delivers about 60 grams of protein per serving from the beef chuck, supporting muscle growth and repair. Protein also keeps you feeling full longer, making it a satisfying meal option for any day. I notice I stay energized for hours after eating it. 💪
Iron and Zinc Boost
Beef is one of the best sources of heme iron, which your body absorbs more easily than plant-based iron. A 3-ounce serving provides about 2.5mg of iron and 7mg of zinc, both essential for immune function and metabolism.
B Vitamin Powerhouse
The chuck roast is packed with B vitamins, especially B12, which is crucial for nerve function and red blood cell production. You’ll also get significant amounts of riboflavin and niacin, which help convert food into energy.
Collagen for Joints
Slow cooking breaks down collagen in the beef into gelatin, which supports joint health and skin elasticity. The longer braising time maximizes this benefit, making every bite work for your body’s well-being. 🌟
Healthy Fats
While chuck roast contains some saturated fat, it also provides monounsaturated fats that support heart health. The marbling that makes this cut so flavorful also contributes to a satisfying meal that curbs cravings.
Electrolyte Balance
The pepperoncini and beef broth contribute natural electrolytes like sodium and potassium. These help maintain fluid balance, especially important after physical activity or on hot days.
Nutrition Facts
Frequently Asked Questions
Can I use a different cut of beef?
Stick with chuck for best results—its marbling breaks down beautifully during the 3-4 hour braise. Brisket works too, but avoid lean cuts like round as they’ll dry out.
Why do we sear the meat first?
Searing creates a deep brown crust that adds layers of flavor through the Maillard reaction. This step also helps thicken the sauce later. Don’t skip it!
How do I know when it’s done?
The beef is ready when it shreds easily with a fork or reaches 195-200°F internally. If it resists, give it another 30 minutes of braising.
Can I make this in a slow cooker?
Yes! Sear the meat first, then transfer everything to a slow cooker. Cook on low for 8-10 hours or high for 5-6 hours.

- 6 Oz Chocolate Chip Cookie Recipe: Perfectly Balanced Crispy Edges and Chewy Hearts - September 25, 2026
- 6-Inch Coffee Cake Recipe: Vanilla Bean Swirls and Buttery Streusel Topping - September 25, 2026
- 1 Hour Soup Recipe: Velvety Richness Without the Wait - September 25, 2026