
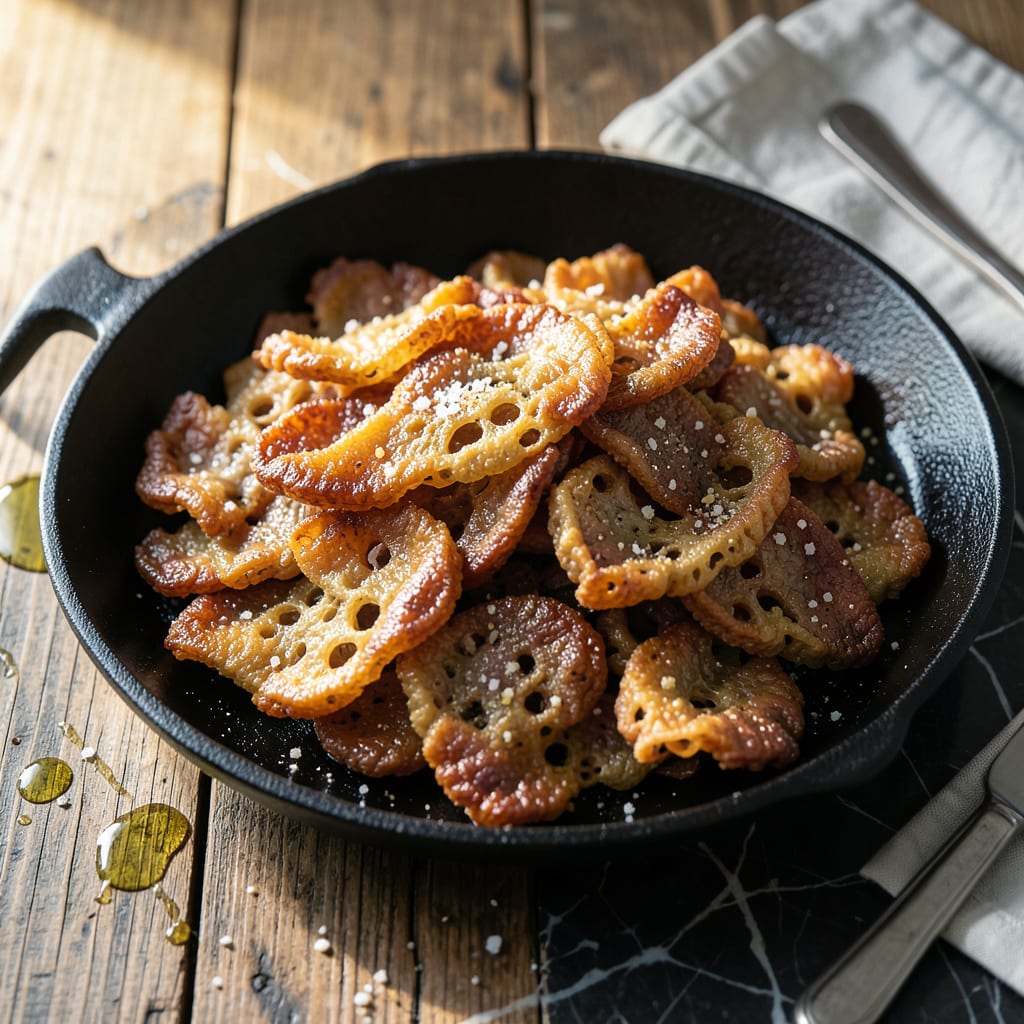
Achieving perfectly crispy beef fat crackling requires precise technique and patience. This method transforms beef fat into golden, shatteringly brittle pieces ideal for snacking or garnishing.
Render the fat slowly at low heat, then increase the temperature to create airy, blistered bubbles. The result is a pork-free alternative with the same addictive crunch and rich flavor.
Ingredients for Beef Fat Crackling
Minimal ingredients transform beef fat into golden, shatteringly crisp cracklings perfect for snacking.
| Ingredient | Amount | Notes |
|---|---|---|
| Beef Fat 🥩 | 2 lb | Freshly trimmed, cold |
| Kosher Salt 🧂 | 1 tbsp | Diamond Crystal preferred |
| Baking Powder 🧂 | 1 tsp | For airy texture |
| Black Pepper 🌶️ | 1 tsp | Freshly ground for best flavor |
| Garlic Powder 🧄 | 1 tsp | Optional for seasoning |
| Onion Powder 🧅 | 1 tsp | Optional for depth |
| Smoked Paprika 🌶️ | ½ tsp | For smoky undertone |
| Water 💧 | ¼ cup | For initial steaming |
| Neutral Oil 🫒 | 2 tbsp | For greasing pan |
| Fresh Rosemary 🌿 | 1 tbsp | Chopped, optional garnish |
The beef fat is critical—source from a trusted butcher or trim excess from steaks like ribeye or brisket. Ensure it is fresh and cold before rendering, as warm fat renders unevenly. Look for fat with a vibrant white color and avoid any with a grayish tint, which indicates oxidation. Local butcher shops often sell trimmed fat at a discount, and Whole Foods typically carries high-quality options.
No beef fat? Duck fat or lamb fat work similarly, though the flavor will differ slightly. For seasoning, sea salt can replace kosher salt at half the amount due to its finer grain. Smoked paprika can be swapped for regular paprika if a milder flavor is desired. The baking powder is essential for the crackling’s signature airy texture—do not omit.
Store rendered cracklings in an airtight container at room temperature for up to 5 days, or freeze for 1 month. Reheat in a dry skillet or oven to restore crispiness. Unused raw fat can be frozen for 3 months if stored properly in a sealed container.
Why You’ll Love This Recipe
- One Pan Magic: I just melt the beef fat, mix in the spices, and let the oven do the rest.
- Crispy Garlic Perfection: That first crunch with the garlic powder kick? Ridiculously good.
- Snack or Side: I toss these on salads, soups, or just eat them straight from the pan.
- Budget Savior: I use leftover beef fat I’d normally toss—now it’s my favorite zero-waste treat.
Step-by-Step Instructions for Beef Fat Crackling
This method ensures maximum crispness with a satisfying crunch in every bite.
Step 1: Prepare and Season the Beef Fat
Begin by cutting the 2 lb Beef Fat into ½-inch cubes. Ensure the fat is freshly trimmed and cold for easier handling. The uniform size guarantees even cooking and consistent texture throughout the batch.
In a large bowl, toss the cubed fat with 1 tbsp Kosher Salt, 1 tsp Baking Powder, 1 tsp Black Pepper, 1 tsp Garlic Powder, 1 tsp Onion Powder, and 0.5 tsp Smoked Paprika. The baking powder creates micro-bubbles, contributing to an airy, crackling texture. Distribute the seasoning evenly for balanced flavor in every piece.
Step 2: Hydrate and Rest the Mixture
Add the 0.25 cup Water to the seasoned fat and mix gently. The water helps to initially steam the fat, rendering it slowly before crisping. This step prevents the fat from drying out too quickly in the oven.
Let the mixture rest for 10-15 minutes. This allows the seasoning to penetrate and the baking powder to begin its leavening action. You’ll notice the fat cubes start to develop a slightly tacky surface, which is perfect for the next step.
Step 3: Arrange and Bake for Initial Rendering
Preheat your oven to 325°F. Lightly grease a baking sheet with 2 tbsp Neutral Oil to prevent sticking. Spread the seasoned fat cubes in a single layer on the sheet, ensuring they don’t touch each other. This spacing allows for even air circulation and consistent crisping.
Bake for 45-60 minutes until the fat begins to render and the edges turn light golden brown. The low temperature ensures the fat renders slowly without burning, creating a melt-in-your-mouth texture.
Step 4: Increase Heat for Final Crisping
Increase the oven temperature to 400°F. Continue baking for an additional 20-30 minutes, checking frequently after the first 10 minutes. The fat should now be deeply golden brown and crispy, with the rendered fat bubbling around the cubes.
Watch closely during this stage—the crackling can go from perfectly crisp to burnt quickly at higher temperatures. The pieces should be light and airy with a satisfying crunch when tested.
Step 5: Drain and Garnish for Serving
Remove the baking sheet from the oven and immediately transfer the crackling to a paper towel-lined plate to drain excess fat. Sprinkle with 1 tbsp Fresh Rosemary while still hot for an aromatic finish. The rosemary adds a fresh, herbal note that complements the rich, savory crackling.
Allow the crackling to cool completely before serving. The texture will become even crisper as it cools. Store in an airtight container at room temperature for up to 3 days, though it’s best enjoyed fresh.
Pro Tips For Making Beef Fat Crackling
- Use Fresh Fat: I learned this the hard way—old or rancid beef fat makes cracklings taste bitter. Use fresh, white fat trimmed from steaks or ask your butcher for suet.
- Salt Generously: Beef fat needs more salt than you think to bring out its rich flavor. Go heavy with the kosher salt before baking—it’s the only seasoning that really penetrates.
- Low and Slow First: Start at 275°F for 30-40 minutes to render the fat before cranking the heat. This keeps them from burning before they crisp up.
- Dry Thoroughly: Pat the fat chunks completely dry with a paper towel before seasoning. Any moisture steams instead of crisps—after burning two batches, I finally figured this out.
Pro Cooking Tips for This Recipe
Fat Selection Matters
I always source my beef fat from a trusted butcher—Whole Foods works too. Look for fresh, cold, white fat without gray tints. Trimmed ribeye or brisket fat works wonderfully. Warm or oxidized fat won’t crisp properly. 💡
Uniform Cubing
Cut the 2 lb beef fat into precise ½-inch cubes. This ensures even rendering and consistent texture. I use a sharp chef’s knife for clean cuts—dull blades crush fat, leading to uneven cooking.
Low and Slow Start
Begin at 325°F for 45-60 minutes. This low temp gently renders fat while preventing burning. I check every 15 minutes and rotate the pan for even browning. The edges should turn light golden before increasing heat.
High Heat Finish
Boost the oven to 400°F for the final 20-30 minutes. This creates those airy, blistered bubbles. Watch closely—cracklings can burn quickly. They’re done when deeply golden brown and shatter when tested. 🔥
Draining Technique
Transfer cracklings to a paper towel-lined plate immediately. Press gently with another towel to absorb excess fat. I let them cool completely—this makes them even crisper. Add fresh rosemary right after baking for maximum aroma.
Storage Tip
Store in an airtight container at room temp for up to 3 days. To revive, spread on a baking sheet and warm at 350°F for 5 minutes. They’ll regain that just-made crunch.
Nutrition Facts
Frequently Asked Questions
What’s the best way to store leftover cracklings?
Keep them in an airtight container at room temperature for up to 3 days. For longer storage, freeze for up to 1 month.
Can I use a different type of fat?
Yes, duck fat or lamb fat work well with similar results. Avoid poultry fat as it has a lower smoke point and may burn.
Why did my cracklings turn out chewy?
This usually means the temperature was too low or the pieces were too large. Stick to ½-inch cubes and ensure the oven reaches 400°F for the final crisp.
Do I need to use baking powder?
Yes, it’s essential for creating the airy texture. Skip it and you’ll miss the signature crackling effect. 1 tsp is the perfect amount.

- 8 Bean Soup Recipe Crock Pot: Hearty Vegetable Medley in One Pot - September 25, 2026
- 4C Bread Crumbs Meatballs Recipe: Crispy Crust and Juicy Centers - September 25, 2026
- 6 Oz Chocolate Chip Cookie Recipe: Perfectly Balanced Crispy Edges and Chewy Hearts - September 25, 2026