
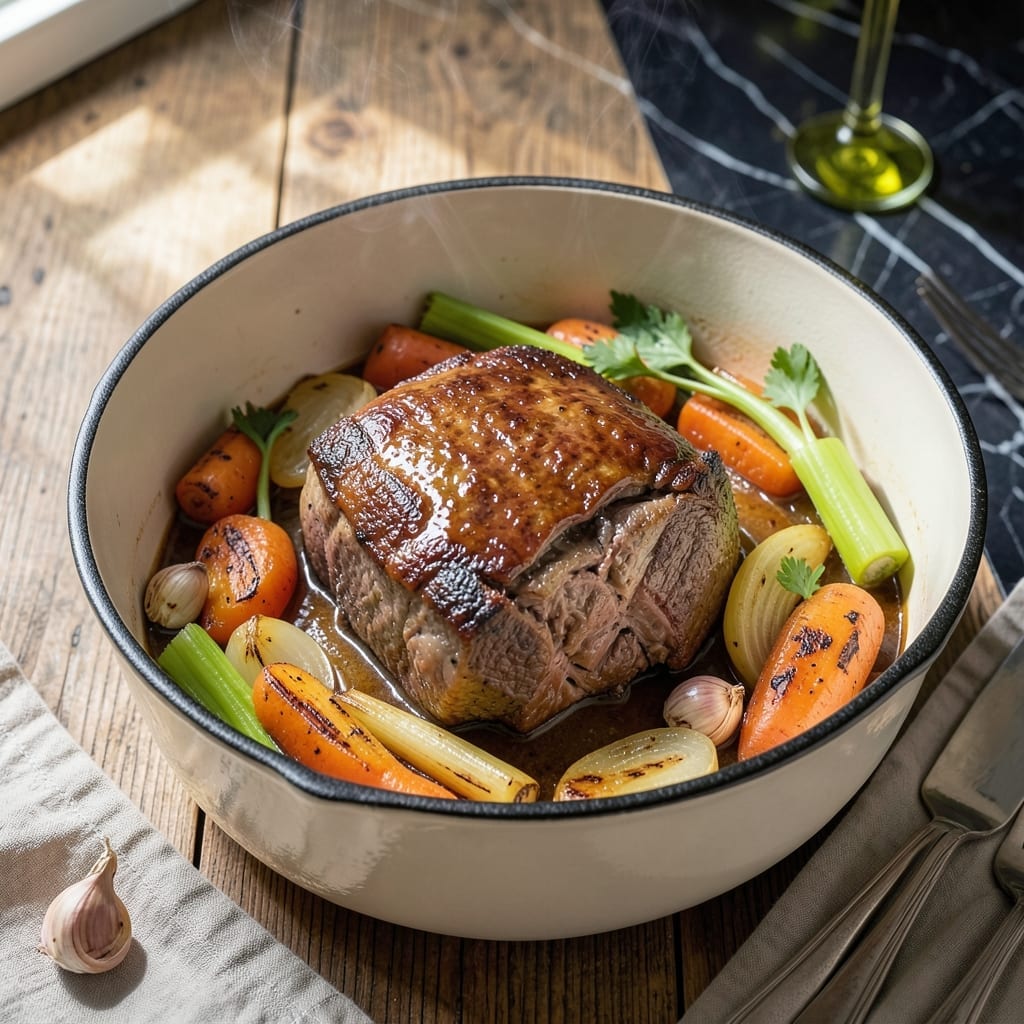
Pot roast transforms tough cuts into tender, flavorful perfection through slow cooking. The key lies in selecting the right beef cut with ample marbling and connective tissue that breaks down beautifully over time.
Chuck roast stands as the undisputed champion for this dish, offering rich flavor and ideal fat distribution. Brisket and round roast also deliver excellent results when prepared with care and patience.
What emerges after hours of gentle braising is melt-in-your-mouth beef with complex, deep flavors. The meat becomes fork-tender while soaking up the aromatic liquids and seasonings.
This method rewards careful selection and proper technique with a best-in-class pot roast that defines comfort food at its finest.
Ingredients for Best Cut of Beef for Pot Roast
Quality beef and aromatics build the foundation for melt-in-your-mouth pot roast perfection.
| Ingredient | Amount | Notes |
|---|---|---|
| Chuck Roast 🥩 | 3 lb | Well-marbled, bone-in or boneless |
| Olive Oil 🫒 | 2 tbsp | Divided for searing and vegetables |
| Yellow Onion 🧅 | 2 whole | Large, peeled and quartered |
| Carrots 🥕 | 4 whole | Peeled, cut into chunks |
| Celery Stalks 🌿 | 3 whole | Cut into large pieces |
| Garlic Cloves 🧄 | 6 cloves | Smashed, peeled |
| Dry Red Wine 🍷 | 1 ½ cups | Bold variety like Cabernet Sauvignon |
| Beef Broth 🥣 | 2 cups | Low-sodium preferred |
| Tomato Paste 🍅 | 2 tbsp | For depth of flavor |
| Fresh Thyme Sprigs 🌿 | 4 pieces | Tied with kitchen twine |
| Bay Leaf 🍃 | 2 pieces | Dried, whole |
| Kosher Salt 🧂 | 1 ½ tsp | Diamond Crystal preferred |
| Black Pepper 🌶️ | 1 tsp | Freshly ground |
| All-Purpose Flour 🌾 | ¼ cup | For thickening gravy |
The beef selection is paramount. Chuck roast with visible marbling and connective tissue delivers the ideal texture—brisket or round roast are excellent alternatives. Source from Whole Foods or a trusted butcher for superior quality. Look for bright red color with white fat streaks (not yellow or gray). For best results, choose a cut that’s at least 2-3 inches thick to maintain moisture during long cooking.
No red wine? Substitute with additional beef broth plus 1 tbsp balsamic vinegar. Fresh thyme can be replaced with 1 tsp dried thyme. If tomato paste is unavailable, 1/4 cup tomato sauce works in a pinch. For a richer gravy, swap all-purpose flour with cornstarch at half the quantity. The vegetables are flexible—parsnips or potatoes can join the classic mirepoix.
Store raw beef in the coldest part of your refrigerator for up to 3-4 days or freeze for 6-12 months. The cooked pot roast keeps beautifully for 4-5 days refrigerated and freezes well for 3 months. Always bring meat to room temperature before searing for even cooking.
Why You’ll Love This Recipe
- One Pot Wonder: I love how everything—chuck roast, carrots, celery—just goes into one pot and does its thing.
- Fallback Flavor: That chuck roast turns so tender it practically melts, and the veggies soak up all the rich beefy goodness.
- Sunday or Tuesday: Honestly, it’s just as good for a lazy weekend as it is for a quick weeknight dinner.
- Makes Meals Ahead: I always double it—leftovers taste even better the next day, and they freeze beautifully.
Step-by-Step Instructions for Beef Pot Roast
Master the technique for transforming this marbled cut into fork-tender perfection with rich, layered flavors.
Step 1: Sear the Chuck Roast to Develop Flavor
Pat the 3 lb chuck roast dry with paper towels, then season generously with the 1.5 tsp kosher salt and 1 tsp black pepper. Heat 1 tbsp olive oil in a large Dutch oven over medium-high heat until shimmering. The oil is ready when it ripples visibly across the surface.
Place the chuck roast in the pot and sear undisturbed for 4-5 minutes per side until a deep mahogany crust forms. I resist the urge to move it prematurely—this patience ensures a proper Maillard reaction. You’ll know it’s ready to flip when it releases easily from the pot. Transfer the seared roast to a plate and set aside.
Step 2: Sauté the Aromatic Vegetables
In the same Dutch oven, add the remaining 1 tbsp olive oil if needed. Add the 2 whole yellow onion, 4 whole carrots, and 3 whole celery stalks, cooking for 6-8 minutes until the onions begin to soften and brown slightly at the edges.
Add the 6 cloves garlic cloves and 2 tbsp tomato paste, stirring constantly for 1-2 minutes until the tomato paste darkens in color. This step builds the flavor foundation—deep, sweet, and savory. The paste should turn a rustic brick-red hue when it’s fully caramelized.
Step 3: Deglaze and Build the Braising Liquid
Pour in the 1.5 cups dry red wine, scraping the bottom of the pot with a wooden spoon to release all the browned bits. Let the wine reduce by half, about 5 minutes, until the liquid is syrupy and the alcohol smell has cooked off.
Add the 2 cups beef broth, 4 pieces fresh thyme sprigs, and 2 pieces bay leaf, then return the chuck roast to the pot along with any accumulated juices. The liquid should come about halfway up the roast. This is the moment the magic begins—low, slow heat transforms tough fibers into melt-in-your-mouth tenderness.
Step 4: Braise to Tender Perfection
Bring the liquid to a gentle simmer, then reduce the heat to low. Cover the pot and let it braise for 3 to 3.5 hours, turning the roast once halfway through. The ideal internal temperature is 195-200°F, where collagen fully breaks down into gelatin.
You’ll know it’s done when the meat shreds easily with a fork and the braising liquid has reduced into a rich, flavorful broth. If the liquid level drops too low during cooking, add a splash of water or additional beef broth to maintain moisture.
Step 5: Thicken the Gravy and Serve
Transfer the chuck roast to a cutting board and tent with foil. Skim any excess fat from the braising liquid, then place the pot over medium heat. Whisk in the 0.25 cup all-purpose flour and simmer for 3-4 minutes until the gravy thickens enough to coat the back of a spoon.
Slice the roast against the grain or pull it into chunks, then return it to the pot to coat in the gravy. The final dish should have a glossy, velvety sauce clinging to each piece of beef and vegetables. Serve hot with the braised carrots, onions, and celery alongside.
Pro Tips For Making Best Cut Of Beef For Pot Roast
- Sear the Chuck: I learned this the hard way—browning the chuck roast in olive oil over medium-high heat for 3-4 minutes per side makes a real difference in flavor depth.
- Cut Evenly: Chop your onions, carrots, and celery into uniform 1-inch pieces so they cook at the same rate and no one gets a crunchy surprise.
- Skip the Rush: After burning the first pot roast I ever made, I finally figured out that low and slow (around 300°F for 3-4 hours) is non-negotiable for tender beef.
- Use the Fond: Sounds weird, but deglazing the pan with a little water or broth before adding veggies actually changes the outcome—all those browned bits are pure flavor.
Pro Cooking Tips for This Dish
Searing for Maximum Flavor
Always pat the chuck roast completely dry before searing. I use paper towels and press firmly to remove all moisture. This ensures a proper crust forms in 4-5 minutes per side over medium-high heat. The Maillard reaction here creates deep, complex flavors. 🔥
Layering Aromatics Properly
After searing, don’t rush the vegetables. Cook the onions, carrots, and celery for 6-8 minutes until they begin to caramelize. Adding tomato paste and garlic afterward prevents burning. I stir constantly during this phase for even cooking.
Braising Liquid Balance
When deglazing with 1.5 cups dry red wine, scrape every browned bit from the pot’s bottom. This fond contains immense flavor. Reduce the wine by half before adding broth. The liquid should cover about a third of the roast, not submerge it completely.
Perfect Braising Temperature
Maintain a gentle simmer at 195-200°F internal temperature throughout the 3-3.5 hour cook. I check the heat source every 45 minutes to ensure it hasn’t dropped too low. This slow process transforms connective tissue into gelatin. 💡
Resting Before Slicing
Let the finished pot roast rest for 15-20 minutes before slicing. This allows juices to redistribute throughout the meat. I tent it with foil to keep it warm. Slicing too soon results in dry meat and lost flavor.
Gravy Thickening Trick
For perfect gravy, skim excess fat first, then whisk in 0.25 cup all-purpose flour over medium heat. Simmer for 3-4 minutes until it coats a spoon. I often add a splash of cold water if it thickens too quickly.
Nutrition Facts
Frequently Asked Questions
Why does chuck roast work so well for slow cooking?
Chuck has abundant marbling and connective tissue that breaks down into gelatin during long, moist cooking. This creates incredibly tender, flavorful meat that’s perfect for braising.
Can I use a leaner cut like sirloin?
Lean cuts lack the fat and collagen needed to become tender through braising. They’ll likely turn out dry and tough after 3-3.5 hours of cooking. Stick with well-marbled cuts for best results.
How do I know when it’s perfectly cooked?
It’s done when the internal temperature reaches 195-200°F and the meat shreds easily with a fork. The collagen will have fully converted to gelatin at this point.
What if my roast isn’t tender after cooking?
If it’s still tough, it likely needs more time. Return it to the pot with additional liquid and cook for another 30-60 minutes at a gentle simmer. Patience is key!

- 4C Bread Crumbs Meatballs Recipe: Crispy Crust and Juicy Centers - September 25, 2026
- 6 Oz Chocolate Chip Cookie Recipe: Perfectly Balanced Crispy Edges and Chewy Hearts - September 25, 2026
- 6-Inch Coffee Cake Recipe: Vanilla Bean Swirls and Buttery Streusel Topping - September 25, 2026