
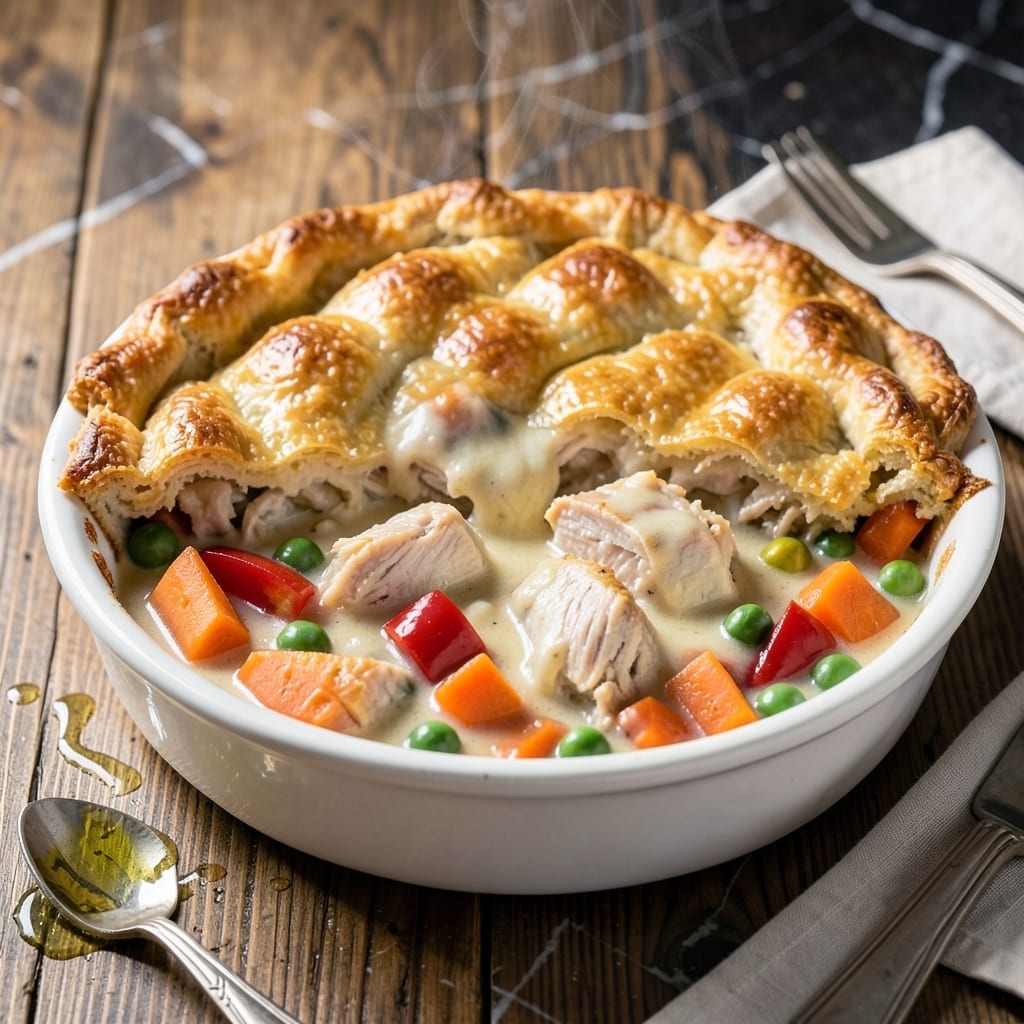
This classic chicken pot pie delivers comfort food at its finest, with a flaky Bisquick topping that bakes to golden perfection.
I developed this method to streamline the process without sacrificing the rich, creamy filling or buttery crust we all love. The Bisquick mix simplifies the topping while maintaining that homestyle texture.
The filling combines tender chicken, hearty vegetables, and a velvety sauce that bubbles up through the biscuit layer as it bakes. It’s the quickest way to achieve that nostalgic classic taste.
Ready in under an hour, this dish brings warmth and satisfaction to any meal. Here’s how to make it just like grandma used to.
Ingredients for Original Bisquick Chicken Pot Pie
Flaky biscuit topping meets creamy chicken filling in this nostalgic comfort classic.
| Ingredient | Amount | Notes |
|---|---|---|
| Bisquick Baking Mix 🍞 | 2 cups | Original variety preferred |
| Cooked Chicken Breast 🍗 | 2 cups | Shredded or diced |
| Frozen Mixed Vegetables 🥕 | 2 cups | Peas, carrots, corn, green beans |
| Cream of Chicken Soup 🥫 | 1 can | 10.5 oz size |
| Chicken Broth 💧 | 1 ⅓ cups | Low-sodium preferred |
| Whole Milk 🥛 | ⅔ cup | For creamy filling |
| Unsalted Butter 🧈 | 4 tbsp | Melted for sauce |
| Yellow Onion 🧅 | ½ whole | Diced, about 1/2 cup |
| Garlic Cloves 🧄 | 2 cloves | Minced for depth |
| All-Purpose Flour 🌾 | ¼ cup | For thickening sauce |
| Salt 🧂 | ½ tsp | Kosher or sea salt |
| Black Pepper 🌶️ | ¼ tsp | Freshly ground preferred |
| Dried Thyme 🌿 | ½ tsp | For savory aroma |
| Paprika 🌶️ | ¼ tsp | Sweet or smoked variety |
The Bisquick is the shortcut here—Betty Crocker’s original mix gives that perfect flaky texture without the fuss of homemade biscuits. You’ll find it in the baking aisle at any Walmart or Target. For the chicken, rotisserie chicken shreds beautifully (and saves time), but leftover roasted chicken works just as well. If using raw, poach it first in the broth for extra flavor.
No cream of chicken soup? Cream of mushroom or celery works in a pinch. Out of milk? Half-and-half at half the amount keeps it rich. Fresh veggies can replace frozen—just dice them small so they cook through. The thyme can be fresh (use triple the amount), but dried is easier and keeps forever in the pantry.
Leftovers reheat best in the oven (microwave makes the biscuit topping soggy). Keeps covered in the fridge for 3-4 days, or freeze unbaked pies for up to 2 months. The filling thickens as it cools, so don’t worry if it’s soupy right out of the oven.
Why You’ll Love This Recipe
- One Bowl Wonder: I just dump the Bisquick, soup, and broth together—no mixing bowls pileup, and the frozen veggies go straight from bag to dish.
- Crispy-Top Comfort: That buttery Bisquick crust bakes up golden while the creamy chicken and veggie filling stays rich and satisfying.
- Feeds the Freezer: I double the batch, bake one for tonight, and freeze the other unbaked for a future night I don’t feel like cooking.
- Budget Stretcher: Rotisserie chicken and store-brand veggies keep it cheap, and one box of Bisquick covers both the crust and the filling thickener.
Step-by-Step Instructions for Classic Chicken Pot Pie
This method ensures a flaky topping with a creamy, savory filling every time.
Step 1: Sauté Aromatics for the Filling Base
Heat a large skillet over medium heat and add the 4 tbsp unsalted butter. Once melted, stir in the diced 0.5 whole yellow onion and cook for 3-4 minutes until it turns translucent and soft. You’ll know it’s ready when the sharp onion smell mellows.
Add the minced 2 cloves garlic cloves and cook for 30 seconds until fragrant. Be careful not to let the garlic brown—it should just release its aroma. This builds a flavorful foundation for your filling.
Step 2: Create the Creamy Sauce and Combine Ingredients
Sprinkle the 0.25 cup all-purpose flour over the onions and garlic, stirring constantly for 1 minute to cook out the raw flour taste. Slowly pour in the 1.33 cups chicken broth and 0.66 cup whole milk, whisking continuously to avoid lumps.
Add the 1 can cream of chicken soup, 2 cups cooked chicken breast, 2 cups frozen mixed vegetables, 0.5 tsp salt, 0.25 tsp black pepper, 0.5 tsp dried thyme, and 0.25 tsp paprika. Stir well and simmer for 5-7 minutes until the mixture thickens and bubbles gently.
Step 3: Assemble and Bake to Golden Perfection
Preheat your oven to 375°F. Transfer the creamy filling to a 9×13-inch baking dish or deep pie dish. The filling should be steaming hot and slightly thickened, coating the back of a spoon.
In a separate bowl, prepare the topping by mixing the 2 cups Bisquick Baking Mix with enough additional whole milk (about ⅔ cup) to form a soft, slightly sticky dough. Drop spoonfuls of the dough evenly over the filling—it doesn’t need to be perfect. The dough will spread as it bakes.
Step 4: Bake Until Bubbly and Golden
Bake for 25-30 minutes until the topping is golden brown and the filling is bubbling around the edges. You’ll see the biscuit topping rise and turn a deep, appetizing gold, while the filling beneath stays creamy and hot.
Let the pot pie rest for 5-10 minutes after removing it from the oven. This allows the filling to set slightly, making it easier to serve. The topping should be flaky on the outside and tender inside, with a rich, savory filling underneath.
Pro Tips For Making Original Bisquick Chicken Pot Pie
- Preheat the Pan: I learned this the hard way—dump the frozen veggies and soup into a hot skillet first, not a cold one. It keeps the filling from getting watery and helps the Bisquick topping bake evenly.
- Shred the Chicken: Use two forks to pull the cooked chicken into bite-sized pieces instead of chopping. It blends better with the creamy filling and feels more like a classic pot pie texture.
- Skip the Thaw: Toss the frozen mixed vegetables in straight from the freezer—no thawing. It prevents them from turning mushy and actually changes the outcome for the better.
- Thicken Before Baking: Let the chicken and soup mixture simmer for 3-4 minutes before adding the Bisquick topping. This guarantees the filling sets properly instead of turning into a runny mess under the crust.
Essential Equipment for This Recipe
Baking Dish
A 9×13-inch baking dish is ideal for even cooking and that perfect golden crust. I use my stoneware dish from Le Creuset—it distributes heat beautifully and looks great on the table. A deep pie dish works too if you prefer individual servings.
Mixing Bowls
Have at least 2 mixing bowls ready—one for the filling and one for the Bisquick topping. I love my Pyrex glass bowls because they’re durable and let me see the consistency of my dough. Stainless steel works fine too if that’s what you have.
Whisk and Spoon
A sturdy whisk is essential for blending the sauce smoothly without lumps. I keep a OXO silicone whisk in my drawer—it handles thick mixtures well. For the Bisquick topping, a wooden spoon works best to mix the dough without overworking it.
Measuring Tools
Accurate measurements matter, so keep your dry and liquid measuring cups handy. I prefer adjustable measuring cups for liquids and good old-fashioned metal ones for dry ingredients. A tablespoon and teaspoon set ensures your spices are just right.
Skillet for Filling
A large, heavy-bottomed skillet prevents the filling from burning as it thickens. My 12-inch cast iron skillet from Lodge is perfect for this—it heats evenly and transitions from stovetop to oven if needed. Nonstick works too for easier cleanup. 🔥
Pastry Brush
Though optional, a silicone pastry brush helps if you want to add a buttery sheen to the topping before baking. I use mine to brush on a little extra melted butter for extra flavor and browning. It’s a small touch that makes a big difference.
Nutrition Facts
Frequently Asked Questions
Can I use rotisserie chicken for this?
Shredded rotisserie chicken works perfectly and saves time. Use about 2 cups for this recipe. It adds great flavor to the filling.
What if I don’t have cream of chicken soup?
Cream of mushroom or celery soup are great substitutes. You can also make a white sauce with 2 tablespoons flour, 2 tablespoons butter, and 1 cup milk for a homemade option.
How do I prevent a soggy biscuit topping?
Make sure your filling is hot and bubbling before adding the topping. Also, let it rest for 5-10 minutes after baking to set properly.
Can I make this ahead of time?
Yes! Assemble the pie but don’t bake it. Cover and refrigerate for up to 24 hours. Add 5-10 minutes to the baking time if cooking from cold.

- 4C Bread Crumbs Meatballs Recipe: Crispy Crust and Juicy Centers - September 25, 2026
- 6 Oz Chocolate Chip Cookie Recipe: Perfectly Balanced Crispy Edges and Chewy Hearts - September 25, 2026
- 6-Inch Coffee Cake Recipe: Vanilla Bean Swirls and Buttery Streusel Topping - September 25, 2026