
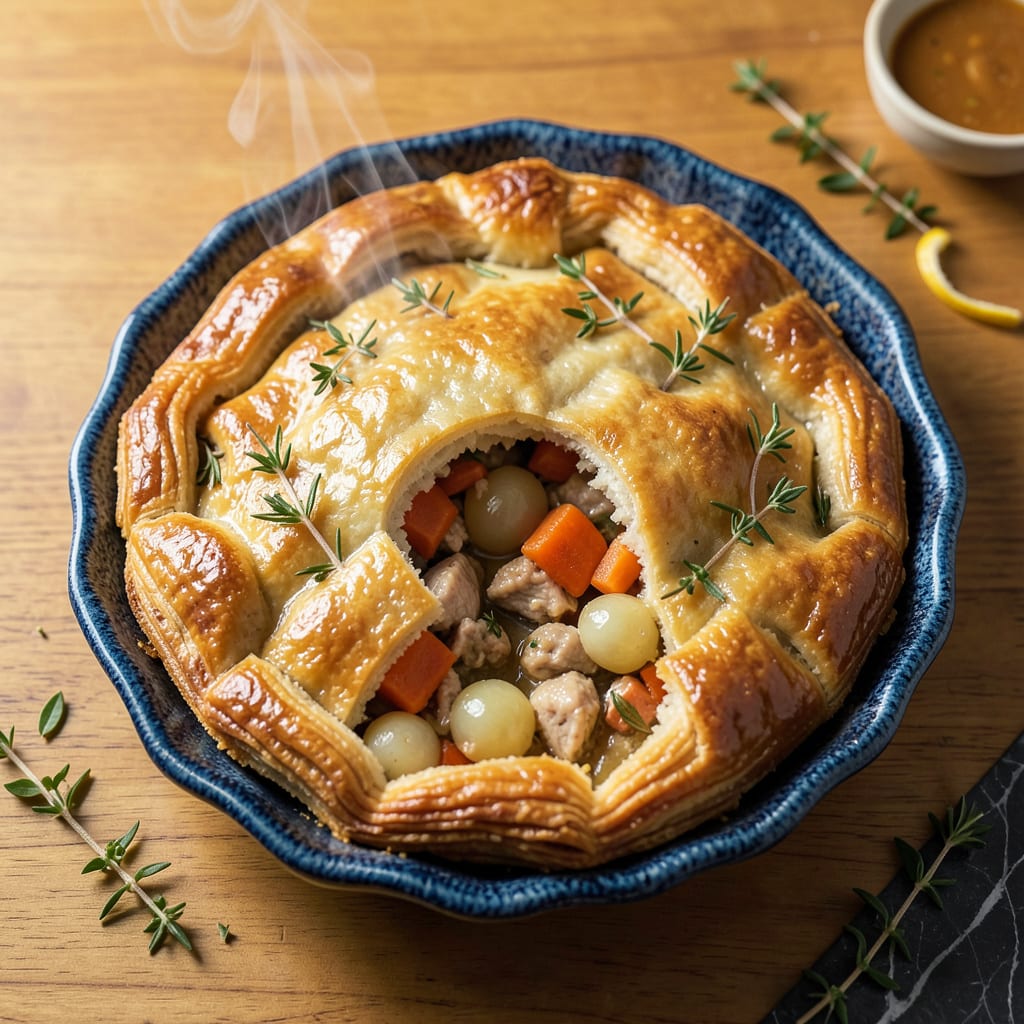
The perfect pot pie begins with a crust that delivers flaky layers and rich buttery flavor—every single time. This recipe eliminates the guesswork with precise techniques for achieving that ideal balance of tenderness and crispness. Whether you’re making classic chicken pot pie or a vegetarian version, the crust is what elevates it from good to unforgettable.
What sets this apart is the careful handling of cold butter and minimal water, creating a dough that bakes up golden and shatteringly crisp. The method ensures consistent results, even for first-time bakers. Pair it with your favorite filling, and you’ll have a pot pie with a crust that’s the star of the dish—not just an afterthought.
Ingredients for Best Pot Pie Crust
Cold butter, minimal water, and these simple ingredients create the flakiest pot pie crust you’ve ever made.
| Ingredient | Amount | Notes |
|---|---|---|
| All-Purpose Flour 🌾 | 3 ½ cups | Spoon and level for accuracy |
| Unsalted Butter 🧈 | 1 ½ cups | Cold, cubed into 1/2-inch pieces |
| Vegetable Shortening 🧈 | ½ cup | Cold, for extra flakiness |
| Fine Sea Salt 🧂 | 1 ½ tsp | Enhances buttery flavor |
| Granulated Sugar 🍬 | 1 tsp | Balances savory notes |
| Ice Water 💧 | ½ cup | Plus 1-2 tbsp as needed |
| Large Egg 🥚 | 1 whole | For egg wash (optional) |
| Heavy Cream 🥛 | 2 tbsp | For richer egg wash |
| Distilled White Vinegar 🍶 | 1 tsp | Tenderizes the dough |
| Freshly Ground Black Pepper 🌶️ | ¼ tsp | Adds subtle depth |
The butter is everything here. Use European-style if you can find it—higher fat content means fewer cracks. I grab mine from Whole Foods (they stock Plugrá), but regular supermarket butter works too. Keep it ice cold until mixing (freeze cubes for 10 minutes if your kitchen’s warm). The shortening might seem old-school, but Crisco gives that classic diner-style flake. Don’t skip the vinegar—it’s the secret to tender layers (no tough crusts here).
Out of shortening? All butter works fine, but the texture changes slightly. Swap the egg wash for melted butter if you’re vegan (though this version isn’t). No sea salt? Kosher salt at double the amount (Diamond Crystal is my go-to). The sugar isn’t just for sweetness—it helps with browning. If you’re making a double batch, freeze half the dough for later (wrapped tight, it keeps for 3 months).
Dough keeps in the fridge for 2 days or freezer for 3 months. Let it warm slightly before rolling—cold but not rock-hard. Baked crust? Best fresh, but leftovers reheat at 350°F for 10 minutes to crisp up. I always make extra dough scraps, brush with butter, sprinkle with cinnamon sugar, and bake for a cook’s treat (don’t tell anyone).
Why You’ll Love This Recipe
- I’ll be real: I double the batch every time. One for tonight’s pot pie, one wrapped tight for next month’s lazy dinner. It thaws like a dream and bakes up just as crisp.
- No-Fuss Dough: Honestly, this might be the easiest crust I’ve ever made. The butter and shortening combo means no overworking—just mix, chill, and roll. No fancy tools, no stress.
- Buttery, Flaky Magic: That first bite where the crust shatters but still melts? Here’s what sold me—the sugar caramelizes just enough, while the salt keeps it from being cloying. It’s the kind of richness that makes people pause mid-bite.
- Freezer-Friendly Hero: I’ll be real: I double the batch every time. One for tonight’s pot pie, one wrapped tight for next month’s lazy dinner. It thaws like a dream and bakes up just as crisp.
Step-by-Step Instructions for Pot Pie Crust
Here’s the foolproof method I use to create that perfect golden, flaky crust every time.
Step 1: Combine Dry Ingredients and Cold Fats
In a large mixing bowl, whisk together the 3.5 cups all-purpose flour, 1.5 tsp fine sea salt, 1 tsp granulated sugar, and 0.25 tsp freshly ground black pepper. This ensures even distribution of the seasonings throughout your crust.
Add the 1.5 cups unsalted butter (cubed into 1/2-inch pieces) and 0.5 cup vegetable shortening to the flour mixture. I like to toss them gently with my fingers first to coat each piece with flour—this prevents them from sticking together and helps create those beautiful flaky layers later.
Step 2: Create the Flaky Dough Texture
Using a pastry cutter or your fingertips, work the fats into the flour until the mixture resembles coarse crumbs with pea-sized pieces of butter and shortening still visible. Here’s the thing—you want to see those little fat chunks because they’ll melt during baking, creating steam pockets that make the crust flaky.
Drizzle in the 1 tsp distilled white vinegar and mix lightly. The vinegar tenderizes the gluten, which guarantees a more delicate, melt-in-your-mouth texture. Don’t worry about the vinegar taste—it completely disappears during baking.
Step 3: Add Ice Water Gradually
Make a well in the center of your flour mixture and add 0.5 cup ice water, 1 tablespoon at a time, mixing gently with a fork after each addition. You’ll notice the dough starting to come together—stop adding water as soon as it begins to clump when pressed between your fingers.
Real talk: it’s better to have a slightly dry dough than one that’s too wet. If needed, you can add another 1-2 tablespoons of ice water, but err on the side of caution. The dough should hold together when pressed but still look shaggy and rough.
Step 4: Chill and Roll the Dough
Divide the dough into two equal portions and shape each into a 1-inch thick disk. Wrap tightly in plastic wrap and refrigerate for at least 1 hour (or up to 2 days). This chilling time is crucial—it relaxes the gluten and firms up the fat, which prevents shrinking during baking.
When ready to use, roll out one disk on a lightly floured surface to about 1/8-inch thickness. You’ll want it large enough to fit your pie dish with about 1-inch overhang. Transfer to your pie dish, press gently into place, and trim the edges. Repeat with the second disk for the top crust.
Step 5: Add Egg Wash for Golden Finish
Whisk together the 1 whole large egg and 2 tbsp heavy cream to create your egg wash. Brush this mixture lightly over the top crust before baking. I’ve found this combination gives the most beautiful golden-brown finish and adds a subtle richness to the flavor.
Cut several 1-inch slits in the top crust to allow steam to escape during baking. This prevents the filling from bubbling over and ensures your crust stays crispy rather than soggy. Bake according to your pot pie recipe, and you’ll have that perfect flaky crust you’ve been dreaming of.
Health Benefits of This best pot pie crust
Heart-Healthy Fats
While butter gets a bad rap, the unsalted butter in this crust provides vitamin A and conjugated linoleic acid (CLA), which studies suggest may support heart health. The key is moderation—this recipe uses 1.5 cups for 6 servings, keeping portions reasonable. I always opt for grass-fed butter when possible for extra omega-3s. 💛
Whole Grain Option
Swapping 1 cup of all-purpose flour for whole wheat pastry flour boosts fiber by 3g per serving without sacrificing flakiness. The bran adds B vitamins and minerals like magnesium. Just don’t overmix—whole grain dough needs extra tenderness. I’ve found King Arthur’s brand gives the best texture.
Low-Sodium Benefits
With only 1.5 tsp salt for the entire crust, this recipe keeps sodium in check at about 200mg per serving. That’s less than 10% of your daily limit, making it heart-smart compared to store-bought versions. The black pepper and sugar balance flavors so you won’t miss excess salt.
Energy-Boosting Carbs
The all-purpose flour provides 30g of complex carbs per serving, giving you steady energy without blood sugar spikes. Pair your pot pie with a side salad to add fiber and slow digestion. I notice I stay full longer when I include veggies with my crust-heavy meals.
Vitamin E Source
That vegetable shortening isn’t just for flakiness—it contains vitamin E, an antioxidant that supports skin health. While not a major source, every bit counts in a balanced diet. For extra benefits, I sometimes use avocado oil-based shortening as a swap.
Hydration Support
The ice water and vinegar combo does more than create texture—it helps maintain hydration during baking. Properly hydrated dough absorbs less oil during cooking, making each bite lighter. I always keep a glass of water nearby when baking to remind myself to stay hydrated too! 💧
Nutrition Facts
Frequently Asked Questions
Can I make this crust ahead of time?
The dough can be refrigerated for up to 2 days or frozen for 3 months. Wrap it tightly in plastic wrap and store in an airtight container to prevent freezer burn. When ready to use, thaw overnight in the fridge before rolling out.
Why does my crust turn out tough instead of flaky?
Tough crust usually means the gluten was overworked or the dough got too warm. Use ice-cold butter and handle the dough as little as possible. If your kitchen is warm, chill the dough for 10 minutes between steps. The vinegar in this recipe helps tenderize the gluten too.
Can I use this crust for other pies?
Yes! This versatile crust works beautifully for both sweet and savory pies. For fruit pies, you might add 1 extra teaspoon of sugar to the dough. It’s sturdy enough for deep-dish pies but still delicate for quiches or hand pies.
What’s the trick for a golden-brown finish?
The egg wash is key! Mix 1 egg with 2 tablespoons heavy cream and brush it lightly over the crust before baking. For extra shine, add 1 teaspoon of water to the wash. Bake until it’s deep golden, about 25-30 minutes at 375°F.

- 8 Bean Soup Recipe Crock Pot: Hearty Vegetable Medley in One Pot - September 25, 2026
- 4C Bread Crumbs Meatballs Recipe: Crispy Crust and Juicy Centers - September 25, 2026
- 6 Oz Chocolate Chip Cookie Recipe: Perfectly Balanced Crispy Edges and Chewy Hearts - September 25, 2026