
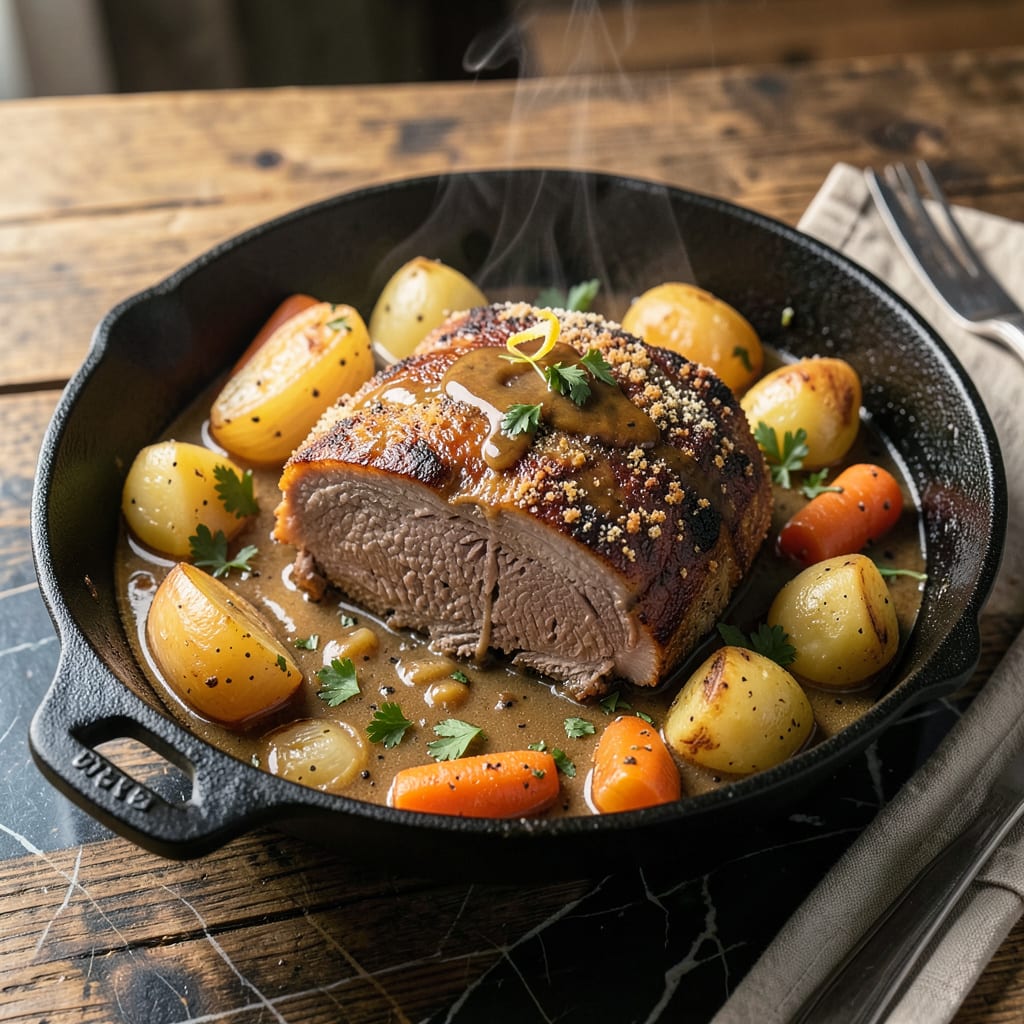
There’s something timeless about a perfectly cooked pot roast—tender beef that falls apart at the touch of a fork, surrounded by rich, flavorful vegetables. This recipe captures the homestyle comfort of Bob Evans’ classic Sunday supper, using simple ingredients and slow cooking to achieve restaurant-quality results at home.
The secret lies in proper searing and low, steady heat. A well-browned chuck roast simmers with aromatic vegetables in a savory broth until the meat becomes impossibly tender. By the time it’s done, you’ll have a hearty, satisfying meal that tastes like it cooked all day—because it did. Serve with mashed potatoes to soak up every drop of the rich, flavorful juices.
Ingredients for Bob Evans Pot Roast
This classic Sunday supper requires just fourteen ingredients to achieve restaurant-quality tenderness and depth of flavor.
| Ingredient | Amount | Notes |
|---|---|---|
| Chuck Roast 🥩 | 4 lb | Well-marbled, boneless preferred |
| Kosher Salt 🧂 | 2 tsp | Diamond Crystal recommended |
| Freshly Ground Black Pepper 🌶️ | 1 tsp | Coarsely ground for texture |
| All-Purpose Flour 🌾 | ¼ cup | For dredging the roast |
| Extra-Virgin Olive Oil 🫒 | 2 tbsp | For searing the meat |
| Yellow Onions 🧅 | 2 whole | Large, quartered |
| Carrots 🥕 | 4 whole | Peeled, cut into 2-inch pieces |
| Celery Stalks 🌿 | 3 whole | Cut into 2-inch pieces |
| Garlic Cloves 🧄 | 6 cloves | Smashed, peeled |
| Low-Sodium Beef Broth 🥫 | 3 cups | Homemade or high-quality store-bought |
| Dry Red Wine 🍷 | 1 cup | Cabernet Sauvignon or Merlot |
| Tomato Paste 🍅 | 2 tbsp | San Marzano preferred |
| Fresh Thyme Sprigs 🌿 | 4 sprigs | Tied with kitchen twine |
| Bay Leaves 🍃 | 2 whole | Dried, for aromatic depth |
| Unsalted Butter 🧈 | 2 tbsp | For finishing the sauce |
[recipeingredientscaler]
The chuck roast is non-negotiable for this preparation. Optimal quality requires well-marbled beef—look for USDA Choice or Prime grades at your butcher or the meat counter at Whole Foods. The marbling ensures the meat remains moist during the extended cooking time. For the vegetables, select firm, fresh carrots and celery with vibrant color; their integrity holds up better during the long simmer. The beef broth should be low-sodium to allow for proper seasoning control, with Pacific Foods or Kettle & Fire recommended for their rich, clean flavor profiles.
Substitutions must preserve the dish’s fundamental character. Dry white wine can replace red in a pinch, though the flavor profile will be lighter. If avoiding alcohol, substitute additional beef broth with 1 tbsp balsamic vinegar for acidity. Sweet potatoes may stand in for carrots, though their texture differs. For the tomato paste, Trader Joe’s offers convenient single-serve tubes to avoid waste. The fresh thyme is ideal, but 1 tsp dried thyme (preferably Penzeys) may be used if necessary—add it with the broth rather than as a garnish.
Proper storage ensures optimal results. The raw chuck roast should be refrigerated on the bottom shelf for no more than 3 days prior to cooking. Prepared pot roast keeps beautifully, refrigerated in its cooking liquid for up to 5 days, with flavors deepening over time. For longer storage, portion the cooled meat and vegetables with some broth into airtight containers and freeze for up to 3 months. Reheat gently on the stovetop to preserve texture, adding a splash of broth or water as needed.
Why You’ll Love This Recipe
- One-Pan Magic: Honestly, this is my kind of cooking—sear the chuck roast in olive oil, let it simmer with just salt, pepper, and a dusting of flour, and the pan does all the work. No fancy equipment, no mountain of dishes, just rich flavor building in one trusty pot.
- That Crust, Though: Here’s what sold me—the flour coating on the roast turns into this golden, crispy crust while the inside stays fork-tender. It’s the kind of texture contrast that makes you pause mid-bite just to appreciate it.
- Sunday or Tuesday: I’ve served this at family dinners and also thrown it together after a long day when takeout felt tempting. The leftovers? Even better—piled onto crusty bread or stirred into mashed potatoes for a next-day meal that feels intentional, not sad.
- Budget Hero: A chuck roast feeds my family of four for two nights (sometimes three if I stretch it with extra veggies), and it costs less than half what steaks would. I’ll be real: it’s the reason I can splurge on good olive oil without guilt.
Step-by-Step Instructions for Fall-Apart Tender Pot Roast
Master this classic preparation with professional techniques that guarantee perfect results every time.
Step 1: Sear the Chuck Roast for Maximum Flavor
Pat the 4 lb chuck roast completely dry with paper towels—this ensures proper browning. Season aggressively with the 2 tsp kosher salt and 1 tsp freshly ground black pepper, pressing the seasoning into all surfaces. Dredge the roast in the 0.25 cup all-purpose flour, shaking off excess, which will create a flavorful crust during searing.
Heat the 2 tbsp extra-virgin olive oil in a Dutch oven over medium-high heat until shimmering. Add the roast and sear for 4-5 minutes per side until a deep mahogany crust forms. Don’t move the meat during searing—this develops the Maillard reaction that creates complex flavors. Transfer the roast to a plate and reserve.
Step 2: Build the Aromatic Base
In the same Dutch oven, add the 2 whole yellow onions (quartered), 4 whole carrots (cut into 2-inch pieces), and 3 whole celery stalks (cut into 2-inch pieces). Cook over medium heat for 8-10 minutes, stirring occasionally, until the vegetables develop caramelized edges and the onions become translucent.
Add the 6 cloves garlic cloves (smashed) and cook for 1 minute until fragrant. Stir in the 2 tbsp tomato paste and cook for 2 minutes until it darkens slightly—this intensifies its umami properties. Deglaze with the 1 cup dry red wine, scraping up all browned bits from the bottom of the pot, which contain concentrated flavor compounds.
Step 3: Braise to Perfect Tenderness
Return the seared roast to the pot along with any accumulated juices. Add the 3 cups low-sodium beef broth, 4 sprigs fresh thyme sprigs (tied with twine), and 2 whole bay leaves. The liquid should come about halfway up the roast—add water if needed to reach this level.
Bring to a simmer, then cover and transfer to a 325°F oven. Braise for 3-3.5 hours, turning the roast halfway through, until it’s fork-tender and the connective tissue has fully broken down. The meat should pull apart easily with gentle pressure from a fork, indicating perfect doneness.
Step 4: Reduce the Sauce and Finish
Carefully transfer the roast and vegetables to a serving platter and tent with foil. Skim excess fat from the surface of the braising liquid, then place the Dutch oven over medium-high heat. Simmer for 10-15 minutes until the sauce reduces by about one-third and develops a velvety consistency.
Whisk in the 2 tbsp unsalted butter off heat to create a rich, emulsified sauce. Taste and adjust seasoning if needed, though the initial salting should be sufficient. The finished sauce should coat the back of a spoon and have a balanced, savory depth from the reduced wine and beef broth.
Step 5: Rest and Serve
Let the roast rest for 15 minutes before slicing against the grain into thick pieces. This allows the juices to redistribute throughout the meat, ensuring each serving remains moist and tender. Arrange the sliced roast on a platter surrounded by the braised vegetables.
Spoon the reduced sauce over the top and garnish with fresh thyme leaves if desired. The ideal serving temperature is 160°F—warm enough to highlight the dish’s richness but not so hot that it masks the developed flavors. Serve with crusty bread or mashed potatoes to soak up the luxurious sauce.
Storing and Reheating bob evans pot roast
Refrigerator Storage
After your pot roast has cooled to room temperature (about 2 hours), transfer it to an airtight container with some of the braising liquid. I love using Glasslock containers because they’re leak-proof and let me see the contents. Store in the fridge for up to 5 days—the flavors actually deepen over time. 💡
Freezing for Later
For longer storage, portion the cooled roast with vegetables and sauce into freezer-safe bags or containers. Leave 1 inch of headspace for expansion, and squeeze out excess air to prevent freezer burn. Label with the date—it keeps beautifully for up to 3 months without losing quality.
Stovetop Reheating
This is my favorite method for maintaining texture. Place the roast and sauce in a pot over low heat, adding ¼ cup beef broth if needed. Cover and warm gently for 15-20 minutes, stirring occasionally. The meat should reach 165°F—just hot enough to be safe without drying out.
Microwave Method
For quick meals, transfer portions to a microwave-safe dish with 2 tbsp of sauce. Cover with a damp paper towel and heat on 50% power for 2-3 minutes, stirring halfway. This prevents the meat from becoming rubbery. Let it rest for 1 minute before serving.
Reviving Leftovers
If the sauce thickens too much during storage, thin it with splashes of water or broth while reheating. For extra richness, stir in 1 tbsp butter at the end. I often add fresh parsley when serving leftovers to brighten the flavors. ✨
Make-Ahead Strategy
This dish actually tastes better the next day! Prepare it completely, cool, and refrigerate overnight. The next morning, skim any solidified fat from the surface before reheating. The extended time allows the flavors to meld even more deeply, creating an even more satisfying meal. 💛
Nutrition Facts
Frequently Asked Questions
Can I use a different cut of beef?
Chuck roast is ideal for its marbling and connective tissue, but brisket or bottom round can work too. Brisket needs 1 extra hour of cooking, while bottom round may be slightly less tender. Avoid lean cuts like sirloin—they’ll dry out during long braising.
What if I don’t have a Dutch oven?
A heavy slow cooker or oven-safe pot with lid works fine. For slow cookers, sear the meat first in a skillet, then transfer. Cook on low for 8-10 hours or high for 5-6 hours until fork-tender.
How do I know when it’s done?
The roast should pull apart easily with a fork—no knife needed. Internal temp should reach 195-205°F for perfect tenderness. If it resists, return to oven and check every 30 minutes until ready.
Can I make this ahead?
It tastes even better the next day. Prepare completely, cool, and refrigerate overnight. Skim solidified fat before reheating. Flavors meld beautifully, making it perfect for meal prep or dinner parties.

- 8 Bean Soup Recipe Crock Pot: Hearty Vegetable Medley in One Pot - September 25, 2026
- 4C Bread Crumbs Meatballs Recipe: Crispy Crust and Juicy Centers - September 25, 2026
- 6 Oz Chocolate Chip Cookie Recipe: Perfectly Balanced Crispy Edges and Chewy Hearts - September 25, 2026