
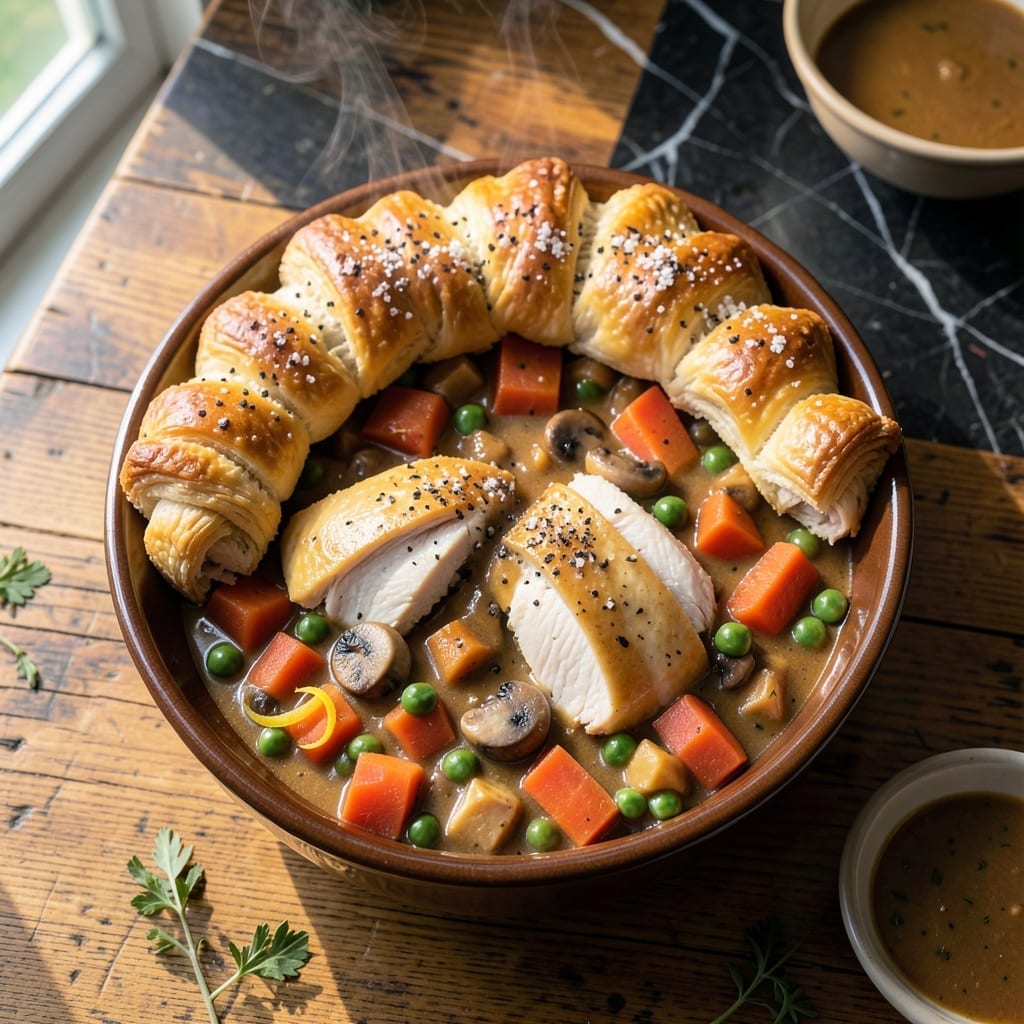
I’ve perfected a pot pie that outshines the classic with a flaky golden crust and a creamy filling packed with tender vegetables and savory meat. Every bite delivers comfort without the heavy, soggy bottom traditional versions often suffer from.
The secret lies in pre-baking the crust separately and loading the filling with a rich, velvety sauce that clings to each ingredient. This method ensures every layer stays distinct yet harmonious, from the buttery top to the hearty center.
What you get is a dish that’s satisfyingly indulgent yet balanced—crisp where it should be, tender where it counts. The filling is so flavorful it doesn’t rely on a thick, pasty texture to impress.
This is the pot pie upgrade you’ve been waiting for. Let’s get started.
Ingredients for Better Than a Pot Pie
Pantry staples and a few fresh picks make this comfort classic shine bright.
| Ingredient | Amount | Notes |
|---|---|---|
| All-Purpose Flour 🌾 | 2 ½ cups | Plus extra for dusting |
| Unsalted Butter 🧈 | 1 cup | Cold, cubed for crust |
| Ice Water 💧 | ½ cup | For pie dough |
| Salt 🧂 | 1 tsp | Divided for crust and filling |
| Black Pepper 🌶️ | ½ tsp | Freshly ground preferred |
| Chicken Breast 🍗 | 1 ½ lb | Boneless, skinless, cubed |
| Carrots 🥕 | 2 whole | Peeled and diced |
| Frozen Peas 🌱 | 1 cup | No need to thaw |
| Yellow Onion 🧅 | 1 whole | Medium, finely diced |
| Celery Stalks 🌿 | 2 whole | Diced for filling |
| Garlic Cloves 🧄 | 3 cloves | Minced for sauce |
| All-Purpose Flour 🌾 | ¼ cup | For thickening sauce |
| Chicken Broth 🥣 | 1 ½ cups | Low-sodium preferred |
| Heavy Cream 🥛 | ½ cup | For velvety sauce |
| Fresh Thyme 🌿 | 1 tbsp | Chopped, or 1 tsp dried |
| Large Egg 🥚 | 1 whole | For egg wash |
The butter is key here—use a high-fat European style like Plugrá or Kerrygold for the flakiest crust. For the chicken, thigh meat actually stays juicier than breast (and it’s cheaper). I grab mine from Whole Foods when they have the air-chilled kind, but regular supermarket chicken works too. Look for pieces that are uniform in size so they cook evenly. The veggies? Fresh is ideal, but frozen works in a pinch—just don’t thaw them first.
No chicken? Turkey breast or even firm tofu work great. Swap the heavy cream for half-and-half or whole milk if that’s what you’ve got. Out of fresh thyme? Dried thyme at one-third the amount is fine. The peas can be swapped for green beans or corn. If you’re making this gluten-free, King Arthur’s measure-for-measure flour is my go-to for the crust.
The filling tastes even better the next day once everything melds. Keeps 3-4 days in the fridge, freezes for 2-3 months (thaw overnight before reheating). I always make two pies at once—one for now, one for the freezer. Totally worth the effort.
Why You’ll Love This Recipe
- No Fuss Dough: That buttery crust comes together with just flour, cold butter, and ice water—no fancy techniques, just my hands and a bowl.
- Flaky Perfection: The salted butter in the pastry makes every bite crisp yet tender, way better than store-bought crusts.
- Weeknight Hero: I’ve served this for lazy Sundays and rushed Tuesdays—it’s that adaptable.
- Leftovers? Yes Please: Honestly, it tastes even better the next day, and the crust stays crisp when reheated in the oven.
Step-by-Step Instructions for Better Than Pot Pie
This method delivers that nostalgic comfort with a crust so flaky it shatters with every bite.
Step 1: Make the Flaky Pie Crust
In a large bowl, combine the 2.5 cups All-Purpose Flour with ½ tsp of the salt. Cut in the 1 cup Unsalted Butter (cold and cubed) using a pastry cutter or your fingers until the mixture resembles coarse crumbs with pea-sized butter pieces visible.
Gradually add the ½ cup Ice Water, 1 tablespoon at a time, mixing just until the dough comes together. It’s ready when it holds when pressed but isn’t sticky. Divide the dough into two equal portions, shape into discs, wrap in plastic, and refrigerate for 1 hour—this chilling time prevents shrinking and ensures flakiness.
Step 2: Prepare the Hearty Filling
In a large skillet, cook the 1.5 lb Chicken Breast (cubed) over medium-high heat for 6-8 minutes until no longer pink. Remove and set aside. In the same skillet, sauté the yellow onion, carrots, and celery stalks until softened, about 5 minutes.
Add the 3 cloves Garlic Cloves (minced) and cook for 30 seconds until fragrant. Sprinkle the 0.25 cup All-Purpose Flour over the vegetables and stir for 1 minute to cook off the raw flour taste. This creates a roux that will thicken your sauce beautifully.
Step 3: Build the Creamy Sauce
Slowly pour in the 1.5 cups Chicken Broth and remaining ½ tsp salt, whisking constantly to avoid lumps. Stir in the 1 tbsp Fresh Thyme and 0.5 tsp Black Pepper. Let it simmer for 3-4 minutes until it begins to thicken.
Return the chicken to the skillet along with the 1 cup Frozen Peas and ½ cup Heavy Cream. Simmer for 2-3 minutes until the filling is thick enough to coat the back of a spoon. Taste and adjust seasoning if needed—the filling should be rich and velvety, not thin or watery.
Step 4: Assemble and Bake to Golden Perfection
Roll out one dough disc to fit a 9-inch pie dish. Transfer the creamy filling into the crust. Roll out the second dough disc and place it over the filling. Crimp the edges to seal, then cut a few slits in the top crust to allow steam to escape.
Brush the top crust with the 1 whole Large Egg beaten with 1 tablespoon water for a golden finish. Bake at 375°F for 40-45 minutes until the crust is deep golden brown and the filling is bubbling. Let it rest for 10 minutes before slicing—this allows the filling to set.
Pro Tips For Making Better Than A Pot Pie
- Chill the Dough: Pop your dough in the fridge for at least 30 minutes before rolling—I learned this the hard way after my first three pot pies turned into lopsided blobs.
- Use Ice-Cold Water: Sounds obvious, but actually use water with ice cubes in it, not just cold from the tap. It keeps the butter from melting too soon, which is the thing that matters most for flaky crust.
- Don’t Overwork It: Mix the dough just until it comes together, even if it looks shaggy. After over-kneading my early attempts, I finally figured out that less handling means a tender, not tough, crust.
- Salt the Butter: Since you’re using unsalted butter, add ½ teaspoon of salt to it before cutting into the flour—my grandmother swore by this, and she was right.
Storing and Reheating This Dish
Fridge Storage
Let your creation cool completely, then transfer to an airtight container. It keeps in the fridge for 3-4 days—I find the flavors deepen overnight. Reheat slices individually for best results. ❄️
Freezer Method
Wrap cooled slices tightly in plastic wrap, then place in a freezer bag. It freezes beautifully for 2-3 months. Thaw overnight in the fridge before reheating to maintain texture.
Oven Reheating
Preheat to 350°F and place slices on a baking sheet. Cover loosely with foil and warm for 15-20 minutes. Uncover the last 5 minutes to crisp the crust. 🔥
Microwave Option
For quick meals, microwave individual portions on 70% power for 2-3 minutes. Add a damp paper towel to prevent drying. Stir halfway through for even heating.
Crust Revival
If the crust loses crispness, pop it under the broiler for 1-2 minutes after reheating. Watch closely to avoid burning. This trick works for both oven and microwave methods.
Nutrition Facts
Frequently Asked Questions
Can I use store-bought pie crust?
Yes, but homemade delivers better flakiness. If using store-bought, opt for all-butter versions and pre-bake the bottom crust for 10 minutes at 375°F to prevent sogginess.
Why does the filling stay creamy?
The roux base and heavy cream create a velvety texture. Simmering the sauce for 3-4 minutes ensures it thickens properly without turning gluey.
Can I make this ahead of time?
Assemble the pie but don’t bake. Refrigerate for up to 24 hours or freeze for 1 month. Add 5-10 minutes to baking time if cold.
How do I avoid a soggy bottom crust?
Pre-bake the bottom crust for 10 minutes before adding filling. Also, let the filling cool slightly before assembling to reduce steam.

- 6 Oz Chocolate Chip Cookie Recipe: Perfectly Balanced Crispy Edges and Chewy Hearts - September 25, 2026
- 6-Inch Coffee Cake Recipe: Vanilla Bean Swirls and Buttery Streusel Topping - September 25, 2026
- 1 Hour Soup Recipe: Velvety Richness Without the Wait - September 25, 2026