
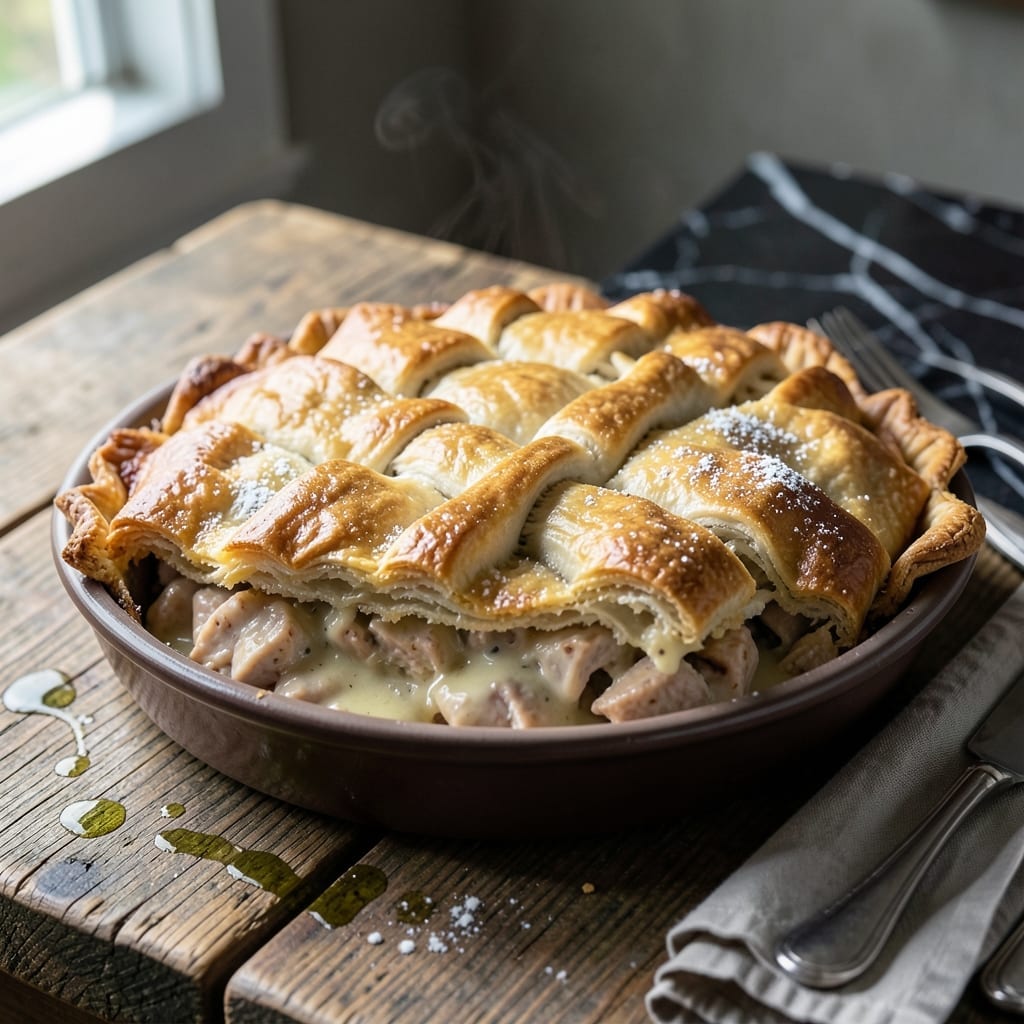
This Bisquick topping delivers a golden, flaky crust with minimal effort. I’ve tested countless shortcuts, and this remains the most reliable method for a homemade finish without the hassle of pastry.
With just a few pantry staples and 5 minutes of prep, you’ll have a light, airy topping that bakes up perfectly crisp. The key is mixing the batter just until combined—overworking it toughens the texture.
The result is a buttery, golden-brown crust that seals in savory fillings and bakes in under 30 minutes. It’s the ideal solution for weeknight comfort food without sacrificing quality.
Perfect for chicken, turkey, or vegetable pot pies. Here’s how to make it.
Ingredients for Bisquick Pot Pie Topping
Pantry staples plus Bisquick make this golden topping effortless and delicious every time.
| Ingredient | Amount | Notes |
|---|---|---|
| Bisquick Baking Mix 🥣 | 1 ½ cups | Original or buttermilk variety |
| Whole Milk 🥛 | ¾ cup | Cold, for best texture |
| Large Egg 🥚 | 1 whole | Beaten lightly before adding |
| Unsalted Butter 🧈 | 2 tbsp | Melted and cooled slightly |
| All-Purpose Flour 🌾 | 2 tbsp | For dusting work surface |
| Kosher Salt 🧂 | ¼ tsp | Adjust to taste preference |
| Freshly Ground Black Pepper 🌶️ | ¼ tsp | Adds subtle depth of flavor |
| Dried Parsley Flakes 🍃 | 1 tsp | Optional, for color and garnish |
| Garlic Powder 🧄 | ¼ tsp | Enhances savory notes |
| Onion Powder 🧅 | ¼ tsp | Complements the crust flavor |
| Paprika 🌶️ | ¼ tsp | Sweet or smoked variety |
The Bisquick is doing most of the work here—original or buttermilk variety both bake up perfectly. I grab mine from Target or Walmart in the baking aisle (the blue box). The milk needs to be cold to keep that butter from seizing up—whole milk gives the richest crust, but 2% works in a pinch. Butter is non-negotiable though—use real, unsalted for the best flavor and texture.
No whole milk on hand? Half-and-half or even water will do (the crust just won’t be as rich). Skip the egg if you’re out, but the topping might be slightly denser. Fresh herbs like thyme or rosemary can replace the dried parsley at one-third the amount. For extra flakiness, add 1 extra tablespoon of melted butter—just don’t overmix the batter.
Mix the dry ingredients ahead and store in an airtight container for up to 6 months. The wet ingredients (milk, egg, butter) should be fresh. Leftovers? Unlikely, but if you have extra batter, it keeps in the fridge for 2 days—just give it a quick stir before using.
Why You’ll Love This Recipe
- One Bowl Wonder: I just dump the Bisquick, milk, and egg in a bowl, stir, and it’s ready for the pie—no extra dishes, no fuss.
- Buttery Crisp Perfection: The melted butter in the topping bakes into a golden, flaky crust that cracks just right with every bite.
- Weeknight Hero: I throw this together on busy evenings when I need comfort food fast—filling and satisfying in under an hour.
- Stretches the Budget: Bisquick and basic pantry staples make this topping cheap, and it turns humble leftovers into a whole new meal.
Step-by-Step Instructions for Bisquick Pot Pie Topping
This streamlined method delivers a flaky, golden crust with minimal effort and maximum flavor.
Step 1: Prepare the Work Surface and Dry Ingredients
Lightly dust your work surface with the 2 tbsp All-Purpose Flour. This prevents the dough from sticking and makes rolling easier. I like to use a silicone mat for this—it grips the dough just enough without requiring excess flour.
In a medium bowl, combine the 1.5 cups Bisquick Baking Mix, 0.25 tsp Kosher Salt, 0.25 tsp Freshly Ground Black Pepper, 1 tsp Dried Parsley Flakes, 0.25 tsp Garlic Powder, 0.25 tsp Onion Powder, and 0.25 tsp Paprika. Whisk until evenly distributed—this ensures every bite of your topping carries consistent flavor.
Step 2: Mix the Wet Ingredients into the Dry Base
Create a well in the center of your dry mixture. Pour in the 0.75 cup Whole Milk and the 1 whole Large Egg, which you’ve beaten lightly beforehand. Gently fold the ingredients together with a spatula until just combined. The dough will be slightly sticky—that’s normal.
Now, drizzle in the 2 tbsp Unsalted Butter, which should be melted and cooled slightly. Fold it in until the dough comes together but still looks shaggy. Overworking it will make the topping tough, so stop as soon as the flour is just incorporated.
Step 3: Shape and Roll the Dough
Turn the dough onto your floured surface and pat it into a rough rectangle. Use a rolling pin to roll it into a ¼-inch thick sheet, adding a sprinkle more flour if it sticks. The key here is even thickness—this ensures uniform baking and a consistent texture.
If the dough cracks at the edges, don’t stress. Just press it back together with your fingers. For a pot pie, you can either cut the dough into strips for a lattice top or leave it whole to cover the entire dish. Trim any excess dough for a clean finish.
Step 4: Assemble and Bake to Golden Perfection
Place the dough over your filled pot pie dish. If using a whole sheet, cut a few small slits in the center to allow steam to escape. For a lattice, weave the strips loosely. Brush the top with a bit of extra melted butter if you’d like extra shine.
Bake at 375°F for 20-25 minutes or until the topping is golden brown and puffed. You’ll know it’s done when the crust is firm to the touch and the edges are just beginning to pull away from the dish. Let it cool for 5 minutes before serving to allow the topping to set.
Pro Tips For Making Bisquick Pot Pie Topping
- Chill the Dough: After mixing the Bisquick topping, let it rest in the fridge for 10-15 minutes—it makes the dough easier to handle and prevents shrinking while baking.
- Use Cold Butter: Cut the unsalted butter into small cubes and keep it cold until mixing; this creates flakier layers in the finished topping.
- Skip Overmixing: I learned this the hard way—stir just until the dough comes together, or the topping will turn out tough instead of tender.
- Add Extra Flour: Dust your work surface with a little all-purpose flour before rolling out the dough to prevent sticking and make transfer easier.
Perfect Pairings for These Flavors
Side Dish Ideas
A simple green salad with a tangy vinaigrette cuts through the richness of the pot pie. I toss 4 cups mixed greens with 2 tbsp balsamic vinegar and 3 tbsp olive oil for balance. 🥗
Comfort Food Pairings
Mashed potatoes or buttered egg noodles make excellent bases to soak up the filling. For extra flavor, stir ¼ cup grated Parmesan into your mashed potatoes. These classics complement the flaky topping beautifully.
Vegetable Sides
Steamed green beans or roasted Brussels sprouts add freshness. Toss the Brussels with 1 tbsp olive oil and roast at 400°F for 20 minutes until crisp. The caramelized edges pair perfectly with the savory pie.
Beverage Matches
A crisp Chardonnay or light Pinot Noir works wonderfully. For non-alcoholic options, try sparkling apple cider or iced tea with lemon. These drinks cleanse your palate between bites. 🍷
Dessert Follow-Ups
End with warm apple crisp or vanilla ice cream for a cozy finish. The contrast of warm and cold textures is delightful after the rich main. I often serve both for a crowd-pleasing dessert spread.
Nutrition Facts
Frequently Asked Questions
Can I use water instead of milk?
Yes, but the crust won’t be as rich. Use the same 0.75 cup measurement. Whole milk gives the best texture and flavor.
How do I make it extra crispy?
Brush the top with an extra 1 tbsp of melted butter before baking. Bake at 375°F for the full 25 minutes for maximum crispness.
Can I make this ahead of time?
Mix the dry ingredients and store in an airtight container for up to 6 months. Add wet ingredients just before baking for best results.
What if my topping is too thick?
Add 1-2 tbsp more milk to thin the batter. The dough should be slightly sticky but not dry or crumbly.

- 4C Bread Crumbs Meatballs Recipe: Crispy Crust and Juicy Centers - September 25, 2026
- 6 Oz Chocolate Chip Cookie Recipe: Perfectly Balanced Crispy Edges and Chewy Hearts - September 25, 2026
- 6-Inch Coffee Cake Recipe: Vanilla Bean Swirls and Buttery Streusel Topping - September 25, 2026