
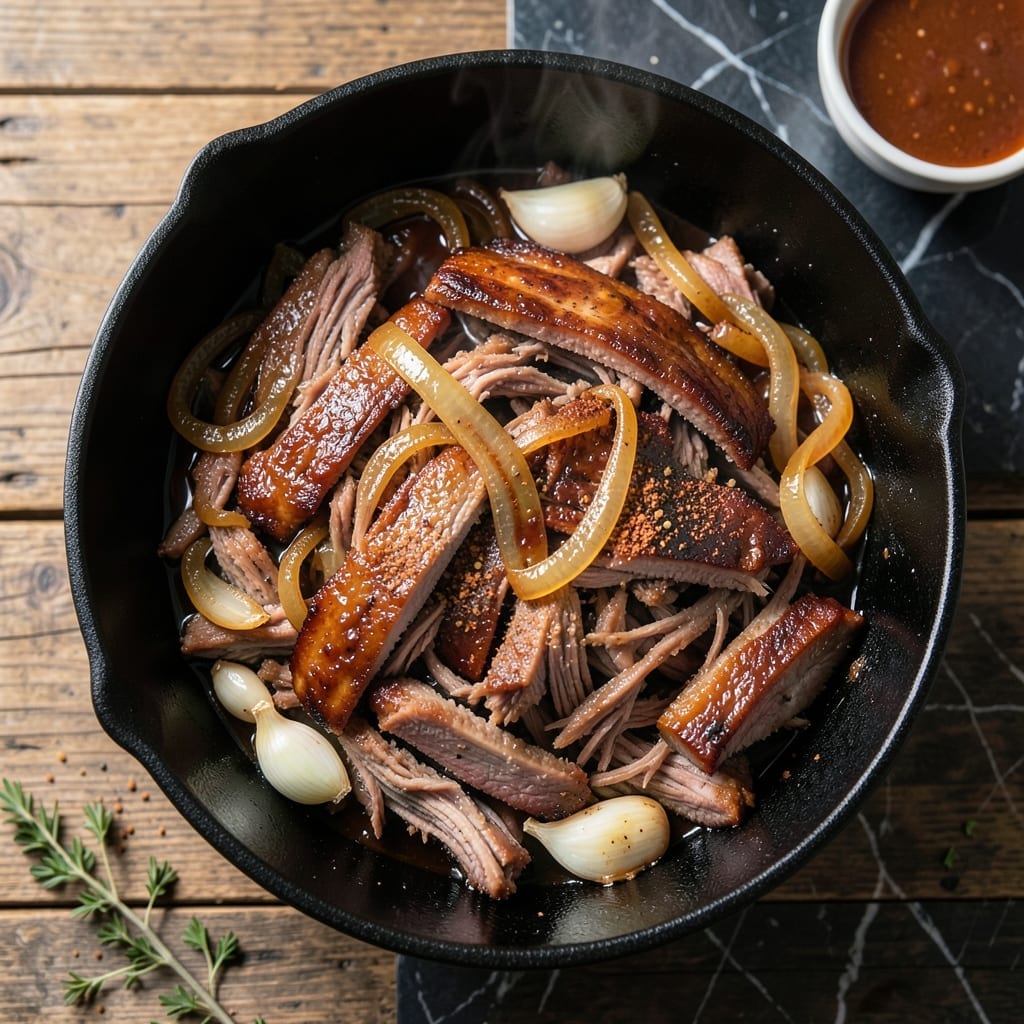
This one-pot method delivers tender pulled pork with minimal active effort. A single Dutch oven handles everything from searing to slow cooking, locking in smoky flavors without complicated techniques.
The key lies in the low-and-slow approach, transforming tough pork shoulder into fall-apart tender strands. Simple seasonings and a bit of liquid create a rich, flavorful base that infuses every bite.
You’ll end up with juicy, flavorful pork that shreds effortlessly, ready for sandwiches, tacos, or salads. The best part? Cleanup is just as easy as the cooking process itself.
Perfect for feeding a crowd or meal prepping for the week. Here’s how to make it.
Ingredients for One Pot Pulled Pork
A few bold seasonings and pork shoulder transform into smoky, fall-apart perfection in one pot.
| Ingredient | Amount | Notes |
|---|---|---|
| Pork Shoulder 🥩 | 3 lb | Boneless, well-marbled for tenderness |
| Kosher Salt 🧂 | 1 ½ tbsp | Diamond Crystal preferred for even seasoning |
| Black Pepper 🌶️ | 1 tbsp | Freshly ground for optimal flavor |
| Smoked Paprika 🌶️ | 1 tbsp | Adds essential smoky depth |
| Garlic Powder 🧄 | 1 tbsp | Uniform distribution in dry rub |
| Onion Powder 🧅 | 1 tbsp | Balances savory profile |
| Brown Sugar 🍚 | ¼ cup | Light or dark, for caramelization |
| Olive Oil 🫒 | 2 tbsp | For searing pork surface |
| Chicken Broth 🥫 | 1 cup | Low-sodium to control salt content |
| Apple Cider Vinegar 🍏 | ¼ cup | Tangy brightness to cut richness |
| Yellow Onion 🧅 | 1 whole | Large, roughly chopped |
| Garlic Cloves 🧄 | 4 cloves | Smashed for aromatic release |
| Bay Leaves 🍃 | 2 pieces | Dried, for slow-cooked depth |
The pork shoulder is non-negotiable here. Bone-in or boneless both work, but look for good marbling—this fat renders down during the low-and-slow cook, creating that melt-in-your-mouth texture. Costco has excellent pre-packaged shoulders at a great price point. Avoid pre-cut pork chunks; the whole roast holds moisture better during the long cook.
Out of smoked paprika? Regular paprika plus a pinch of liquid smoke gets you close, though the flavor won’t be as complex. No apple cider vinegar? White vinegar or lemon juice at half the amount works. The brown sugar can be swapped for honey or maple syrup (adjust liquid slightly). For extra depth, add a shot of bourbon to the braising liquid.
Pork keeps in the fridge for 4-5 days and freezes beautifully for 3 months. Shred only what you’ll use immediately—the rest stays juicier in its own fat. Reheat gently on the stove with a splash of broth to restore that just-cooked texture.
Why You’ll Love This Recipe
- One Pot Wonder: I toss everything in, walk away, and let the pork shoulder turn tender while the smoky paprika and garlic do their magic.
- Flavor Bomb: That first bite with the crusty edges and the deep, smoky-sweet flavor from the spices? Ridiculously good.
- Feeds a Crowd: I’ve served this at summer BBQs and weeknight dinners—it’s just as perfect in sandwiches as it is in tacos the next day.
- Leftovers for Days: Honestly, it tastes even better the next day—so I always make extra for easy lunches all week.
Step-by-Step Instructions for One Pot Pulled Pork
This method delivers fall-apart tender pork with deep smoky flavor using just one pot.
Step 1: Create and Apply the Dry Rub
In a small bowl, combine the 1.5 tbsp Kosher Salt, 1 tbsp Black Pepper, 1 tbsp Smoked Paprika, 1 tbsp Garlic Powder, 1 tbsp Onion Powder, and 0.25 cup Brown Sugar. Mix thoroughly until the spices are evenly distributed and the brown sugar has no lumps.
Pat the 3 lb Pork Shoulder dry with paper towels to ensure the rub adheres properly. Apply the rub mixture generously to all sides of the pork, pressing it into the meat so it forms a uniform crust. This step builds the foundation of flavor and creates a beautiful bark as the pork cooks.
Step 2: Sear the Pork for Depth of Flavor
Heat the 2 tbsp Olive Oil in a large, heavy pot or Dutch oven over medium-high heat until it shimmers. Add the pork shoulder and sear for 3-4 minutes per side until deeply browned on all surfaces. The searing process develops complex flavors through the Maillard reaction and ensures a rich, caramelized exterior.
Resist the urge to move the pork too soon—let it develop a dark crust before turning. Once browned, transfer the pork to a plate and set it aside momentarily while you prepare the cooking liquid.
Step 3: Build the Cooking Liquid and Begin Slow Cooking
In the same pot, add the roughly chopped 1 whole Yellow Onion and cook for 2-3 minutes until softened and beginning to brown. Add the 4 cloves Garlic Cloves (smashed) and cook for an additional 30 seconds until fragrant.
Pour in the 1 cup Chicken Broth and 0.25 cup Apple Cider Vinegar, using a wooden spoon to scrape up any browned bits from the bottom of the pot. Add the 2 pieces Bay Leaves, then return the pork to the pot, along with any accumulated juices. The liquid should come about halfway up the pork.
Step 4: Simmer Until Fork-Tender
Reduce the heat to low, cover the pot, and let the pork simmer gently for 3-4 hours. Check occasionally to ensure the liquid hasn’t reduced too much—add a splash of water if needed. The pork is ready when it shreds easily with a fork and reaches an internal temperature of 195-205°F.
This slow cooking process breaks down the collagen in the pork, transforming it into gelatin that keeps the meat moist and tender. The combination of the smoky rub, tangy vinegar, and aromatic vegetables infuses the pork with layers of flavor.
Step 5: Shred and Serve
Once the pork is fork-tender, remove it from the pot and place it on a cutting board. Use two forks to shred the pork into bite-sized pieces, discarding any large fat chunks. Skim excess fat from the cooking liquid if desired, then return the shredded pork to the pot.
Toss the pork in the cooking liquid to coat it evenly, allowing it to absorb the remaining flavors. Serve immediately, ensuring each portion has a mix of the tender pork and the rich, flavorful sauce. The result should be succulent, smoky, and perfectly tender pulled pork.
Pro Tips For Making One Pot Pulled Pork
- Sear the Shoulder: Take 5 minutes to brown the pork shoulder on all sides in the pot before adding liquids—I learned this the hard way after making pale, flavorless pulled pork for years.
- Season Aggressively: Use more kosher salt and smoked paprika than you think, especially since pork shoulder can handle bold flavors and the long cook time mellows them out.
- Skip the Boiling: Keep the heat low and steady; if the liquid boils, the pork will toughen up before it has a chance to get tender.
- Shred Late: Resist the urge to pull the pork apart until it hits at least 195°F internal temp—any earlier and it’ll fight you, plus it won’t be as juicy.
Common Mistakes When Making This Dish
Skipping the Sear
I know it’s tempting to skip this step, but searing the pork in olive oil over medium-high heat for 3-4 minutes per side builds a deep, caramelized crust. This creates the Maillard reaction that adds complex, smoky flavors your pulled pork can’t develop otherwise. 🔥
Using the Wrong Cut
Pork shoulder is non-negotiable here. Pork loin or tenderloin will dry out during the long cook. Look for 3 lb boneless pork shoulder with good marbling—this fat renders down, keeping the meat moist and flavorful throughout the 3-4 hour simmer.
Insufficient Liquid
The cooking liquid should come about halfway up the pork. Using only 1 cup chicken broth and ¼ cup apple cider vinegar works, but check occasionally. If the liquid reduces too much, add a splash of water to prevent burning and ensure even cooking.
Not Letting It Cook Long Enough
Pulled pork is ready when it shreds easily with a fork, not when it’s just tender. Aim for an internal temperature of 195-205°F. Rushing this step results in tough, stringy meat instead of fall-apart perfection. The low-and-slow approach is key. 💡
Over-shredding Too Soon
Wait until the pork is fully cooked and rested before shredding. Shredding too early releases juices, drying out the meat. Once done, use two forks to pull it apart, discarding any large fat chunks. This ensures every bite stays juicy and flavorful.
Ignoring the Rest
After shredding, let the pork sit in its cooking liquid for 10-15 minutes. This allows the meat to reabsorb the rich, smoky flavors. Skim excess fat if desired, but don’t skip this step—it makes all the difference in taste and texture.
Nutrition Facts
Frequently Asked Questions
What’s the best cut for tender results?
Use 3 lb boneless pork shoulder with good marbling. This cut stays juicy during the 3-4 hour simmer, while leaner cuts like loin dry out. The fat renders down, creating that signature melt-in-your-mouth texture.
Can I make this in a slow cooker?
Yes! Sear the pork first, then transfer everything to the slow cooker. Cook on low for 8-10 hours or high for 5-6 hours. The hands-off method works great, though the Dutch oven gives slightly better flavor.
How do I know when it’s done?
It’s ready when it shreds easily with a fork and reaches 195-205°F internally. If it resists pulling apart, give it more time—the collagen needs to fully break down for that perfect tenderness.
Can I use a different liquid?
Swap 1 cup chicken broth for beef broth, apple juice, or even cola for different flavor profiles. Just maintain the ¼ cup apple cider vinegar for brightness.

- 4C Bread Crumbs Meatballs Recipe: Crispy Crust and Juicy Centers - September 25, 2026
- 6 Oz Chocolate Chip Cookie Recipe: Perfectly Balanced Crispy Edges and Chewy Hearts - September 25, 2026
- 6-Inch Coffee Cake Recipe: Vanilla Bean Swirls and Buttery Streusel Topping - September 25, 2026