
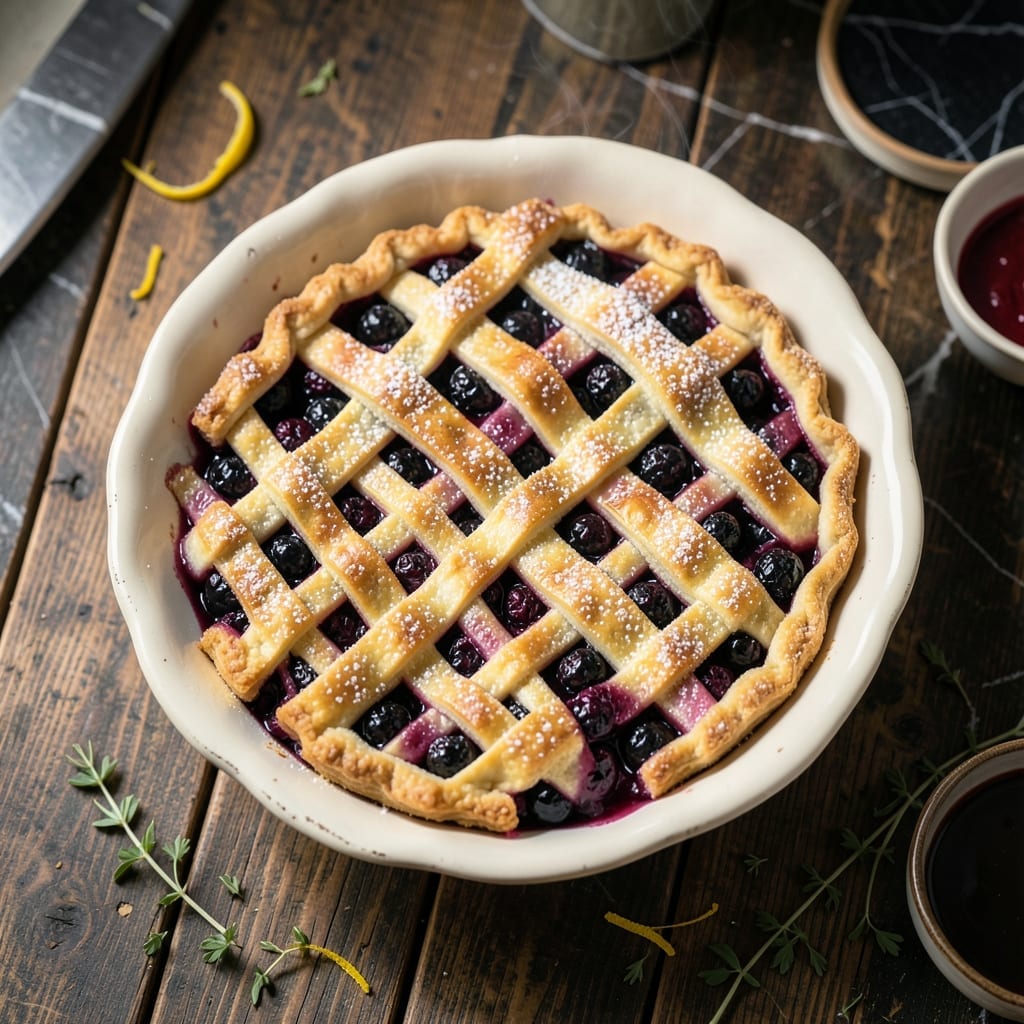
This blackberry pot pie delivers a flaky golden crust over a bubbling, jam-like filling that bursts with ripe berry flavor. The secret lies in pre-cooking the filling to concentrate the natural juices before baking.
I developed this recipe to showcase peak-season blackberries, balancing their sweetness with a touch of lemon zest. The double crust seals in every drop of that luscious filling, creating a mess-free slice every time.
The result is a dessert that looks as impressive as it tastes—crisp pastry layers giving way to a thick, glossy berry center. It’s the kind of pie that earns second helpings without a word spoken.
Serve warm with vanilla ice cream for the ultimate contrast of hot and cold textures. This method guarantees success even for first-time pie makers.
Ingredients for Blackberry Pot Pie
Ripe blackberries, flaky crust, and a few pantry staples create this impressive dessert.
| Ingredient | Amount | Notes |
|---|---|---|
| Fresh Blackberries 🫐 | 6 cups | Ripe, washed and drained |
| Granulated Sugar 🍚 | ¾ cup | Adjust to berry sweetness |
| Cornstarch 🌾 | 3 tbsp | For thickening filling |
| Lemon Zest 🍋 | 1 tbsp | Finely grated for brightness |
| Lemon Juice 🍋 | 2 tbsp | Freshly squeezed preferred |
| Vanilla Extract 🌿 | 1 tsp | Pure for best flavor |
| All-Purpose Flour 🌾 | 2 ½ cups | Plus extra for dusting |
| Unsalted Butter 🧈 | 1 cup | Cold, cubed for crust |
| Ice Water 💧 | ½ cup | For pie dough cohesion |
| Salt 🧂 | ½ tsp | Fine sea salt preferred |
| Large Egg 🥚 | 1 whole | For egg wash finish |
| Turbinado Sugar 🍚 | 1 tbsp | For crust topping sparkle |
The blackberries are non-negotiable here. Farmers market berries have superior depth of flavor compared to supermarket offerings, but use what’s available—just ensure they’re plump and deeply colored. For the butter, European-style (like Plugrá) has higher fat content, which yields a flakier crust. The cornstarch must be fresh; old stock loses thickening power.
No fresh berries? Frozen blackberries at one-and-a-half times the quantity work well (do not thaw before using). Short on cornstarch? Instant tapioca at a one-to-one ratio substitutes perfectly. The lemon zest brightens the filling—if you’re out, a pinch of citric acid works in a pinch (but fresh zest is ideal).
The assembled pie freezes beautifully for up to 3 months. Baked pies keep at room temperature for 2 days (cover loosely with foil). For the flakiest results, chill your dough thoroughly between each handling step—warm butter means tough crust.
Why You’ll Love This Recipe
- One Bowl Wonder: I just dump the blackberries, sugar, and cornstarch right in—no fancy prep, and the lemon zest does all the flavor heavy lifting.
- Tart Meets Sweet: That first bite where the juicy blackberries hit the bright lemon? It’s like summer in a crust.
- Brunch or Dessert: I’ve served this warm for Sunday brunch and cold for a midnight snack—honestly, it works both ways.
- Leftovers? Ha.: Here’s what sold me—the filling thickens so perfectly it tastes even better the next day, if it lasts that long.
Step-by-Step Instructions for Blackberry Pot Pie
Master the technique for a buttery flaky crust encasing a luscious berry filling with these precise steps.
Step 1: Prepare the All-Butter Pie Crust
In a food processor, pulse the 2.5 cups all-purpose flour and 0.5 tsp salt until combined. Add the 1 cup unsalted butter, cut into ½-inch cubes and chilled, pulsing until the mixture resembles coarse crumbs with pea-sized butter pieces visible.
With the processor running, drizzle in the 0.5 cup ice water through the feed tube, processing just until the dough begins to come together. The dough should look shaggy but hold when pressed—not wet or sticky. Turn the dough onto a lightly floured surface, divide into two equal portions, and shape into discs. Wrap in plastic and chill for 1 hour.
Step 2: Make the Blackberry Filling
In a large bowl, gently toss the 6 cups fresh blackberries with the 0.75 cup granulated sugar, 3 tbsp cornstarch, 1 tbsp lemon zest, 2 tbsp lemon juice, and 1 tsp vanilla extract. Use a light hand to avoid crushing the berries.
The cornstarch will thicken the natural juices released during baking, creating a glossy, jam-like consistency. Let the mixture sit for 10-15 minutes to allow the berries to release some liquid and the cornstarch to begin hydrating. Stir once more before using.
Step 3: Assemble the Pot Pie
On a floured surface, roll one dough disc into a 12-inch circle and transfer it to a 9-inch pie dish. Trim the edges to leave a ½-inch overhang. Spoon the blackberry filling into the crust, mounding slightly in the center. Dot the filling with any remaining butter from the dough preparation if desired.
Roll the second dough disc into another 12-inch circle and place it over the filling. Trim the top crust to match the bottom, then fold the overhang under and crimp the edges with your fingers or a fork to seal. Cut 4-5 slits in the top crust to allow steam to escape during baking.
Step 4: Bake to Golden Perfection
Preheat the oven to 375°F. Brush the top crust with a beaten large egg and sprinkle evenly with the 1 tbsp turbinado sugar. This creates a glossy, golden-brown finish with a satisfying crunch.
Bake on the center rack for 45-50 minutes, until the crust is deep golden brown and the filling is bubbling vigorously through the vents. If the edges brown too quickly, tent them with foil. Let the pot pie cool for 20-30 minutes before serving to allow the filling to set.
Pro Tips For Making Blackberry Pot Pie
- Pre-Cook the Berries: Toss the blackberries with sugar and cornstarch, then let them sit for 10 minutes—this draws out juices so the filling thickens properly instead of turning soupy.
- Zest First, Juice Later: Always zest the lemon before halving it for juice; it’s nearly impossible to do afterward, and fresh zest brightens the filling more than dried ever could.
- Skip Frozen Berries: Fresh blackberries hold their shape better than frozen, which can bleed too much liquid and turn your pot pie into a purple puddle.
- Chill the Filling: Let the blackberry mixture cool completely before assembling the pie—hot filling will melt the crust and make the bottom soggy.
Troubleshooting blackberry pot pie
Filling Too Runny
If your filling isn’t thickening properly, the cornstarch may not have been fully activated. I always pre-cook the berry mixture on the stovetop for 3-5 minutes until it bubbles and thickens. This ensures the cornstarch reaches its full thickening potential before baking. 💡
Soggy Bottom Crust
A soggy bottom often means the filling was too wet when assembled. After pre-cooking the berries, let the mixture cool completely and drain any excess liquid before adding to the crust. I also brush the bottom crust with a thin layer of beaten egg white to create a moisture barrier.
Crust Browning Too Quickly
If the edges darken before the filling is done, tent them with aluminum foil. I use a pie shield for convenience. For the top crust, wait until the last 15 minutes of baking to add the egg wash and sugar topping. This prevents over-browning while ensuring a beautiful finish.
Filling Bubbling Over
This happens when the steam can’t escape properly. Make sure your top crust vents are at least 1-inch long and cut with a sharp knife. I also place a baking sheet on the rack below to catch any spills. This keeps your oven clean and prevents burnt drips from affecting flavor.
Dry or Tough Crust
Overworking the dough develops too much gluten, resulting in a tough texture. I pulse the butter into the flour just until pea-sized crumbs form. Also, ensure your butter stays cold—work quickly and return the dough to the fridge if it starts to soften. 🔥
Filling Not Setting
If the filling is still liquid after cooling, it may need more cornstarch. For this recipe, 3 tbsp works perfectly with 6 cups of berries. If using frozen berries, increase the cornstarch to 4 tbsp to account for the extra moisture they release.
Nutrition Facts
Frequently Asked Questions
Can I use frozen blackberries instead of fresh?
Yes, use 9 cups frozen blackberries and increase cornstarch to 4 tbsp. Don’t thaw them first to prevent mushiness. The texture will be slightly softer but just as flavorful.
How do I prevent a soggy bottom crust?
Pre-cook the filling until thickened, then cool completely. Brush the bottom crust with beaten egg white before adding filling to create a moisture barrier. This extra step ensures crispness.
Why did my filling bubble over?
Steam needs escape routes. Cut vents at least 1-inch long in the top crust. Place a baking sheet below to catch spills. Check vents aren’t sealed by egg wash.
Can I make this ahead of time?
Assemble the pie and freeze unbaked for up to 3 months. Bake straight from frozen, adding 10-15 minutes to baking time. The crust stays flakier this way.

- 4C Bread Crumbs Meatballs Recipe: Crispy Crust and Juicy Centers - September 25, 2026
- 6 Oz Chocolate Chip Cookie Recipe: Perfectly Balanced Crispy Edges and Chewy Hearts - September 25, 2026
- 6-Inch Coffee Cake Recipe: Vanilla Bean Swirls and Buttery Streusel Topping - September 25, 2026