
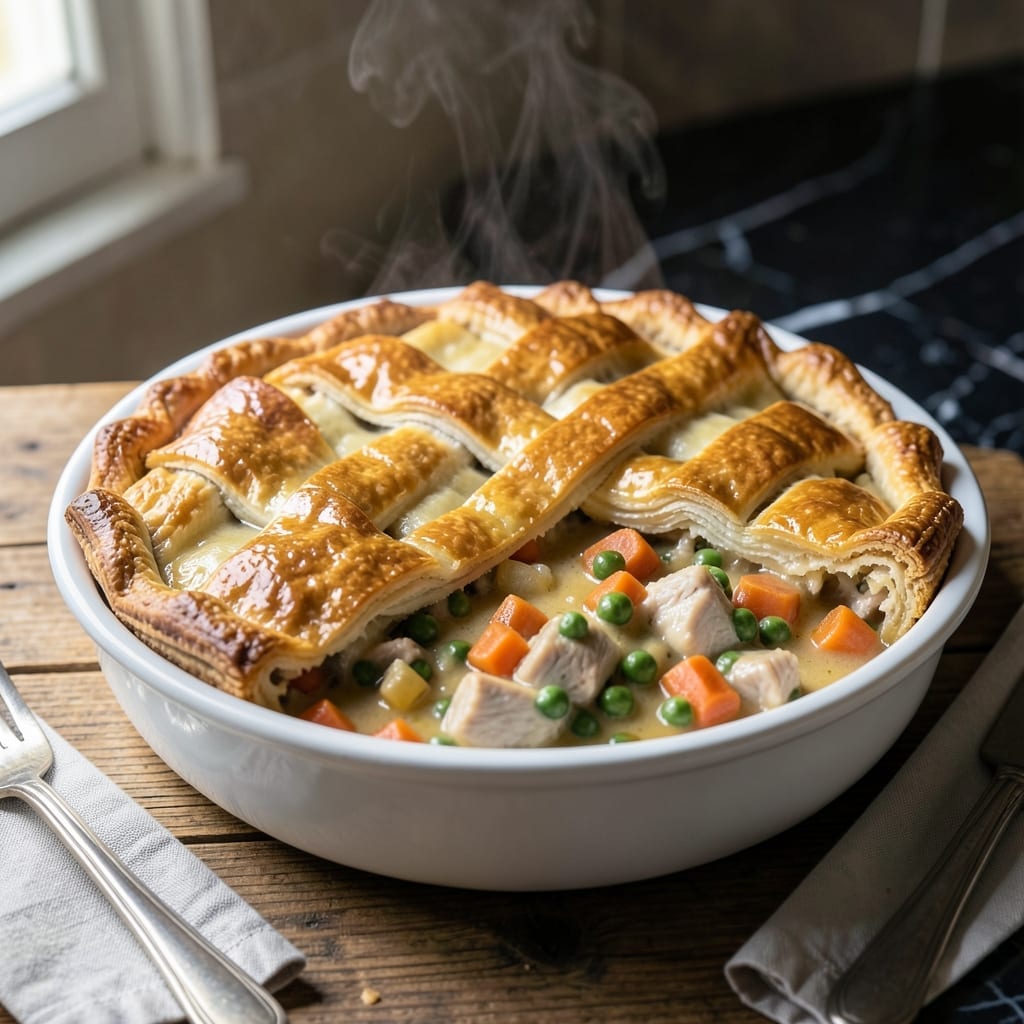
This chicken pot pie delivers the comfort of a classic with layers of flaky pastry embracing tender chicken and vegetables.
I’ve refined this version to capture that signature buttery crust and creamy filling that makes it irresistible. The filling comes together with a simple roux, ensuring a velvety sauce that clings to every bite of chicken and veggies.
The top crust bakes to a golden finish, while the bottom stays crisp, creating that perfect contrast in every forkful. It’s a dish that feels like home, with every layer working in harmony.
Serve it fresh from the oven for a meal that’s as satisfying as it is nostalgic.
Ingredients for Boston Market Chicken Pot Pie
Flaky crusts hug tender chicken and veggies in this cozy classic. Probably have most already.
| Ingredient | Amount | Notes |
|---|---|---|
| Chicken Breast 🍗 | 1 ½ lb | Boneless, skinless, diced |
| Frozen Mixed Vegetables 🥕 | 2 cups | Peas, carrots, corn blend |
| Yellow Onion 🧅 | 1 whole | Medium, finely diced |
| Celery Stalks 🌿 | 2 pieces | Finely chopped |
| Unsalted Butter 🧈 | ¾ cup | Divided for roux and crust |
| All-Purpose Flour 🌾 | ⅓ cup | For roux, plus extra for dusting |
| Chicken Broth 🥄 | 1 ½ cups | Low-sodium preferred |
| Whole Milk 🥛 | ¾ cup | Full-fat for creaminess |
| Salt 🧂 | 1 tsp | Divided to taste |
| Black Pepper 🌶️ | ½ tsp | Freshly ground preferred |
| Garlic Powder 🧄 | ½ tsp | For depth of flavor |
| Dried Thyme 🌿 | ½ tsp | Crushed between fingers |
| Refrigerated Pie Crusts 🥧 | 2 sheets | Store-bought or homemade |
| Large Egg 🥚 | 1 whole | For egg wash |
The chicken is key here—boneless, skinless breasts stay juicy if you don’t overcook them. I grab mine from Costco for big batches, but any grocery store works. The veggies? Frozen mixed saves time and keeps the filling hearty (no one will judge). For the crust, Pillsbury pie crusts are the easiest shortcut—they bake up flaky every time.
No chicken broth? Water plus bouillon cubes work in a pinch. Fresh out of thyme? Poultry seasoning at half the amount gets you close. Swap milk for half-and-half if you want it extra rich. The celery can be skipped, but it adds that classic crunch. And if you’re feeling fancy, a pinch of nutmeg in the filling is worth the extra minute.
Assemble and bake right away, or prep ahead and refrigerate for 24 hours. Leftovers keep 3-4 days in the fridge—reheat in the oven to crisp the crust. Freeze uncooked pies for 2 months (thaw before baking).
Why You’ll Love This Recipe
- One Pot Magic: I toss everything—the chicken, frozen veggies, onion, and celery—into a single pot, and the butter ties it all together with barely any cleanup.
- That Boston Market Taste: The celery and onion sautéed in butter give it that rich, savory depth that makes it taste just like the restaurant version.
- Feeds the Freezer: I double the batch and freeze half for those nights when even 20 minutes feels like too much.
- Budget Stretch: Chicken breast and frozen veggies keep the cost low, but it feels like a real indulgence.
Step-by-Step Instructions for Chicken Pot Pie
Here’s how I get that perfect flaky crust and creamy filling every time.
Step 1: Cook the Chicken and Vegetables
Heat a large skillet over medium-high heat and add 2 tablespoons of the unsalted butter. Once melted, add the 1.5 lb chicken breast diced into ½-inch pieces. Cook for 5-6 minutes until no longer pink and just starting to brown.
Add the 1 whole yellow onion finely diced and 2 pieces celery stalks finely chopped. Cook for 3-4 minutes until the onion softens and becomes translucent. Stir in the 2 cups frozen mixed vegetables and cook for another 2 minutes to take the chill off.
Season with ½ tsp salt, ½ tsp black pepper, ½ tsp garlic powder, and ½ tsp dried thyme. This builds the flavor base for your filling. Remove from heat and set aside.
Step 2: Make the Creamy Roux-Based Sauce
In the same skillet, melt the remaining unsalted butter over medium heat. Once foamy, whisk in the 0.33 cup all-purpose flour to create a roux. Cook for 1-2 minutes, stirring constantly, until it turns a light golden color.
Gradually whisk in the 1.5 cups chicken broth and 0.75 cup whole milk, a little at a time, until smooth. Bring to a simmer and cook for 3-4 minutes until the sauce thickens enough to coat the back of a spoon.
Return the chicken and vegetable mixture to the skillet and stir to combine. Let it cook for another 2 minutes to meld the flavors. Taste and adjust seasoning with the remaining ½ tsp salt if needed.
Step 3: Assemble and Bake the Pot Pie
Preheat your oven to 375°F. Unroll 1 sheet refrigerated pie crust and place it in a 9-inch pie dish, pressing it gently against the bottom and sides. Trim any excess dough hanging over the edge.
Pour the chicken and vegetable filling into the crust. Unroll the second refrigerated pie crust and place it over the filling. Crimson the edges with a fork to seal, then cut 4-5 slits in the top crust to allow steam to escape.
Whisk the 1 whole large egg and brush it lightly over the top crust. This gives it that beautiful golden-brown finish. Bake for 30-35 minutes until the crust is deep golden brown and the filling is bubbly.
Step 4: Rest and Serve
Remove from the oven and let it rest for 10 minutes before slicing. This allows the filling to set slightly so it doesn’t run out when you serve it. The crust should be flaky and golden, while the filling should be thick and creamy.
Slice into wedges and serve warm. Each bite should deliver tender chicken, perfectly cooked vegetables, and that rich, velvety sauce all encased in buttery, flaky layers. The aroma alone will have everyone gathering around the table.
Pro Tips For Making Boston Market Chicken Pot Pie
- Pre-Cook the Chicken: Poach or sauté the chicken breast first—raw chicken in the filling often ends up dry or undercooked, especially with frozen veggies releasing moisture. I learned this the hard way after pulling apart rubbery chunks more than once.
- Thaw the Veggies: Drain and pat dry the frozen mixed vegetables before adding them, or they’ll turn your filling into a watery mess. Sounds obvious, but I skipped this step once and spent 20 extra minutes reducing the broth.
- Sauté the Aromatics: Cook the yellow onion and celery in the unsalted butter until soft—about 5-7 minutes. This builds the base flavor that makes the pie taste like it simmered all day, not just thrown together.
- Chill Before Baking: Let the assembled pot pie rest in the fridge for 15-20 minutes before baking. This keeps the crust from getting soggy on the bottom, which is the difference between a good pie and a great one.
Storing and Reheating boston market chicken pot pie
Refrigerator Storage
Let your pot pie cool completely before storing. I transfer leftovers to airtight containers and refrigerate at 40°F or below for up to 4 days. The flavors deepen overnight, making it taste even better the next day. ❄️
Freezer Storage
For longer storage, wrap individual slices tightly in plastic wrap and place in a freezer-safe bag. They’ll keep well for up to 3 months without losing quality. Label with the date so you don’t forget!
Oven Reheating
Preheat your oven to 350°F and place the pot pie on a baking sheet. Cover loosely with aluminum foil and heat for 15-20 minutes until warmed through. This method keeps the crust crisp. 🔥
Microwave Reheating
For a quick meal, microwave individual slices on 50% power for 2-3 minutes, covered with a damp paper towel. Stir halfway through to ensure even heating. The crust won’t be as crispy, but it’s fast and convenient.
Make-Ahead Tip
Assemble the pot pie up to the baking step and refrigerate for up to 24 hours before baking. This is perfect for busy days when you want a hot meal ready to go. Just add 5-10 minutes to the baking time if starting cold.
Nutrition Facts
Frequently Asked Questions
Can I use chicken thighs instead of breasts?
Yes! Chicken thighs stay juicier and add richer flavor. Use 1.5 lb boneless, skinless thighs and cook for 6-7 minutes to prevent drying.
How do I prevent a soggy bottom crust?
Pre-bake the bottom crust for 8-10 minutes before adding filling. Also, ensure filling is thickened to avoid excess moisture.
Can I make this ahead of time?
Assemble completely and refrigerate for up to 24 hours. Add 5-10 minutes to baking time if starting cold.
What if my filling is too thin?
Simmer the roux-based sauce for an extra 2-3 minutes until thick. A slurry of 1 tablespoon cornstarch mixed with water can also help.

- 6 Oz Chocolate Chip Cookie Recipe: Perfectly Balanced Crispy Edges and Chewy Hearts - September 25, 2026
- 6-Inch Coffee Cake Recipe: Vanilla Bean Swirls and Buttery Streusel Topping - September 25, 2026
- 1 Hour Soup Recipe: Velvety Richness Without the Wait - September 25, 2026