
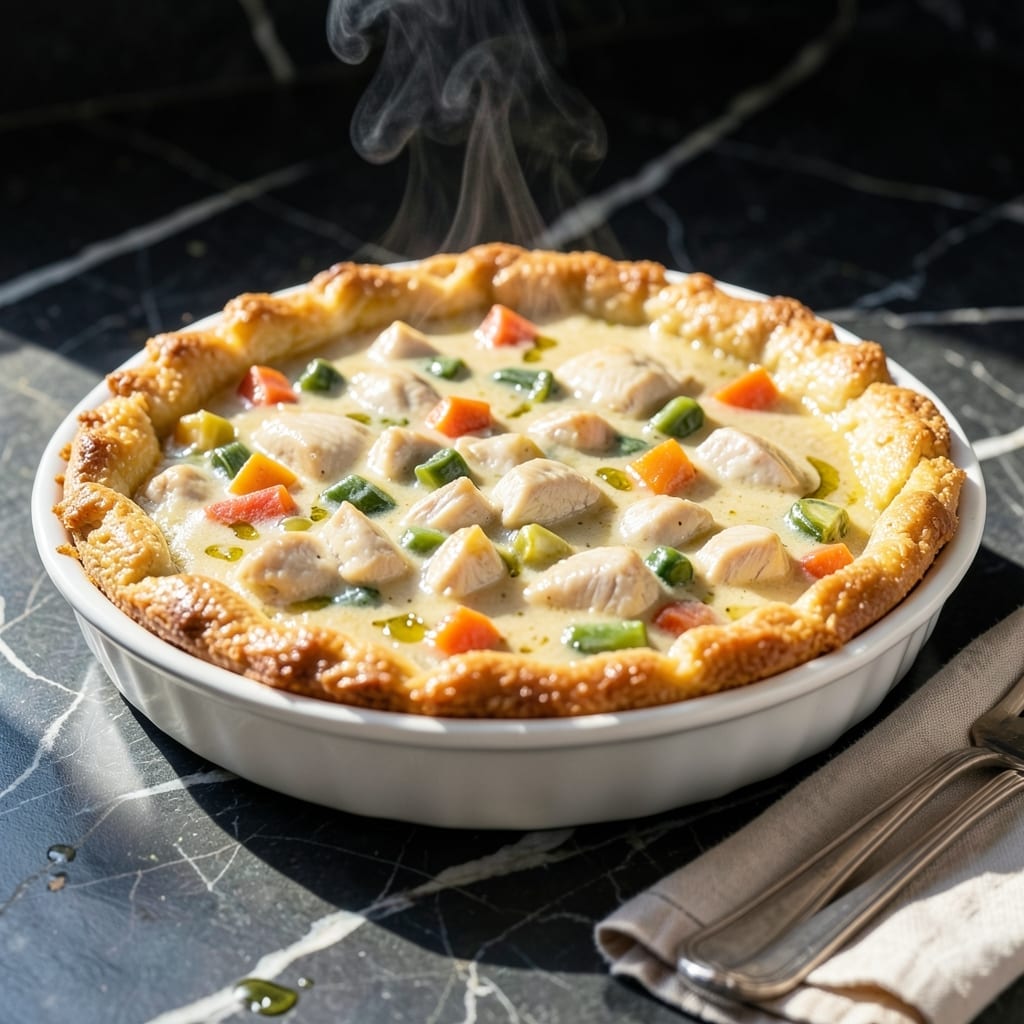
There’s nothing quite like a warm chicken pot pie to bring classic comfort to the dinner table. This version combines tender chicken with a creamy vegetable filling and the signature flaky topping that makes it unforgettable.
The secret lies in using Bisquick for a flaky, golden crust that bakes up perfectly every time. With just a few simple ingredients and straightforward steps, this dish delivers quick satisfaction without sacrificing that homemade feel.
Each bite offers the rich, savory filling you expect from a traditional pot pie, elevated by the buttery, layered texture of the biscuit topping. It’s a classic that feels like a hug on a plate.
Ideal for busy weeknights or cozy weekends, this recipe proves that comfort food doesn’t have to be complicated.
Ingredients for Campbell’s Chicken Pot Pie Recipe Bisquick
Classic comfort starts with creamy soup, tender chicken, and flaky Bisquick topping.
| Ingredient | Amount | Notes |
|---|---|---|
| Cooked Chicken Breast 🍗 | 2 cups | Shredded or diced rotisserie |
| Campbell's Cream of Chicken Soup 🥫 | 1 can | 10.5 oz size preferred |
| Frozen Mixed Vegetables 🥕 | 1 cup | Peas, carrots, corn, green beans |
| Chicken Broth 💧 | ¾ cup | Low-sodium for control |
| Bisquick Baking Mix 🥣 | 1 ½ cups | Original formula preferred |
| Whole Milk 🥛 | ½ cup | For flaky biscuit topping |
| Unsalted Butter 🧈 | 4 tbsp | Melted for topping |
| Yellow Onion 🧅 | ½ whole | Finely diced for filling |
| Celery Stalks 🌿 | 2 pieces | Finely diced for texture |
| Garlic Cloves 🧄 | 2 cloves | Minced for depth of flavor |
| Dried Thyme 🍃 | ½ tsp | For earthy warmth |
| Black Pepper 🌶️ | ½ tsp | Freshly ground preferred |
| Salt 🧂 | ¼ tsp | Adjust to taste |
The Bisquick topping is the secret here. Original formula gives you that flaky, golden crust without the fuss of pie dough. Campbell’s Cream of Chicken Soup is the base—use the 10.5 oz can for the right consistency. For the chicken, rotisserie saves time, but leftover roasted works just as well (and stretches a meal further). Most grocery stores carry both, but Walmart and Target usually have the best prices.
No rotisserie chicken? Canned chicken at half the amount works in a pinch. Fresh out of cream of chicken? Cream of mushroom gives a similar texture. The mixed vegetables can be fresh—just dice small and par-cook to avoid a soggy topping. For extra richness, swap the milk for half-and-half in the biscuit topping. The thyme can be fresh at double the amount if you’ve got it growing in the yard.
Assemble and bake immediately, or refrigerate the filling and topping separately for up to 24 hours. Leftovers keep 3-4 days in the fridge and reheat beautifully. The biscuit topping softens over time, so store any extras in the oven to crisp up again.
Why You’ll Love This Recipe
- One Bowl Wonder: I dump everything in a single bowl, mix, and pop it in the oven—no fancy prep, just comfort food magic.
- That Creamy Crunch: The Bisquick topping bakes up golden while the Campbell’s soup keeps every bite rich and saucy.
- Weeknight Hero: Between us, this is my Tuesday night lifesaver when I need dinner on the table fast.
- Stretches Further: Leftovers taste even better the next day, and it feeds my family of four with zero fuss.
Step-by-Step Instructions for Campbell’s Chicken Pot Pie With Bisquick Topping
This method delivers flaky biscuit topping and creamy filling with minimal effort.
Step 1: Sauté Aromatics for Flavor Foundation
Heat a large skillet over medium-high heat. Add the finely diced 0.5 whole yellow onion and 2 pieces finely diced celery stalks, cooking for 4-5 minutes until softened and translucent. The onion should lose its sharp bite and develop a subtle sweetness.
Stir in the 2 cloves minced garlic cloves, 0.5 tsp dried thyme, 0.5 tsp black pepper, and 0.25 tsp salt, cooking for 30 seconds until fragrant. This aromatic base builds depth for the filling without overpowering the dish.
Step 2: Create Creamy Filling Base
Pour in the 1 can Campbell’s Cream of Chicken Soup and 0.75 cup chicken broth, stirring to combine. Reduce heat to medium and simmer for 2-3 minutes until the mixture thickens slightly and bubbles gently at the edges.
Add the 2 cups cooked chicken breast and 1 cup frozen mixed vegetables, stirring to coat everything in the creamy sauce. Cook for another 3-4 minutes until the vegetables are thawed and the mixture is hot throughout. The sauce should cling to the chicken and vegetables with a velvety texture.
Step 3: Prepare Bisquick Biscuit Topping
In a separate bowl, combine the 1.5 cups Bisquick baking mix and 0.5 cup whole milk, stirring just until the dough comes together. It will be shaggy and slightly sticky—that’s exactly what you want for tender, flaky biscuits.
Don’t overmix. As soon as the dry ingredients are moistened, stop stirring. Overworking the dough will make the biscuits tough instead of light and airy.
Step 4: Assemble and Bake to Golden Perfection
Transfer the hot chicken filling to a 9×13-inch baking dish or similar oven-safe vessel. Drop spoonfuls of the Bisquick dough evenly over the top—you should have about 8-10 biscuits. Drizzle the 4 tbsp melted unsalted butter over the biscuits for extra richness and browning.
Bake at 375°F for 20-25 minutes until the biscuits are golden brown and the filling is bubbling at the edges. The topping should rise significantly and develop a crisp, buttery crust.
Step 5: Rest and Serve Warm
Remove from the oven and let rest for 5-10 minutes before serving. This brief pause allows the filling to set slightly, making it easier to serve neat portions without the biscuits sliding off.
Serve warm, with each portion featuring a generous amount of creamy filling and at least one flaky biscuit on top. The contrast between the rich, comforting filling and the light, buttery topping is what makes this dish truly special.
Pro Tips For Making Campbell’S Chicken Pot Pie Recipe Bisquick
- Precook the Veggies: Microwave the frozen mixed vegetables for 2-3 minutes before mixing them in—I learned this the hard way after biting into rock-hard peas in my first few attempts.
- Shred the Chicken: Use two forks to shred the cooked chicken breast into small, even pieces rather than cubing it. It distributes better in every bite and soaks up the creamy soup base like a dream.
- Thicken the Filling: After combining the soup, broth, and veggies, let it simmer for 3-4 minutes to reduce slightly. Sounds weird, but it prevents a runny pie that turns your Bisquick topping into a soggy mess.
- Add a Butter Layer: Before spooning the Bisquick mix on top, dot the filling with small pats of butter—about 1 tablespoon total. My grandmother swore by this, and it gives the topping a richer, golden finish.
Common Mistakes When Making Perfect Results
Overworking the Dough
The Bisquick topping needs just 8-10 gentle stirs to combine. Overmixing develops gluten, turning your flaky biscuits into dense hockey pucks. Stop as soon as the dry spots disappear.
Skipping the Sauté
Those 4-5 minutes for onion and celery aren’t optional. Raw alliums leave a harsh bite that ruins the creamy filling. Cook until translucent for sweet, mellow flavor. 🌡️
Cold Filling Mistake
Always start with hot filling when assembling. Cold filling causes the biscuits to sink into the sauce instead of rising into flaky layers. Heat your filling to bubbling before topping.
Butter Omission
Don’t skip the 4 tbsp melted butter drizzle. It’s not just for browning—it adds essential moisture that transforms the topping from dry to irresistibly tender.
Oven Temperature
Bake at exactly 375°F. Higher heat burns the biscuits before the filling cooks through. Lower heat produces pale, soggy results. Use an oven thermometer for precision.
Rushing the Rest
The 5-10 minute rest lets juices settle. Slicing too soon sends filling spilling over the biscuits. I learned this the hard way with my first pot pie disaster. 💡
Nutrition Facts
Frequently Asked Questions
Can I use a different cream soup?
Yes! Cream of mushroom or celery work well. Each adds a slightly different flavor but maintains the creamy texture.
What if my biscuits aren’t browning?
Check your oven temperature first. If accurate, brush the topping with extra melted butter and broil for 1-2 minutes at the end.
Can I make this ahead of time?
Prepare the filling and topping separately, then refrigerate for up to 24 hours. Assemble and bake just before serving for best results.
Why is my filling watery?
This usually means the filling wasn’t hot enough when assembled. Ensure it’s bubbling before adding the biscuit topping.

- 6 Oz Chocolate Chip Cookie Recipe: Perfectly Balanced Crispy Edges and Chewy Hearts - September 25, 2026
- 6-Inch Coffee Cake Recipe: Vanilla Bean Swirls and Buttery Streusel Topping - September 25, 2026
- 1 Hour Soup Recipe: Velvety Richness Without the Wait - September 25, 2026