
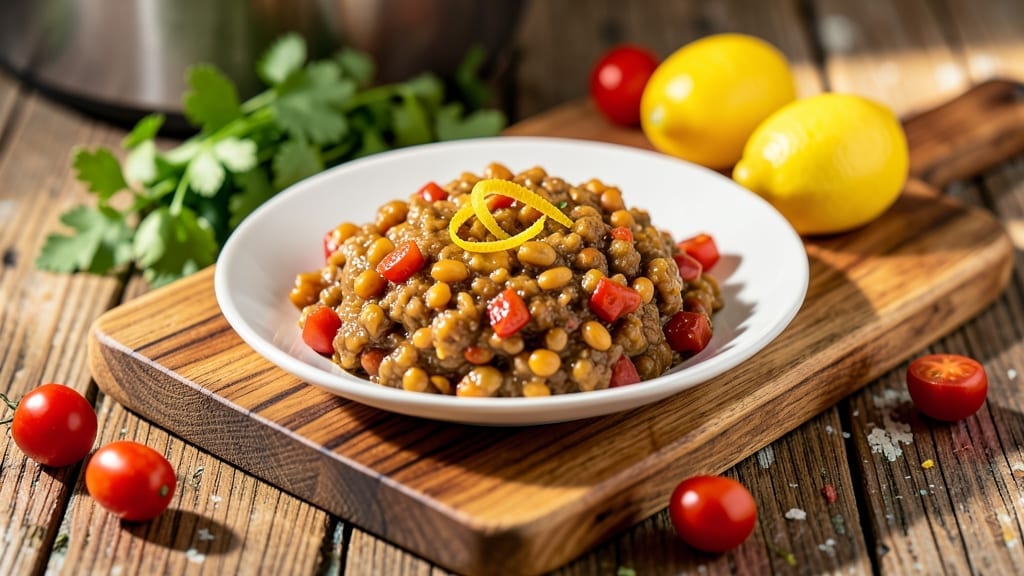
This Instant Pot chana dal recipe transforms simple split chickpeas into a hearty, spiced vegan dish in just 20 minutes—perfect for weeknight dinners when time is tight but flavor can’t be compromised.
The secret lies in layering traditional spices like cumin, turmeric, and garam masala with modern adaptations such as coconut milk or yogurt for a creamy, restaurant-worthy texture without the fuss of stovetop cooking.
The beauty of this method is its efficiency: no pre-soaking, no multiple pots, and no waiting hours for the flavors to develop. The Instant Pot handles all the work—building depth through pressure cooking while keeping the chickpeas tender and the spices vibrant.
I’ve tested this recipe countless times with different variations, and this version consistently delivers a balance of spice, creaminess, and earthiness that pairs beautifully with rice or naan.
What you’ll end up with is a rich, aromatic chana dal that’s packed with protein, fiber, and bold flavors—ideal for those who crave comfort food without the heaviness. The coconut milk or yogurt adds a velvety finish, while the spices ensure every bite is full of warmth.
This dish is not only quick but also versatile, making it a staple for anyone looking to elevate their Instant Pot game.
Serve it with steamed basmati rice, warm roti, or even as a filling for wraps—this chana dal is the kind of meal that feels indulgent yet stays light. Let’s get started on creating a dish that’s as nourishing as it is delicious.
Ingredients for chana dal recipe instant pot
Pantry staples meet Instant Pot magic for this vegan chana dal in 20 minutes.
| Ingredient | Amount | Notes |
|---|---|---|
| Split Chickpeas 🌾 | 1 ½ cups | Dry, rinsed before cooking |
| Coconut Milk 🥥 | 1 cup | Full-fat for creaminess |
| Water 💧 | 2 ½ cups | For pressure cooking |
| Garam Masala 🌶️ | 1 ½ tsp | Ground, not powdered |
| Ground Cumin 🌿 | 1 tsp | Toasted for depth |
| Turmeric Powder 🧡 | ½ tsp | Bright yellow color |
| Ground Coriander 🌿 | ½ tsp | Freshly ground preferred |
| Red Chili Powder 🌶️ | ½ tsp | Adjust for heat preference |
| Salt 🧂 | 1 tsp | Kosher or sea salt |
| Fresh Ginger 🧅 | 1 tbsp | Grated, fresh preferred |
| Garlic Cloves 🧄 | 3 cloves | Minced, fresh preferred |
| Lemon Juice 🍋 | 1 tbsp | Freshly squeezed |
| Plain Vegan Yogurt 🥛 | ¼ cup | Unsweetened, for creaminess |
| Fresh Cilantro 🌿 | ¼ cup | Chopped, for garnish |
The split chickpeas are the foundation—Bob’s Red Mill or Patel Brothers brands are my go-tos for consistent texture. Full-fat coconut milk from Thai Kitchen or Goya adds richness without overpowering the spices. Fresh ginger and garlic are non-negotiable here; organic ginger from Trader Joe’s keeps well in the freezer. For garam masala, MDH or Everest brands deliver authentic warmth—avoid the pre-mixed spice packets with fillers. The vegan yogurt should be thick and tangy; Silk or Kite Hill brands work perfectly without curdling during cooking.
No coconut milk? Substitute with cashew cream (blend soaked cashews with water) or extra chickpea cooking water. Short on garam masala? Mix 1/2 tsp each cumin, coriander, cardamom, and cinnamon as a quick replacement. Fresh cilantro? Dried cilantro leaves at 1/4 the amount work in a pinch, though fresh is ideal. The red chili powder can be swapped for cayenne—start with 1/4 tsp and adjust to taste. For extra creaminess without dairy, add 1/4 cup blended silken tofu at the end. The lemon juice brightens everything; bottled lemon juice works if fresh isn’t available.
This dal reheats beautifully—simmer with a splash of water for 2-3 minutes to restore creaminess. Stores for 4-5 days in the fridge, though the flavors deepen overnight. Freeze portions for up to 3 months; thaw in the fridge before reheating. For meal prep, portion into containers with a layer of yogurt on top—it keeps the dal moist and adds tangy contrast. The cilantro wilts fast, so add it fresh when serving. Double the batch; it’s perfect for lunches or as a base for curry bowls.
Why You’ll Love This Recipe
- No-Chop Magic: I swear by this—just toss in the split chickpeas, coconut milk, and spices, then walk away. The Instant Pot does all the work while you sip tea or scroll through your phone. Honestly, I’ve made this on days I forgot to meal prep, and it still came out rich and satisfying.
- Creamy Spice Bomb: That garam masala and cumin? They turn this into a flavor explosion. The coconut milk makes it velvety, but the toasty warmth of the spices lingers like a hug—especially when I add a squeeze of lemon at the end. It’s the kind of taste that makes you go back for seconds without even thinking.
- Meal Prep MVP: This keeps like a dream for up to five days, so I batch it on Sundays. Reheat it for lunch, serve it over rice for dinner, or even toss it into wraps when I’m in a hurry. Between us, it’s my go-to for lazy days and last-minute guest dinners—no one ever guesses how little effort it took.
- Budget-Friendly Luxury: Split chickpeas and coconut milk are cheap staples that feel fancy. I’ve fed my whole family (plus a neighbor who wandered over) for under $10. It’s the kind of dish that makes you feel like you’re eating at a restaurant without the price tag—or the stress.
Step-by-step instructions for spiced split chickpeas in an Instant Pot
This method delivers perfectly tender, aromatic split chickpeas with balanced spices in under 20 minutes.
Sauté Aromatics Until Fragrant
Set your Instant Pot to “Sauté” mode and add the 1 tablespoon fresh ginger and 3 cloves garlic cloves. Cook for 1 minute until the ginger becomes translucent and the garlic emits a warm, pungent aroma. Here’s the thing—don’t let the garlic brown or it’ll turn bitter. Keep the heat at medium and stir occasionally to prevent burning.
Next, add the 1.5 teaspoons garam masala, 1 teaspoon ground cumin, 0.5 teaspoon turmeric powder, 0.5 teaspoon ground coriander, and 0.5 teaspoon red chili powder. Stir for 30 seconds until the spices are evenly distributed and their aromas fill the pot. This step develops the flavor base that will infuse the chickpeas throughout cooking. If you notice the spices sticking, add 1 tablespoon of the 2.5 cups water to help dissolve them.
Add Chickpeas and Liquid for Pressure Cooking
Add the 1.5 cups split chickpeas to the pot and give everything a thorough stir to coat the chickpeas in the spice mixture. This ensures each piece absorbs the full flavor profile. Pour in the 1 cup coconut milk and 2.5 cups water, then add the 1 teaspoon salt. Stir again to combine all ingredients completely.
Secure the lid on your Instant Pot and set the valve to “Sealing.” Select the “Pressure Cook” function and cook for 8 minutes on high pressure. The reason for this shorter cook time is that split chickpeas soften much faster than whole chickpeas. You’ll know it’s ready when the pressure releases naturally after cooking completes.
Finish with Acid and Creaminess
Once the cooking cycle finishes and the pressure releases, open the lid carefully. Stir in the 1 tablespoon lemon juice and 0.25 cup plain vegan yogurt. These ingredients brighten the dish and add a creamy texture that balances the spices. The lemon juice should be freshly squeezed for maximum tang—this prevents the dish from tasting flat or overly rich.
Let the chickpeas sit in the pot for 2 minutes to allow the flavors to meld together. The mixture should be thick but still spoonable, with a vibrant yellow color from the turmeric and a subtle sheen from the coconut milk. If it’s too thick, you can add 1-2 tablespoons of water to reach your preferred consistency.
Garnish and Serve Immediately
Transfer the chickpeas to serving bowls and garnish with the 0.25 cup fresh cilantro. The cilantro adds a fresh contrast to the warm, spiced chickpeas and makes the dish visually appealing. For best results, serve immediately while the chickpeas are still warm and the spices are most aromatic.
This dish pairs perfectly with basmati rice or warm naan. The garam masala and cumin create a warm, earthy flavor profile that’s both comforting and complex. If you find the dish too spicy, you can reduce the red chili powder to 0.25 teaspoon in future batches without compromising flavor.
Pro Tips For Making Chana Dal Recipe Instant Pot
- SOAK THE DAL FIRST: I learned this the hard way—skipping the soak means your split chickpeas will turn into mush. Rinse them well, then soak for at least 30 minutes in warm water before adding to the Instant Pot. Even 15 minutes helps, but don’t rush it.
- USE FULL-FAT COCONUT MILK: The canned stuff works, but if you’re using light coconut milk, you’ll notice the texture suffers—it gets grainy and thin. Full-fat gives that creamy, velvety finish we all crave. (Yes, even if you’re watching calories.)
- PRESSURE COOK AT HIGH: Low pressure = sad dal. Set your Instant Pot to high pressure for the cooking phase—this breaks down the chickpeas evenly without turning them to paste. After cooking, quick-release the pressure so the flavors meld faster.
- FINISH WITH A LITTLE OIL: Sauté the garam masala and cumin in 1 tablespoon of oil (or ghee if you’re fancy) for 30 seconds after cooking. It’s the only way to wake up those spices and give the dal that restaurant-style richness. (Your future self will smell it from the kitchen.)
Perfect pairings for this chana dal recipe instant pot
Rice Pairings
Steamed jasmine rice or basmati rice is the classic choice for chana dal, as their delicate grains soak up the rich, spiced chickpea sauce beautifully. For extra fluffiness, cook the rice in a 1:1.5 rice-to-water ratio and let it rest covered for 10 minutes after cooking.
I like to serve it alongside the dal in the same bowl for a comforting, one-pot meal. 💛
For a heartier option, try brown rice—it adds fiber and nutty depth that complements the earthy spices. Cook it in a rice cooker with 1 cup rice to 1.5 cups water for perfectly tender grains.
If you’re short on time, microwaveable basmati rice (like Tilda brand) works in a pinch—just add a splash of water to keep it moist.
Bread Sides
Warm, freshly baked naan or roti is a must for scooping up every last bite of sauce. I recommend brushing the bread with garlic-infused olive oil and baking at 400°F for 5-7 minutes until puffed and golden.
For a gluten-free option, corn tortillas or cauliflower naan (like Caulipower brand) hold up well to the creamy dal. 🌾
Another great choice is garlic bread—simply toast a baguette with butter, minced garlic, and parsley until crispy. The buttery contrast balances the spiced chickpeas perfectly. If you’re meal prepping, store bread separately and warm in a toaster oven for 3-4 minutes before serving.
Vegetable Accompaniments
Fresh cucumber raita adds a cooling contrast to the warm dal. Mix 1 cup grated cucumber with 2 tbsp vegan yogurt, 1 tsp chaat masala, and a pinch of salt.
The tangy, crunchy texture cuts through the richness of the coconut milk. For extra freshness, add chopped mint leaves and a squeeze of lemon juice. 🥒
Sautéed spinach or kale with garlic and a pinch of turmeric makes a nutrient-packed side. Heat 1 tbsp oil in a pan, add 2 cloves minced garlic, and toss in 2 cups chopped greens until wilted.
Finish with a splash of lemon juice to brighten the flavors. This side adds a vibrant pop of color to your plate.
Protein Boosters
For a complete meal, stir in 1 cup cooked quinoa or lentils into the dal for extra protein. Quinoa adds a nutty flavor and fluffy texture, while puffed brown rice (like Lotus brand) gives a light, crispy contrast.
Both options bulk up the dish without overpowering the chickpea flavor. 🌱
If you’re serving this as a main course, consider adding toasted cashews or pumpkin seeds for crunch. Toast 2 tbsp cashews in a dry pan for 2 minutes until golden, then sprinkle on top. The seeds add a satisfying texture and extra nutrients to balance the meal.
Drink Pairings
A mango lassi (blended mango, yogurt, and cardamom) is the perfect refreshing drink to pair with this dish. For a non-dairy option, blend 1 cup frozen mango chunks with 1 cup coconut milk and 1 tsp honey until smooth. The sweetness complements the spicy, savory dal beautifully. 🍹
For a caffeine kick, chai tea (especially masala chai) enhances the warm spices in the dal. Brew 1 black tea bag with 1 cup hot water, add 1 tsp chai spice mix, and let steep for 5 minutes.
Serve with a splash of steamed milk for a cozy pairing. If you prefer something lighter, sparkling mint lemonade adds a crisp finish.
Nutrition facts
Frequently asked questions
Do I need to soak split chickpeas before making this Instant Pot chana dal?
No soaking is required! This recipe uses split chickpeas, which cook much faster than whole chickpeas—just rinse them well before adding to the pot. The 8-minute pressure cook time ensures they’re perfectly tender without any pre-soaking hassle.
Can I make this recipe without coconut milk?
For a lighter version, replace the coconut milk with 1 cup extra water or 1/2 cup blended cashews for creaminess. The dish will still be flavorful, though the texture will be slightly thinner. For a tangy twist, stir in 1/4 cup vegan yogurt at the end.
Why does my chana dal taste too bland after pressure cooking?
Blandness often happens when spices aren’t toasted enough or the cooking liquid dilutes the flavors. Always sauté your spices on medium-high heat for 30 seconds to release their aromas before adding chickpeas. If needed, add a pinch of asafetida (hing) or extra lemon juice at the end for depth. The Instant Pot’s steam can also mute flavors—simmer uncovered for 2 minutes after cooking to concentrate the sauce.
How can I adjust the spice level for kids or sensitive palates?
Reduce the red chili powder to 1/4 teaspoon and omit cayenne entirely. For warmth without heat, add 1/2 teaspoon sweet paprika instead. Kids often love the creamy coconut milk base—just serve it with mild garlic naan or steamed veggies to balance the flavors.
Can I make this chana dal in a regular pot instead?
Yes, but it’ll take longer—simmer 1.5 cups split chickpeas with spices and 4 cups water for 25-30 minutes until tender. The Instant Pot’s pressure cooking cuts time by 75% while preserving texture. For stovetop, use a heavy pot and keep heat at a gentle simmer to avoid breaking the chickpeas.

- Crock Pot Round Steak Recipe: Slow-Sear Crust With Juicy Center - November 6, 2026
- Candied Sweet Potatoes Crock Pot Recipe: Caramelized Sweetness With Zero Effort - November 6, 2026
- Steak Recipe Crock Pot: Juicy, Caramelized Crust in 4 Hours - November 6, 2026