
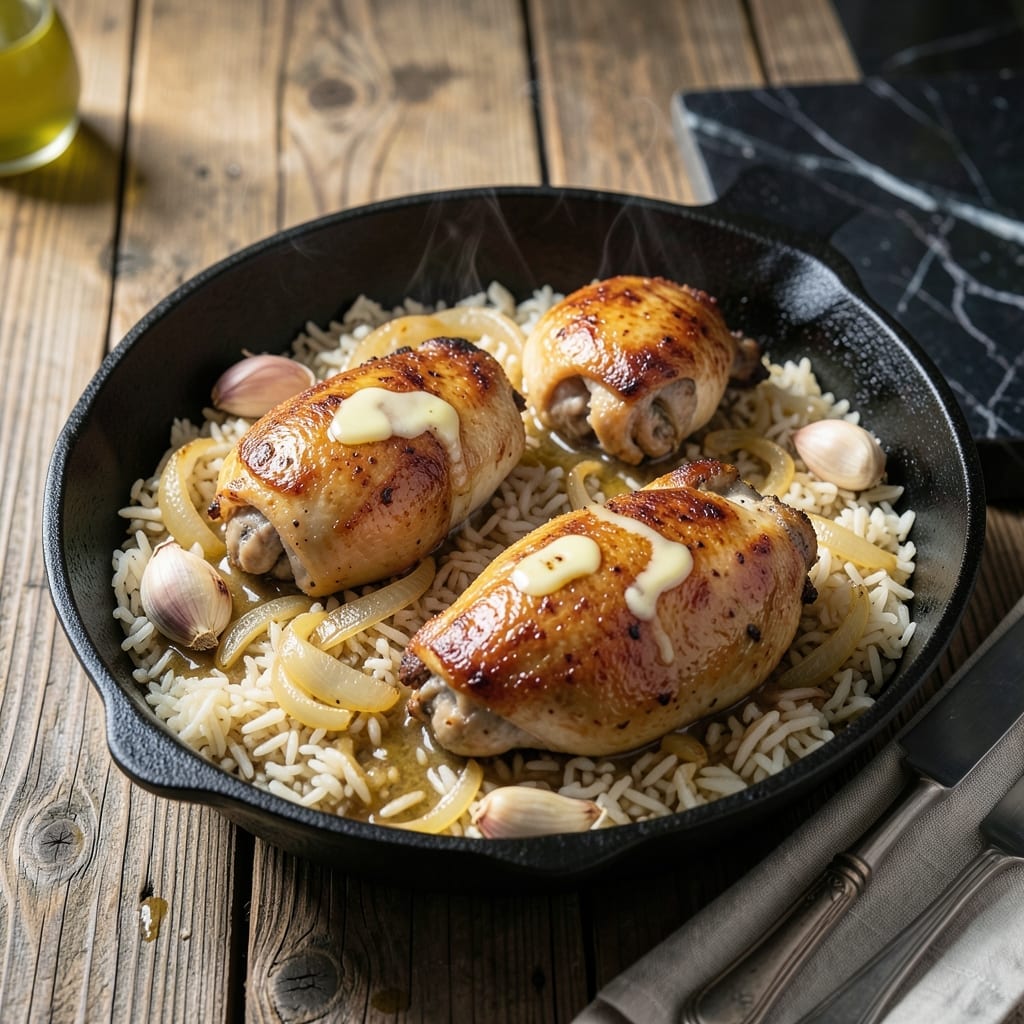
There’s a simple joy in watching a complete meal come together in a single dish, with minimal effort and maximum flavor. This oven-baked creation delivers golden-brown chicken and perfectly fluffy rice without the fuss of multiple pots and pans.
The magic happens in the oven, where the chicken and rice cook together, allowing the flavors to meld while forming a crispy, golden crust on top. The rice absorbs the savory juices from the chicken, ensuring every bite is packed with taste.
With just one pot to clean and a hands-off baking process, this dish is as practical as it is delicious. The result is tender chicken, fluffy grains, and a satisfying meal that feels like it took hours to prepare.
Ideal for busy weeknights or lazy weekends, this method guarantees consistent, restaurant-quality results with minimal active time.
Ingredients for Chicken and Rice One Pot Oven
Golden-brown chicken and fluffy rice require just these pantry staples and a single pot.
| Ingredient | Amount | Notes |
|---|---|---|
| Chicken Thighs 🍗 | 4 pieces | Boneless, skin-on for crispiness |
| Long-Grain White Rice 🍚 | 1 ½ cups | Rinsed until water runs clear |
| Chicken Broth 🥣 | 2 ½ cups | Low-sodium preferred for control |
| Unsalted Butter 🧈 | 2 tbsp | Melted, for browning chicken |
| Yellow Onion 🧅 | 1 whole | Medium, finely diced |
| Garlic Cloves 🧄 | 3 cloves | Minced for aromatic base |
| Dried Thyme 🌿 | 1 tsp | Crushed between fingers for release |
| Dried Rosemary 🍃 | 1 tsp | Crushed for even distribution |
| Paprika 🌶️ | 1 tsp | Sweet or smoked for color |
| Kosher Salt 🧂 | 1 ½ tsp | Diamond Crystal preferred for texture |
| Freshly Ground Black Pepper 🌶️ | ½ tsp | Coarse grind for texture |
| Fresh Parsley 🌿 | ¼ cup | Chopped, for garnish |
| All-Purpose Flour 🌾 | ¼ cup | For light dusting on chicken |
The chicken quality dictates the final texture. Bone-in, skin-on thighs deliver the most flavor and juiciness, though boneless works in a pinch. Whole Foods or Costco offer consistent quality. For the rice, long-grain varieties like basmati or jasmine hold up best to the oven’s heat without turning mushy. Rinsing the rice removes excess starch, preventing a gummy result.
Substitute chicken breasts if preferred, but reduce baking time by 10 minutes to avoid dryness. Vegetable broth can replace chicken broth for a vegetarian version. No fresh parsley? Dried parsley at half the amount works, though fresh adds that vibrant pop. For extra depth, a splash of white wine in the broth adds complexity without overpowering.
This dish reheats exceptionally well—store leftovers in an airtight container for up to 4 days. The rice may absorb more liquid upon standing, so add a splash of broth when reheating. Freezes beautifully for up to 3 months. Always bring to room temperature before baking if using frozen chicken.
Why You’ll Love This Recipe
- One Pot Magic: I just dump everything in, pop it in the oven, and let the chicken thighs and rice soak up all that buttery broth flavor.
- Rich & Cozy: The onion melts into the rice while the chicken stays juicy—honestly, it’s comfort food at its best.
- Weeknight Hero: Between us, this is my go-to for busy Tuesdays when I need something filling and fast.
- Budget Stretcher: A pack of thighs and a cup of rice feed my whole family, with leftovers for lunch the next day.
Step-by-Step Instructions for Chicken and Rice One Pot Oven Dish
Master the technique for crispy chicken skin and perfectly cooked rice with this streamlined approach.
Step 1: Season and Prepare the Chicken Thighs
Pat the 4 pieces Chicken Thighs completely dry with paper towels. This removes excess moisture, which is essential for achieving crispy skin. Season both sides generously with 1 tsp Paprika, 1 tsp Dried Thyme, 1 tsp Dried Rosemary, 1.5 tsp Kosher Salt, and 0.5 tsp Freshly Ground Black Pepper. The paprika adds color while the herbs infuse the meat with aromatic depth.
Lightly dust each thigh with 0.25 cup All-Purple Flour, shaking off any excess. This thin coating creates a light crust that locks in juices. Set the seasoned thighs aside on a plate while you prepare the rice mixture.
Step 2: Sear the Chicken for Maximum Flavor
Heat a large oven-safe skillet or Dutch oven over medium-high heat. Add the 2 tbsp Unsalted Butter and let it melt completely. Once the butter begins to foam, carefully place the chicken thighs skin-side down in the pan. Sear undisturbed for 5-6 minutes until the skin turns deep golden brown and crispy.
Flip the thighs and sear the other side for 3-4 minutes. The skin should release easily from the pan when it’s properly crisped. Remove the chicken and set aside on a clean plate, leaving the flavorful butter and browned bits in the skillet.
Step 3: Build the Rice Base in the Same Skillet
In the same skillet, add the finely diced 1 whole Yellow Onion and sauté for 3-4 minutes until translucent and soft. Add the 3 cloves Garlic Cloves and cook for 30 seconds until fragrant. These aromatics form the flavor foundation for your rice.
Stir in the 1.5 cups Long-Grain White Rice, coating the grains in the buttery onion mixture. Pour in the 2.5 cups Chicken Broth and bring to a gentle boil. The rice should be fully submerged in the liquid, which will absorb as it cooks.
Step 4: Combine and Bake to Perfection
Return the seared chicken thighs to the skillet, nestling them skin-side up into the rice mixture. The skin should remain above the liquid to maintain its crispness. Cover the skillet with a tight-fitting lid or foil.
Transfer the skillet to a preheated 375°F oven and bake for 25-30 minutes. The dish is done when the chicken reaches an internal temperature of 165°F and the rice has absorbed all the liquid, appearing tender and fluffy.
Step 5: Rest and Garnish Before Serving
Remove the skillet from the oven and let it rest, covered, for 5-10 minutes. This allows the rice to finish steaming and the chicken juices to redistribute. The resting period ensures each serving has moist, flavorful meat and perfectly cooked grains.
Just before serving, sprinkle the dish with 0.25 cup Fresh Parsley for a burst of color and freshness. Serve hot directly from the skillet, ensuring each portion includes both chicken and rice for a complete, satisfying meal.
Pro Tips For Making Chicken And Rice One Pot Oven
- Preheat the Dutch Oven: Always preheat your Dutch oven in the oven for 10 minutes before adding the chicken—this guarantees a proper sear on the thighs before the rice steams.
- Brown the Chicken Well: Sear the chicken thighs skin-side down until golden and crisp, about 5-7 minutes; skip this and the rice will lack depth.
- Use Room-Temp Broth: I learned this the hard way—cold broth straight from the fridge slows the cooking and can leave the rice underdone in spots.
- Rest Before Serving: Let the pot sit covered for 10 minutes after baking—this lets the rice absorb the last of the liquid and the chicken reabsorb its juices.
Make-Ahead Tips for This Recipe
Overnight Prep
Assemble the entire dish the night before, but stop before baking. After searing the chicken and preparing the rice mixture, let everything cool completely, then cover tightly with plastic wrap and refrigerate for up to 12 hours. 📅
Morning Bake
When ready to cook, let the dish sit at room temperature for 30 minutes while preheating the oven to 375°F. This ensures even cooking. Bake covered for 30-35 minutes, then uncover and bake 5-10 minutes to crisp the skin.
Freezer-Friendly
For longer storage, assemble the dish (unbaked) and freeze in an airtight container for up to 3 months. Thaw overnight in the fridge before baking as directed. I always label mine with the date to stay organized. ❄️
Partial Prep
Short on time? Pre-measure and chop all ingredients the night before. Store chicken in a sealed container with seasoning and rice mixture separately. In the morning, simply sear and bake as usual—this cuts active prep to 15 minutes.
Reheating Leftovers
Store cooked leftovers in the fridge for up to 4 days. Reheat in a covered skillet over medium-low heat with 2 tbsp broth to restore moisture. Microwave works too—cover and heat in 1-minute bursts, stirring between each.
Portion Control
Divide the unbaked dish into individual ramekins for perfect single servings. Bake at 375°F for 20-25 minutes. This is ideal for meal prep—just grab and bake when needed. I use 8-ounce ramekins for hearty portions.
Nutrition Facts
Frequently Asked Questions
Can I use chicken breasts instead of thighs?
Yes, but reduce baking time by 10 minutes to prevent dryness. Thighs stay juicier, but breasts work if you prefer white meat. Always check internal temp reaches 165°F.
What if my rice is still crunchy after baking?
Add 1/2 cup hot broth to the skillet, cover, and return to oven for 10-15 minutes. This gives the rice more time to absorb liquid and soften.
Do I need to rinse the rice first?
Rinsing removes excess starch that could make your rice gummy. Continue until the water runs clear for best texture.
Can I make this in a glass baking dish?
Yes, but sear the chicken in a skillet first, then transfer to your dish. Use the same 375°F temperature and cover tightly with foil.

- 6 Oz Chocolate Chip Cookie Recipe: Perfectly Balanced Crispy Edges and Chewy Hearts - September 25, 2026
- 6-Inch Coffee Cake Recipe: Vanilla Bean Swirls and Buttery Streusel Topping - September 25, 2026
- 1 Hour Soup Recipe: Velvety Richness Without the Wait - September 25, 2026