
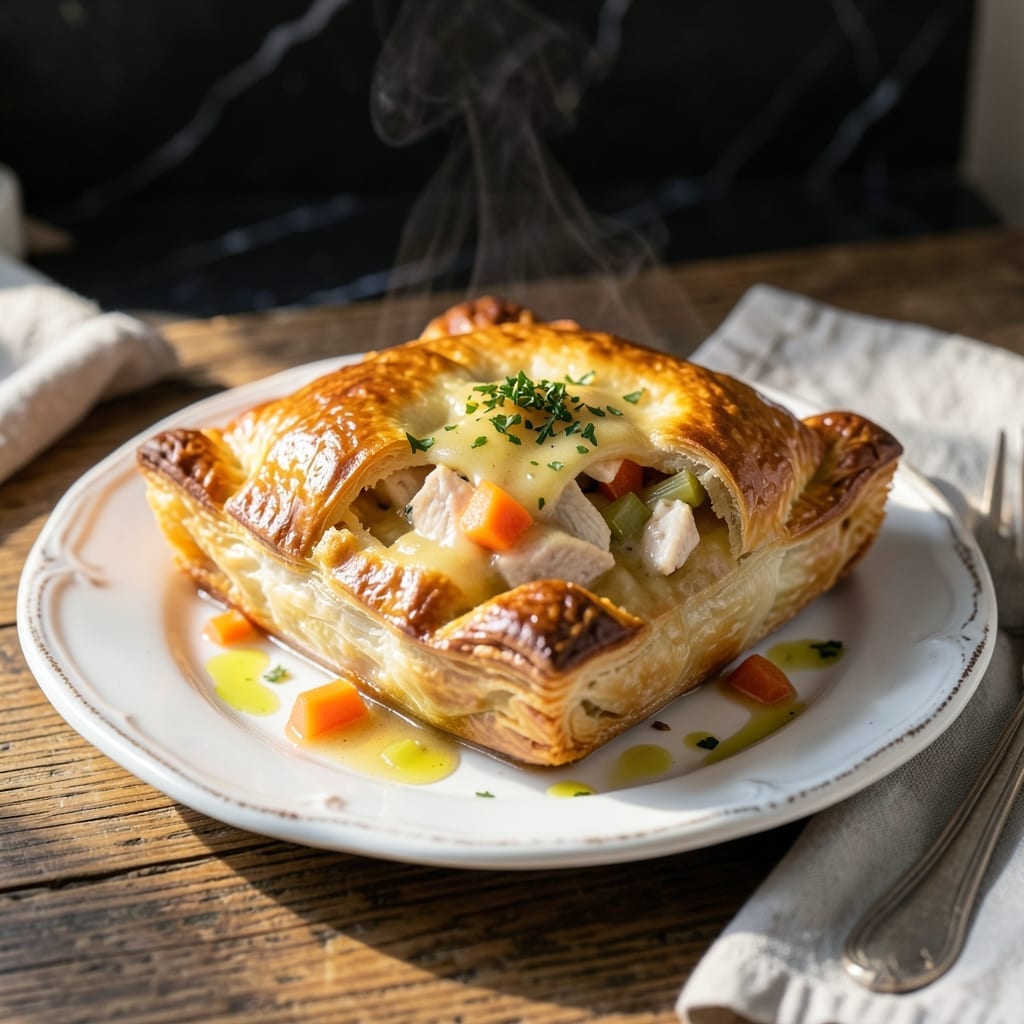
There’s something deeply satisfying about handheld comfort food that delivers all the warmth of a classic meal in portable form. This creation captures the essence of traditional pot pie with a convenient twist.
The secret lies in a flaky crust that encases a rich, creamy filling packed with tender chicken and vegetables. Every bite offers the familiar flavors of a beloved dish, but designed for on-the-go enjoyment.
Perfectly golden and crisp, these individual pies make an impressive presentation while keeping all the hearty goodness contained. The filling stays moist and flavorful, never dry or bland.
Ideal for picnics, lunches, or a comforting dinner, this approach proves that great taste doesn’t need to be complicated or messy.
Ingredients for Chicken Pot Pie Hand Pie
Flaky crust meets creamy chicken filling packed with vegetables in these portable comfort classics.
| Ingredient | Amount | Notes |
|---|---|---|
| All-Purpose Flour 🌾 | 2 ½ cups | Plus extra for dusting |
| Unsalted Butter 🧈 | 1 cup | Cold, cubed for flaky layers |
| Ice Water 💧 | ¼ cup | Plus 1 tbsp as needed |
| Boneless Skinless Chicken Breast 🍗 | 1 lb | Diced into 1/2-inch pieces |
| Carrots 🥕 | 2 whole | Peeled and finely diced |
| Celery Stalks 🥬 | 2 whole | Finely diced for texture |
| Yellow Onion 🧅 | 1 whole | Small dice for even cooking |
| Frozen Peas 🌱 | ¾ cup | No need to thaw |
| Garlic Cloves 🧄 | 2 cloves | Minced for depth of flavor |
| Fresh Thyme Leaves 🌿 | 1 tbsp | Stems removed, chopped |
| Chicken Stock 🍲 | 1 ¼ cups | Low-sodium preferred |
| Heavy Cream 🥛 | ½ cup | Full-fat for richness |
| All-Purpose Flour 🌾 | ¼ cup | For thickening the filling |
| Salt 🧂 | 1 tsp | Diamonds Crystal kosher variety |
| Black Pepper 🌶️ | ½ tsp | Freshly ground preferred |
The crust demands precision. King Arthur Flour is the gold standard for all-purpose, but Gold Medal works too. Use European-style butter (like Plugrá or Kerrygold) for superior flakiness—higher fat content means more layers. Keep everything ice-cold: chill your flour, freeze your butter, and use the coldest water from the tap. The chicken breast should be air-chilled if possible (check labels at Whole Foods).
Need to swap the protein? Rotisserie chicken (shredded) saves time, or try turkey breast for a lighter option. Vegetarian version? Mushrooms or chickpeas hold up well. No heavy cream? Whole milk plus 1 tbsp cornstarch mimics the thickness. Fresh thyme can be replaced with 1 tsp dried, but reduce other dried herbs by half if using. Frozen mixed vegetables work in a pinch.
Assembled pies freeze beautifully before baking—wrap tightly in plastic and foil for up to 2 months. Baked pies keep 3-4 days in the fridge; reheat in a toaster oven to revive the crust. The dough can be made 2 days ahead and refrigerated, or frozen for 1 month. Always let cold dough sit at room temperature for 10 minutes before rolling for easier handling.
Why You’ll Love This Recipe
- No-Fuss Pastry: I use just flour, butter, and ice water for the crust—no fancy techniques, just flaky layers every time.
- That Golden Bite: The chicken and carrots inside get this rich, creamy filling, and the edges turn perfectly crisp.
- Grab-and-Go Meals: I pack these for lunches or picnics. They’re just as good cold as they are fresh from the oven.
- Budget Stretcher: One batch makes enough for dinner plus leftovers, and chicken breasts keep it affordable.
Step-by-Step Instructions for Chicken Pot Pie Hand Pies
Master the technique for achieving flaky pastry and rich filling in this portable comfort classic.
Step 1: Prepare the Flaky Pastry Dough
In a food processor, pulse the 2.5 cups all-purpose flour with 1 tsp salt to combine. Add the 1 cup unsalted butter, cubed and chilled, and pulse until the mixture resembles coarse crumbs with pea-sized butter pieces visible. This uneven texture is critical for creating flaky layers in your crust.
With the processor running, drizzle in the 0.25 cup ice water through the feed tube just until the dough begins to come together. It should hold when pressed but not form a solid ball. Turn the dough out onto a lightly floured surface, divide into two equal portions, flatten into discs, wrap in plastic, and refrigerate for 1 hour. This chilling step prevents the butter from melting prematurely, which would compromise the flakiness.
Step 2: Create the Savory Filling
In a large skillet over medium heat, cook the diced 1 lb boneless skinless chicken breast until no longer pink, about 6-8 minutes. Transfer to a plate and set aside. In the same skillet, add the finely diced 2 carrots, 2 celery stalks, and 1 yellow onion. Sauté for 5-7 minutes until the vegetables soften and the onion becomes translucent.
Add the minced 2 cloves garlic cloves and 1 tbsp fresh thyme leaves, cooking for 1 minute until fragrant. Sprinkle the 0.25 cup all-purpose flour over the vegetables and stir to create a roux. Gradually whisk in the 1.25 cups chicken stock and 0.5 cup heavy cream, bringing the mixture to a simmer. Return the chicken to the skillet along with the 0.75 cup frozen peas, 1 tsp salt, and 0.5 tsp black pepper. Simmer for 5 minutes until the filling thickens enough to coat the back of a spoon.
Step 3: Assemble the Hand Pies
On a lightly floured surface, roll one disc of dough to ⅛-inch thickness. Using a 5-inch round cutter, cut out circles of dough. Place 2 tablespoons of the cooled filling in the center of each circle. Lightly brush the edges with water, then fold the dough over the filling to create a half-moon shape. Press the edges firmly with a fork to seal, ensuring no filling escapes during baking.
Transfer the assembled pies to a parchment-lined baking sheet. Cut a small slit in the top of each pie to allow steam to escape. Chill the assembled pies in the refrigerator for 15 minutes while preheating the oven to 375°F. This final chill helps maintain the pastry’s structure during baking.
Step 4: Bake to Golden Perfection
Bake the chilled hand pies in the preheated 375°F oven for 25-30 minutes, or until the crust is golden brown and the filling is bubbling. Rotate the baking sheet halfway through the baking time to ensure even browning. The pies are done when the crust is deeply golden and flaky, and the filling is hot throughout.
Remove from the oven and let the pies cool on the baking sheet for 5 minutes before transferring to a wire rack. This brief rest allows the filling to set slightly, making the pies easier to handle. Serve warm for the ultimate comfort experience, with the flaky crust and creamy filling in every bite.
Pro Tips For Making Chicken Pot Pie Hand Pie
- Chill the Dough: Let your dough rest in the fridge for at least 30 minutes before rolling—I learned this the hard way after my first few hand pies cracked open in the oven.
- Dice Chicken Small: Cut the boneless chicken breast into ¼-inch pieces so it cooks through quickly and fits neatly into each hand pie without tearing the crust.
- Pre-Cook the Carrots: Sauté the carrots for 3-4 minutes before mixing into the filling; raw carrots won’t soften enough in the short bake time.
- Seal with Cold Water: Use a dab of ice water to help the edges stick together before crimping—this trick keeps the filling from leaking out during baking.
Serving Suggestions for Leftovers
Elegant Plating
Arrange these golden pies on a wooden serving board for rustic charm. Space them slightly apart to showcase their perfect crimp. I like to add a sprig of fresh thyme between each for a pop of color and subtle aroma.
Dipping Sauces
Offer warm chicken gravy in small ramekins for dipping—the extra richness complements the flaky crust. A side of Dijon mustard adds a tangy contrast that cuts through the creaminess. I serve both for variety.
Fresh Pairings
A simple green salad with lemon vinaigrette balances the richness beautifully. The acidity refreshes your palate between bites. Toss 4 cups mixed greens with 2 tbsp olive oil and 1 tbsp lemon juice. 🥗
Beverage Choices
Pair with a crisp Sauvignon Blanc—its citrus notes complement the thyme and vegetables. For non-alcoholic options, sparkling apple cider adds festive bubbles that cleanse your palate. Both work wonderfully with the buttery crust.
Garnish Ideas
Brush the tops with 1 beaten egg yolk mixed with 1 tbsp water before baking for extra shine. After baking, sprinkle with flaky sea salt to enhance all the flavors. These small touches make a big visual impact.
Serving Temperature
These are best served warm, straight from the oven. If reheating, warm in a 350°F oven for 10 minutes to revive the crust. I always let them cool for 5 minutes first to prevent filling from spilling out. 🔥
Nutrition Facts
Frequently Asked Questions
Can I use store-bought pie crust?
Yes, store-bought crust works in a pinch. Chill it first and roll to ⅛-inch thickness for best results. Homemade crust yields superior flakiness.
How do I prevent the filling from leaking?
Seal edges tightly with a fork and chill assembled pies for 15 minutes before baking. A small slit on top allows steam to escape without bursting.
Can I make these ahead of time?
Assemble and freeze unbaked pies for up to 2 months. Bake from frozen, adding 5-10 minutes to the baking time. Perfect for meal prep!
What’s the best way to reheat leftovers?
Warm in a 350°F oven for 10 minutes to restore crispness. Microwaving makes the crust soggy, so avoid it.

- 6 Oz Chocolate Chip Cookie Recipe: Perfectly Balanced Crispy Edges and Chewy Hearts - September 25, 2026
- 6-Inch Coffee Cake Recipe: Vanilla Bean Swirls and Buttery Streusel Topping - September 25, 2026
- 1 Hour Soup Recipe: Velvety Richness Without the Wait - September 25, 2026