
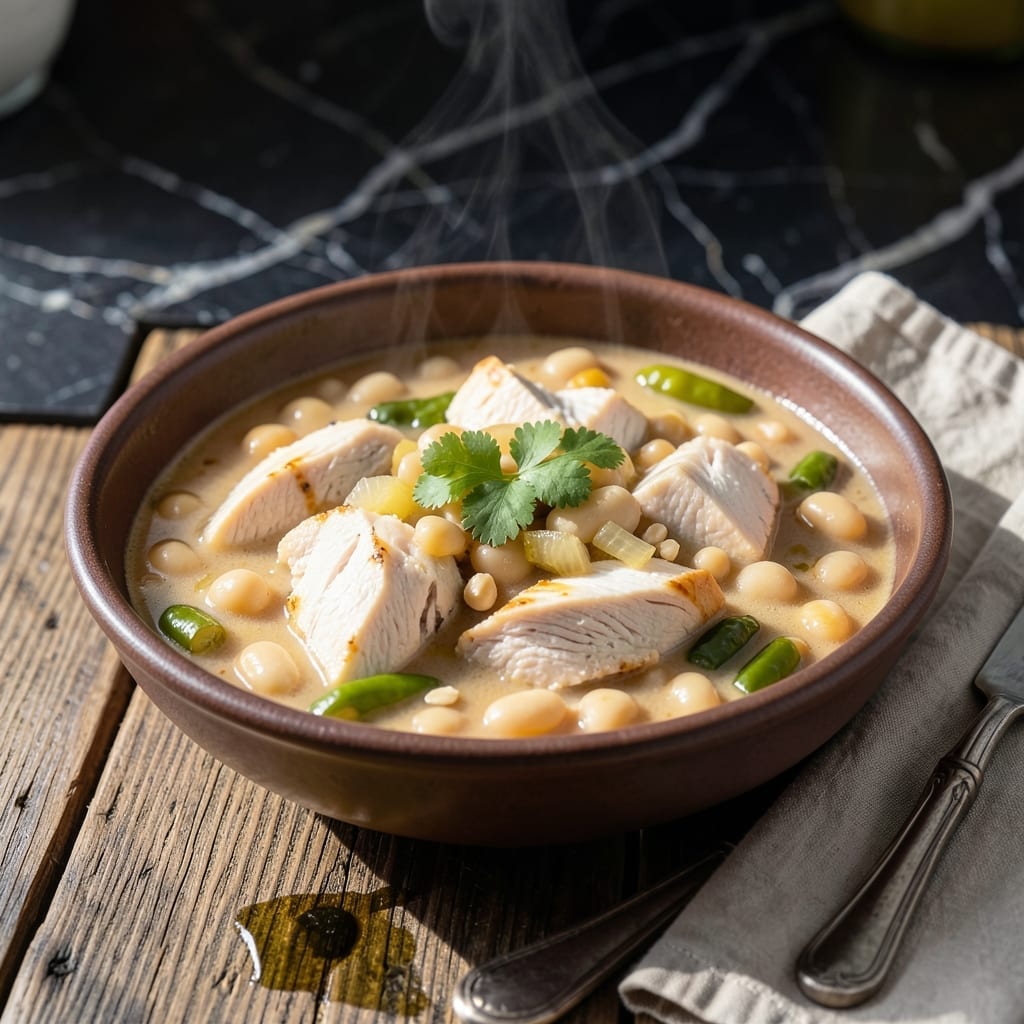
This Instant Pot white chicken chili brings restaurant-quality results to your kitchen with minimal effort. The pressure cooker transforms simple ingredients into a rich, creamy dish in under 30 minutes.
What makes this version special is the balance of tender chicken, hearty beans, and a spiced broth that warms without overwhelming. The Instant Pot locks in flavors while keeping the chicken perfectly moist.
You’ll end up with a thick, satisfying chili that’s packed with protein and fiber. It’s ideal for busy weeknights or cozy weekends when you want comfort without the fuss.
Serve with crusty bread or over rice for a complete meal. This recipe delivers every time.
Ingredients for White Chicken Chilli Instant Pot
Simple ingredients transform into a rich, creamy chili with minimal effort. Nothing complicated here.
| Ingredient | Amount | Notes |
|---|---|---|
| Boneless Skinless Chicken Breasts 🍗 | 1 ½ lb | Cut into bite-sized pieces |
| Cannellini Beans 🥜 | 2 cans | Drained and rinsed |
| Great Northern Beans 🥜 | 1 can | Drained and rinsed |
| Yellow Onion 🧅 | 1 whole | Diced medium |
| Garlic Cloves 🧄 | 4 cloves | Minced finely |
| Green Chile Peppers 🌶️ | 2 cans | Diced, mild or hot |
| Chicken Broth 🥣 | 3 cups | Low-sodium preferred |
| Ground Cumin 🌿 | 1 ½ tsp | Toasted for depth |
| Dried Oregano 🍃 | 1 tsp | Mexican oregano ideal |
| Ground White Pepper 🧂 | ½ tsp | Subtle heat |
| Salt 🧂 | 1 tsp | Adjust to taste |
| Heavy Cream 🥛 | ½ cup | Full-fat for creaminess |
| Cornstarch 🌾 | 2 tbsp | For thickening |
| Olive Oil 🫒 | 2 tbsp | For sautéing |
| Fresh Cilantro 🌿 | ¼ cup | Chopped, for garnish |
The chicken is the foundation. Boneless, skinless breasts stay tender under pressure (thighs work too if you prefer). Costco has great bulk packs, or grab fresh from Whole Foods. For the beans, canned is totally fine—just give them a good rinse. The green chiles are key for that authentic flavor. Look for Old El Paso or store brand, whatever’s on sale (the 4 oz cans).
No cannellini beans? Navy beans or Great Northern in a pinch work fine. Fresh out of green chiles? Jalapeños (diced, with seeds removed) add similar heat. The cream can be half-and-half for a lighter version, but full-fat gives that restaurant-quality richness. If you’re avoiding dairy, coconut milk works surprisingly well here (just use the full-fat canned kind).
Leftovers keep beautifully—actually taste better the next day. Store in the fridge for up to 4 days or freeze for 3 months. I like to portion into containers for easy lunches (worth the extra minute).
Why You’ll Love This Recipe
- One Pot Wonder: I toss everything in the Instant Pot—no pre-cooking, no extra pans, just set it and forget it.
- Garlic & Bean Magic: The garlic cloves and creamy cannellini beans make this chili rich and deeply flavorful every time.
- Meal Prep Hero: I make a big batch on Sunday and it’s ready for lunches all week. (Yes, even on a Tuesday night)
- Budget Stretcher: Boneless chicken breasts and pantry beans feed my family for days without breaking the bank.
Step-by-Step Instructions for White Chicken Chili Instant Pot
This method delivers tender chicken and creamy beans with minimal hands-on time.
Step 1: Sauté Aromatics and Chicken
Set your Instant Pot to Sauté mode and add the 2 tbsp Olive Oil. Once hot, add the diced Yellow Onion and cook for 3-4 minutes until soft and translucent. Stir occasionally to prevent browning.
Add the minced Garlic Cloves and cook for 30 seconds until fragrant. Then, add the 1.5 lb Boneless Skinless Chicken Breasts cut into bite-sized pieces. Cook for 4-5 minutes, stirring occasionally, until the chicken is no longer pink on the outside.
Step 2: Add Spices, Beans, and Liquids
Stir in the 1.5 tsp Ground Cumin, 1 tsp Dried Oregano, 0.5 tsp Ground White Pepper, and 1 tsp Salt. Cook for 1 minute to toast the spices and deepen their flavor.
Add the 2 cans Cannellini Beans, 1 can Great Northern Beans, 2 cans Green Chile Peppers, and 3 cups Chicken Broth. Stir everything together, making sure to scrape any browned bits from the bottom of the pot to prevent burning.
Step 3: Pressure Cook to Perfection
Secure the lid on your Instant Pot and set the valve to Sealing. Cook on High Pressure for 12 minutes. The pot will take about 10-15 minutes to come to pressure before the cooking time begins.
Once the cooking time is complete, allow the pressure to release naturally for 10 minutes, then quick-release any remaining pressure. Open the lid carefully, as there will be hot steam.
Step 4: Thicken and Finish with Cream
In a small bowl, mix the 2 tbsp Cornstarch with 2 tbsp of cold water to create a slurry. Stir the slurry into the chili and set the Instant Pot to Sauté mode again. Cook for 2-3 minutes until the mixture thickens slightly.
Stir in the 0.5 cup Heavy Cream and cook for an additional 1-2 minutes until the chili is creamy and heated through. Taste and adjust the seasoning with additional Salt if needed.
Step 5: Garnish and Serve
Ladle the chili into bowls and garnish each serving with a sprinkle of the 0.25 cup Fresh Cilantro. The cilantro adds a fresh, bright contrast to the rich, spiced flavors of the dish.
Let the chili sit for 5 minutes before serving to allow the flavors to meld together. This dish tastes even better the next day as the flavors continue to develop.
Pro Tips For Making White Chicken Chilli Instant Pot
- Shred Chicken Last: I learned this the hard way—resist the urge to shred the chicken immediately after cooking. Let it rest for 5-10 minutes in the pot first, or it’ll turn dry and stringy.
- Sauté the Aromatics: Cook the yellow onion and garlic in the Instant Pot before adding liquids. About 3 minutes on sauté mode softens them just enough to build real flavor.
- Drain the Beans: Always rinse and drain the cannellini and great northern beans, even if it feels tedious. Skipping this leaves the chili with a metallic, starchy taste.
- Use Room-Temp Chicken: Sounds weird, but it works: pull the chicken breasts out of the fridge 15 minutes before cooking. It cooks more evenly and avoids that rubbery texture I used to get.
Wine and Beer Pairings for This Dish
Crisp White Wines
A Sauvignon Blanc from New Zealand cuts through the creaminess with its bright acidity and citrus notes. I love Kim Crawford or Oyster Bay—both widely available and consistently delicious. The zesty finish refreshes your palate between bites. 🍷
Light Red Options
For red lovers, a chilled Pinot Noir works beautifully. Look for Meiomi or La Crema from California—their red fruit flavors complement the chili’s spice without overpowering it. Serve slightly cool for best results.
Mexican Lager Pairing
Nothing beats a cold Modelo Especial or Pacifico with this dish. The crisp, clean profile of a Mexican lager cleanses your palate and enhances the chili’s flavors. Add a lime wedge for extra brightness.
Craft Beer Choices
A wheat beer like Blue Moon or Allagash White offers a subtle citrus note that pairs well with the chili’s spices. The creamy texture of the beer also mirrors the dish’s richness.
Non-Alcoholic Option
For a non-alcoholic pairing, try sparkling limeade or ginger beer. The effervescence and citrus notes provide a refreshing contrast to the creamy, spiced chili. I love Fever-Tree Ginger Beer for its bold flavor. ✨
Nutrition Facts
Frequently Asked Questions
Can I use chicken thighs instead of breasts?
Boneless, skinless thighs stay even more tender and add richer flavor. Cook time remains the same, but thighs are more forgiving if slightly overcooked.
How do I make this dairy-free?
Swap the heavy cream for full-fat coconut milk. It provides the same creaminess without dairy. Stir it in at the very end, just like the original recipe.
Why did my chili turn out watery?
This usually happens if the cornstarch slurry wasn’t cooked long enough. Simmer for the full 2-3 minutes after adding it, stirring constantly, to reach the perfect thickness.
Can I make this ahead of time?
Yes! The flavors actually deepen overnight. Store in the fridge for up to 4 days or freeze for 3 months. Reheat gently on the stovetop.

- 6 Oz Chocolate Chip Cookie Recipe: Perfectly Balanced Crispy Edges and Chewy Hearts - September 25, 2026
- 6-Inch Coffee Cake Recipe: Vanilla Bean Swirls and Buttery Streusel Topping - September 25, 2026
- 1 Hour Soup Recipe: Velvety Richness Without the Wait - September 25, 2026