
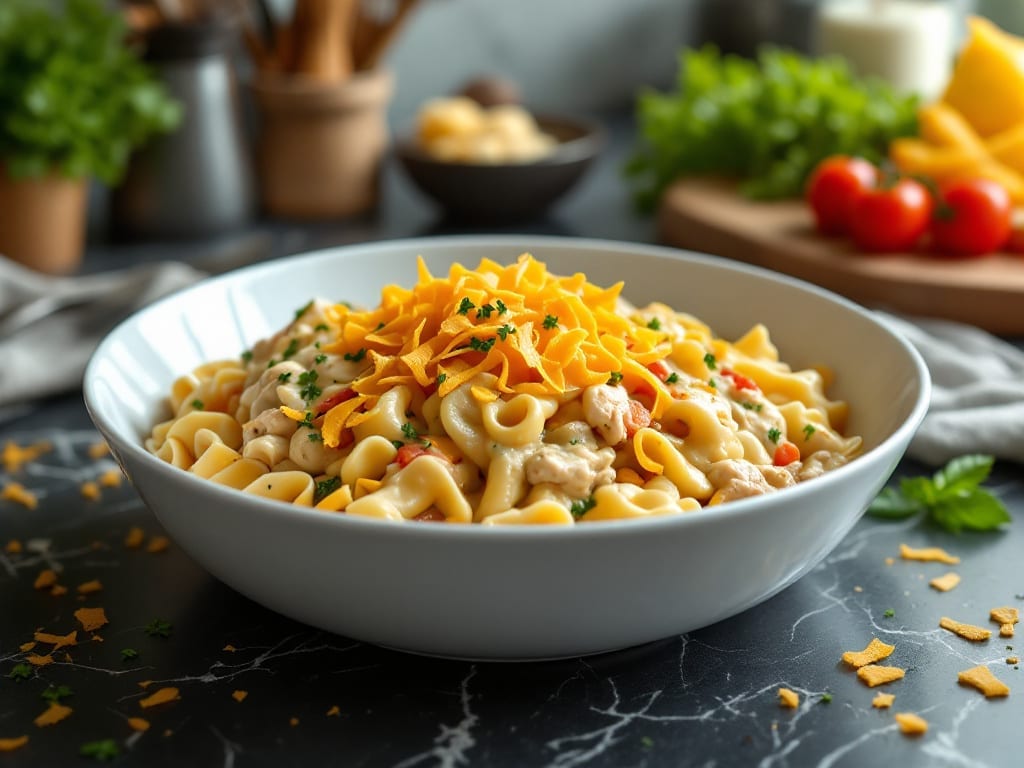
Creating a chicken pot pie noodle skillet that delivers all the creamy comfort of classic pot pie in a single pan is the ultimate weeknight solution.
The secret lies in combining tender chicken, fluffy egg noodles, and a velvety gravy topped with a golden, crispy crust—all while keeping prep simple and cleanup minimal. I developed this recipe after years of testing one-pan techniques, ensuring every element comes together perfectly without sacrificing flavor or texture.
This dish transforms traditional pot pie into a skillet-friendly version that’s just as satisfying. The chicken cooks through in a savory broth infused with carrots, peas, and herbs, while the egg noodles absorb the rich gravy for a creamy, cohesive bite.
The crispy top, achieved with a buttery biscuit-style crust, adds a textural contrast that makes every forkful irresistible. It’s the kind of meal that feels indulgent yet requires minimal effort—ideal for busy nights when comfort is a priority.
What sets this skillet apart is how the components work together: tender chicken, al dente noodles, and a gravy thickened just enough to coat everything without being gluey. The crispy top seals in warmth while adding a satisfying crunch, turning a simple weeknight dinner into something restaurant-worthy.
Best of all, it’s ready in under an hour, with most of that time spent simmering—so you can relax while the flavors develop. Here’s how to make it.
The beauty of this recipe lies in its versatility. Swap in seasonal vegetables like mushrooms or corn, or use rotisserie chicken for an even faster prep. The skillet method ensures even cooking and easy cleanup, making it perfect for feeding a family or meal prepping for later.
Whether you’re craving classic pot pie flavors or a hands-off skillet dinner, this recipe delivers on all fronts—comfort, creamy filling, and a crispy finish.
Ingredients for chicken pot pie noodle skillet
Pantry staples plus a few fresh veggies—this skillet delivers all the comfort of pot pie with zero fuss.
| Ingredient | Amount | Notes |
|---|---|---|
| Boneless, Skinless Chicken Breast 🍗 | 1 ½ lb | Cut into bite-sized pieces |
| Egg Noodles 🍝 | 2 cups | Uncooked, medium width |
| Heavy Cream 🥛 | ½ cup | Full-fat for creaminess |
| Chicken Broth 💧 | 1 ½ cups | Low-sodium preferred |
| All-Purpose Flour 🌾 | ¼ cup | For gravy thickening |
| Unsalted Butter 🧈 | ½ cup | Cold for crispy topping |
| Carrots 🥕 | 1 cup | Diced small for even cooking |
| Yellow Onion 🧅 | 1 whole | Diced fine for sweet flavor |
| Peas 🌱 | ½ cup | Fresh or frozen works |
| Garlic Cloves 🧄 | 3 cloves | Minced for aromatic base |
| Fresh Thyme 🌿 | ¼ cup | Chopped, or dried at 1/4 amount |
| Salt 🧂 | 1 ½ tsp | Kosher or sea salt |
| Black Pepper 🌶️ | ½ tsp | Freshly ground preferred |
| Biscuit Mix 🍞 | 1 cup | For crispy topping |
The chicken breast is your workhorse here—boneless, skinless pieces cook evenly and stay tender. Grab the pre-cut package at Target if you’re short on time, but if you’re prepping ahead, cut your own into 1-inch chunks. The egg noodles? Medium width holds up best to the gravy without getting mushy. For the biscuit mix, Pillsbury Grands is my go-to—it’s foolproof and adds that perfect crispy contrast. Look for the yellow box in the baking aisle, not the refrigerated dough. Fresh thyme makes all the difference, but dried works in a pinch—just use a third of what’s called for.
No heavy cream? Half-and-half or whole milk will work, though the texture gets slightly lighter. Short on carrots? Sweet potatoes or celery add great color and sweetness. The peas? Frozen is perfect—no need to thaw, just dump them in. For the biscuit topping, Pepperidge Farm Shortbread crumbs are a great alternative if you want to skip the baking. The biscuit mix keeps for 6 months in a cool pantry, so buy extra if you’re making this often. Want extra flavor? Add 1/2 tsp smoked paprika to the biscuit mix before baking.
This skillet reheats like a dream—just cover with foil and warm in the oven for 15 minutes. The biscuit topping gets even crispier the second time around. Store leftovers in the fridge for 4 days or freeze for 3 months. I always make a double batch because it’s that good—portion into containers so you can grab and reheat later. The gravy thickens as it cools, so if it seems too thick when reheating, just add a splash of chicken broth and stir.
Why You’ll Love This Recipe
- Here’s what sold me: that crispy, golden crust on top (thanks to the flour slurry) while the inside stays silky and rich. The heavy cream and broth make it taste like a restaurant pot pie, but with half the effort.
- I’ll be real: chicken breast and heavy cream aren’t cheap, but this recipe stretches them perfectly. A single breast feeds four, and the broth and flour make it feel luxurious without breaking the bank. Plus, it’s way cheaper than takeout.
Step-by-step instructions for chicken pot pie noodle skillet
This one-pan wonder delivers all the cozy, comforting flavors you love—creamy filling, tender chicken, and a golden, crispy biscuit top.
Sauté the Vegetables and Chicken
In a large oven-safe skillet, melt the 0.5 cup unsalted butter over medium heat. Add the 1 whole yellow onion and 1 cup carrots, cooking for 5 minutes until softened. Stir in the 3 cloves garlic cloves and 0.25 cup fresh thyme, cooking for 30 seconds until fragrant.
Push the vegetables to one side of the skillet and add the 1.5 lb boneless, skinless chicken breast cut into bite-sized pieces. Season with 1.5 teaspoons salt and 0.5 teaspoon black pepper, then cook for 6-8 minutes until the chicken is no longer pink in the center. You’ll know it’s ready when the edges are golden and the internal temperature reaches 165°F.
Build the Creamy Filling
Remove the skillet from heat and stir in the 2 cups egg noodles, 1.5 cups chicken broth, and 0.5 cup heavy cream. Return the skillet to medium-low heat and bring the mixture to a gentle simmer. Cook for 8-10 minutes, stirring occasionally, until the noodles are tender and the filling thickens slightly.
Add the 0.5 cup peas and stir to heat through. The filling should be creamy but not soupy—if it’s too thin, simmer for an extra 2 minutes to thicken. Taste and adjust seasoning with more salt or pepper if needed. This is your base, so make sure it’s flavorful!
Prepare the Crispy Biscuit Topping
In a small bowl, combine the 1 cup biscuit mix and 0.25 cup all-purpose flour. Stir in 2 tablespoons cold unsalted butter (cut from the remaining 0.5 cup) until the mixture resembles coarse crumbs. Sprinkle evenly over the creamy filling in the skillet.
Here’s the trick: Use the back of a spoon to gently press the biscuit mixture into the filling, creating peaks and valleys. This ensures a crispy, golden top while keeping the filling creamy underneath. The biscuit topping should cover the entire surface but leave some gaps for that rustic, textured look.
Bake to Golden Perfection
Transfer the skillet to a preheated 375°F oven and bake for 20-25 minutes until the biscuit topping is deep golden brown and crispy. The filling should bubble slightly, and the edges of the biscuit topping should turn a rich, caramelized color.
Real talk: Your oven might run hot, so start checking at the 20-minute mark. If the topping browns too quickly, tent it loosely with aluminum foil to prevent burning while the center finishes baking. The filling should be heated through and creamy, with the biscuit topping offering that satisfying crunch.
Rest and Serve
Remove the skillet from the oven and let it rest for 5 minutes before serving. This resting time allows the filling to set slightly, making it easier to scoop and ensuring the biscuit topping stays crispy. Serve straight from the skillet for that comforting, family-style feel.
The first bite should deliver all the promises: tender chicken, creamy filling, and a crispy, buttery biscuit top. If you’re serving this to a crowd, you might want to make two skillets—they disappear fast! Pair with a simple green salad or steamed vegetables for a complete meal.
Pro Tips For Making Chicken Pot Pie Noodle Skillet
- Sear Chicken First: That bland chicken is the biggest giveaway you skipped this. Hit the breasts with a dry pan over medium-high heat for 3-4 minutes per side until golden—no broth yet. The crust locks in flavor and keeps them from turning to rubber when simmered later.
- Cook Noodles Al Dente: I used to overcook them until they turned to mush in the skillet. Boil egg noodles 1 minute less than package instructions, then drain and rinse briefly under cold water. They’ll finish cooking in the sauce without falling apart.
- Whisk the Roux Fast: The moment you add flour to the chicken broth, keep the heat medium and stir like your life depends on it. A fast, smooth roux (2-3 minutes) thickens the sauce evenly—let it brown, and you’ll taste burnt flour. (Yes, even if you’re impatient like me.)
- Deglaze with Broth: After searing the chicken, don’t wipe the pan clean—just splash in ¼ cup chicken broth right away. Scrape up those browned bits (they’re flavor gold) before adding the rest. Skimp here, and your sauce tastes flat.
Storing and reheating this chicken pot pie noodle skillet
Refrigerator Storage
Let your skillet cool completely before storing—this prevents condensation that makes the biscuit topping soggy. Transfer to an airtight container with a lid (I love Rubbermaid Brilliance containers) and refrigerate for up to 4 days.
The flavors actually deepen overnight as the gravy thickens and absorbs into the noodles. When reheating, the biscuit topping will crisp up again beautifully. ❄️
Freezer Prep Tips
For long-term storage, freeze the skillet in single-serving portions—this makes reheating a breeze. Use quart-sized freezer bags (like Ziploc Freezer Gallon) and press out excess air to prevent freezer burn.
Label with the date and freeze for up to 3 months. The biscuit topping stays crispy when reheated properly, so avoid thawing—just go straight from frozen. 💡
Oven Reheating
My favorite method is baking straight from the fridge for 15-20 minutes at 375°F. Cover the skillet loosely with aluminum foil to trap moisture, then remove the foil for the last 5 minutes to crisp the biscuit topping.
If the filling seems dry, add 1-2 tablespoons of chicken broth before reheating. The oven method keeps everything creamy and the topping perfectly crisp. 🔥
Microwave Shortcuts
For quick meals, microwave individual portions covered with a damp paper towel on high for 2-3 minutes. Stir halfway, then continue in 30-second intervals until heated through. Add 1 tablespoon of broth or milk if the filling looks dry.
The biscuit topping won’t crisp as much, but it’s still delicious—just sprinkle with extra Pillsbury Grands crumbs before serving for texture. ⚡
Make-Ahead Biscuit Topping
Prep the biscuit topping mix in advance and store it in a ziplock bag in the fridge for up to 3 days. When ready to assemble, simply sprinkle it over the filling and bake as directed.
This saves time on busy nights, and the topping still turns out golden and crispy. I often make extra mix to use in other dishes like cheesy biscuits or pot pie casseroles. 🍞
Leftovers Reinvention
Turn cold leftovers into a pot pie skillet hash by adding diced potatoes and sausage to the skillet. Reheat with 1 extra tablespoon of butter until crispy, then top with extra biscuit crumbs.
The creamy filling transforms into a hearty, savory dish perfect for lunch. This is my go-to way to use up seconds—zero waste, all flavor! 💛
Nutrition facts
Frequently asked questions
Can I use a different type of noodle instead of egg noodles?
Egg noodles work best because they hold up well to the creamy gravy without getting mushy. For alternatives, try fettuccine or penne—both add great texture. Avoid delicate noodles like angel hair, as they’ll break down too quickly in the liquid. If you prefer gluten-free, use gluten-free egg noodles or rice noodles, but they may require 1-2 extra minutes of cooking time.
How do I make this recipe vegetarian?
Swap the chicken for chickpeas or mushrooms (like cremini or shiitake) for umami depth. Use vegetable broth instead of chicken broth, and add 1 teaspoon smoked paprika to the biscuit topping for extra flavor. The creamy filling will still shine, but the texture will be slightly denser without chicken.
Why did my biscuit topping turn out soggy?
Soggy topping usually means the filling was too wet or the biscuit mix wasn’t pressed firmly enough. To fix it, ensure the gravy is slightly thickened before adding the topping. Press the biscuit crumbs down gently with the back of a spoon, and bake at 375°F for 2-3 extra minutes uncovered. For next time, chill the skillet for 10 minutes before baking to help the topping crisp up better.
Can I make this in a Dutch oven instead of a skillet?
A Dutch oven works great for even heat distribution and deeper filling. Use the same recipe, but you may need to adjust baking time to 25-30 minutes since the sides will trap more heat. The biscuit topping will still crisp beautifully, and the creamy filling will stay rich. Just make sure your Dutch oven is oven-safe and has a lid for trapping steam.
What’s the best way to reheat leftovers without drying out the biscuit topping?
For crispy results, cover the skillet loosely with foil and reheat at 375°F for 15 minutes. Remove the foil for the last 5 minutes to crisp the topping. If using the microwave, cover with a damp paper towel and heat in 30-second bursts, stirring in between. Add 1 tablespoon of broth or milk if the filling looks dry. For extra crunch, sprinkle with Pillsbury Grands crumbs before serving.

- Crock Pot Round Steak Recipe: Slow-Sear Crust With Juicy Center - November 6, 2026
- Candied Sweet Potatoes Crock Pot Recipe: Caramelized Sweetness With Zero Effort - November 6, 2026
- Steak Recipe Crock Pot: Juicy, Caramelized Crust in 4 Hours - November 6, 2026