
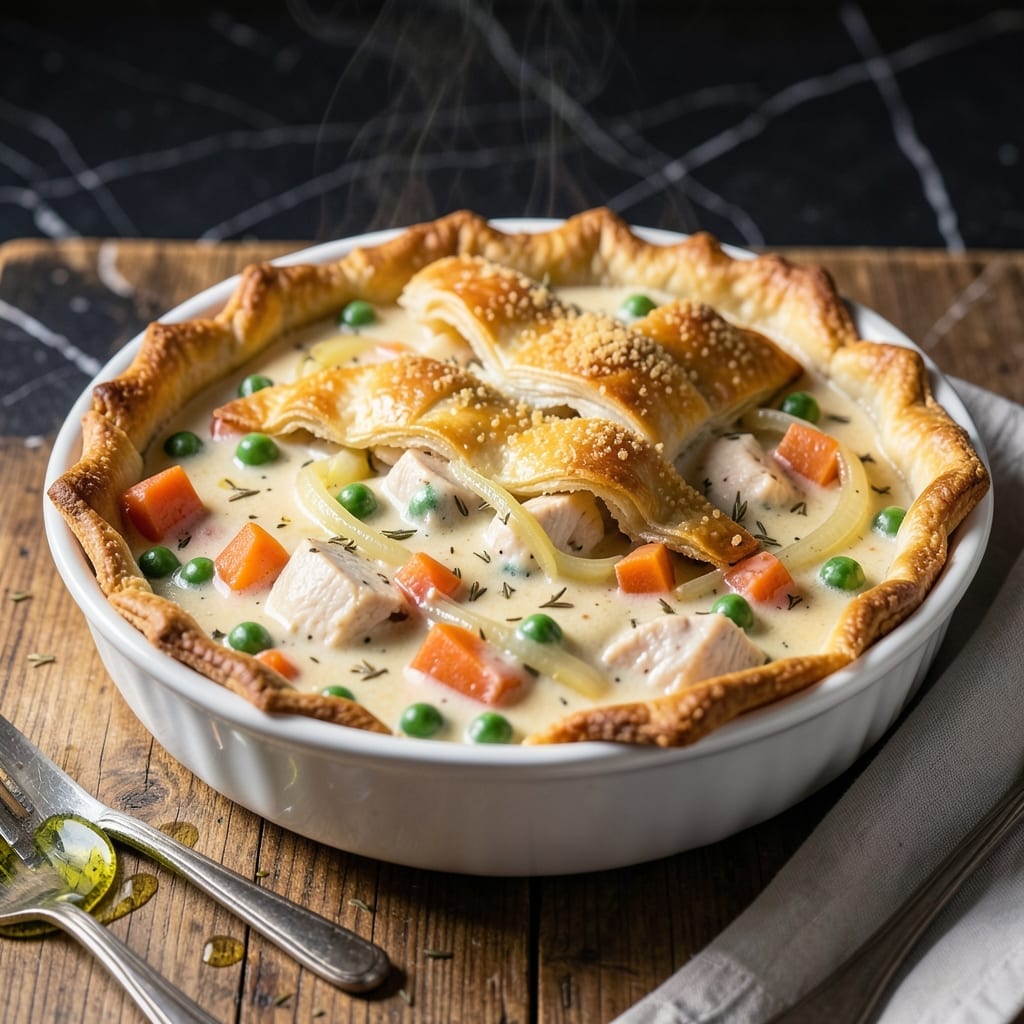
There’s something deeply comforting about a classic chicken pot pie, especially when it comes together quickly in a pressure cooker. This method delivers all the traditional flavors without the long baking time, making it perfect for busy weeknights.
The pressure cooker works its magic by tenderizing the chicken and vegetables in 15 minutes, while the herbs infuse the filling with rich, savory depth. The result is a creamy, hearty filling that tastes as if it simmered for hours.
Topped with a golden, flaky crust, this dish offers the same nostalgic appeal as the oven-baked version, but with far less effort. The steam from the pressure cooker ensures the filling stays moist and flavorful.
Serve it fresh for a satisfying, homemade meal that feels like a hug on a plate. Here’s how to make it.
Ingredients for Chicken Pot Pie Recipe for Pressure Cooker
Classic ingredients for a nostalgic meal with modern pressure cooker speed and ease.
| Ingredient | Amount | Notes |
|---|---|---|
| Boneless Chicken Breast 🍗 | 1 ½ lb | Cut into 1-inch cubes |
| Carrots 🥕 | 2 whole | Peeled and diced |
| Celery Stalks 🥬 | 2 whole | Diced fine |
| Yellow Onion 🧅 | 1 whole | Small dice |
| Frozen Peas 🌱 | 1 cup | No need to thaw |
| Unsalted Butter 🧈 | ½ cup | For roux and crust |
| All-Purpose Flour 🌾 | ½ cup | For filling and crust |
| Chicken Broth 🥣 | 1 ½ cups | Low-sodium preferred |
| Heavy Cream 🥛 | ½ cup | For creamy filling |
| Fresh Thyme 🌿 | 1 tbsp | Chopped, or 1 tsp dried |
| Fresh Rosemary 🌿 | 1 tbsp | Chopped, or 1 tsp dried |
| Garlic Cloves 🧄 | 2 cloves | Minced fine |
| Salt 🧂 | 1 tsp | Kosher or sea salt |
| Black Pepper 🌶️ | ½ tsp | Freshly ground |
| Refrigerated Pie Crust 🥧 | 1 package | 2 crusts (top and bottom) |
The chicken is the foundation. Boneless, skinless breasts are lean and cook evenly under pressure. For the herbs, fresh thyme and rosemary deliver that deep, savory flavor the intro promises. Whole Foods or Trader Joe’s have reliable fresh herb selections, but dried works in a pinch at one-third the amount. Most grocery stores carry pre-diced mirepoix to save time.
No chicken breasts? Boneless thighs stay juicier but need an extra 2 minutes under pressure. Out of fresh herbs? Poultry seasoning blends work well. The frozen peas can be swapped for corn or green beans. For the crust, homemade pie dough is ideal, but Pillsbury refrigerated crusts save time and still deliver that golden finish.
The filling keeps 3-4 days in the fridge, though the crust softens over time. Freeze unbaked pies for up to 2 months—thaw overnight before cooking. Leftovers reheat best in the oven at 350°F to revive the crust.
Why You’ll Love This Recipe
- One-Pot Wonder: I dump everything—chicken, carrots, celery, peas—straight into the pressure cooker. No extra bowls, no mess.
- Rich Comfort: The flaky crust on top with that creamy chicken and veggie filling? Pure cozy in every bite.
- Weeknight Hero: Between us, this saves me on busy evenings when I need dinner fast but still crave homemade.
- Budget Stretcher: One pound of chicken breast and a handful of pantry veggies feeds my family of four. I’ll be real—it’s a money-saver.
Step-by-Step Instructions for Chicken Pot Pie in Pressure Cooker
Master the technique for a flaky crust and rich filling using your pressure cooker’s efficiency.
Step 1: Sauté Aromatics and Chicken
Set your pressure cooker to the sauté function and melt ½ cup unsalted butter in the insert. Add the diced yellow onion, peeled and diced carrots, diced celery, minced garlic, chopped fresh thyme, and chopped fresh rosemary. Sauté for 4-5 minutes until the vegetables soften and the onion becomes translucent.
Stir in the 1-inch cubed boneless chicken breast and cook for another 3-4 minutes until the chicken turns opaque on all sides. This builds a flavorful base and ensures the chicken begins to cook evenly before pressure cooking.
Step 2: Create the Roux and Build the Filling
Sprinkle ½ cup all-purpose flour over the chicken and vegetable mixture, stirring constantly to coat everything evenly. Cook for 1-2 minutes to remove the raw flour taste—you’ll notice the mixture thicken slightly and turn a light golden color.
Slowly pour in 1½ cups chicken broth, stirring continuously to prevent lumps from forming. Add the 1 cup frozen peas, 1 tsp salt, and ½ tsp black pepper. Stir in ½ cup heavy cream and scrape the bottom of the pot to release any browned bits. This ensures a smooth, rich filling.
Step 3: Pressure Cook the Filling
Secure the lid on your pressure cooker and set the valve to sealing. Cook on high pressure for 8 minutes. Once the cooking cycle completes, allow the pressure to release naturally for 5 minutes, then quick-release any remaining pressure.
Carefully remove the lid and stir the filling. The chicken should be fully cooked and tender, and the sauce should have thickened to a creamy consistency. If the filling is too thin, set the pressure cooker back to sauté and simmer uncovered for 2-3 minutes to thicken.
Step 4: Assemble and Bake the Pot Pie
Preheat your oven to 375°F. Transfer the filling to a 9-inch pie dish. Unroll 1 package refrigerated pie crust and place one crust over the filling, trimming and crimping the edges to seal. Cut a few slits in the top crust to allow steam to escape.
Bake for 20-25 minutes until the crust is golden brown and the filling is bubbling. Let the pot pie rest for 5-10 minutes before serving to allow the filling to set. Each serving should have a crisp, flaky crust and a creamy, herb-infused filling.
Pro Tips For Making Chicken Pot Pie Recipe For Pressure Cooker
- Sear the Chicken First: I learned this the hard way—browning the chicken breasts in the pressure cooker before adding liquid locks in flavor and keeps them from turning rubbery. About 3 minutes per side on high heat does the trick.
- Cut Veggies Evenly: Sounds obvious, but chopping carrots, celery, and onion into uniform ½-inch pieces guarantees they cook at the same rate. I used to end up with mushy carrots and crunchy celery until I started doing this.
- Deglaze Thoroughly: After searing, pour in ¼ cup broth or water and scrape the bottom hard to release all those browned bits. Skipping this step means losing flavor and risking a burn notice on your pressure cooker.
- Add Peas Last: Stir in frozen peas only after pressure cooking—they only need the 5-minute natural release to heat through. Adding them earlier turns them to mush, and nobody wants a gray, mushy pea in their pot pie.
Make-Ahead Tips for This Recipe
Prep Ahead Strategy
You can chop all your vegetables the night before and store them in separate airtight containers in the fridge. I like using glass containers to keep the carrots, celery, and onion fresh. This saves 10-15 minutes on cooking day.
Pre-Cook Filling
The filling can be made 1-2 days ahead and refrigerated. Just complete the pressure cooking step, then store the filling in an airtight container. When ready to bake, reheat the filling on sauté mode for 5 minutes before assembling.
Freeze Unbaked Pies
Assemble the entire pot pie but don’t bake it. Wrap tightly in plastic wrap and aluminum foil, then freeze for up to 2 months. Bake from frozen at 375°F for 40-45 minutes. 💡
Crust Prep Tip
Roll out your refrigerated pie crust between parchment paper and keep it in the fridge until ready to use. This prevents sticking and makes assembly quicker. I always keep a Pillsbury crust on hand for this reason.
Reheating Leftovers
Store leftovers in the fridge for up to 4 days. Reheat individual servings covered with aluminum foil in a 350°F oven for 15-20 minutes to maintain crust crispiness. The microwave works but will soften the crust.
Herb Freshness
If using fresh herbs, chop them the day of cooking for maximum flavor. For make-ahead, store whole sprigs in a damp paper towel in a sealed bag. Dried herbs can be pre-measured and kept in a small container. 🌿
Nutrition Facts
Frequently Asked Questions
Can I use chicken thighs instead of breasts?
Yes! Use boneless thighs for juicier meat. Increase pressure cooking time to 10 minutes since thighs need slightly longer to become tender.
Why bake the crust separately if using a pressure cooker?
The pressure cooker excels at tenderizing the filling but can’t achieve a golden, flaky crust. Baking the crust separately ensures that perfect texture.
Can I make this gluten-free?
Swap all-purpose flour for a 1:1 gluten-free blend in the roux, and use a gluten-free pie crust. The texture will be just as delicious.
How do I prevent a soggy bottom crust?
Pre-bake the bottom crust for 8-10 minutes before adding the filling. This creates a barrier to prevent moisture absorption.

- 6 Oz Chocolate Chip Cookie Recipe: Perfectly Balanced Crispy Edges and Chewy Hearts - September 25, 2026
- 6-Inch Coffee Cake Recipe: Vanilla Bean Swirls and Buttery Streusel Topping - September 25, 2026
- 1 Hour Soup Recipe: Velvety Richness Without the Wait - September 25, 2026