
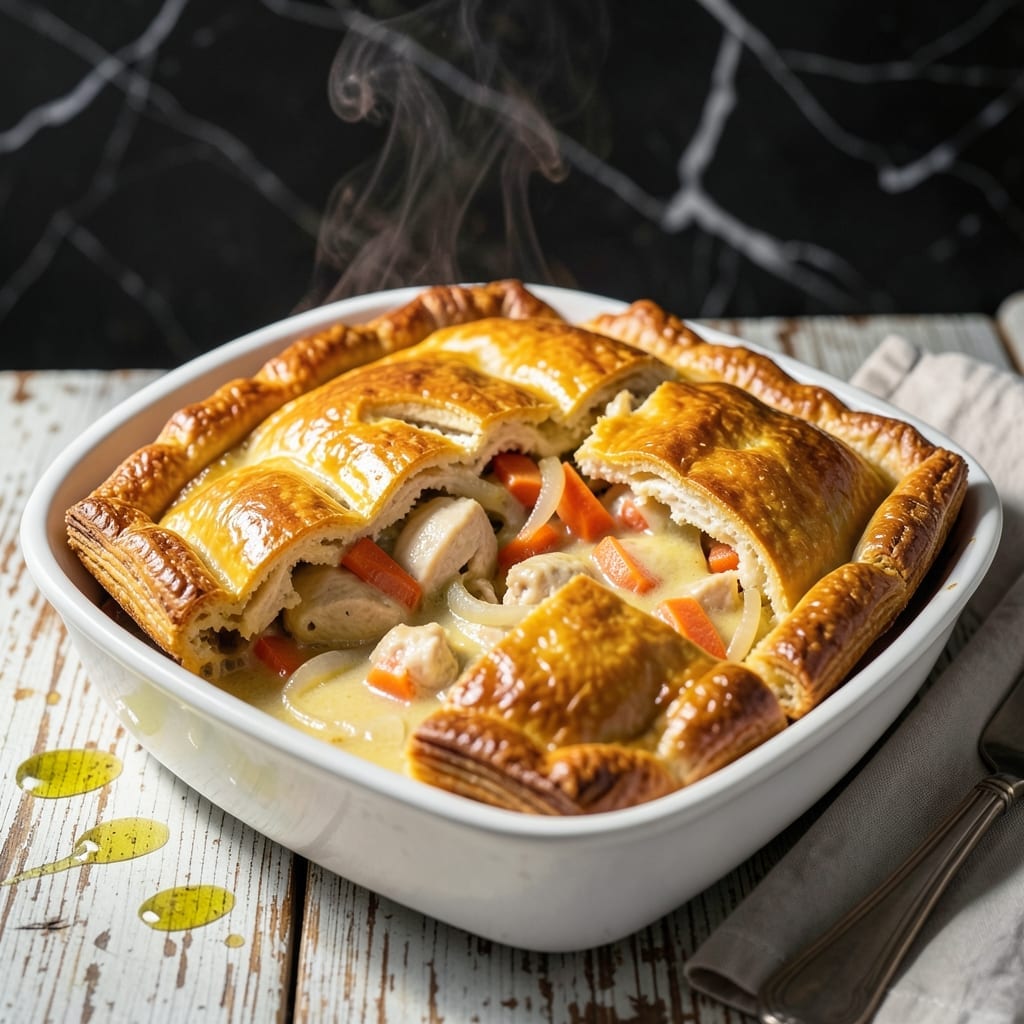
This chicken pot pie delivers comfort food at its finest with a golden, flaky topping that requires minimal effort. The Bisquick mix simplifies the process while still delivering restaurant-quality results.
What makes this dish special is the hearty filling—tender chicken, vegetables, and a creamy sauce—all baked under a perfect biscuit crust. The topping puffs beautifully in the oven, creating an irresistible golden finish.
The filling comes together in one pot, saving time and reducing cleanup. You’ll have a warm, satisfying meal ready in under an hour, with a topping so light and flaky it melts in your mouth.
Ideal for weeknight dinners or cozy weekends when you crave something comforting without the fuss.
Ingredients for Chicken Pot Pie Recipe with Bisquick Mix
Golden biscuit topping meets hearty chicken filling with minimal effort required.
| Ingredient | Amount | Notes |
|---|---|---|
| Bisquick Baking Mix 🥣 | 2 cups | Original variety preferred |
| Milk 🥛 | 0.67 cup | Whole milk for richness |
| Boneless Skinless Chicken Breasts 🍗 | 1 ½ lb | Diced into 1-inch pieces |
| Unsalted Butter 🧈 | ½ cup | Divided for filling and topping |
| Yellow Onion 🧅 | 1 whole | Medium, finely diced |
| Carrots 🥕 | 2 whole | Medium, peeled and diced |
| Celery Stalks 🌿 | 2 pieces | Diced, leaves included |
| Frozen Peas 🌱 | 1 cup | No need to thaw |
| All-Purpose Flour 🌾 | ⅓ cup | For thickening the sauce |
| Chicken Broth 🍲 | 1 ½ cups | Low-sodium preferred |
| Heavy Cream 🥛 | ½ cup | Full-fat for creaminess |
| Garlic Cloves 🧄 | 2 cloves | Minced for depth |
| Dried Thyme 🌿 | ½ tsp | Crushed between fingers |
| Salt 🧂 | 1 tsp | Kosher or sea salt |
| Black Pepper 🌶️ | ½ tsp | Freshly ground preferred |
The Bisquick is the shortcut star here—Betty Crocker’s original mix gives that perfect rise. Grab it from any grocery store; no need for specialty brands. For the chicken, bone-in thighs work too if you prefer darker meat (just remove the skin). The veggies should be fresh except the peas—frozen is actually better since they stay bright and sweet.
Swap the thyme for poultry seasoning at half the amount if that’s what’s in your cabinet. No heavy cream? Whole milk plus a tbsp of cornstarch thickens up nicely. The broth can be homemade or boxed—Swanson or Pacific Foods are solid store-bought options. If you’re out of carrots, parsnips add a nice sweetness (peel and dice them the same way).
Leftovers taste even better the next day once the biscuit soaks up some filling. Store covered in the fridge for up to 4 days. This freezes beautifully for 2-3 months—just thaw overnight before reheating.
Why You’ll Love This Recipe
- One Bowl Wonder: I just dump the Bisquick mix, milk, and butter into one bowl—no fancy steps, no extra dishes to wash.
- That Buttery Crust: The Bisquick topping bakes up golden and flaky, soaking up all the savory chicken and onion juices underneath.
- Feeds the Crew: I stretch this to six servings with a side salad, and honestly, it’s the only thing my picky nephew cleans his plate for.
- Leftovers for Days: Between us, it tastes even better the next day, and I love having lunch sorted for two days straight.
Step-by-Step Instructions for Chicken Pot Pie With Bisquick Mix
This method keeps things simple while delivering a flaky topping and rich, creamy filling.
Step 1: Prepare the Chicken and Vegetables
Start by dicing the 1.5 lb Boneless Skinless Chicken Breasts into 1-inch pieces. I like to work with cold chicken—it’s easier to handle and slices more cleanly. Set this aside while you prep your vegetables.
Finely dice the 1 whole Yellow Onion, 2 whole Carrots, and 2 pieces Celery Stalks. The uniform size ensures everything cooks evenly and each bite has a good mix of textures. Don’t skip the celery leaves—they add a subtle herbal note that complements the filling perfectly.
Step 2: Cook the Filling Base
In a large skillet over medium heat, melt ¼ cup of the 0.5 cup Unsalted Butter. Add the diced onion, carrots, and celery, then cook for 5-7 minutes until the vegetables soften and the onion becomes translucent.
Add the minced 2 cloves Garlic Cloves and cook for 30 seconds until fragrant. Stir in the 0.33 cup All-Purpose Flour to create a roux, cooking for 1-2 minutes until the mixture turns a light golden color. This step removes the raw flour taste and builds the foundation for your sauce.
Step 3: Build and Thicken the Sauce
Gradually pour in the 1.5 cups Chicken Broth and 0.5 cup Heavy Cream, whisking constantly to prevent lumps. Bring the mixture to a gentle simmer and cook for 3-4 minutes until it thickens enough to coat the back of a spoon.
Add the diced chicken, 1 cup Frozen Peas, 0.5 tsp Dried Thyme, 1 tsp Salt, and 0.5 tsp Black Pepper. Simmer for 10-12 minutes until the chicken is cooked through and the sauce has reached your desired consistency. The peas will thaw and warm through as the chicken cooks.
Step 4: Prepare and Add the Bisquick Topping
While the filling simmers, combine the 2 cups Bisquick Baking Mix and 0.67 cup Milk in a bowl. Stir just until the dough comes together—it will be slightly sticky. Overmixing will make your topping tough.
Transfer the hot filling to a baking dish. Drop spoonfuls of the Bisquick mixture evenly over the top, then spread gently to create a complete layer. Melt the remaining ¼ cup Unsalted Butter and drizzle it over the topping for extra richness and browning.
Step 5: Bake to Golden Perfection
Preheat your oven to 400°F. Bake the pot pie for 20-25 minutes until the topping is golden brown and the filling is bubbling at the edges. You’ll see the biscuit layer rise and develop a beautiful, crispy crust.
Let it rest for 5 minutes before serving. This brief pause allows the filling to set slightly, making it easier to serve. The topping should be flaky and tender, with a rich, creamy filling beneath that’s packed with vegetables and tender chicken in every bite.
Pro Tips For Making Chicken Pot Pie Recipe With Bisquick Mix
- Precook the Chicken: Poach or sauté the chicken breasts first—raw pieces in the filling often dry out or stay undercooked by the time the Bisquick topping is done.
- Chill the Dough: Let the Bisquick and milk mixture rest in the fridge for 10 minutes before shaping; it’s stickier than you expect and easier to handle when cold.
- Skip the Raw Onions: Cook the yellow onions until soft before mixing into the filling; raw ones stay crunchy and can make the pie watery.
- Butter the Dish: Grease the baking dish with some of that unsalted butter—it keeps the Bisquick topping from sticking and adds a little extra richness.
Wine and Beer Pairings for These Flavors
White Wine Pairings
A crisp Chardonnay with bright acidity cuts through the creamy filling beautifully. Look for unoaked versions from California—they won’t overpower the dish. I love how the citrus notes complement the thyme in the recipe. 🍷
Red Wine Options
For red lovers, a light Pinot Noir works wonderfully. The Oregon varieties have earthy notes that pair well with the chicken and vegetables. Avoid heavy tannins—they’ll clash with the creamy sauce.
Craft Beer Choices
A Belgian witbier like Blue Moon offers citrus and spice that enhance the herbs in the filling. The effervescence cleanses your palate between bites. Serve it ice-cold for the best experience. 🍺
Light Beer Alternatives
An American pale lager such as Bud Light or Coors Banquet provides a crisp, refreshing contrast. The mild flavor won’t compete with the dish’s rich, savory notes.
Non-Alcoholic Pairings
For a booze-free option, try sparkling apple cider with a squeeze of lemon. The bubbles and sweetness balance the buttery topping and creamy filling perfectly.
Nutrition Facts
Frequently Asked Questions
Can I use chicken thighs instead of breasts?
Yes! Use 1.5 lb boneless, skinless thighs for juicier meat. They cook in the same 10-12 minutes and add richer flavor to the filling. Just trim visible fat first.
How do I prevent a soggy topping?
Don’t stir the Bisquick dough into the filling. Spoon it on top in dollops, leaving some gaps for steam to escape. Baking at 400°F for 20-25 minutes ensures a crisp, golden crust.
Can I make this ahead?
Assemble the dish, cover tightly, and refrigerate for up to 24 hours. Bake as directed, adding 5-10 minutes if cold. Avoid freezing unbaked topping—it alters texture.
What if my filling is too thin?
Simmer uncovered for 2-3 extra minutes before adding the topping. If needed, mix 1 tablespoon cornstarch with 1 tablespoon cold water, stir into filling, and cook until thickened.

- 6 Oz Chocolate Chip Cookie Recipe: Perfectly Balanced Crispy Edges and Chewy Hearts - September 25, 2026
- 6-Inch Coffee Cake Recipe: Vanilla Bean Swirls and Buttery Streusel Topping - September 25, 2026
- 1 Hour Soup Recipe: Velvety Richness Without the Wait - September 25, 2026