
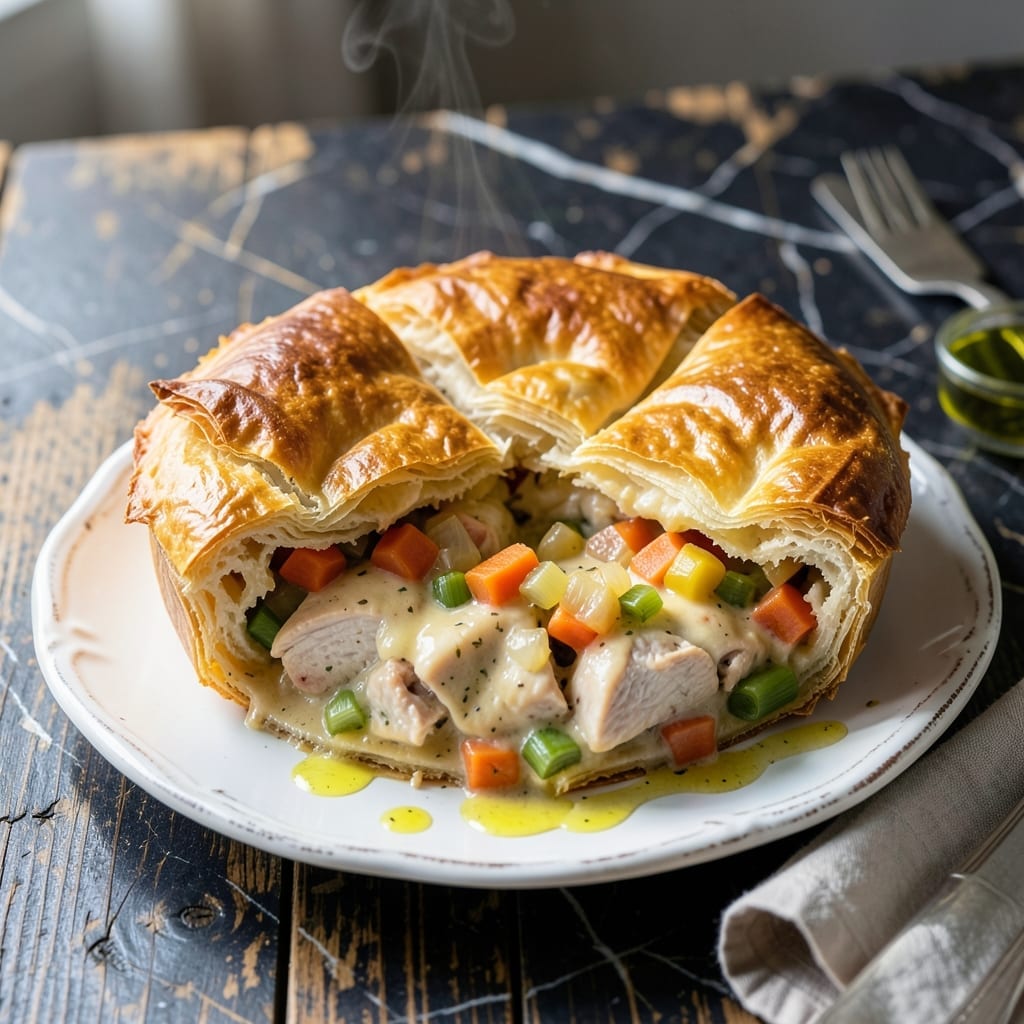
This recipe transforms classic comfort food with a flaky, elegant twist. Thin layers of filo dough create a crispy, golden crust that shatters with every bite, revealing a rich, creamy filling beneath.
The filling brings together tender chicken, hearty vegetables, and a velvety sauce that’s both savory and deeply satisfying. Each ingredient is chosen to build layers of flavor without overpowering the dish.
Assembling the filo top might seem intimidating, but the process is straightforward. A few simple folds and a light brush of butter ensure each sheet bakes to perfectly flaky perfection.
Serve this pie fresh from the oven for a meal that feels special enough for company but simple enough for a weeknight. The contrast of textures makes every bite memorable.
Ingredients for Chicken Pot Pie Recipe with Filo Dough
Thin filo layers and a creamy chicken filling come together for this elevated comfort dish.
| Ingredient | Amount | Notes |
|---|---|---|
| Chicken Breast 🍗 | 1 ½ lb | Boneless, skinless, diced |
| Filó Dough 🥟 | 12 sheets | Thawed if frozen |
| Unsalted Butter 🧈 | ½ cup | Melted for brushing |
| Carrots 🥕 | 2 whole | Peeled and diced |
| Celery Stalks 🌿 | 2 whole | Diced for texture |
| Yellow Onion 🧅 | 1 whole | Finely chopped |
| Garlic Cloves 🧄 | 3 cloves | Minced for depth |
| All-Purpose Flour 🌾 | ⅓ cup | For thickening sauce |
| Chicken Broth 🍲 | 2 cups | Low-sodium preferred |
| Heavy Cream 🥛 | ½ cup | For creamy sauce |
| Frozen Peas 🌱 | ¾ cup | No need to thaw |
| Fresh Thyme 🌿 | 1 tbsp | Chopped for aroma |
| Fresh Parsley 🌿 | 2 tbsp | Chopped for garnish |
| Salt 🧂 | 1 tsp | Kosher or sea salt |
| Black Pepper 🌶️ | ½ tsp | Freshly ground preferred |
The filo dough is non-negotiable here. Athens brand is widely available and reliably thin. Look for it in the freezer section at Whole Foods or most major supermarkets—thaw it overnight in the fridge. The chicken should be boneless, skinless for even cooking. For the vegetables, use fresh carrots and celery; their texture holds up better than canned or frozen.
No filo? Puff pastry works in a pinch but won’t have the same shatter. Swap chicken broth for vegetable broth if needed. Heavy cream can be replaced with half-and-half at half the amount (or full-fat coconut milk for a dairy-free twist). Fresh thyme and parsley are ideal, but dried at one-third the quantity gets you close.
Assemble just before baking—filo dries out fast. Leftovers keep 3-4 days in the fridge but lose some crispness. Reheat in the oven to revive the flaky top (microwave ruins it).
Why You’ll Love This Recipe
- No-Fuss Layers: I just brush the filo sheets with melted butter and stack—no rolling, no fuss, and they crisp up beautifully.
- That Crunch: The buttery filo shatters with every bite, while the chicken and veggies stay juicy inside. Honestly, it’s the texture contrast that gets me every time.
- Feeds a Crowd: One batch makes enough for dinner plus leftovers, and it reheats like a dream. Between us, it’s my go-to for potlucks.
- Pantry Friendly: Carrots, celery, and chicken breast are always in my fridge, and filo dough keeps in the freezer. I’ll be real: this saves me from last-minute grocery runs.
Step-by-Step Instructions for Chicken Pot Pie With Filo Dough
This method ensures a creamy filling and perfectly crisp filo layers every time.
Step 1: Sauté Aromatics and Cook Chicken
Heat 2 tablespoons of the unsalted butter in a large skillet over medium heat. Add the diced yellow onion, carrots, and celery stalks, cooking for 5-6 minutes until the vegetables soften and the onion becomes translucent.
Add the minced garlic cloves and cook for 30 seconds until fragrant. Stir in the 1.5 lb chicken breast and cook until the outside turns white, about 5-6 minutes. The chicken doesn’t need to be fully cooked yet—it will finish in the sauce.
Step 2: Create a Rich, Creamy Sauce
Sprinkle the 0.33 cup all-purpose flour over the chicken and vegetables, stirring to coat evenly. Cook for 1-2 minutes to remove the raw flour taste. Slowly pour in the 2 cups chicken broth, stirring constantly to prevent lumps.
Bring the mixture to a simmer and cook for 3-4 minutes until it thickens slightly. Stir in the 0.5 cup heavy cream, 0.75 cup frozen peas, 1 tbsp fresh thyme, 1 tsp salt, and 0.5 tsp black pepper. Simmer for another 2-3 minutes until the sauce is creamy and the chicken is fully cooked through.
Step 3: Prepare the Filo Dough Layers
Preheat the oven to 375°F. Melt the remaining unsalted butter for brushing. Transfer the chicken filling to a 9-inch pie dish or similar oven-safe dish.
Layer 6 sheets of filó dough over the filling, brushing each sheet with melted unsalted butter before adding the next. Repeat with the remaining 6 sheets, ensuring the top is fully covered. Tuck the edges of the filo into the dish to seal the pie.
Step 4: Bake to Golden Perfection
Bake for 25-30 minutes until the filo is golden brown and crisp. If the top begins to brown too quickly, loosely cover it with foil. You’ll know it’s done when the layers are flaky and the filling bubbles slightly at the edges.
Remove from the oven and let it rest for 5-10 minutes to allow the filling to set. Garnish with the 2 tbsp fresh parsley before serving. The contrast of crispy filo and creamy, savory filling makes this dish unforgettable.
Pro Tips For Making Chicken Pot Pie Recipe With Filo Dough
- Precook the Chicken: Poach the chicken breasts in the broth you’ll use for the filling—sounds like an extra step, but it keeps them juicy and infuses the liquid with flavor. I learned this the hard way after too many dry, chewy bites.
- Dry the Filo: Pat each sheet of filo with a dry towel before buttering—excess moisture makes it soggy instead of crisp. My grandmother swore by this, and she was right.
- Skip Raw Veggies: Sauté the carrots and celery until just tender before adding to the filling. After burning three batches, I finally figured out that raw veggies release too much water and turn the pie to mush.
- Butter Generously: Use at least 1/2 cup melted unsalted butter for brushing the filo—more than you think, especially if you want that golden, flaky finish. This isn’t the prettiest method, but it’s the tastiest.
Pro Cooking Tips for This Dish
Prevent Soggy Bottoms
Always pre-cook your filling completely before assembling. I simmer mine for an extra 2-3 minutes to evaporate excess moisture. A slotted spoon helps transfer just the solids to the dish, leaving liquid behind. This ensures the filo stays crisp. 💡
Butter Application
Use melted unsalted butter and brush each filo sheet generously but evenly. I found that 1.5 tbsp per 6 sheets gives perfect crispness without sogginess. A pastry brush works best for even coverage.
Layering Technique
For maximum flakiness, stagger your filo sheets slightly rather than stacking perfectly. This creates more surface area for crisping. I overlap edges by about 1 inch for structural integrity.
Oven Position
Place your pie on the middle rack at 375°F. If your oven runs hot, reduce to 350°F. Rotate the dish halfway through baking for even browning. I check mine at 20 minutes to monitor progress.
Resting Period
Let the pie rest for at least 10 minutes after baking. This allows the filling to set properly. Cutting too soon will cause the filling to spill out and the layers to separate. 🔥
Crisp Revival
For leftovers, reheat in a 350°F oven for 10-12 minutes. Cover loosely with foil to prevent over-browning. The microwave will make the filo soggy, so avoid it if possible.
Nutrition Facts
Frequently Asked Questions
Can I use puff pastry instead of filo?
Yes, but the texture will differ. Puff pastry creates a thick, flaky crust rather than filo’s delicate, crisp layers.
How do I keep the filo from tearing?
Work quickly and keep unused sheets covered with a damp towel. Handle gently and brush with melted butter immediately after placing.
Can I make this ahead of time?
Assemble just before baking—filo dries out fast. Prep filling up to 2 days ahead and store it in the fridge.
Why did my filo turn soggy?
Excess moisture in the filling is the main culprit. Pre-cook the filling completely and drain well before assembling.

- 6 Oz Chocolate Chip Cookie Recipe: Perfectly Balanced Crispy Edges and Chewy Hearts - September 25, 2026
- 6-Inch Coffee Cake Recipe: Vanilla Bean Swirls and Buttery Streusel Topping - September 25, 2026
- 1 Hour Soup Recipe: Velvety Richness Without the Wait - September 25, 2026