
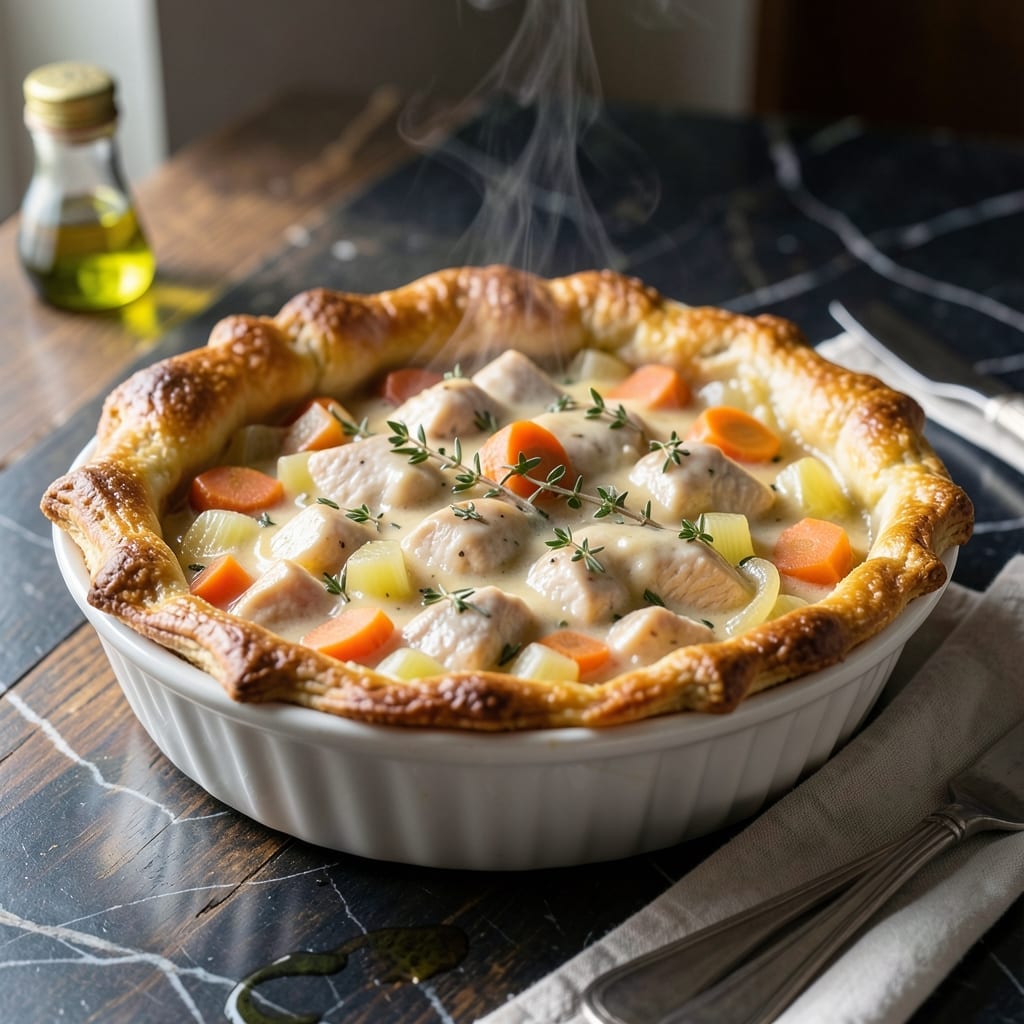
There’s nothing quite like a freshly baked chicken pot pie with its flaky golden crust and rich, creamy filling. I developed this recipe after years of testing to achieve the perfect balance between tender chicken, hearty vegetables, and a velvety sauce that doesn’t turn soggy.
The secret lies in the baking temperature and timing. A hot oven ensures the crust becomes beautifully golden while the filling cooks through without drying out. I also use a technique of pre-cooking the filling to prevent a gummy bottom crust.
What you’ll get is a dish that looks and tastes like it came from a professional kitchen. The crust stays crisp and layered, while the filling remains thick and flavorful with every bite.
This is comfort food at its finest, with every element working in harmony. The aroma alone will have everyone gathered around the table before it even comes out of the oven.
Ingredients for Chicken Pot Pie Recipe Oven Temp
Classic comfort food ingredients for a dish that feels like home.
| Ingredient | Amount | Notes |
|---|---|---|
| Boneless Skinless Chicken Breasts 🍗 | 1 ½ lb | Diced into bite-sized pieces |
| Unsalted Butter 🧈 | ½ cup | For roux and richness |
| All-Purpose Flour 🌾 | ½ cup | For thickening sauce |
| Yellow Onion 🧅 | 1 whole | Medium, finely diced |
| Carrots 🥕 | 2 whole | Peeled and diced |
| Celery Stalks 🌿 | 2 whole | Diced for flavor |
| Garlic Cloves 🧄 | 3 cloves | Minced for depth |
| Chicken Broth 💧 | 2 cups | Low-sodium preferred |
| Whole Milk 🥛 | ¾ cup | For creamy sauce |
| Frozen Peas 🌱 | 1 cup | Thawed before using |
| Fresh Thyme 🌿 | 1 tbsp | Chopped, or 1 tsp dried |
| Salt 🧂 | 1 tsp | Kosher or sea salt |
| Black Pepper 🌶️ | ½ tsp | Freshly ground preferred |
| Refrigerated Pie Crust 🥧 | 2 sheets | For top and bottom crust |
| Large Egg 🥚 | 1 whole | For egg wash on crust |
The crust is non-negotiable here. Pillsbury refrigerated pie crust saves time without sacrificing flakiness. For the chicken, thighs work too if you prefer darker meat—just adjust cooking time. I grab my chicken from Whole Foods or Trader Joe’s for quality. Look for broth with no added MSG if that’s a concern (the good stuff, not the canned kind with a million additives).
No thyme? Rosemary at half the amount works well. Swap milk for half-and-half if you want extra richness (trust me on the full-fat version). Frozen mixed veggies can replace peas and carrots—1.5 cups total. The butter can be swapped for olive oil in the roux, but you’ll lose some flavor. Pre-chopped mirepoix from the grocery store? Works in a pinch.
Assemble and bake same day, or prep filling ahead—keeps 2 days in the fridge. Leftovers reheat best in the oven at 350°F for 15 minutes to crisp the crust. Freeze unbaked pies for up to 3 months (don’t skip this part).
Why You’ll Love This Recipe
- One Pan Magic: I toss everything in one baking dish—chicken, veggies, and that buttery crust—then let the oven do the work.
- Golden Crust Love: The butter and flour create this flaky, golden top that cracks open to reveal tender chicken and sweet carrots.
- Feeds a Hungry Crowd: Between us, this is my go-to for family dinners, potlucks, or even just meal prepping for the week.
- Leftovers for Days: Honestly, it tastes even better the next day, and I love that it reheats beautifully for quick lunches.
Step-by-Step Instructions for Chicken Pot Pie
Here’s the method. Straightforward, tested, works every time.
Step 1: Cook and Shred the Chicken
Start by dicing the 1.5 lb boneless skinless chicken breasts into bite-sized pieces. I like to keep them uniform so they cook evenly. Heat a large skillet over medium-high heat and add just enough water to cover the bottom—about ¼ inch.
Add the chicken pieces and cook for 8-10 minutes until they’re no longer pink inside. You’ll know they’re done when the internal temperature reaches 165°F. Drain the chicken and set it aside to cool slightly before shredding with two forks. This gives you tender, easy-to-eat pieces in every bite.
Step 2: Build the Creamy Filling
In the same skillet, melt the 0.5 cup unsalted butter over medium heat. Add the finely diced yellow onion, carrots, and celery stalks. Cook for 5-7 minutes until the vegetables soften and the onion becomes translucent.
Stir in the minced 3 cloves garlic cloves and 1 tbsp fresh thyme, cooking for another 30 seconds until fragrant. Sprinkle the 0.5 cup all-purpose flour over the mixture and stir constantly for 1 minute to cook off the raw flour taste. This creates your roux—the foundation of the creamy sauce.
Slowly pour in the 2 cups chicken broth and 0.75 cup whole milk, whisking continuously to prevent lumps. Bring to a simmer and cook for 3-5 minutes until the sauce thickens enough to coat the back of a spoon. Stir in the 1 cup frozen peas, shredded chicken, 1 tsp salt, and 0.5 tsp black pepper.
Step 3: Assemble the Pie
Preheat your oven to 425°F. Unroll one sheet of the refrigerated pie crust and place it in a 9-inch pie dish, pressing it gently against the bottom and sides. Trim any excess crust hanging over the edge, leaving about ½ inch to fold under later.
Pour the chicken and vegetable filling into the crust-lined pie dish. It should mound slightly in the center—don’t press it down. Unroll the second sheet of pie crust and place it over the filling. Fold the edges of the top crust under the bottom crust and crimp with your fingers or a fork to seal. Cut 4-5 slits in the top crust to allow steam to escape.
Step 4: Bake to Golden Perfection
Whisk the 1 whole large egg with 1 tablespoon of water to make an egg wash. Brush this evenly over the top crust—this gives you that beautiful golden brown finish. Place the pie dish on a baking sheet to catch any overflow.
Bake for 30-35 minutes until the crust is deep golden brown and the filling is bubbling. If the crust begins to brown too quickly, tent the pie loosely with aluminum foil. Let it rest for 10 minutes before serving—this allows the filling to set slightly, making it easier to slice.
Pro Tips For Making Chicken Pot Pie Recipe Oven Temp
- Precook the Chicken: Poach the boneless skinless chicken breasts in salted water for 12-15 minutes before dicing—this guarantees they stay tender instead of drying out in the oven.
- Chill the Dough: Let your pie crust rest in the fridge for at least 30 minutes before rolling; I learned this the hard way after watching my edges shrink in the oven.
- Deglaze the Pan: After sautéing the onions and carrots in butter, add a splash of chicken broth to scrape up those browned bits—it adds depth to the filling that you can’t get any other way.
- Vent the Top: Cut 3-4 small slits in the top crust before baking, or you’ll end up with a soggy bottom from trapped steam—I skip this when I’m lazy, but the pie is noticeably better when I don’t.
Essential Equipment for Perfect Results
Pie Dish Essentials
I always use a 9-inch glass pie dish for even heat distribution and easy monitoring of the crust’s browning. Pyrex is my go-to brand—it handles the 425°F oven temperature without issues. The transparency lets me check the bottom crust without flipping the pie. 💡
Crust Preparation Tools
A rolling pin helps smooth out the refrigerated crust if it cracks. I also keep a pastry brush handy for the egg wash—silicone bristles work best. For crimping, a fork creates classic edges, but I love the decorative touch of my Wilton crimper.
Baking Sheet Necessity
Place your pie dish on a rimmed baking sheet to catch any filling overflow. This prevents messes and makes transfer easier. I use a half-sheet pan lined with parchment—it fits perfectly in my oven and cleans up in seconds.
Thermometer for Perfection
An instant-read thermometer ensures your filling hits 165°F in the center. I trust my ThermoWorks ThermoPop for accuracy. It also helps verify your oven’s true temperature, as many run hot or cold by 25-50°F.
Cooling Rack
After baking, transfer the pie to a wire cooling rack to prevent the bottom crust from steaming. This keeps it crisp while the filling sets. I allow 10 minutes minimum before slicing—any sooner and the filling might run.
Optional Upgrade
For extra flakiness, I sometimes use a pie crust shield or aluminum foil ring to protect the edges from over-browning during the final 10 minutes of baking. This simple tool makes a noticeable difference. ✨
Nutrition Facts
Frequently Asked Questions
Why preheat the oven?
Preheating to 425°F ensures even cooking from the start. This helps the crust puff and brown properly while the filling heats through without drying out.
Can I use a different pan size?
A 9-inch dish is ideal, but 8-inch works if you make a deeper pie. Avoid larger pans—the filling may spread too thin and the crust won’t cook evenly.
How do I prevent a soggy bottom crust?
Pre-cook the filling to remove excess moisture, and use a hot oven. Placing the pie on a preheated baking sheet also helps crisp the bottom crust.
What if the crust browns too fast?
Tent the pie loosely with aluminum foil if the edges darken before the filling is done. Remove it for the last 5-10 minutes to finish browning.

- 6 Oz Chocolate Chip Cookie Recipe: Perfectly Balanced Crispy Edges and Chewy Hearts - September 25, 2026
- 6-Inch Coffee Cake Recipe: Vanilla Bean Swirls and Buttery Streusel Topping - September 25, 2026
- 1 Hour Soup Recipe: Velvety Richness Without the Wait - September 25, 2026