
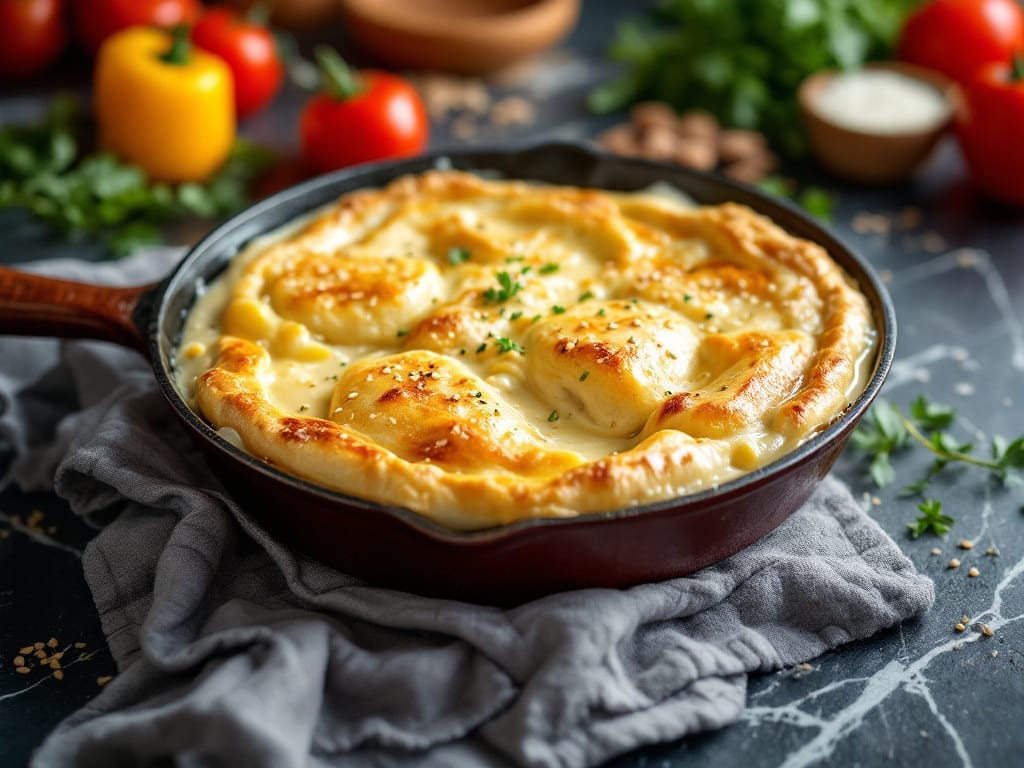
The chicken pot pie recipe with heavy whipping cream delivers comfort food perfection—creamy, velvety sauce that never curdles, tender chicken, and flaky pastry in every bite. This recipe solves the classic problem of lumpy gravy by using a precise roux technique that transforms simple ingredients into restaurant-quality results.
The secret lies in slow-cooked chicken and vegetables bathed in a sauce thickened just enough to coat without separating.
What sets this version apart is the foolproof velvety sauce, achieved by tempering the heavy whipping cream with warm roux rather than dumping it in all at once. This method ensures a smooth, rich consistency that stays creamy even after baking.
The recipe builds flavor gradually through caramelized onions, tender chicken, and seasonal vegetables, all encased in a golden, flaky crust that seals in every delicious bite.
By the time you serve this pot pie, your kitchen will smell like home, and your guests will never guess it took just one hour of active prep. The sauce remains silky-smooth, the chicken stays juicy, and the crust achieves that perfect balance of crispy edges and tender interior.
This is the kind of dish that transforms ordinary weeknights into special occasions—without requiring advanced skills.
Perfect for family dinners, holiday gatherings, or meal prep, this recipe scales beautifully while maintaining its velvety texture and rich flavor. The assembly process is straightforward, with clear steps for blind-baking the crust and layering ingredients for even cooking. Let’s get started on creating your most impressive pot pie yet.
Ingredients for chicken pot pie recipe with heavy whipping cream
Comfort food essentials that create velvety chicken pot pie perfection in one hour.
| Ingredient | Amount | Notes |
|---|---|---|
| Boneless Chicken Thighs 🍗 | 1 ½ lb | Skin-on preferred for juiciness |
| Yellow Onions 🧅 | 1 medium | Diced, about 1 cup |
| Carrots 🥕 | 1 ½ cups | Peeled, sliced into rounds |
| Celery Stalks 🧅 | 3 whole | Diced, about 1 cup |
| Garlic Cloves 🧄 | 4 cloves | Minced, for depth of flavor |
| Heavy Whipping Cream 🥛 | 1 cup | Full-fat for rich sauce |
| All-Purpose Flour 🌾 | ¼ cup | For velvety roux |
| Unsalted Butter 🧈 | ½ cup | Cold, cubed for roux |
| Chicken Broth 💧 | 1 ½ cups | Low-sodium preferred |
| Dried Thyme 🌿 | 1 tsp | Or 1 tbsp fresh |
| Salt 🧂 | 1 ½ tsp | Kosher or sea salt |
| Black Pepper 🌶️ | ½ tsp | Freshly ground |
| Pie Crust 🥧 | 1 pre-made | Store-bought or homemade |
| Egg 🥚 | 1 whole | For egg wash |
The chicken thighs are non-negotiable here—skin-on delivers unmatched juiciness that regular breasts can’t match. Grab the family pack at Costco for the best price, or check the butcher section for locally sourced options. For the vegetables, fresh, crisp carrots and celery make all the difference—avoid the pre-shredded kind, which often tastes bland. The onions should be sweet yellow, not bitter red, for that perfect caramelized flavor. If you’re short on time, frozen vegetables work fine, just thaw and drain them well before using.
No heavy whipping cream? Half-and-half plus a splash of cream cheese gets you close, though the texture won’t be quite as rich. Substituting butter for the cream? Use 3/4 cup and add 1/4 cup milk to maintain smoothness. For the pie crust, Pillsbury or homemade both work—just avoid the pre-made refrigerated kind if you want that classic flaky texture. The dried thyme should be light brown, not dark or clumpy. If you’ve got fresh, use three times the amount. The chicken broth matters too—Knudsen or Swanson low-sodium are reliable choices, but homemade is always better.
This pot pie reheats beautifully—just cover with foil and bake at 375°F for 20 minutes. Keeps 4-5 days in the fridge, freezes for 3 months for quick weeknight dinners. I always make an extra pie—the leftovers taste even better the next day as the flavors meld together. For meal prep, portion into individual servings and freeze with parchment between each slice to prevent sticking.
Why You’ll Love This Recipe
- One-Pot Magic: I swear by this recipe because it’s basically a dump-and-go situation—chop the veggies roughly (no knife skills required), brown the chicken thighs in the same pot, then let the cream and broth work their magic. Honestly, the only measuring I do is the cream, and even then, I eyeball it.
- Creamy Garlic Hug: That heavy whipping cream turns this into something luxurious—silky, rich, and packed with flavor from the garlic and onions caramelizing into the sauce. The chicken thighs stay juicy while soaking up all that dreamy goodness, and the carrots and celery melt into the broth like they belong there.
- Weeknight to Dinner Party: Between us, this is my go-to for both lazy Tuesdays and when I’m hosting. The same base works for a quick family meal or a fancier spread if I add a sprinkle of thyme or a dollop of extra cream on top. My kids ask for it more than pizza, and my in-laws think I’m a gourmet chef.
- Leftovers That Don’t Suck: I make a double batch every time because the flavor only gets better the next day. The cream thickens slightly, the chicken stays tender, and reheating it is just about microwaving it—no soggy disasters here. Plus, it’s cheaper than takeout and way more satisfying.
Step-by-step instructions for chicken pot pie with heavy whipping cream
Here’s the method for a creamy, foolproof chicken pot pie with a golden crust and velvety filling.
Sear the Chicken Thighs
Pat the 1.5 lb boneless chicken thighs dry with paper towels and season generously with 1.5 tsp salt and 0.5 tsp black pepper. Heat a large oven-safe skillet over medium-high heat and add 0.25 cup all-purpose flour to coat the bottom. Add the chicken thighs and cook for 5-6 minutes per side until golden brown and cooked through to an internal temperature of 165°F. The flour creates a light crust while keeping the meat juicy.
Remove the chicken from the skillet and set aside. You’ll notice the pan will have browned bits sticking to it—this is flavor you’ll use later. If the pan isn’t browned enough, increase the heat slightly and let it cook for another minute to develop more color.
Build the Creamy Filling
In the same skillet, reduce heat to medium and add 0.5 cup unsalted butter. Let it melt completely, then add the 1 medium diced yellow onions, 1.5 cups sliced carrots, and 3 diced celery stalks. Cook for 8-10 minutes until the vegetables soften slightly but still retain their shape. Add the 4 minced garlic cloves and cook for 30 seconds until fragrant.
Return the chicken to the skillet and pour in the 1.5 cups chicken broth. Sprinkle 1 tsp dried thyme over everything and bring to a gentle simmer. Let it cook for 5 minutes to allow the flavors to meld. You want the vegetables to be tender but not mushy, and the chicken should be fully rewarmed.
Create the Velvety Cream Sauce
Lower the heat to medium-low and gradually whisk in the 1 cup heavy whipping cream. The sauce will thicken slightly as it warms. If it starts to curdle, immediately remove the skillet from heat and stir continuously until smooth. Return to heat and let it simmer gently for 3-4 minutes until the sauce coats the back of a spoon.
This is where the magic happens—the cream should be thick enough to coat the vegetables and chicken but still flow smoothly. If it’s too thick, add 1-2 tablespoons of chicken broth to loosen it. The sauce should be velvety, not grainy, and completely smooth.
Assemble and Bake
Preheat your oven to 375°F. Transfer the chicken and vegetable mixture to a 9-inch pie dish or deep baking dish. Roll out the pre-made pie crust on a floured surface to fit the top of your dish, leaving a ½-inch overhang on all sides. Brush the edges of the crust with the whole egg, then place the rolled-out crust on top.
Trim the excess crust, fold the edges under, and crimp with a fork or your fingers to seal. Cut 4-5 small slits in the center of the crust to allow steam to escape. Bake for 35-40 minutes until the crust is golden brown and the filling is bubbling through the slits. The filling should be heated through but not boiling.
Rest and Serve
Remove the pot pie from the oven and let it rest for 10-15 minutes before serving. This resting period allows the filling to set slightly and the juices to redistribute, ensuring each bite is creamy and flavorful. The crust will firm up as it cools, making it easier to slice.
Cut into 4 equal servings and serve warm. The filling should be rich and velvety, with tender chicken and perfectly cooked vegetables. The crust should be golden and flaky, providing the perfect contrast to the creamy filling. Enjoy immediately while still warm for the best texture.
Pro Tips For Making Chicken Pot Pie Recipe With Heavy Whipping Cream
- Sear the Chicken First: I used to skip this step, thinking the cream would save the day—but searing the chicken thighs in a hot pan for 3-4 minutes per side builds flavor that nothing else can. The browned crust stays intact even after simmering, and the meat stays juicy when you pull it apart later. Use a splash of water to deglaze the pan afterward; that liquid turns into a rich base for the sauce.
- Dice Veggies Small: Big chunks of onion or carrot turn to mush in heavy cream, and nobody wants that. Cut everything—onions, carrots, celery—into ¼-inch dice so they soften evenly without falling apart. If you’re impatient, microwave the chopped veggies for 2 minutes before adding them to the pot to jumpstart the cooking process.
- Simmer, Don’t Boil: Heavy cream scalds faster than you’d think, and once it curdles, there’s no fixing it. Keep the pot at a gentle simmer—barely bubbling—while the chicken cooks, and stir occasionally to prevent hot spots. If the sauce thickens too much, add a splash of chicken broth to loosen it up.
- Use Cold Cream: Sounds weird, but it works: chill the heavy whipping cream in the fridge for 10 minutes before adding it to the pot. Cold cream blends smoother and resists curdling when it hits the hot liquid. If you’re in a rush, just stir in the cream gradually while the pot’s off the heat for the last minute.
Flavor customization for this dish
Creamy Variations
Swap the heavy whipping cream for crème fraîche or sour cream to add tangy depth—just reduce the amount to ½ cup and whisk in ¼ cup milk to maintain smoothness. For a lighter option, use Greek yogurt mixed with 2 tbsp melted butter and 1 tbsp flour as a thickener.
I’ve found that coconut milk works surprisingly well for a dairy-free version, though the texture becomes slightly more delicate. 🥛
Herb & Spice Twists
Boost the classic flavor with 1 tsp smoked paprika or ½ tsp ground mustard for warmth, or add 1 tbsp fresh tarragon for an elegant touch. For a rustic twist, stir in 1 tbsp Dijon mustard with the cream—it brightens the sauce beautifully.
I love adding ¼ tsp nutmeg when simmering the filling for a subtle, cozy note that pairs perfectly with the creamy base.
Protein Swaps
Replace chicken thighs with shredded rotisserie chicken for convenience, or try ground turkey or beef for a heartier version. For seafood lovers, swap in cooked shrimp or scallops—just reduce the cooking time to 3-4 minutes to avoid overcooking.
I’ve also made a vegetarian version using chickpeas or mushrooms for a meaty texture, though the sauce benefits from a splash of vegetable broth for depth.
Vegetable Upgrades
Add diced potatoes for heartiness—toss them in the broth with the other veggies and cook until tender. For a spring twist, include asparagus or peas, which add vibrant color and sweetness. Roasted zucchini or bell peppers work well too, especially if you’re using them from summer gardens.
I always keep a stash of frozen peas on hand for quick additions—they add a pop of color without overpowering the creamy filling.
Crust Alternatives
Skip the traditional crust for a baked potato topping—halve russet potatoes, brush with oil, and bake until tender, then top with the filling and broil until golden.
For a gluten-free option, use a store-bought almond flour crust or make your own with 1 cup almond flour, ¼ cup melted butter, and 1 egg. I’ve also tried a waffle crust made from leftover waffles, which adds a fun, crispy texture that kids love. 🥧
Nutrition facts
Frequently asked questions
Why does my creamy sauce sometimes curdle when making pot pie?
The most common cause is adding cold heavy whipping cream directly to hot liquids. Always temper the cream by gradually whisking it into the warm roux over medium-low heat, never pouring it in all at once. If it starts to curdle, remove from heat immediately and stir continuously until smooth. The sauce should coat the back of a spoon but remain silky, not grainy.
Can I make this pot pie without a traditional crust?
For a crustless version, transfer the filling to an oven-safe dish and bake covered with foil at 375°F for 25 minutes, then uncover and bake 10 more minutes to create a light crust on top. Alternatively, serve the filling over mashed potatoes or buttery noodles for a heartier meal. The creamy sauce works beautifully without any crust at all.
How do I prevent the pie crust from getting soggy?
Prevent soggy crust by blind-baking the bottom crust for 5-7 minutes before adding filling, or by brushing the top crust with egg wash and sprinkling it with coarse sugar before baking. Another trick is to chill the assembled pie for 30 minutes before baking to help the crust firm up. The slits in the top crust should be small (¼-inch) to control steam release while allowing it to breathe.
What’s the best way to reheat leftovers?
Cover the pot pie with foil and reheat in a 375°F oven for 20-25 minutes until warmed through. For microwave reheating, cover with a damp paper towel and heat in 30-second intervals on medium power, stirring between each interval. The creamy sauce benefits from gentle reheating to maintain its velvety texture. Leftovers actually improve as flavors meld together—store for up to 4 days in the fridge.
Can I make this pot pie ahead of time?
Yes! Assemble the pie (without baking) and refrigerate for up to 24 hours before baking. For make-ahead freezing, bake the pie completely, then cool and wrap tightly in plastic wrap. Freeze for up to 3 months. Thaw overnight in the fridge before reheating. The flavors develop beautifully when made ahead, and the crust stays crispy when reheated properly. This makes it perfect for holiday meal prep!

- Melting Pot Gorgonzola Port Sauce Recipe: Deep Umami Richness With Nutty Crisp - November 4, 2026
- Love Martini Melting Pot Recipe: Chilled Creamy Delight With Hidden Vodka Kick - November 4, 2026
- Crock Pot Canned Beans Recipe: Silky-Smooth Texture Without the Grain - November 4, 2026