
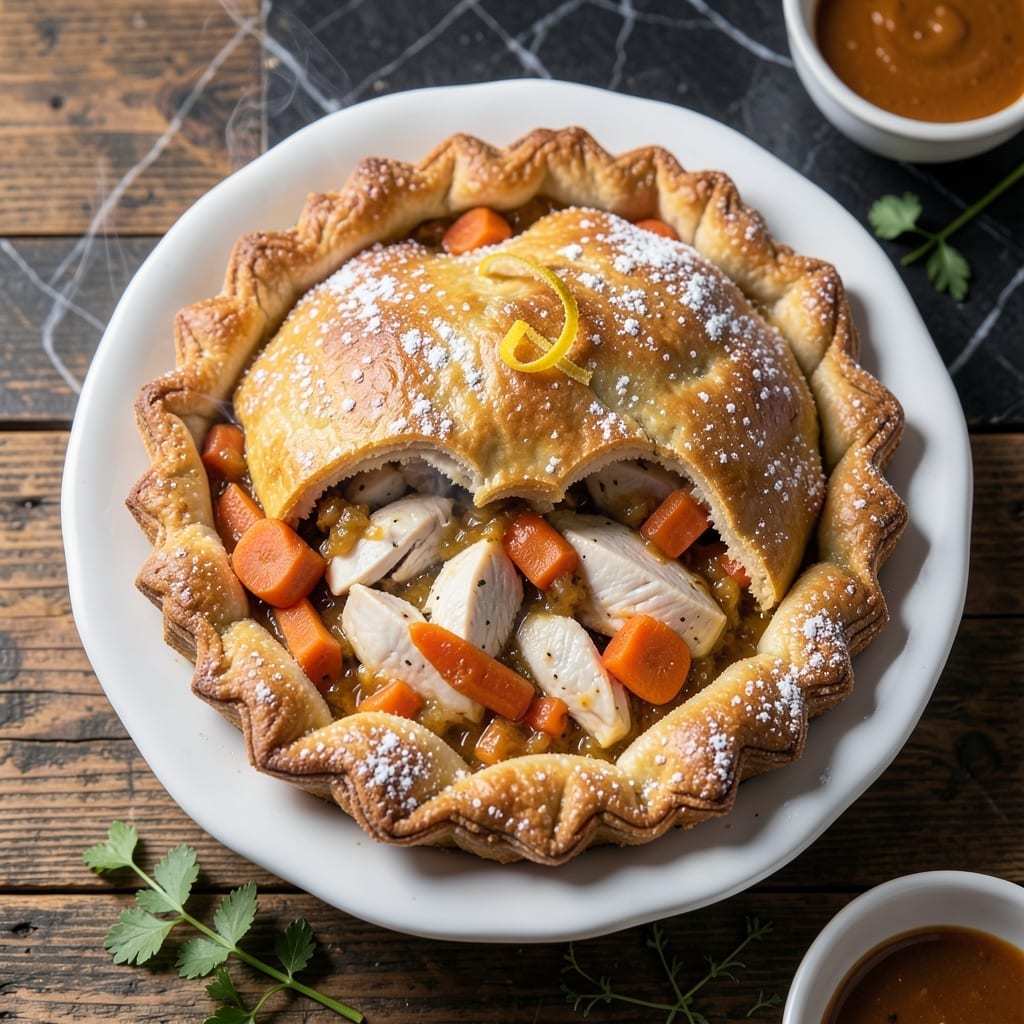
This chicken pot pie delivers everything you love about the classic—flaky crust, creamy filling, and hearty vegetables—without a drop of dairy.
I developed this version to accommodate dietary needs while keeping the rich, comforting texture we all expect. A simple roux made with oil or dairy-free butter replaces milk, creating a velvety sauce that coats every bite perfectly.
The filling stays thick and flavorful, packed with tender chicken, carrots, peas, and celery. The top crust bakes to golden perfection, sealing in all those savory, herb-infused juices.
Serve warm for a satisfying meal that proves dairy-free doesn’t mean flavor-free.
Ingredients for Chicken Pot Pie Recipe Without Milk
Pantry staples and fresh produce come together for this comforting, dairy-free classic.
| Ingredient | Amount | Notes |
|---|---|---|
| All-Purpose Flour 🌾 | 2 ½ cups | Divided for crust and roux |
| Dairy-Free Butter 🧈 | ¾ cup | Cold, cubed for crust |
| Ice Water 💧 | ½ cup | For pie crust dough |
| Salt 🧂 | 1 tsp | Divided for crust and filling |
| Boneless Skinless Chicken Breasts 🍗 | 1 ½ lb | Cubed into bite-sized pieces |
| Carrots 🥕 | 2 whole | Peeled and diced |
| Celery Stalks 🌿 | 2 whole | Finely chopped |
| Frozen Peas 🌱 | 1 cup | No need to thaw |
| Yellow Onion 🧅 | 1 whole | Medium, finely diced |
| Garlic Cloves 🧄 | 3 cloves | Minced for filling |
| Chicken Broth 🥣 | 2 cups | Low-sodium preferred |
| Olive Oil 🫒 | 2 tbsp | For cooking chicken |
| Dried Thyme 🌿 | 1 tsp | Or 1 tbsp fresh |
| Dried Rosemary 🌿 | 1 tsp | Crushed between fingers |
| Black Pepper 🌶️ | ½ tsp | Freshly ground |
The crust hinges on that dairy-free butter—Miyoko’s or Earth Balance work beautifully. Keep it ice cold until you’re ready to cut it in. For the flour, all-purpose is perfect (I use King Arthur), but if you’re gluten-free, a 1:1 blend does the trick. The chicken? Boneless thighs actually stay juicier than breasts if you’re open to swapping.
No dairy-free butter on hand? Coconut oil in solid form (not melted) works in the crust—just chill your mixing bowl first. Fresh herbs can replace dried (use three times the amount). For the broth, Better Than Bouillon makes a great chicken-flavored base. Short on time? Pre-diced mirepoix from the store saves chopping (worth every penny).
The filling thickens as it cools, so it’ll seem thin at first. Leftovers keep 3-4 days in the fridge. Freeze unbaked pies for up to 2 months—just thaw before baking. Always reheat covered to prevent the crust from drying out.
Why You’ll Love This Recipe
- One Bowl Crust: The flaky dairy-free butter and ice water come together in the same bowl I use for mixing—less cleanup, same great texture.
- Rich Without Dairy: Honestly, the chicken and herbs pack so much flavor you won’t miss the milk one bit.
- Feeds a Crowd: I make one big pie for dinner and have leftovers for lunch the next day—no extra effort.
- Pantry Staples: All-purpose flour, salt, and a few basics are all I need. No last-minute grocery runs.
Step-by-Step Instructions for Chicken Pot Pie Without Milk
Here’s the method for achieving that perfect flaky crust and rich filling without a drop of dairy.
Step 1: Craft the Flaky Dairy-Free Crust
In a large bowl, whisk together 2 cups All-Purpose Flour and ½ tsp Salt. This division ensures the crust has its own balanced seasoning. Cut in the 0.75 cup Dairy-Free Butter (cold and cubed) using a pastry cutter or your fingers until the mixture resembles coarse crumbs with pea-sized butter pieces visible.
The key to flakiness is keeping the butter cold—don’t overwork it. Gradually add 0.5 cup Ice Water, 1 tbsp at a time, mixing just until the dough comes together. It should hold when pressed but not be sticky. Form into a disk, wrap in plastic, and chill for 30 minutes while you prepare the filling.
Step 2: Sear Chicken and Build Filling Base
Heat 2 tbsp Olive Oil in a large skillet over medium-high heat. Add the cubed 1.5 lb Boneless Skinless Chicken Breasts and cook for 5-6 minutes until lightly browned and cooked through. Remove chicken and set aside.
In the same skillet, add diced Yellow Onion, Carrots, and Celery Stalks. Sauté for 5 minutes until the vegetables soften. Stir in minced 3 cloves Garlic Cloves, 1 tsp Dried Thyme, 1 tsp Dried Rosemary, and remaining ½ tsp Salt plus 0.5 tsp Black Pepper. Cook for 1 minute until fragrant.
Step 3: Create the Roux and Thicken the Filling
Sprinkle the remaining 0.5 cup All-Purpose Flour over the vegetables and stir to coat. This creates a roux that will thicken your filling beautifully. Pour in 2 cups Chicken Broth, stirring constantly to prevent lumps. Bring to a simmer and cook for 3-4 minutes until the mixture thickens noticeably.
Return the chicken to the skillet along with 1 cup Frozen Peas. Stir to combine and cook for an additional 2 minutes until everything is heated through. The filling should coat the back of a spoon. Taste and adjust seasoning if needed, remembering that the crust has its own salt.
Step 4: Assemble and Bake to Golden Perfection
Preheat your oven to 375°F. Roll out the chilled dough on a lightly floured surface to about ⅛-inch thickness. Transfer the filling to a pie dish and cover with the rolled dough, crimping the edges to seal. Cut several slits in the top to allow steam to escape.
Bake for 30-35 minutes until the crust is golden brown and the filling is bubbling. If the edges brown too quickly, cover them with foil. Let the pot pie rest for 10 minutes before serving to allow the filling to set slightly—this makes slicing cleaner and prevents burns from the molten filling.
Pro Tips For Making Chicken Pot Pie Recipe Without Milk
- Chill the Dough: After mixing your flour, dairy-free butter, and ice water, let the dough rest in the fridge for at least 30 minutes—this prevents shrinking during baking and makes rolling easier.
- Dry the Chicken: Pat the boneless chicken breasts completely dry before cooking to avoid a watery filling; I learned this the hard way after a soggy first attempt.
- Skip Overworking: Mix the crust just until it comes together—overworking the dough with dairy-free butter can make it tough, and nobody wants a chewy pot pie crust.
- Use Ice Water: The colder the water, the flakier the crust; I keep a cup of water with ice cubes in it and measure from that, never skipping this step.
Storing and Reheating This Recipe
Refrigerator Storage
Let your pot pie cool completely before storing—this prevents soggy crust. Transfer to an airtight container or wrap tightly in foil. It keeps beautifully in the fridge at 40°F or below for 3-4 days. I love that the flavors deepen overnight. ❄️
Freezer Storage
Unbaked pot pies freeze best. Assemble completely, wrap in plastic wrap then foil, and freeze for up to 2 months. For baked pies, cool completely first. I always label with the date to track freshness.
Oven Reheating
Preheat oven to 350°F. Cover the pie with foil and heat for 15-20 minutes until warmed through. Remove foil last 5 minutes to crisp the crust. This method preserves that flaky texture we worked so hard to create. 🔥
Microwave Option
For single servings, microwave on 70% power for 2-3 minutes, covered with a damp paper towel. The crust won’t be as crisp, but it’s perfect for quick lunches. Stir filling halfway through.
Crust Protection
To prevent sogginess when storing, place a paper towel between the crust and container. For reheating, a wire rack allows air circulation underneath. I learned this trick after too many disappointing leftovers.
Nutrition Facts
Frequently Asked Questions
What can I use instead of dairy butter?
Use dairy-free butter like Earth Balance or Miyoko’s for the crust. Coconut oil in solid form works too. Chill your bowl first to keep it firm while cutting in.
Why is my crust tough?
Overworking the dough develops too much gluten. Mix just until combined and keep ingredients ice-cold. Resting the dough for 30 minutes before rolling also helps.
Can I make this gluten-free?
Yes! Swap the all-purpose flour for a 1:1 gluten-free blend. Ensure your dairy-free butter is also gluten-free, as some brands contain wheat. The method remains the same.
How do I prevent a soggy bottom crust?
Pre-bake the bottom crust for 10 minutes before adding filling. Also, let the filling cool slightly before assembling to reduce steam.

- 6 Oz Chocolate Chip Cookie Recipe: Perfectly Balanced Crispy Edges and Chewy Hearts - September 25, 2026
- 6-Inch Coffee Cake Recipe: Vanilla Bean Swirls and Buttery Streusel Topping - September 25, 2026
- 1 Hour Soup Recipe: Velvety Richness Without the Wait - September 25, 2026