
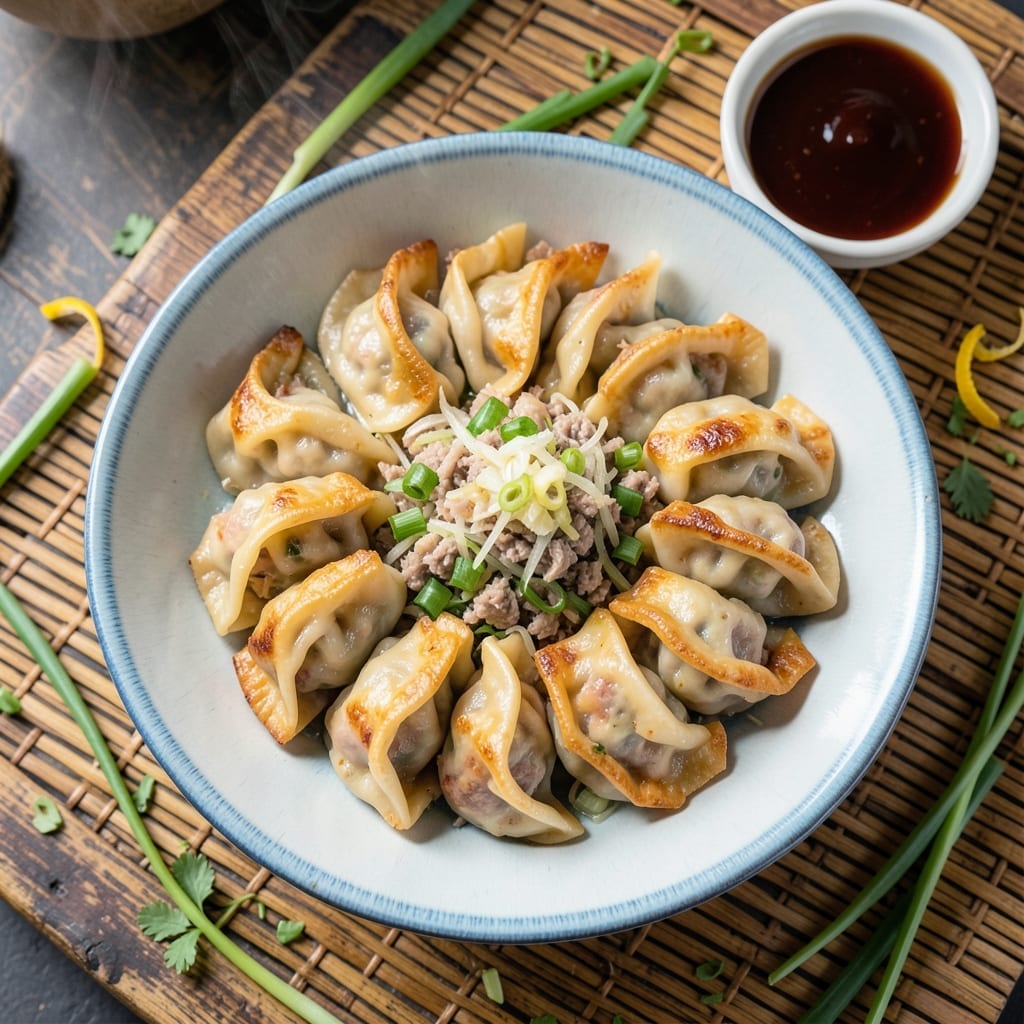
There’s a reason pot stickers are a dim sum staple—crispy golden bottoms and juicy fillings create the perfect bite every time. I’ve refined this method to ensure consistent results, from the folding technique to the pan-frying process.
The filling combines ground pork with napa cabbage, green onions, and ginger for authentic flavor. The dough is simple: just flour and water, rolled thin for that delicate texture. Pan-frying then steaming locks in moisture while creating a shatteringly crispy base.
Each dumpling delivers a satisfying contrast: tender wrapper, savory pork, and that signature crispness. Serve with a tangy dipping sauce for the full experience. This recipe stays true to tradition without unnecessary shortcuts.
Perfect for parties or a weekend project, these pot stickers freeze beautifully for future cravings.
Ingredients for Chinese Pork Pot Stickers
Traditional ingredients for authentic pot stickers with crispy bottoms and juicy fillings ready to impress.
| Ingredient | Amount | Notes |
|---|---|---|
| Ground Pork 🐖 | 1 lb | 80% lean for best juiciness |
| Napa Cabbage 🥬 | 2 cups | Finely shredded, salted and drained |
| Green Onions 🧅 | 4 whole | White and green parts, thinly sliced |
| Fresh Ginger 🌿 | 1 tbsp | Peeled and finely minced |
| Garlic Cloves 🧄 | 3 cloves | Minced to fine paste |
| Soy Sauce 🫒 | 2 tbsp | Low-sodium preferred for control |
| Sesame Oil 🫒 | 1 tsp | Toasted for authentic aroma |
| All-Purpose Flour 🌾 | 3 cups | For dumpling dough, plus extra for dusting |
| Warm Water 💧 | 1 ¼ cups | Gradually added to flour |
| Vegetable Oil 🫒 | ¼ cup | For pan-frying, neutral flavor |
| Rice Vinegar 🍯 | 1 tbsp | For dipping sauce balance |
| Sugar 🧂 | ½ tsp | White granulated for sauce |
| Salt 🧂 | 1 tsp | Divided between filling and dough |
| Black Pepper 🌶️ | ½ tsp | Freshly ground for filling |
The pork is the foundation—80% lean ground pork delivers the perfect fat-to-meat ratio for juiciness. Asian markets often have better quality options than standard supermarkets. For the cabbage, Napa variety is essential (not regular green cabbage) for its delicate, slightly sweet flavor. The ginger and garlic should be fresh, not powdered, for authentic depth. Most of these are pantry staples if you cook Chinese regularly.
Need a pork alternative? Ground chicken or turkey works well for a lighter version. No Napa cabbage? Regular cabbage at half the amount (it’s denser) in a pinch. For gluten-free dough, swap all-purpose flour for a gluten-free blend with xanthan gum. The soy sauce can be tamari for gluten-free, but check labels—San-J makes a reliable version. Sesame oil is hard to substitute, but a few drops of toasted peanut oil can add depth.
Uncooked pot stickers freeze for up to 3 months on a tray before bagging. Cooked ones keep in the fridge for 3-4 days—reheat in a skillet to recapture crispiness. The dipping sauce can be made ahead and stored for 1 week in the refrigerator. Always bring filling ingredients to room temperature before assembling for easier wrapping.
Why You’ll Love This Recipe
- Minimal Chopping Required: I just throw everything in the food processor—Napa cabbage, green onions, ginger, garlic—done in seconds.
- Umami Bomb: The pork soaks up the ginger and garlic like a sponge, and that first crispy bite? Ridiculously good.
- Freezer Friendly: I make a double batch, freeze half, and pull them straight from freezer to pan. (Yes, even on a Tuesday night)
- Stretches Far: One pound of pork makes about 40 dumplings—enough for dinner, leftovers, and a snack I won’t share.
Step-by-Step Instructions for Chinese Pork Pot Stickers
Master the technique that guarantees golden crispy bottoms and succulent juicy fillings every time.
Step 1: Prepare the Filling Mixture
In a large bowl, combine the 1 lb Ground Pork with 2 cups Napa Cabbage (salted and drained), 4 whole Green Onions (thinly sliced), 1 tbsp Fresh Ginger (minced), and 3 cloves Garlic Cloves (minced to paste).
Add 2 tbsp Soy Sauce, 1 tsp Sesame Oil, ½ tsp Black Pepper, and ½ tsp of the 1 tsp Salt. Mix thoroughly in one direction until sticky and well combined—this ensures even distribution of flavors and a cohesive texture when cooked.
Step 2: Make the Dumpling Dough
In a separate bowl, combine 3 cups All-Purpose Flour with the remaining ½ tsp Salt. Gradually add 1.25 cups Warm Water while stirring with chopsticks or a fork until a shaggy dough forms.
Turn the dough onto a lightly floured surface and knead for 8-10 minutes until smooth and elastic. The dough should spring back when pressed lightly with a finger. Cover with a damp towel and let rest for 30 minutes—this relaxes the gluten for easier rolling.
Step 3: Assemble the Pot Stickers
Divide the rested dough into 4 equal portions and roll each into a 1-inch thick log. Cut each log into 12 equal pieces and roll each piece into a 3-inch circle, keeping the unused dough covered with a damp towel to prevent drying.
Place 1 tbsp of filling in the center of each wrapper. Fold in half and pleat the edges, pressing firmly to seal. The pleats should be uniform and the seal completely closed to prevent the filling from leaking during cooking.
Step 4: Pan-Fry for Crispy Bottoms
Heat ¼ cup Vegetable Oil in a non-stick skillet with a tight-fitting lid over medium-high heat. Arrange the pot stickers in a single layer, not touching, and cook for 2-3 minutes until the bottoms are golden brown.
Add ½ cup of water to the pan, immediately cover with the lid, and reduce heat to medium. Steam for 6-8 minutes until the water has evaporated and the pot stickers are cooked through. Remove the lid and cook for an additional 1-2 minutes until the bottoms are deep golden and crispy.
Step 5: Create the Dipping Sauce and Serve
While the pot stickers cook, combine 1 tbsp Rice Vinegar, ½ tsp Sugar, and a pinch of Salt in a small bowl. Stir until the sugar dissolves completely.
Transfer the pot stickers to a serving platter, crispy side up. Serve immediately with the dipping sauce on the side. The perfect pot sticker should have a crispy, golden-brown bottom that shatters slightly when bitten, giving way to a juicy, flavorful filling inside.
Pro Tips For Making Chinese Pork Pot Stickers
- Pre-cook the cabbage: I learned this the hard way—raw Napa cabbage releases too much water and makes the filling soggy. Sauté it first with a pinch of salt, then squeeze out every last drop of moisture before mixing with the pork.
- Chill the filling: After mixing the pork, cabbage, green onions, ginger, and garlic, let it rest in the fridge for 30 minutes. This makes the filling easier to handle and prevents the wrappers from tearing when you fold them.
- Skip the overcrowding: Resist the urge to pack the pan with too many pot stickers at once. Give them at least an inch of space—otherwise, they’ll steam instead of crisp, and you’ll lose that golden-brown crust.
- Use hot water for sealing: Sounds weird, but it works: Dip your finger in hot water and run it along the edge of the wrapper before folding. It creates a tighter seal than cold water, so your pot stickers won’t burst open while cooking.
Health Benefits of This Dish
Rich Protein Source
These dumplings pack a protein punch with 1 lb ground pork providing about 20g of protein per 3-4 pot stickers. Protein is essential for muscle repair and keeping you full. The pork’s natural fats also contribute to that signature juicy texture we all love. 💪
Low-Carb Option
Each pot sticker wrapper contains minimal carbs—about 10g per dumpling—making this dish relatively low-carb. The filling’s primary carb source is the 2 cups napa cabbage, which adds fiber and volume without excessive calories. Perfect for those watching their carb intake.
Vitamin and Mineral Boost
The napa cabbage and green onions bring important vitamins to the table. Cabbage is rich in vitamin K and vitamin C, while green onions provide vitamin A and antioxidants. Garlic and ginger add immune-boosting properties to every bite.
Healthy Fats
Sesame oil in the filling contains heart-healthy polyunsaturated fats. The vegetable oil used for frying, while higher in calories, helps create that irresistible crispy texture. Balance is key—enjoy these as part of a varied diet.
Gut-Friendly Ingredients
Garlic and ginger in the filling have natural prebiotic properties that support gut health. Fermented soy sauce adds beneficial bacteria. This combination not only tastes delicious but may also promote a healthy digestive system. 🥗
Portion Control
At about 50-60 calories per pot sticker, these are perfect for portion control. Serve with a side of steamed vegetables to create a balanced meal. The protein and fiber content helps maintain steady energy levels throughout the day.
Nutrition Facts
Frequently Asked Questions
Can I use store-bought wrappers instead?
Yes, store-bought dumpling wrappers work fine. Look for round wrappers labeled “pot sticker” or “gyoza” skins. They may be slightly thicker than homemade, so adjust cooking time by 1-2 minutes to prevent burning.
Why do my pot stickers stick to the pan?
Use a non-stick skillet and ensure it’s hot before adding oil. Wait until the oil shimmers at medium-high heat before adding dumplings. If they still stick, let them cook undisturbed for the full 2-3 minutes to develop a crust.
How do I know when they’re done?
The bottoms should be deep golden brown and crispy. The filling reaches 160°F when fully cooked. After steaming, cook uncovered for an extra 1-2 minutes to guarantee crispiness.
Can I bake these instead of pan-frying?
Baking works but won’t give the same crispy texture. Brush with oil and bake at 400°F for 15-20 minutes, flipping halfway. For best results, pan-fry first then finish in the oven.

- 4C Bread Crumbs Meatballs Recipe: Crispy Crust and Juicy Centers - September 25, 2026
- 6 Oz Chocolate Chip Cookie Recipe: Perfectly Balanced Crispy Edges and Chewy Hearts - September 25, 2026
- 6-Inch Coffee Cake Recipe: Vanilla Bean Swirls and Buttery Streusel Topping - September 25, 2026