
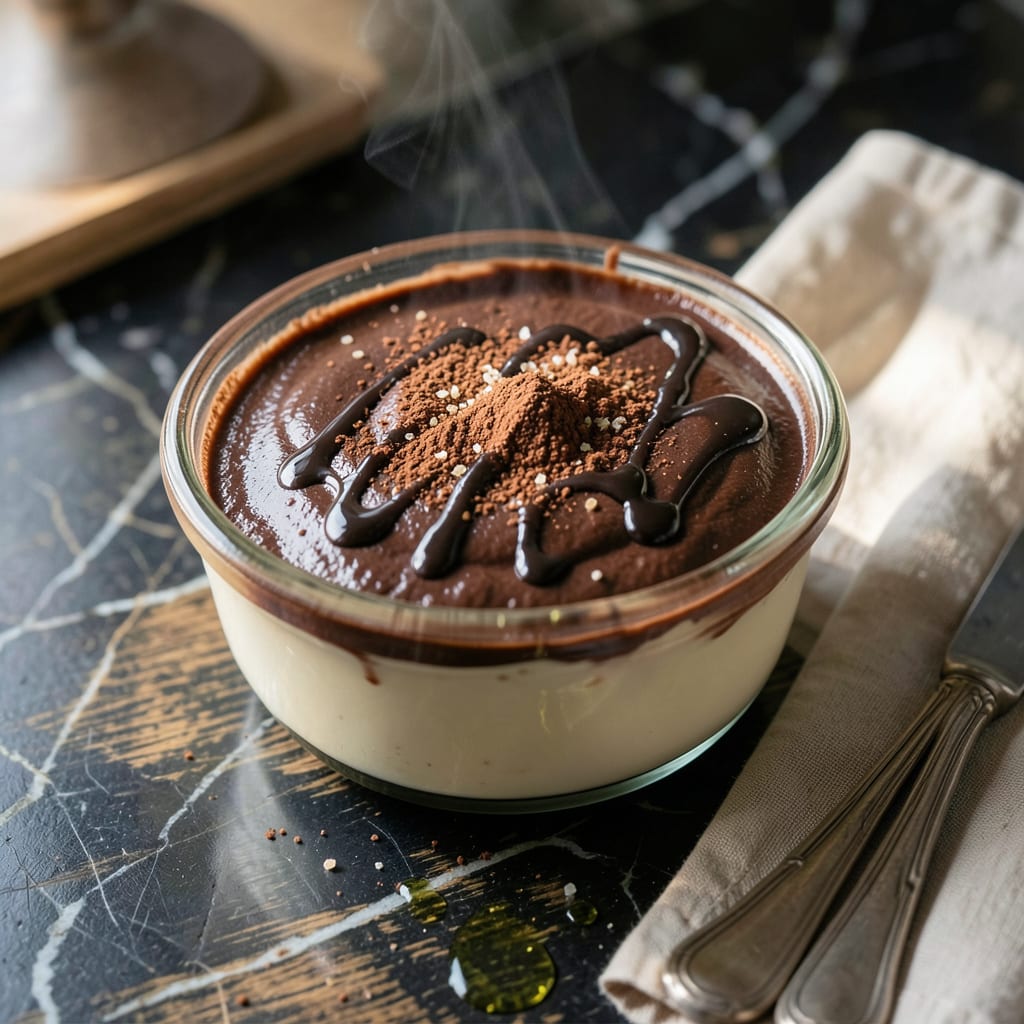
This chocolate pudding proves that using low-fat milk doesn’t mean sacrificing richness or texture. The result is a velvety dessert that feels indulgent without the guilt.
With just a few simple ingredients and careful whisking, you’ll achieve a smooth, creamy pudding that rivals any full-fat version. Perfect for satisfying a sweet tooth while staying mindful of nutrition.
Ingredients for Chocolate Pudding Recipe Low Fat Milk
Simple pantry staples create this decadent yet light chocolate dessert everyone will love.
| Ingredient | Amount | Notes |
|---|---|---|
| Granulated Sugar 🍚 | ¾ cup | Divided for sweetness balance |
| Unsweetened Cocoa Powder 🍫 | ½ cup | Dutch-process for smoother flavor |
| Cornstarch 🌾 | ¼ cup | Thickening agent essential |
| Salt 🧂 | ¼ tsp | Enhances chocolate flavor |
| Low-Fat Milk 🥛 | 3 cups | Whole or 2% works too |
| Large Egg Yolks 🥚 | 3 whole | Room temperature preferred |
| Vanilla Extract 🌿 | 2 tsp | Pure extract for best flavor |
| Unsalted Butter 🧈 | 1 tbsp | Optional for richness |
| Semi-Sweet Chocolate Chips 🍫 | 2 oz | Melted for depth |
| Heavy Cream 🥛 | ¼ cup | Optional for lighter texture |
The cocoa powder is critical here. Hershey’s Special Dark or Ghirardelli Dutch-process deliver that deep, smooth chocolate flavor. Most grocery stores carry these in the baking aisle. For the cornstarch, Argo or Clabber Girl are reliable brands—avoid the lumps by mixing it with sugar before adding liquids. Low-fat milk from Organic Valley or your preferred dairy brand works perfectly.
No Dutch-process cocoa? Natural cocoa powder at 1:1 ratio works but may taste slightly sharper. Out of cornstarch? All-purpose flour at double the amount can substitute in a pinch (though texture may suffer). Skip the butter entirely for a truly low-fat version, or use coconut oil for a dairy-free twist. Semi-sweet chocolate chips can be replaced with chopped chocolate bars.
The pudding thickens as it cools, so don’t overcook. Store in an airtight container for up to 5 days in the fridge. A thin layer of plastic wrap pressed directly on the surface prevents a skin from forming. Best served chilled after at least 4 hours of setting time.
Why You’ll Love This Recipe
- Stovetop Simple: I just whisk everything in one pot—no fancy equipment, no fuss.
- Rich Chocolate Fix: The cocoa powder gives it that deep, velvety chocolate taste without being too sweet.
- Kid-Approved Treat: Honestly, my picky niece asks for this after school instead of cookies.
- Budget Stretch: A gallon of low-fat milk makes multiple batches, so it’s cheap to feed a crowd.
Step-by-Step Instructions for Chocolate Pudding with Low-Fat Milk
This method ensures a luscious texture using standard kitchen tools and precise temperature control.
Step 1: Combine Dry Ingredients and Milk
In a medium saucepan, whisk together the 0.75 cup Granulated Sugar, 0.5 cup Unsweetened Cocoa Powder, 0.25 cup Cornstarch, and 0.25 tsp Salt until fully incorporated. This dry blend prevents lumps when the liquid is added.
Gradually pour in the 3 cups Low-Fat Milk while whisking constantly to create a smooth, homogeneous mixture. The cornstarch will begin to thicken slightly as it hydrates, but the mixture should still be pourable at this stage.
Step 2: Cook the Base to Proper Thickness
Place the saucepan over medium heat and cook, stirring constantly with a wooden spoon or silicone spatula, scraping the bottom and sides of the pan to prevent scorching. The mixture will start to thicken after 5-7 minutes.
Continue cooking until it reaches a full boil and thickens enough to coat the back of a spoon. At this point, the pudding base should have a glossy appearance and leave a clear path when you run a finger through it on the spoon.
Step 3: Temper and Incorporate Egg Yolks
In a separate bowl, lightly beat the 3 whole Large Egg Yolks. Slowly ladle about 1 cup of the hot pudding mixture into the yolks while whisking vigorously to temper them. This gradual introduction prevents the eggs from curdling.
Pour the tempered egg mixture back into the saucepan and return to medium heat. Cook for an additional 2-3 minutes, stirring constantly, until the pudding thickens further and reaches a custard-like consistency that holds its shape briefly when the spoon is lifted.
Step 4: Finish with Chocolate and Aromatics
Remove the saucepan from heat. Immediately add the 2 oz Semi-Sweet Chocolate Chips, 1 tbsp Unsalted Butter, and 2 tsp Vanilla Extract. Stir until the chocolate and butter are completely melted and the mixture is smooth and glossy.
For a lighter texture, gently fold in the 0.25 cup Heavy Cream at this stage. The cream adds richness without overpowering the chocolate flavor, creating that signature velvety finish.
Step 5: Chill and Serve
Transfer the pudding to individual serving dishes or a large bowl. Press plastic wrap directly onto the surface to prevent a skin from forming. Refrigerate for at least 4 hours, or until fully set and chilled throughout.
The pudding will continue to thicken as it cools. Serve chilled with whipped cream or fresh berries for contrast. The texture should be smooth, creamy, and rich, with a deep chocolate flavor that belies its lighter milk base.
Pro Tips For Making Chocolate Pudding Recipe Low Fat Milk
- Whisk Cornstarch First: Mix the cornstarch with a little cold low-fat milk before adding to the pot—this prevents lumps and gives you that silky texture I learned this the hard way after fishing out clumps from my first three batches.
- Use Dutch Process Cocoa: Swap regular cocoa for Dutch process if you have it; it dissolves smoother in low-fat milk and cuts the bitterness without extra sugar.
- Watch the Simmer: The moment it thickens, pull it off the heat—low-fat milk scorches fast, and nobody wants burnt chocolate pudding.
- Add Pinch of Sugar: Low-fat milk can taste a touch flat, so I always add an extra teaspoon of granulated sugar to balance it out. Sounds small, but it actually changes the outcome.
Dietary Considerations for chocolate pudding recipe low fat milk
Dairy-Free Swaps
Replace low-fat milk with unsweetened almond milk or oat milk for a plant-based version. I’ve found Silk Unsweetened Almond Milk works particularly well.
Sugar Alternatives
For a lower sugar option, swap granulated sugar with coconut sugar or monk fruit sweetener at a 1:1 ratio. The flavor will be slightly different but still delicious.
Egg-Free Option
Use 2 tbsp cornstarch mixed with 2 tbsp water as an egg substitute. This maintains the thickening power without altering the texture too much.
Vegan Adjustments
Combine dairy-free milk with vegan chocolate chips and skip the butter entirely. Enjoy Life brand offers excellent allergy-friendly chocolate that melts beautifully.
Gluten-Free Note
This recipe is naturally gluten-free as written, but always check labels on cocoa powder and chocolate chips. Ghirardelli and Hershey’s typically label their products clearly.
Lower Calorie Tip
Skip the butter and heavy cream entirely for a lighter version. The pudding will still set nicely and deliver that rich chocolate flavor you crave. 💪
Nutrition Facts
Frequently Asked Questions
Can I use skim milk instead of low-fat?
Yes, but the texture may be slightly less creamy. Skim milk has less fat, which can make the pudding a bit thinner. For best results, stick with 1% or 2% low-fat milk.
Why does my pudding have lumps?
Lumps usually form if the cornstarch isn’t fully dissolved before heating. Whisk dry ingredients with sugar first, then gradually add milk. Constant stirring while cooking prevents clumping.
How can I make it thicker?
Cook it 1-2 minutes longer after it boils to reach desired thickness. If it’s still too thin after chilling, mix 1 tbsp cornstarch with 1 tbsp cold water and stir in while reheating.
Can I make this ahead of time?
It keeps well in the fridge for up to 5 days. Press plastic wrap directly on the surface to prevent a skin from forming. Serve chilled for the best texture.

- 8 Bean Soup Recipe Crock Pot: Hearty Vegetable Medley in One Pot - September 25, 2026
- 4C Bread Crumbs Meatballs Recipe: Crispy Crust and Juicy Centers - September 25, 2026
- 6 Oz Chocolate Chip Cookie Recipe: Perfectly Balanced Crispy Edges and Chewy Hearts - September 25, 2026