
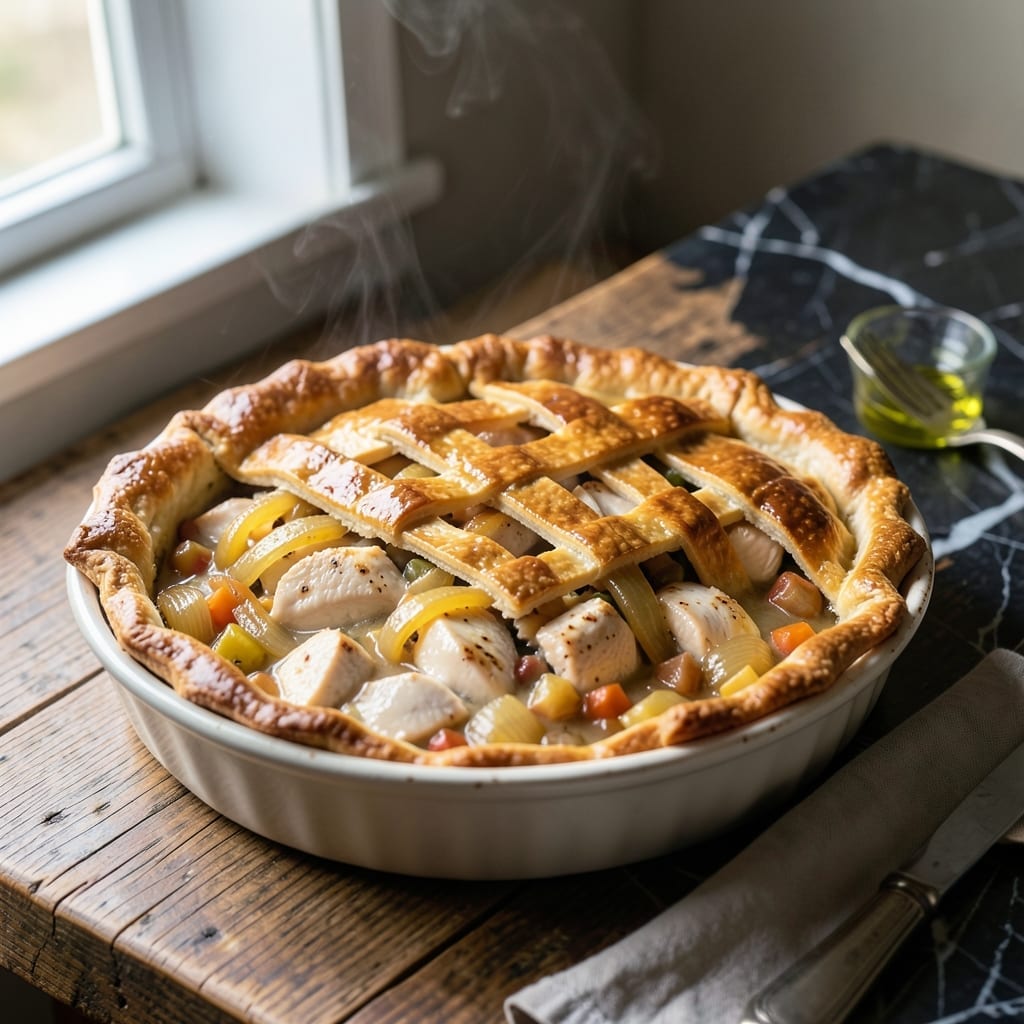
Few dishes capture comforting tradition like a golden pot pie straight from the oven.
This version builds on the classic foundation with a flaky crust and creamy herb-infused filling that never disappoints. The filling comes together with tender vegetables and rich sauce that bubbles beautifully beneath the buttery top.
What sets this apart is the attention to detail—properly sealed edges and a vented top ensure perfect baking. The result is a meal that looks as impressive as it tastes, with layers that separate cleanly with every serving.
Serve warm for the ultimate satisfying experience that brings everyone to the table.
Ingredients for Classic Pot Pie
Classic comfort starts with these carefully selected ingredients for a golden, flaky masterpiece.
| Ingredient | Amount | Notes |
|---|---|---|
| All-Purpose Flour 🌾 | 2 ½ cups | Plus extra for dusting surface |
| Unsalted Butter 🧈 | 1 cup | Cold, cubed for crust |
| Ice Water 💧 | ½ cup | For pie dough cohesion |
| Salt 🧂 | 1 tsp | Divided between crust and filling |
| Boneless Skinless Chicken Breast 🍗 | 1 ½ lb | Diced into bite-sized pieces |
| Yellow Onion 🧅 | 1 whole | Medium, finely diced |
| Carrots 🥕 | 2 whole | Peeled and diced |
| Celery Stalks 🌿 | 2 whole | Diced for mirepoix base |
| Frozen Sweet Peas 🌱 | 1 cup | No need to thaw first |
| Fresh Thyme Leaves 🍃 | 1 tbsp | Chopped, or 1 tsp dried |
| Fresh Rosemary 🌿 | 1 tbsp | Finely chopped for depth |
| Garlic Cloves 🧄 | 3 cloves | Minced for aromatic base |
| Heavy Cream 🥛 | 1 ½ cups | Full-fat for rich sauce |
| Chicken Stock 🍲 | 1 ½ cups | Low-sodium preferred to control salt |
| Large Egg 🥚 | 1 whole | For egg wash on crust |
The crust demands precision. King Arthur Flour for the all-purpose base delivers consistent results—avoid self-rising as it throws off the balance. For butter, Plugrá or Kerrygold offer the 80-82% fat content that creates those flaky layers. The chicken should be fresh, not previously frozen, to prevent a rubbery texture in the filling. Most supermarkets carry suitable options in their butcher section.
No fresh herbs? Dried thyme and rosemary at one-third the amount work in a pinch. Swap chicken for turkey breast or make it vegetarian with cremini mushrooms and chickpeas. The heavy cream can be replaced with half-and-half, though the sauce will be slightly less rich. For the stock, Better Than Bouillon paste mixed with hot water yields excellent flavor when you’re out of boxed stock.
Assemble the pie just before baking for the flakiest crust. Leftovers keep 3-4 days sealed in the fridge, though the crust softens with time. For make-ahead convenience, prepare the filling a day in advance and refrigerate—just bring it to room temperature before assembling and baking. Freezes beautifully for up to 3 months if tightly wrapped.
Why You’ll Love This Recipe
- One Bowl Magic: I love that the flaky crust comes together with just flour, butter, and ice water—no fancy tools, no fuss.
- That Golden Crust: The buttery layers with tender chicken inside? Ridiculously good first bite to last.
- Feeds Everyone: From Sunday dinner to freezing extras for lazy nights, this works for any crowd.
- Dollar Stretcher: Boneless chicken breast keeps it budget-friendly, and leftovers taste even better the next day.
Step-by-Step Instructions for Classic Pot Pie
Master the technique behind this timeless dish with precision and care for consistent results.
Step 1: Prepare the Flaky Pie Crust
In a food processor, pulse the 2.5 cups All-Purpose Flour and ½ tsp Salt to combine. Add the 1 cup Unsalted Butter (cold, cubed) and pulse until the mixture resembles coarse crumbs with some pea-sized butter pieces visible. The key to flakiness is keeping the butter cold throughout the process.
With the processor running, slowly drizzle in the ½ cup Ice Water until the dough just comes together. It should hold when pressed but not be sticky. Turn the dough onto a lightly floured surface, divide into two equal portions, shape into discs, wrap in plastic, and refrigerate for 1 hour to relax the gluten and firm the butter.
Step 2: Sauté the Aromatic Vegetable Base
In a large skillet over medium heat, cook the diced 1 whole Yellow Onion, 2 whole Carrots, and 2 whole Celery Stalks for 8-10 minutes until softened and beginning to caramelize. Add the minced 3 cloves Garlic Cloves, 1 tbsp Fresh Thyme Leaves, and 1 tbsp Fresh Rosemary, stirring for 1 minute until fragrant.
This mirepoix forms the flavor foundation of the filling. The natural sugars in the vegetables should start to brown slightly, creating depth. Don’t rush this step—undercooked vegetables will taste raw in the final dish.
Step 3: Cook the Chicken and Create the Cream Sauce
Increase heat to medium-high and add the diced 1.5 lb Boneless Skinless Chicken Breast to the skillet. Cook for 5-6 minutes until the chicken is no longer pink and begins to brown. The pieces should be fully cooked through but still tender.
Pour in the 1.5 cups Chicken Stock and 1.5 cups Heavy Cream, scraping up any browned bits from the bottom of the pan. Simmer for 8-10 minutes until the sauce thickens enough to coat the back of a spoon. Stir in the 1 cup Frozen Sweet Peas and remaining ½ tsp Salt. The sauce should be rich and velvety, with visible herbs speckled throughout.
Step 4: Assemble and Bake the Pot Pie
Roll out one disc of dough on a floured surface to fit a 9-inch pie dish. Line the dish with the dough, allowing it to overhang slightly. Pour in the chicken and sauce mixture, ensuring an even distribution. The filling should come nearly to the top of the dish but not overflow.
Roll out the second disc of dough and place it over the filling. Trim the overhang to ½ inch, then crimp the edges to seal. Cut several slits in the top crust to allow steam to escape. Brush with a beaten 1 whole Large Egg for a golden finish. Bake at 375°F for 40-45 minutes until the crust is deeply golden and the filling is bubbling.
Step 5: Rest and Serve
Remove the pot pie from the oven and let it rest for 10-15 minutes before serving. This allows the filling to thicken slightly as it cools, making it easier to slice. The crust should be flaky and golden, with a rich, creamy filling beneath.
Serve portions in shallow bowls to capture every bit of the luscious sauce. Each serving should showcase the buttery layers of the crust with the hearty, herb-infused chicken and vegetable filling.
Pro Tips For Making Classic Pot Pie
- Chill the Dough: After mixing the flour, butter, and ice water, let the dough rest in the fridge for at least 30 minutes—this keeps the butter from melting too soon and guarantees a flaky crust.
- Poach the Chicken: Simmer the boneless chicken breasts in salted water for 12-15 minutes until just cooked through, then shred or cube it—this keeps the meat moist instead of dry and stringy.
- Vent the Top: Cut a few small slits in the top crust before baking so steam can escape, or you’ll end up with a soggy bottom and a messy oven.
- Use Cold Butter: Keep your unsalted butter ice-cold when cutting it into the flour, and work fast—warm butter means a tough, flat crust instead of layers that puff and separate.
Troubleshooting Great classic pot pie
Soggy Bottom Crust
Prevent this by blind-baking the bottom crust for 10 minutes at 375°F before adding filling. I also brush the crust with a thin layer of beaten egg white to create a moisture barrier. This works like a charm every time. 💡
Filling Too Thin
If your sauce isn’t thickening, simmer it uncovered for an extra 5-7 minutes. For a quick fix, mix 1 tbsp cornstarch with 2 tbsp cold water and stir into the filling before baking. The sauce should coat the back of a spoon.
Crust Not Browning
Brush the top crust with egg wash (1 beaten egg + 1 tbsp water) right before baking. For extra shine, add 1 tsp milk to the wash. If it’s still pale after 30 minutes, tent with foil and extend baking time.
Steam Explosions
Always cut 4-5 slits in the top crust to allow steam to escape. Without vents, pressure builds and can rupture the crust. I use a sharp knife to make decorative cuts—this adds visual appeal while serving a functional purpose.
Filling Overflow
Don’t overfill your pie dish—leave at least ½ inch of space at the top. Place a baking sheet on the rack below to catch any spills. This prevents messy oven cleanups and ensures even baking. 🔥
Dry Filling
If your pie seems dry after baking, the filling likely overcooked. Check at 40 minutes and cover with foil if the crust is browning too quickly. Let it rest 15 minutes before serving—the sauce will reabsorb some moisture.
Nutrition Facts
Frequently Asked Questions
Can I use store-bought pie crust?
Yes, but homemade tastes better. If using store-bought, thaw it fully and roll it out to fit your dish. Brush with egg wash for extra browning.
How do I keep the crust from getting soggy?
Blind-bake the bottom crust for 10 minutes at 375°F. Also, brush it with beaten egg white before adding filling to create a moisture barrier.
Can I make this ahead of time?
Prepare the filling a day in advance and refrigerate. Assemble and bake just before serving for the flakiest crust.
What can I substitute for heavy cream?
Use half-and-half or whole milk, though the sauce will be less rich. For a dairy-free option, try full-fat coconut milk.

- 4C Bread Crumbs Meatballs Recipe: Crispy Crust and Juicy Centers - September 25, 2026
- 6 Oz Chocolate Chip Cookie Recipe: Perfectly Balanced Crispy Edges and Chewy Hearts - September 25, 2026
- 6-Inch Coffee Cake Recipe: Vanilla Bean Swirls and Buttery Streusel Topping - September 25, 2026