
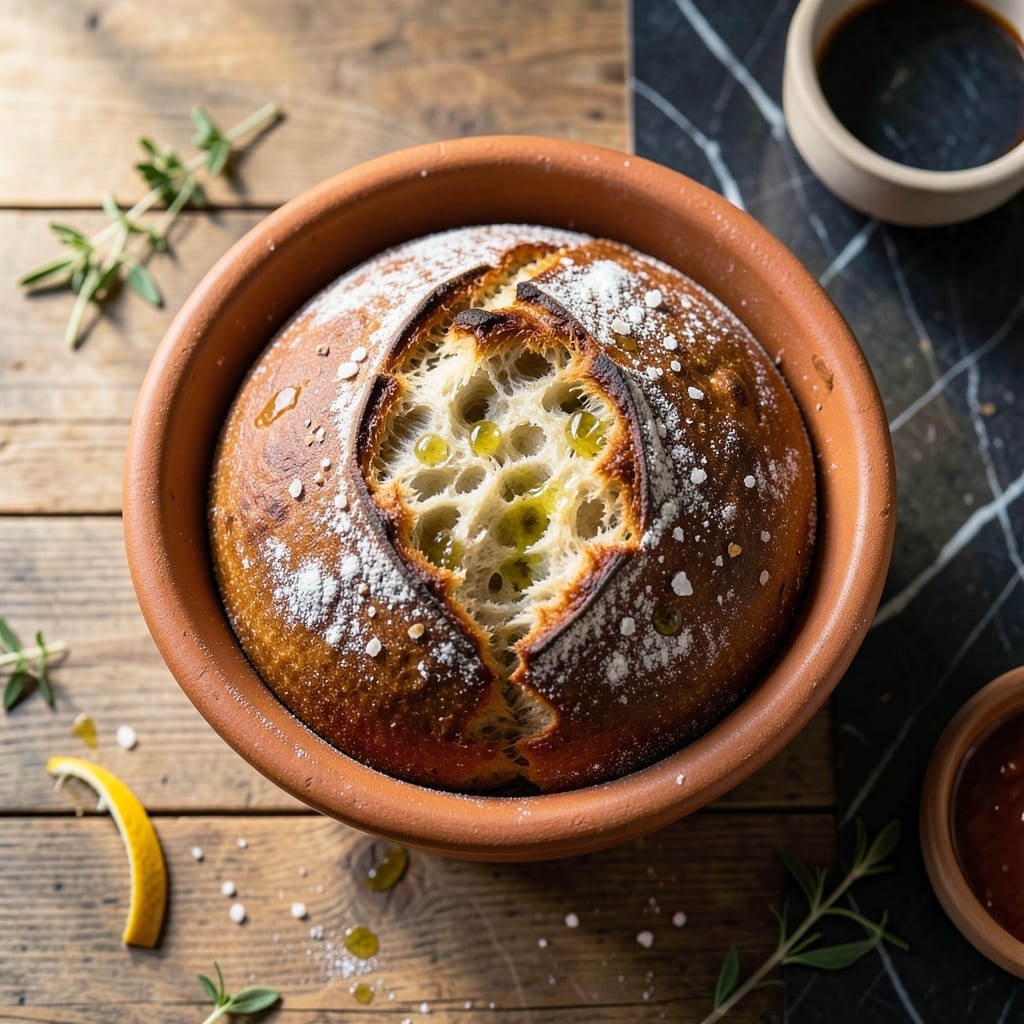
There’s something deeply satisfying about pulling a loaf of bread from a clay pot, its crust perfectly blistered and golden. This method transforms simple dough into artisanal bread with minimal effort and maximum reward.
The clay pot traps steam, creating an environment that mimics professional bread ovens. The result is a loaf with a crispy, rustic crust and a soft, airy interior that’s hard to resist. No special equipment is needed beyond the pot itself.
I’ve refined this technique to ensure consistent results every time. The dough requires just a few ingredients and a short rise, making it accessible for bakers of all skill levels. The baking process is straightforward but yields bread that looks and tastes like it came from a bakery.
Serve it warm with butter or alongside your favorite meal. This bread is as versatile as it is delicious.
Ingredients for Clay Pot Bread
A few humble ingredients yield bakery-quality bread with a rustic, blistered crust.
| Ingredient | Amount | Notes |
|---|---|---|
| Bread Flour 🌾 | 4 cups | Plus extra for dusting |
| Active Dry Yeast 🍞 | 2 ¼ tsp | One packet, proofed in warm water |
| Warm Water 💧 | 1 ½ cups | 110°F for yeast activation |
| Sea Salt 🧂 | 2 tsp | Fine grain for even distribution |
| Granulated Sugar 🍚 | 1 tbsp | Feeds the yeast for rising |
| Olive Oil 🫒 | 2 tbsp | For dough softness and greasing |
| Cornmeal 🌽 | ¼ cup | Prevents sticking to clay pot |
| Honey 🍯 | 1 tbsp | Optional for subtle sweetness |
| Unsalted Butter 🧈 | 2 tbsp | Melted for serving |
The flour is the foundation—King Arthur Bread Flour is the gold standard for its high protein content and consistent results. Yeast freshness is critical; check the expiration date and store unopened packets in the freezer. Warm water should be precisely 110°F—too hot kills the yeast, too cool delays activation. For the clay pot, unglazed terra cotta (like a Roma or Emile Henry baker) works best for steam retention.
No bread flour? All-purpose flour works at a 1:1 ratio, though the crumb will be slightly less chewy. Out of yeast? This recipe isn’t adaptable—yeast is non-negotiable for rise. Honey can be swapped with maple syrup or agave for vegan versions. The cornmeal prevents sticking; semolina or additional flour can substitute. For a richer dough, replace water with warm whole milk.
Store flour and yeast in airtight containers in a cool, dark place. Bread is best eaten the same day but keeps well wrapped at room temperature for 2-3 days. The clay pot should cool completely before cleaning—never use soap, just warm water and a brush. Re-season occasionally with oil to maintain its non-stick surface.
Why You’ll Love This Recipe
- One Bowl Wonder: I mix the flour, yeast, warm water, salt and sugar in a single bowl—no fancy tools, no mess.
- Crispy Golden Crust: That clay pot gives it a crust so perfect it cracks when I tap it, with a soft, airy inside.
- Weeknight Hero: Honestly, it’s my Tuesday dinner savior—pairs with soup, salad, or just butter.
- Pennywise Loaf: A few cents of ingredients makes a bakery-quality bread that lasts for days.
Step-by-Step Instructions for Clay Pot Bread
Master the technique for achieving a golden crust and tender crumb with this traditional method.
Step 1: Activate the Yeast and Prepare the Dough
In a large mixing bowl, combine the 1.5 cups Warm Water, 2.25 tsp Active Dry Yeast, and 1 tbsp Granulated Sugar. Let this mixture sit for 5-7 minutes until it becomes frothy and cloudy—this confirms your yeast is active and ready to work.
Add the 4 cups Bread Flour and 2 tsp Sea Salt to the yeast mixture, stirring until a shaggy dough forms. Drizzle in the 2 tbsp Olive Oil and continue mixing until the dough comes together. If using, stir in the 1 tbsp Honey for a touch of sweetness.
Step 2: Knead and First Rise
Turn the dough onto a lightly floured surface and knead for 8-10 minutes until it becomes smooth and elastic. The dough should spring back slowly when pressed with your finger. This development of gluten is what gives the bread its structure.
Place the dough in a lightly oiled bowl, cover with a damp towel, and let it rise in a warm, draft-free place for 1-1.5 hours, or until it has doubled in size. The ideal temperature for rising is around 75-80°F.
Step 3: Shape and Second Rise
Once the dough has risen, punch it down to release the air and turn it out onto a clean surface. Shape it into a round loaf, tucking the edges under to create surface tension. This tension helps the bread hold its shape during baking.
Generously dust your clay pot with the 0.25 cup Cornmeal to prevent sticking. Place the shaped dough into the pot, cover, and let it rise again for 30-45 minutes until it has puffed up noticeably. The cornmeal also adds a subtle texture to the crust.
Step 4: Bake to Perfection
Preheat your oven to 450°F. Once the dough has completed its second rise, place the covered clay pot in the oven. Bake for 30 minutes with the lid on to allow the bread to rise fully and develop steam, which contributes to a crisp crust.
Remove the lid and bake for an additional 15-20 minutes until the loaf is deep golden brown and sounds hollow when tapped on the bottom. The internal temperature should register 200-210°F on an instant-read thermometer.
Step 5: Cool and Serve
Remove the bread from the clay pot and transfer it to a wire rack. Let it cool for at least 20 minutes before slicing. This resting period allows the crumb structure to set, so your slices won’t be gummy.
Serve warm, brushed with the 2 tbsp Unsalted Butter for extra richness. The crust should be crisp and the interior soft and airy, with a rustic appearance that highlights the artisan quality of this bread.
Pro Tips For Making Clay Pot Bread
- Preheat the Pot: Soak your clay pot in water for 15 minutes, then preheat it in a cold oven as the temperature rises to 450°F—this prevents cracking and guarantees even heat distribution.
- Test Your Yeast: Always bloom your active dry yeast in warm water (110°F) with a pinch of sugar first; if it doesn’t foam within 5 minutes, your bread won’t rise and you’ll waste flour.
- Skip Cold Water: Using water straight from the tap can shock the yeast—let it sit for a few minutes to take the chill off, or your dough will proof sluggishly.
- Score the Dough: Just before baking, slash the top of your dough with a sharp knife or razor; it lets the bread expand without splitting and gives that bakery-style crust.
Serving Suggestions for This Dish
Fresh from the Oven
Serve this warm with 2 tbsp melted Unsalted Butter brushed over the crust. The butter soaks into the crust, adding richness that complements the bread’s rustic simplicity. I love watching it disappear as it melts into every nook and cranny. 💛
Soup and Salad Pairings
A thick slice pairs perfectly with tomato soup or minestrone for dipping. For salads, try it with a Caprese or kale Caesar. The bread’s crisp crust holds up beautifully to hearty soups and fresh greens alike.
Charcuterie Board Addition
Add torn pieces to your charcuterie spread alongside aged cheddar, prosciutto, and olives. The bread’s soft interior and crisp exterior create the perfect texture contrast with cured meats and cheeses.
Breakfast Treat
Toast leftover slices and top with jam or honey for a quick breakfast. The crust stays crisp even after toasting, and the interior remains tender. I often make extra just for this purpose.
Dinner Side
Serve alongside roasted chicken or pasta dishes to soak up sauces. The bread’s sturdy structure makes it ideal for mopping up every last bit of flavor from your plate.
Sweet Finishes
Transform it into dessert by serving with whipped cream cheese and fresh berries. The subtle sweetness of the bread balances the tartness of the fruit beautifully. 🍓
Nutrition Facts
Frequently Asked Questions
Do I need to soak the clay pot first?
Soaking isn’t required, but you should preheat the pot in the oven for 20 minutes at 450°F to prevent thermal shock. Always start with a room-temperature pot to avoid cracking.
Can I use all-purpose flour instead of bread flour?
Yes, but the texture will be slightly less chewy. Bread flour’s higher protein content creates better structure and crumb. The difference is subtle but noticeable.
Why did my bread stick to the pot?
This usually happens if the pot wasn’t dusted properly with cornmeal or if the dough was too wet. Use 0.25 cup Cornmeal and ensure your dough has the right consistency.
How do I know when it’s fully baked?
The loaf should be deep golden brown and sound hollow when tapped. For precision, use a thermometer to check for an internal temperature of 200-210°F.

- 6 Oz Chocolate Chip Cookie Recipe: Perfectly Balanced Crispy Edges and Chewy Hearts - September 25, 2026
- 6-Inch Coffee Cake Recipe: Vanilla Bean Swirls and Buttery Streusel Topping - September 25, 2026
- 1 Hour Soup Recipe: Velvety Richness Without the Wait - September 25, 2026