
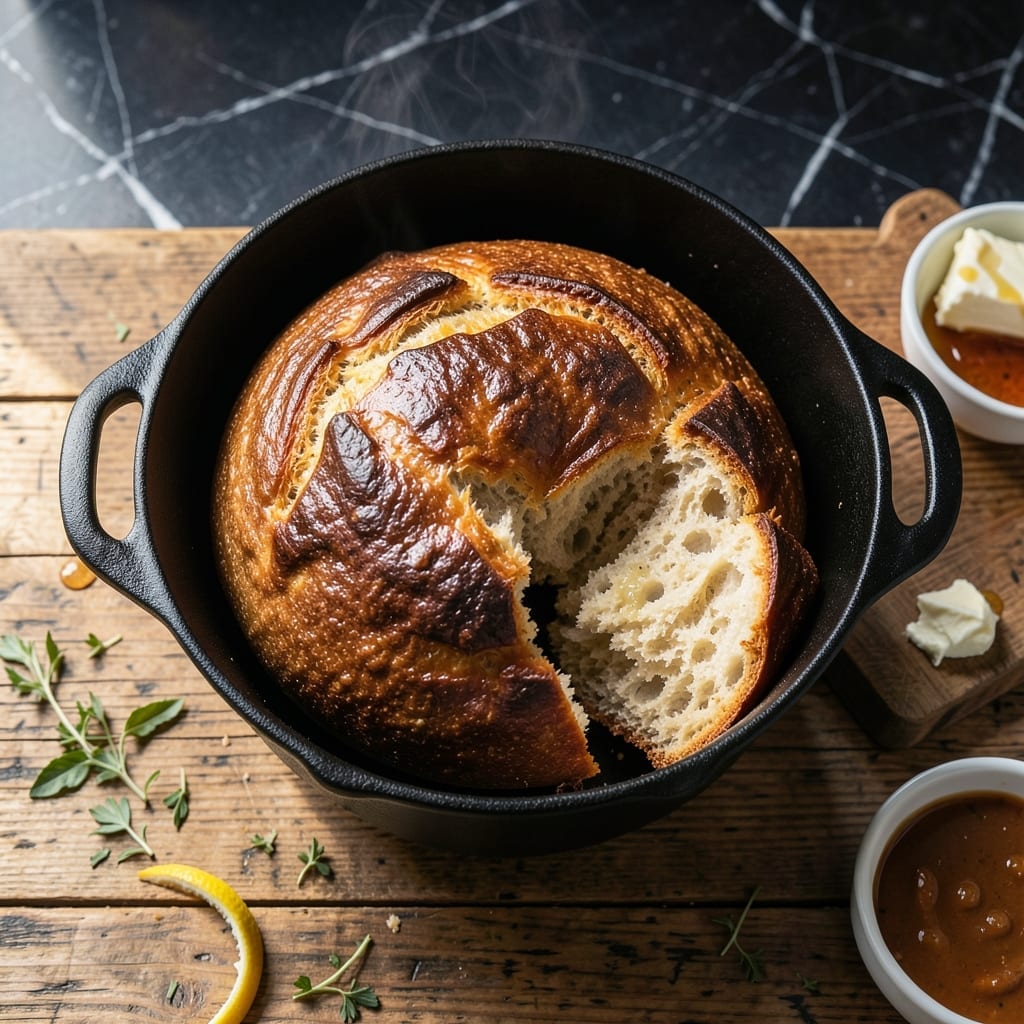
This Dutch oven bread recipe transforms basic ingredients into a crusty, artisan loaf with minimal effort. The method relies on high heat and steam to create that signature golden exterior and airy interior.
No kneading required—just mix, rest, and bake. The Dutch oven traps steam, mimicking professional bread ovens for restaurant-quality results at home. Perfect for beginners and seasoned bakers alike.
You’ll end up with a round loaf featuring a shatteringly crisp crust and a soft, open crumb. The simplicity of the process makes it ideal for daily baking.
Serve warm with butter or as a base for sandwiches. This technique never fails to impress.
Ingredients for Dutch Pot Bread
Basic staples create artisan-quality bread with minimal effort and maximum reward.
| Ingredient | Amount | Notes |
|---|---|---|
| Bread Flour 🌾 | 3 ½ cups | Unbleached, all-purpose works too |
| Water 💧 | 1 ½ cups | Warm, about 110°F |
| Active Dry Yeast 🍞 | 2 ¼ tsp | One packet, or instant yeast |
| Kosher Salt 🧂 | 2 tsp | Diamond Crystal preferred |
| Olive Oil 🫒 | 1 tbsp | For greasing bowl |
| Honey 🍯 | 1 tbsp | Optional, for slightly sweeter loaf |
| Cornmeal 🌽 | ¼ cup | For dusting Dutch oven |
| All-Purpose Flour 🌾 | ½ cup | For dusting work surface |
| Ice Cubes ❄️ | 4 pieces | For creating steam |
| Unsalted Butter 🧈 | 2 tbsp | Melted, for serving |
The flour foundation matters most here. King Arthur Bread Flour is ideal for its consistent protein content, but Gold Medal All-Purpose works nearly as well—just expect a slightly denser crumb. Yeast freshness is non-negotiable: check the expiration date and store unopened packets in the freezer. Diamond Crystal Kosher Salt dissolves perfectly and won’t over-salt your dough.
No bread flour? Substitute all-purpose with a 1 tbsp vital wheat gluten per cup of flour. Missing honey? Sugar or maple syrup at the same quantity works fine. The cornmeal can be swapped for semolina or extra flour—it just prevents sticking. For the steam, if you don’t have ice cubes, a spray bottle of water works in a pinch.
Dough rises best at 70-75°F. Cover with a damp towel to prevent drying. Baked loaves keep at room temperature for 2 days, wrapped in cloth. For longer storage, slice and freeze for up to 3 months.
Why You’ll Love This Recipe
- One Bowl Wonder: I mix everything in a single bowl—flour, water, yeast, salt—then let the dough do its thing.
- Crispy Golden Crust: That first crackle when I pull it from the pot? The olive oil gives it a perfect crunch every time.
- Weeknight Hero: Honestly, it’s my Tuesday dinner savior—pairs with soup, salad, or just butter.
- Budget Stretch: Five ingredients, zero waste, and leftovers make killer sandwiches the next day.
Step-by-Step Instructions for Dutch Pot Bread
This method ensures a professional-quality artisan loaf with minimal hands-on time.
Step 1: Activate the Yeast and Mix the Dough
In a large mixing bowl, whisk together the 1.5 cups Water (warmed to about 110°F) with the 2.25 tsp Active Dry Yeast and 1 tbsp Honey. Let this sit for 5-7 minutes until the mixture becomes frothy and slightly domed—this confirms the yeast is active and ready to work.
Add the 3.5 cups Bread Flour and 2 tsp Kosher Salt to the yeast mixture. Using a wooden spoon or dough whisk, stir until a shaggy dough forms. The dough will be sticky and rough, but all the flour should be fully incorporated. This initial mixing develops the gluten structure that gives the bread its chewy texture.
Drizzle in the 1 tbsp Olive Oil and continue mixing until the dough starts to pull away slightly from the sides of the bowl. The oil adds richness and helps create a tender crumb while still allowing for that desirable crusty exterior.
Step 2: Bulk Fermentation and Folding
Cover the bowl with a damp kitchen towel or plastic wrap and let the dough rise at room temperature for 1.5 to 2 hours. You’re looking for the dough to roughly double in volume and become bubbly and elastic. The exact time depends on your kitchen’s temperature—warmer environments will speed up the process.
After the initial rise, perform a series of coil folds to strengthen the dough. Wet your hands to prevent sticking, then grab one side of the dough, stretch it upward, and fold it over the top. Rotate the bowl and repeat this process 4-6 times around the dough. This technique builds tension in the dough, creating a strong structure for the final rise.
Cover the dough again and let it rest for another 30-45 minutes. By the end of this period, the dough should feel aerated and jiggle slightly when you gently shake the bowl. This second rest allows the gluten to relax, making the dough easier to shape.
Step 3: Shape and Final Proof
Turn the dough out onto a surface lightly dusted with the 0.5 cup All-Purpose Flour. Shape it into a tight boule by pulling the edges toward the center and pinching them together to create surface tension. This tight shape is crucial for an even rise and a uniform crumb.
Place the shaped dough seam-side down on a piece of parchment paper. Lightly dust the top with the 0.25 cup Cornmeal to prevent sticking and add a rustic texture. Cover with the damp towel and let it proof for 30-45 minutes at room temperature, or until it springs back slowly when gently pressed with a finger.
About 20 minutes before the final proof is complete, preheat your Dutch oven with the lid on in an oven set to 475°F. The Dutch oven needs to be screaming hot to create that initial burst of steam, which is essential for a good oven spring and a crisp crust.
Step 4: Bake with Steam for Crusty Perfection
Carefully transfer the dough (still on the parchment) into the preheated Dutch oven. Use oven mitts—the pot will be extremely hot. Quickly add the 4 pieces Ice Cubes to the corners of the pot to create steam, then immediately cover with the lid. This steam prevents the crust from forming too quickly, allowing the bread to expand fully.
Bake covered for 20 minutes, then remove the lid and bake for an additional 20-25 minutes until the loaf is a deep golden brown and the internal temperature reaches 205-210°F. The bread should have a hollow sound when tapped on the bottom—a sure sign it’s fully baked.
Transfer the loaf to a wire rack and let it cool for at least 1 hour before slicing. This cooling period is crucial; slicing too soon can result in a gummy crumb. Once cooled, serve warm with the 2 tbsp Unsalted Butter melted over the top for an extra layer of richness.
Pro Tips For Making Dutch Pot Bread
- Preheat the Pot: I learned this the hard way—put your Dutch oven in the oven for at least 30 minutes at 450°F before adding the dough. A screaming-hot pot guarantees that perfect crackly crust.
- Use Room Temp Water: Sounds weird, but it works: 75-80°F water wakes up the yeast without shocking it. Too hot kills it, too cold slows the rise.
- Score the Dough: Skip this and your bread might split in odd places. A sharp razor or knife, a quick 1/2-inch slash right before baking, and you control the expansion.
- Olive Oil the Dough: Before the final rise, brush the dough with about 1 teaspoon of olive oil—it keeps the surface from drying out and adds a subtle richness to the crust.
Health Benefits of This dutch pot bread
Rich in B Vitamins
This bread provides essential B vitamins, particularly thiamine, riboflavin, and niacin, which help convert food into energy. Just one slice contributes to your daily needs, keeping you energized throughout the day. I notice a difference when I include fresh bread in my meals. 💪
Good Source of Fiber
Using bread flour gives your loaf a fiber boost, aiding digestion and promoting gut health. A single serving offers about 2-3 grams of fiber, which helps maintain steady blood sugar levels and keeps you feeling full longer.
Low in Added Sugar
With only 1 tbsp honey as an optional ingredient, this bread is naturally low in sugar. The fermentation process also breaks down most of the natural sugars, making it a healthier option compared to store-bought loaves packed with additives.
Healthy Fats from Olive Oil
The 1 tbsp olive oil in the recipe adds heart-healthy monounsaturated fats, which support cardiovascular health. These fats also help your body absorb fat-soluble vitamins like vitamin E, present in the flour and yeast. 🌱
Minimal Processing
By making bread at home, you control the ingredients, avoiding preservatives and artificial additives found in many commercial options. The kosher salt and active dry yeast are the only processed components, and even those are minimally refined.
Balanced Carbohydrates
The complex carbs in this loaf provide sustained energy, unlike the quick spikes from refined grains. Pair it with protein like unsalted butter to create a balanced snack that powers you through your afternoon. 💛
Nutrition Facts
Frequently Asked Questions
Why preheat the Dutch oven?
Preheating ensures an even, hot surface for proper oven spring. The screaming-hot pot at 475°F creates steam immediately, helping the bread rise and develop a crisp crust. Skip this step and you’ll get a dense loaf.
Can I use all-purpose flour instead of bread flour?
Yes, but expect a slightly denser crumb. Bread flour’s higher protein content creates better gluten structure. For best results, add 1 tbsp vital wheat gluten per cup of all-purpose flour.
How do I know when the bread is done?
The loaf should be deep golden brown with an internal temperature of 205-210°F. Tap the bottom—it should sound hollow. Avoid slicing too soon, or the crumb will be gummy.
Can I make this without a Dutch oven?
You can bake on a preheated baking stone or heavy sheet pan. Place a metal pan with 1 cup boiling water on the oven rack below to mimic steam. Results won’t be identical but will still be tasty.

- 6 Oz Chocolate Chip Cookie Recipe: Perfectly Balanced Crispy Edges and Chewy Hearts - September 25, 2026
- 6-Inch Coffee Cake Recipe: Vanilla Bean Swirls and Buttery Streusel Topping - September 25, 2026
- 1 Hour Soup Recipe: Velvety Richness Without the Wait - September 25, 2026