
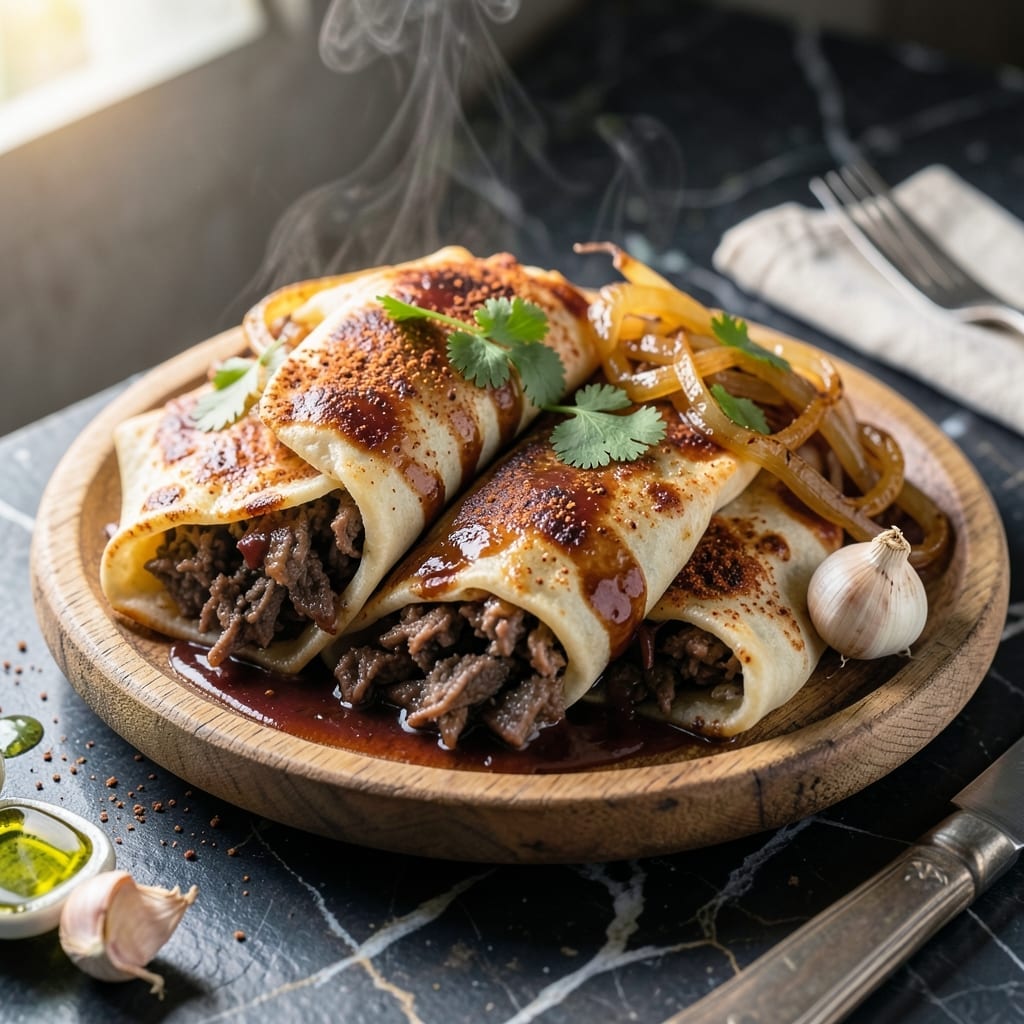
This crock pot method delivers crispy chimichangas with minimal effort, combining slow-cooked beef with melty cheese in a perfectly portable package. The secret lies in the two-step process: first tenderizing the meat, then finishing in the oven for that essential crunch.
I developed this approach after too many soggy attempts, realizing the crock pot handles the flavor development while the oven creates the texture we all crave. The beef becomes fall-apart tender, ready to be wrapped in tortillas with your favorite fillings.
The final bake transforms these from good to exceptional, creating a golden exterior that shatters with each bite. You’ll get all the satisfaction of traditional chimichangas without the deep-frying mess or stress.
Serve with sour cream, salsa, or guacamole for a complete meal that’s sure to impress. This technique works every time, delivering consistent results with crispy perfection.
Ingredients for Crock Pot Chimichangas
Slow-cooked beef, melty cheese, and crispy tortillas come together effortlessly here.
| Ingredient | Amount | Notes |
|---|---|---|
| Beef Chuck Roast 🥩 | 2 lb | Boneless, trimmed of fat |
| Yellow Onion 🧅 | 1 whole | Medium, finely diced |
| Garlic Cloves 🧄 | 4 cloves | Minced for depth |
| Beef Broth 💧 | 1 cup | Low-sodium preferred |
| Chili Powder 🌶️ | 1 tbsp | Mild or hot variety |
| Ground Cumin 🌿 | 1 tsp | Toasted for warmth |
| Dried Oregano 🍃 | 1 tsp | Mexican oregano ideal |
| Salt 🧂 | 1 tsp | Diamond Crystal kosher |
| Black Pepper 🌶️ | ½ tsp | Freshly ground preferred |
| Flour Tortillas 🌮 | 8 pieces | Large, burrito-sized |
| Shredded Monterey Jack Cheese 🧀 | 2 cups | Or cheddar blend |
| Olive Oil 🫒 | 2 tbsp | For brushing tortillas |
| Green Chili 🌶️ | 1 can | 4 oz, diced |
| Tomato Paste 🍅 | 2 tbsp | For richness and depth |
The beef is non-negotiable for texture—chuck roast is the only cut that shreds like it should. Most supermarkets carry it, but Costco has the best marbling for the price. Look for pieces with visible fat streaks (they render down beautifully). The green chilis add brightness without heat—Old El Paso is my go-to brand for canned.
No chuck roast? Brisket or short ribs work but cook down differently (brisket gets stringy, ribs stay chunky). Skip the fresh garlic? Garlic powder at one-third the amount in a pinch. Out of Monterey Jack? Pepper Jack or Colby melt just as well. The tortillas must be flour—corn won’t hold up to the filling. And if you’re watching sodium, low-sodium broth keeps everything balanced.
The filling keeps in the fridge for 4 days before assembling. Wrap assembled chimichangas in parchment, then foil—they’ll freeze for 3 months (bake straight from frozen, just add 10 minutes). Leftovers reheat best in the oven or toaster oven to keep that crunch intact.
Why You’ll Love This Recipe
- Set and Forget: The beef chuck roast simmers all day in the crock pot with onions and garlic—no babysitting required.
- Deep, Smoky Flavor: That chili powder and slow-cooked beef broth create a richness that tastes like it simmered for hours.
- Crowd-Pleasing Meal: I serve these at gatherings, and honestly, even the picky eaters go back for seconds.
- Budget Stretch: A single chuck roast makes enough filling for a week of dinners—my wallet thanks me every time.
Step-by-Step Instructions for Crock Pot Chimichangas
Here’s the method that delivers tender beef and crispy tortillas without the deep-fryer mess.
Step 1: Sear and Slow-Cook the Beef
Pat the 2 lb Beef Chuck Roast dry with paper towels. Heat a large skillet over medium-high heat and sear the beef on all sides until deeply browned—about 3-4 minutes per side. This builds a flavor foundation you can’t skip.
Transfer the beef to your crock pot. Add the finely diced 1 whole Yellow Onion, 4 cloves minced Garlic Cloves, 1 cup Beef Broth, 1 tbsp Chili Powder, 1 tsp Ground Cumin, 1 tsp Dried Oregano, 1 tsp Salt, 0.5 tsp Black Pepper, 1 can Green Chili, and 2 tbsp Tomato Paste. Stir to combine.
Cook on low for 7-8 hours or high for 4-5 hours until the beef shreds effortlessly with a fork. The meat should fall apart at the touch, and the liquid should be rich and aromatic.
Step 2: Shred and Reduce the Filling
Remove the beef from the crock pot and shred it using two forks. Return the shredded beef to the pot and stir it into the cooking liquid. This step ensures every bite is infused with the bold, spiced broth.
Switch the crock pot to high heat and cook uncovered for 15-20 minutes to reduce the liquid slightly. You want the filling thick enough to hold its shape in the tortillas but not dry. Watch for the mixture to darken and intensify in flavor as the excess moisture evaporates.
Step 3: Assemble the Chimichangas
Warm the 8 pieces Flour Tortillas one at a time in a dry skillet over medium heat for 10-15 seconds per side to make them pliable. This prevents cracking when rolling. Place about ½ cup of the beef mixture onto each tortilla, then sprinkle ¼ cup Shredded Monterey Jack Cheese evenly over the beef.
Fold the sides of the tortilla inward, then roll tightly from the bottom up, tucking in the filling as you go. The tortilla should be snug around the filling with no gaps. This keeps the chimichangas intact during the final crisping step.
Step 4: Crisp the Chimichangas to Perfection
Brush the assembled chimichangas lightly with 2 tbsp Olive Oil on all sides. Heat a large skillet over medium heat and place the chimichangas seam-side down first. Cook for 2-3 minutes per side until they’re golden brown and crispy all over.
Press down gently with a spatula to ensure even contact with the pan. The oil helps create that coveted crunch while the filling stays warm and melty inside. You’ll hear a satisfying sizzle as the tortillas crisp up.
Serve immediately while the tortillas are still crisp and the cheese is gooey. Each chimichanga should hold its shape but give way easily to the fork, revealing the tender beef and melted cheese within.
Pro Tips For Making Crock Pot Chimichangas
- Shred While Hot: Pull the beef chuck roast apart straight from the crock pot while it’s still steaming—I learned this the hard way after letting it cool and ending up with dry, stringy meat.
- Bloom the Spices: Sauté the chili powder with the onions and garlic for 1-2 minutes before adding broth, or the flavor stays flat. Sounds weird, but it works.
- Skip the Pre-Browning: Don’t waste time searing the chuck roast first; the slow cooker does the tenderizing, and I’ve never noticed a difference in taste.
- Drain the Beef: After cooking, drain the beef well before shredding, or your chimichangas will be soggy instead of crispy when fried.
Creative Variations of This Recipe
Spicy Chipotle Kick
Add 2 chipotle peppers in adobo minced to the crock pot with the other spices. This smoky heat transforms the beef filling. I also stir in 1 tsp adobo sauce for extra depth. The result pairs perfectly with cool sour cream to balance the spice. 🔥
Breakfast Twist
Swap the beef for 2 cups scrambled eggs mixed with ½ cup cooked breakfast sausage. Replace Monterey Jack with cheddar cheese. Serve with salsa and a side of hash browns. This morning version became my weekend brunch favorite.
Vegetarian Option
Use 2 cups cooked black beans and 1 cup sautéed bell peppers instead of beef. Increase cumin to 1½ tsp for extra flavor. The beans hold their shape surprisingly well during baking, and the peppers add sweetness.
Buffalo Chicken Style
Shred 2 cups cooked chicken and toss with ½ cup hot sauce before filling. Use blue cheese crumbles instead of Monterey Jack. Drizzle with extra hot sauce after baking. This version delivers that classic buffalo flavor in every bite.
Cheesy Bean Burrito
Combine 1 can refried beans with 1 cup Mexican cheese blend for a simple, meat-free option. Add ½ cup corn kernels for texture. These are ready in 20 minutes and kid-friendly too.
Nutrition Facts
Frequently Asked Questions
Can I use a different cut of beef?
Yes, but chuck roast is ideal for shredding. You can use brisket or short ribs, but they have different textures. Brisket gets stringy, ribs stay chunky. Stick with well-marbled cuts for the best results.
How do I keep them from getting soggy?
Warm the tortillas before filling and brush with olive oil before crisping. Cook on medium heat for 2-3 minutes per side until golden brown. Serve immediately for maximum crunch.
Can I make these ahead of time?
The filling keeps in the fridge for 4 days. Assemble, wrap in foil, and freeze for up to 3 months. Bake from frozen, adding 10 minutes to the cooking time.

- 6 Oz Chocolate Chip Cookie Recipe: Perfectly Balanced Crispy Edges and Chewy Hearts - September 25, 2026
- 6-Inch Coffee Cake Recipe: Vanilla Bean Swirls and Buttery Streusel Topping - September 25, 2026
- 1 Hour Soup Recipe: Velvety Richness Without the Wait - September 25, 2026