
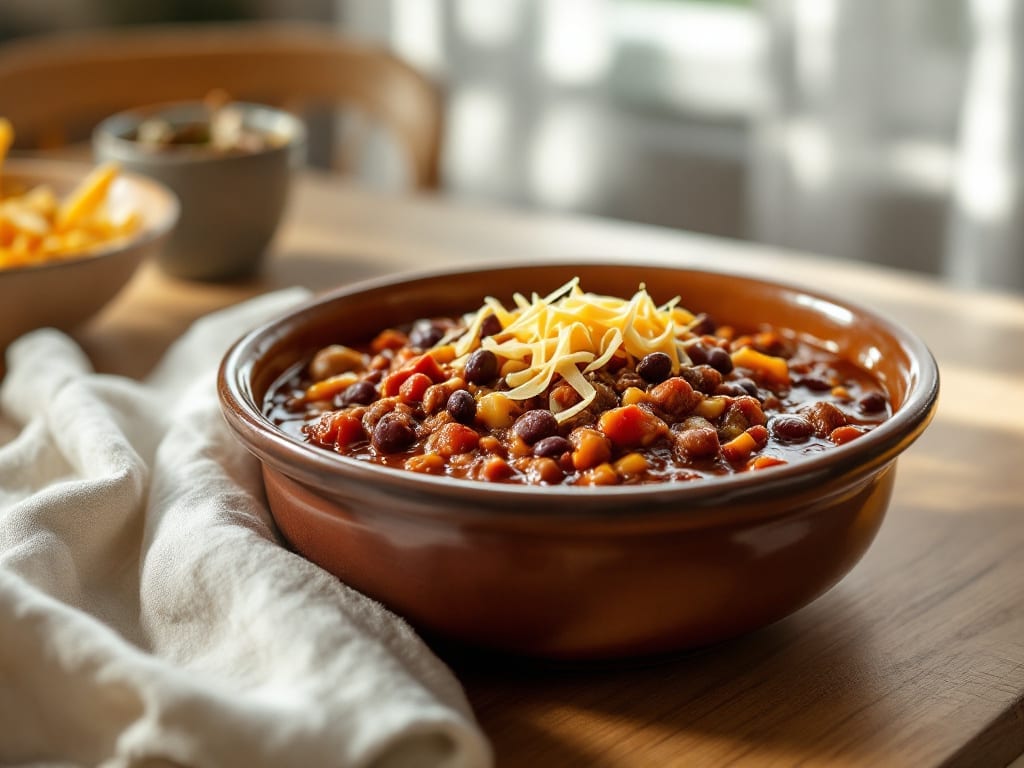
This Crock Pot Texas chili recipe delivers the deep, smoky flavor of a traditional Texas chili without the stove-top fuss—just six hours of slow cooking transforms tough beef into tender, flavorful chunks.
The secret lies in layering spices like chili powder and cumin while letting the crock pot work its magic, creating a rich, meat-forward dish that stays true to its roots.
I’ve perfected this version over years of testing, balancing heat and depth so every bite delivers that classic Texas chili experience.
The beauty of this recipe is its simplicity: dump the ingredients in, set the timer, and let the crock pot do the work. No stirring, no watching—just pure, hands-off cooking that yields a chili so hearty it’ll satisfy even the most skeptical chili purists.
The result is a pot of chili with a thick, velvety texture and a flavor profile that’s bold yet balanced, thanks to the slow infusion of spices and the natural sweetness of the beef.
By the time you’re ready to serve, you’ll have a pot of chili that’s ready to be topped with your favorite fixings—shredded cheese, chopped onions, or a dollop of sour cream.
It’s the kind of dish that tastes even better the next day, making it perfect for meal prep or feeding a crowd. Whether you’re a chili traditionalist or just love a hearty, flavorful stew, this recipe delivers.
This version stays true to Texas chili’s meat-heavy roots while leveraging the crock pot’s efficiency for modern convenience. The slow cook transforms tough cuts into melt-in-your-mouth pieces, and the spices develop a depth that’s hard to achieve on the stovetop.
Serve it up with crusty bread or cornbread, and you’ve got a meal that’s as satisfying as it is simple.
Ingredients for crock pot texas chili
Six ingredients do the heavy lifting here—meat, beans, and spices that transform into Texas chili magic.
| Ingredient | Amount | Notes |
|---|---|---|
| Chuck Roast 🥩 | 2 ½ lb | Tough cut for tender results |
| Dried Kidney Beans 🌱 | 1 ½ cups | Soaked overnight or quick-soaked |
| Chili Powder 🌶️ | 2 tbsp | Smoked variety for depth |
| Ground Cumin 🌿 | 1 ½ tbsp | Toasted for richer flavor |
| Garlic Powder 🧄 | 1 tbsp | Freshly ground preferred |
| Onion Powder 🧅 | 1 tbsp | Not onion salt |
| Salt 🧂 | 1 ½ tsp | Kosher or sea salt |
| Black Pepper 🌶️ | 1 tsp | Freshly ground preferred |
| Cayenne Pepper 🔥 | ½ tsp | Adjust for heat preference |
| Beef Broth 💧 | 2 cups | Low-sodium preferred |
| Tomato Paste 🍅 | 2 tbsp | Squeeze tube works |
| Brown Sugar 🍯 | 1 tbsp | Light or dark |
| Yellow Onion 🧅 | 1 whole | Diced, medium size |
| Garlic Cloves 🧄 | 4 cloves | Minced for even distribution |
| Apple Cider Vinegar 🍎 | 1 tbsp | For tangy brightness |
The chuck roast is non-negotiable—it’s the tough cut that turns tender under slow cooking. Costco sells it pre-cubed for convenience, but if you’re buying a whole roast, ask the butcher to cut it into 1.5-inch chunks. The beans? Dried kidney beans are traditional, but pinto or black beans work too. Just make sure they’re soaked overnight—no shortcuts here. For spices, Penzeys has great bulk options, but the regular grocery store stuff is fine if it’s fresh. The key is toasting your cumin seeds before grinding (if using whole seeds)—it makes all the difference. Look for vibrant color in your spices, not dusty old jars.
No chili powder? Mix 1 tbsp smoked paprika + 1 tsp cayenne for a close substitute. Short on kidney beans? Pinto or black beans work just as well—just adjust cooking time slightly. The beef broth can be swapped for water, but low-sodium is key so you don’t over-salt the chili. For the tomato paste, those little squeeze tubes at Trader Joe’s are perfect—they’re mess-free and last forever. The apple cider vinegar might sound odd, but it cuts through the richness and brightens everything up. If you don’t have any, a splash of lemon juice works in a pinch. The onion and garlic can be pre-chopped for convenience, but fresh is always better if you’ve got the time.
This chili tastes even better the next day—honestly, that’s when all the flavors meld together perfectly. Keeps for 5 days in the fridge, freezes for 3 months without losing quality. I always make double batches because it reheats so well. For serving, I like to portion it into individual containers with a side of cornbread mix—just add water and bake. The chili thickens as it cools, so if it seems too thick when reheating, just add a splash of broth or water. Trust me, it’s worth the extra hour of cooking time.
Why You’ll Love This Recipe
- I swear by this: toss in the chuck roast, beans, and spices, then walk away. The crock pot does all the work—no stirring, no babysitting, just perfectly tender meat and beans when you get home.
- Dump-and-Go Magic: I swear by this: toss in the chuck roast, beans, and spices, then walk away. The crock pot does all the work—no stirring, no babysitting, just perfectly tender meat and beans when you get home.
- Deep, Smoky Soul: That combo of chili powder, cumin, and garlic powder? It’s ridiculously good. The dried kidney beans soak up all the flavor while the chuck roast melts into rich, hearty chunks—every bite tastes like a hug from a Texas cookout.
- Leftovers That Don’t Suck: Honestly, I make this on Sundays just to have it for the week. The chili actually improves the next day—more flavor, less effort—and it’s still a crowd-pleaser when reheated. (Yes, even on a Tuesday night.)
Step-by-step instructions for slow-cooked Texas-style chili
This method transforms tough chuck roast and simple spices into hearty, smoky chili with minimal effort.
Prepare the Beans and Meat
If using dried kidney beans, sort through them to remove any stones or debris, then rinse thoroughly under cold water. For quicker cooking, soak the beans overnight in plenty of water, or use the quick-soak method: cover the beans with boiling water, remove from heat, cover, and let sit for at least 1 hour. Drain and set aside.
Cut the 2.5 lb chuck roast into 1-inch cubes, discarding any large fat deposits. This size ensures the meat cooks evenly and breaks down beautifully in the slow cooker. Pat the cubes dry with paper towels—this helps them brown better when they hit the pot.
Build the Chili Base
In a large bowl, combine the drained 1.5 cups dried kidney beans, 2 tbsp chili powder, 1.5 tbsp ground cumin, 1 tbsp garlic powder, 1 tbsp onion powder, 1.5 tsp salt, 1 tsp black pepper, and 0.5 tsp cayenne pepper. Toss everything together until the spices are evenly distributed and the beans are lightly coated. This step ensures every bite has deep, consistent flavor.
In a separate small bowl, mix the 2 tbsp tomato paste with 1 tbsp brown sugar and 1 tbsp apple cider vinegar. Stir until smooth—this combination adds richness and balances the spices. Set aside for now.
Sauté Aromatics and Brown the Meat
Finely dice the 1 whole yellow onion and mince the 4 cloves garlic. Heat a large skillet over medium-high heat and add the onions. Sauté for 5-6 minutes until they soften and begin to caramelize—this adds sweet depth to the chili. Add the garlic and cook for another 30 seconds until fragrant.
While the onions cook, add the chuck roast cubes to the same skillet (no need to add oil—the rendered fat from the meat will release). Sear the meat for 3-4 minutes per side until it develops a deep brown crust. This step isn’t just for flavor; it also helps tenderize the meat further during the slow cook.
Combine and Slow Cook
Transfer the browned meat and onions to your slow cooker. Add the spiced beans, the tomato paste mixture, and the 2 cups beef broth. Stir everything together gently—you want the ingredients to blend without breaking up the meat or beans too much. The liquid should just cover everything but not be too deep.
Place the lid on the slow cooker and cook on low for 6 hours. This long, gentle cooking time is what transforms the tough chuck roast into fork-tender pieces and lets the beans soften just enough to hold their shape while absorbing all that smoky flavor. Resist the urge to peek or stir—this keeps the chili from getting watery and ensures even cooking.
Adjust and Serve
After 6 hours, the chili should be thick and rich, with the meat falling apart easily. Taste and adjust the seasoning if needed—add more salt if it’s bland, or a pinch of cayenne if you want more heat. Let the chili sit off the heat for 10-15 minutes before serving to let the flavors meld even more.
Serve the chili hot, topped with shredded cheese, chopped green onions, or a dollop of sour cream if you like. The slow cooking process creates a chili that’s hearty enough to stand alone, but it’s also perfect for serving with cornbread or over rice. Leftovers keep well in the refrigerator for up to 5 days, and the flavor actually improves as it sits.
Pro Tips For Making Crock Pot Texas Chili
- SEAR THE CHUCK FIRST: That crock pot won’t brown meat worth a damn—so hit a skillet with high heat and sear the chuck roast in 2-3 minutes per side before dumping it in. The crust adds depth the slow cooker alone can’t match, and it keeps the meat from turning into mushy gray paste.
- SOAK BEANS OVERNIGHT: I used to toss dried kidney beans straight into the pot and wonder why they stayed rock-hard. Soak them 8-12 hours first, then drain and rinse—this cuts cooking time by half and prevents that chalky texture. (Yes, even if you’re impatient like me.)
- ADD BEANS LATE: Dump the beans in with the meat, and they’ll turn to mush before the chili’s done. Instead, stir them in the last 30-45 minutes—just enough time to soften without disappearing. Your future self will notice the difference.
- BLOOM THE SPICES: Tossing chili powder and cumin dry into the pot? You’re missing out. Heat them in a dry skillet for 30 seconds until fragrant—this unlocks their flavor way better than just sprinkling. (Sounds weird, but it works: trust me.)
Common mistakes when making your crock pot texas chili
Overloading the Pot
One of the biggest mistakes is packing your crock pot too tightly. When ingredients are crammed in, they don’t cook evenly, and the chili can turn out watery or underseasoned. I’ve learned the hard way—leave about 1 inch of space between the top of the ingredients and the lid.
This ensures proper heat circulation and prevents a mushy texture. If your chili looks too thick after cooking, it’s better to add a splash of broth later than struggle with a dense, uneven mess. 🌡️
Skipping the Sear
Many people skip browning the meat entirely, thinking the slow cooker will handle everything. But that deep, caramelized crust from searing is what builds the rich, complex flavor in Texas chili.
I always take 5 minutes to brown the chuck roast in a hot skillet—it makes a noticeable difference in the final dish. If you’re short on time, at least pat the meat dry before adding it to the crock pot, as this helps it absorb flavors better.
Using Pre-Cooked Beans
Canned beans are convenient, but they lack the texture and flavor depth that properly soaked dried beans provide. The slow cooker can handle dried beans just fine if they’re pre-soaked, but canned beans often make the chili too soft and mushy.
If you’re in a hurry, use canned beans, but reduce the cooking time by 1 hour and add them in the last 2 hours of cooking. For the best results, though, I always stick with dried beans—it’s worth the extra prep.
Ignoring the Rest Time
After the chili finishes cooking, it’s tempting to dive right in. But letting it rest for 10-15 minutes allows the juices to redistribute, ensuring every bite is tender and flavorful. I’ve rushed this step before, and the chili always ends up a little dry or uneven.
If you’re serving a crowd, use this time to set the table or prepare toppings—it’s a small sacrifice for a better-tasting dish.
Overlooking the Vinegar
The apple cider vinegar might seem like an afterthought, but it’s crucial for brightening the chili and cutting through the richness of the meat and spices. Without it, the dish can taste flat or one-dimensional. I’ve made this mistake more than once—always include it!
If you’re out, a splash of lemon juice or even a few drops of Worcestershire sauce can work in a pinch, but vinegar is the gold standard for this recipe.
Not Tasting Before Serving
This is a classic rookie move. The chili might look perfect, but the flavors can shift dramatically after cooking. Always taste and adjust the seasoning before serving—add salt if it’s bland, cayenne if it’s too mild, or even a pinch of sugar if it’s too acidic.
I keep a small bowl of each spice nearby while cooking so I can tweak the flavor quickly. A little attention here makes all the difference in the final result. 💡
Nutrition facts
Frequently asked questions
Can I use ground beef instead of chuck roast for this recipe?
The recipe is designed for chuck roast because it delivers that perfect tender texture when slow-cooked. However, if you’re short on time, you can substitute 1.5 lbs of ground beef (80/20 blend for best flavor). Just reduce the cooking time to 4-5 hours on low, and add the beans in the last 1 hour to prevent mushiness. The flavor will be slightly different but still delicious!
How do I make this chili less spicy?
If you prefer a milder chili, reduce the cayenne pepper to ¼ tsp or omit it completely. You can also add 1-2 tbsp of brown sugar or a pinch of baking soda (just ⅛ tsp) to neutralize some of the heat. For an extra-mild version, stir in ½ cup of tomato sauce at the end—it helps balance the spices naturally.
Can I make this chili in an Instant Pot instead?
Use the same ingredients but adjust the cooking time to 30 minutes on high pressure after browning the meat. Quick-release the pressure, then let it sit for 10 minutes before opening. For beans, use canned (no soaking needed) and add them in the last 5 minutes of cooking. The Instant Pot version cooks faster but still delivers that deep, smoky flavor.
What are the best toppings for Texas chili?
Classic Texas chili toppings include shredded sharp cheddar cheese, chopped green onions, and a dollop of sour cream. For extra crunch, try crushed tortilla chips or diced avocado. If you want something heartier, serve it with cornbread or warm flour tortillas. Pro tip: A sprinkle of crushed red pepper flakes adds a little kick without overpowering the dish.
How do I reheat leftover chili without drying it out?
Reheat your chili on the stovetop over low heat with the lid slightly ajar, stirring occasionally and adding 1-2 tbsp of beef broth or water as needed. For microwave reheating, cover with a damp paper towel and heat in 30-second intervals, stirring between each. Never reheat to a boil—this breaks down the texture and makes the chili watery. The slow cooker’s “warm” setting also works great for keeping leftovers ready to serve.

- Crock Pot Round Steak Recipe: Slow-Sear Crust With Juicy Center - November 6, 2026
- Candied Sweet Potatoes Crock Pot Recipe: Caramelized Sweetness With Zero Effort - November 6, 2026
- Steak Recipe Crock Pot: Juicy, Caramelized Crust in 4 Hours - November 6, 2026