
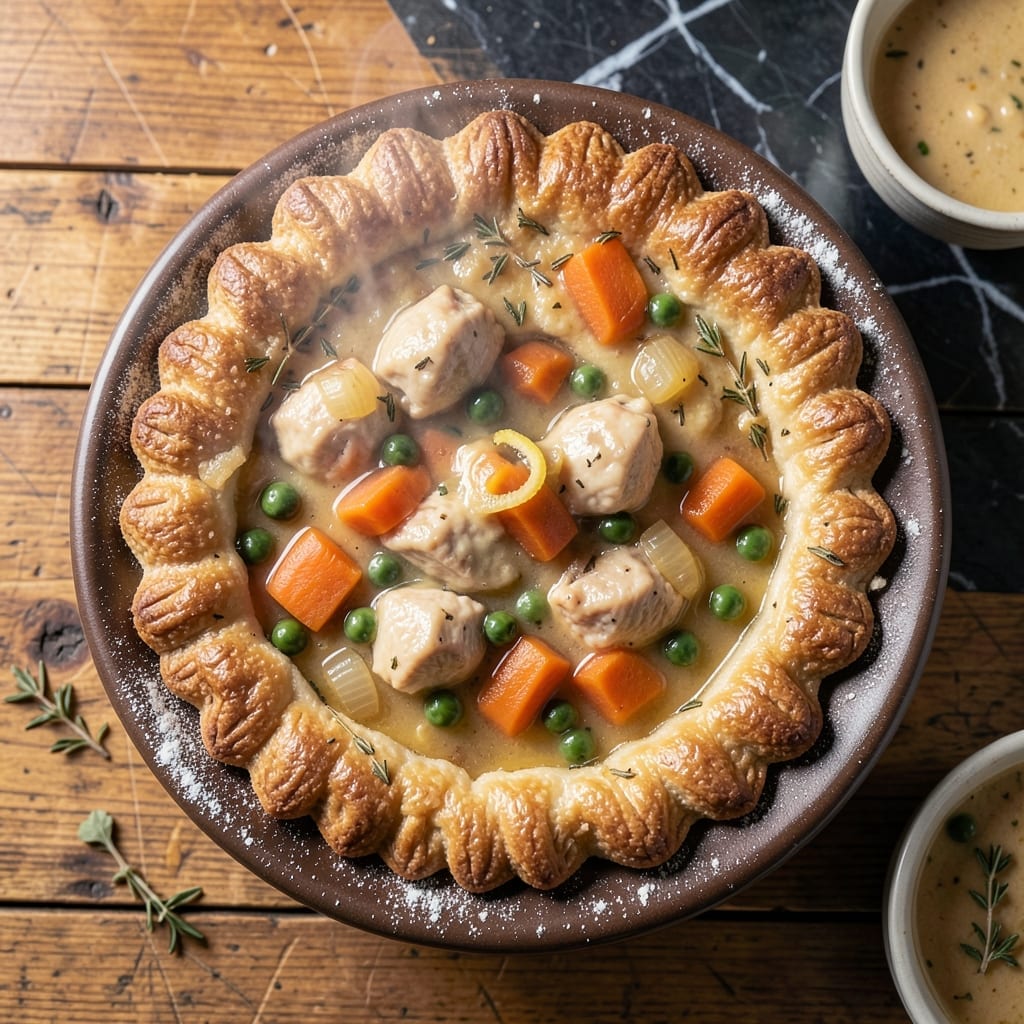
There’s a reason this pot pie has been my dad’s signature dish for decades—it never fails to deliver comfort in every bite.
The golden biscuit topping bakes to perfectly flaky perfection, while the filling overflows with tender vegetables and rich, savory gravy. It’s the kind of meal that turns a simple dinner into something special.
What sets this version apart is the balance: hearty enough to satisfy, but light enough that you’ll want seconds. The biscuits soak up just enough of the filling to create a buttery, crusty top layer.
Ideal for family dinners or when you need a taste of home. This is how to make it right.
Ingredients for Dad’s Pot Pie
Flaky biscuits meet tender veggies in this comforting family classic.
| Ingredient | Amount | Notes |
|---|---|---|
| All-Purpose Flour 🌾 | 2 cups | For biscuit topping and filling |
| Baking Powder 🧂 | 1 tbsp | For fluffy biscuits |
| Salt 🧂 | 1 tsp | Divided between biscuits and filling |
| Cold Unsalted Butter 🧈 | ½ cup | Cubed for biscuit topping |
| Whole Milk 🥛 | ¾ cup | For biscuit dough |
| Chicken Broth 🍲 | 2 cups | Low-sodium preferred |
| Carrots 🥕 | 2 whole | Peeled and diced |
| Yellow Onion 🧅 | 1 whole | Diced for filling |
| Frozen Peas 🌱 | 1 cup | No need to thaw |
| Celery Stalk 🥬 | 2 whole | Diced for crunch |
| Garlic Cloves 🧄 | 2 cloves | Minced for depth |
| Fresh Thyme 🌿 | 1 tbsp | Chopped for aroma |
| Olive Oil 🫒 | 1 tbsp | For sautéing vegetables |
| All-Purpose Flour 🌾 | ¼ cup | For thickening gravy |
| Black Pepper 🌶️ | ½ tsp | Freshly ground |
The butter needs to be ice-cold for those flaky layers (cut it into cubes and chill while you prep). I use King Arthur Flour for the biscuit topping—consistent results every time. For the broth, Swanson or College Inn are my go-tos. Fresh thyme makes a difference, but dried in a pinch works if you use one-third the amount. Grab it from the produce section at Whole Foods—their herbs last longer.
No fresh thyme? Dried oregano or rosemary can stand in. Swap chicken broth for vegetable broth to keep it meat-free. Out of peas? Frozen corn or green beans work just as well. The milk can be whole or 2%—just avoid skim (you want that richness). If you’re making this ahead, prep the veggies the night before (store them in water to keep them crisp).
Biscuit topping is best the day it’s baked, but leftovers keep 3-4 days in the fridge. Reheat covered with foil at 350°F for 15 minutes. Freezes beautifully for up to 3 months—just thaw overnight before reheating.
Why You’ll Love This Recipe
- One Bowl Wonder: I just dump the flour, baking powder, salt, cold butter, and milk in one bowl—no fancy steps, no mess.
- Buttery Crust: That cold butter makes the flakiest crust, and the milk keeps it tender. Honestly, it’s the reason I make this every time.
- Feeds the Whole Crew: It’s my go-to for family dinners, potlucks, or even a cozy night in with leftovers for days.
- Pantry Staples Only: No special trips to the store—just basic ingredients I always have on hand. Between us, that’s a win.
Step-by-Step Instructions for Dad’s Pot Pie
Here’s my foolproof method that delivers that nostalgic comfort in every golden bite.
Step 1: Prepare the Hearty Vegetable Filling
Heat the 1 tablespoon olive oil in a large pot over medium heat. Add the diced yellow onion, 2 whole carrots, and 2 whole celery stalk, cooking for 5-7 minutes until they begin to soften and the onion turns translucent.
Stir in the minced 2 cloves garlic cloves and chopped 1 tablespoon fresh thyme, cooking for 30 seconds until fragrant. This builds the flavor foundation. Sprinkle the 0.25 cup all-purpose flour over the vegetables and stir constantly for 1 minute to cook off the raw flour taste.
Slowly pour in the 2 cups chicken broth, whisking continuously to prevent lumps. Add the 1 cup frozen peas (no need to thaw) and 0.5 teaspoon black pepper. Bring to a simmer and cook for 8-10 minutes until the mixture thickens to a gravy-like consistency.
Step 2: Make the Fluffy Biscuit Topping
In a large bowl, whisk together the 2 cups all-purpose flour, 1 tablespoon baking powder, and ½ teaspoon salt (reserving the other ½ teaspoon for the filling). The baking powder will give your biscuits that perfect lift.
Cut the 0.5 cup cold unsalted butter (cubed) into the flour mixture using a pastry cutter or your fingers, working until the mixture resembles coarse crumbs with pea-sized butter pieces visible. This creates those flaky layers we all love in a good biscuit.
Make a well in the center and pour in the 0.75 cup whole milk. Stir just until the dough comes together—don’t overmix. The dough should be shaggy and slightly sticky. Let it rest for 5 minutes while you preheat the oven to 400°F.
Step 3: Assemble and Bake to Golden Perfection
Pour the vegetable filling into a 9×13-inch baking dish or deep oven-safe skillet. The filling should be bubbling hot when you add the topping. This helps cook the biscuits from the bottom up.
Drop spoonfuls of the biscuit dough evenly over the filling—you should have about 8-10 biscuits. Don’t worry about making them perfect; rustic is fine. The dough will spread as it bakes. Brush the tops lightly with a little extra milk for added browning.
Bake for 20-25 minutes until the biscuits are golden brown on top and the filling is bubbling around the edges. You’ll know it’s done when a toothpick inserted into a biscuit comes out clean. Let it cool for 5-10 minutes before serving—this allows the filling to thicken slightly.
Pro Tips For Making Dad’S Pot Pie
- Chill the Butter: Keep your unsalted butter ice cold until the very last second—warm butter means a tough, flat crust. I learned this the hard way after my first three pot pies came out dense as hockey pucks.
- Measure Flour Right: Spoon your all-purpose flour into the measuring cup and level it off—don’t scoop directly from the bag. Packed flour adds extra weight and throws off the crust’s tenderness.
- Skip Warm Milk: Use whole milk straight from the fridge. Warm milk softens the butter prematurely, and that’s the fastest way to lose the flaky layers dad’s recipe is known for.
- Rest the Dough: Give the dough 10 minutes in the fridge before rolling—this relaxes the gluten and prevents shrinking. I was skeptical until I tried it, but now my crusts stay put and bake up light.
Regional Styles of This Dish
Midwest Classic
In the heartland, this dish often includes cream of chicken soup in the filling for extra richness. I remember my grandma in Ohio adding shredded rotisserie chicken to make it a full meal. The biscuits stay soft under the lid of her CorningWare dish. 💛
Southern Comfort
Down South, they might swap the biscuit topping for cornbread using Martha White mix. The filling gets a kick with 1 tsp cayenne pepper and sometimes okra for thickness. My buddy in Georgia swears by this version for Sunday suppers.
New England Twist
Coastal versions often feature seafood like chopped shrimp or scallops mixed into the filling. I tried this in Maine with Old Bay seasoning—it was a game-changer. The biscuits stay the same, but the filling tastes like the ocean.
Southwest Flair
In Texas, you might find diced green chiles and cumin in the filling. Some even use pepper jack cheese in the biscuits. I love this version with a side of sour cream for dipping. It’s like a pot pie met a tamale. 🔥
Pacific Northwest
This region favors fresh herbs like rosemary and sage in the filling. Wild mushrooms often join the veggies. My cousin in Oregon adds Dungeness crab when it’s in season—pure luxury in every bite.
Nutrition Facts
Frequently Asked Questions
Can I make this with store-bought biscuits?
Yes, but homemade tastes far better. If short on time, use refrigerated biscuit dough and arrange pieces on top. Bake as directed until golden brown.
Why did my filling turn out watery?
Likely the flour didn’t cook long enough to thicken. Simmer the filling for the full 8-10 minutes before baking. If needed, mix 1 tablespoon cornstarch with cold water and stir in.
Can I add chicken to this recipe?
Stir in 2 cups cooked, shredded chicken when adding the peas. This makes it a complete meal. Use rotisserie chicken for convenience.
What’s the best baking dish to use?
A 9×13-inch baking dish works perfectly, but a deep oven-safe skillet is great too. Avoid glass if baking at 400°F—it may not handle the heat well.

- 4C Bread Crumbs Meatballs Recipe: Crispy Crust and Juicy Centers - September 25, 2026
- 6 Oz Chocolate Chip Cookie Recipe: Perfectly Balanced Crispy Edges and Chewy Hearts - September 25, 2026
- 6-Inch Coffee Cake Recipe: Vanilla Bean Swirls and Buttery Streusel Topping - September 25, 2026