
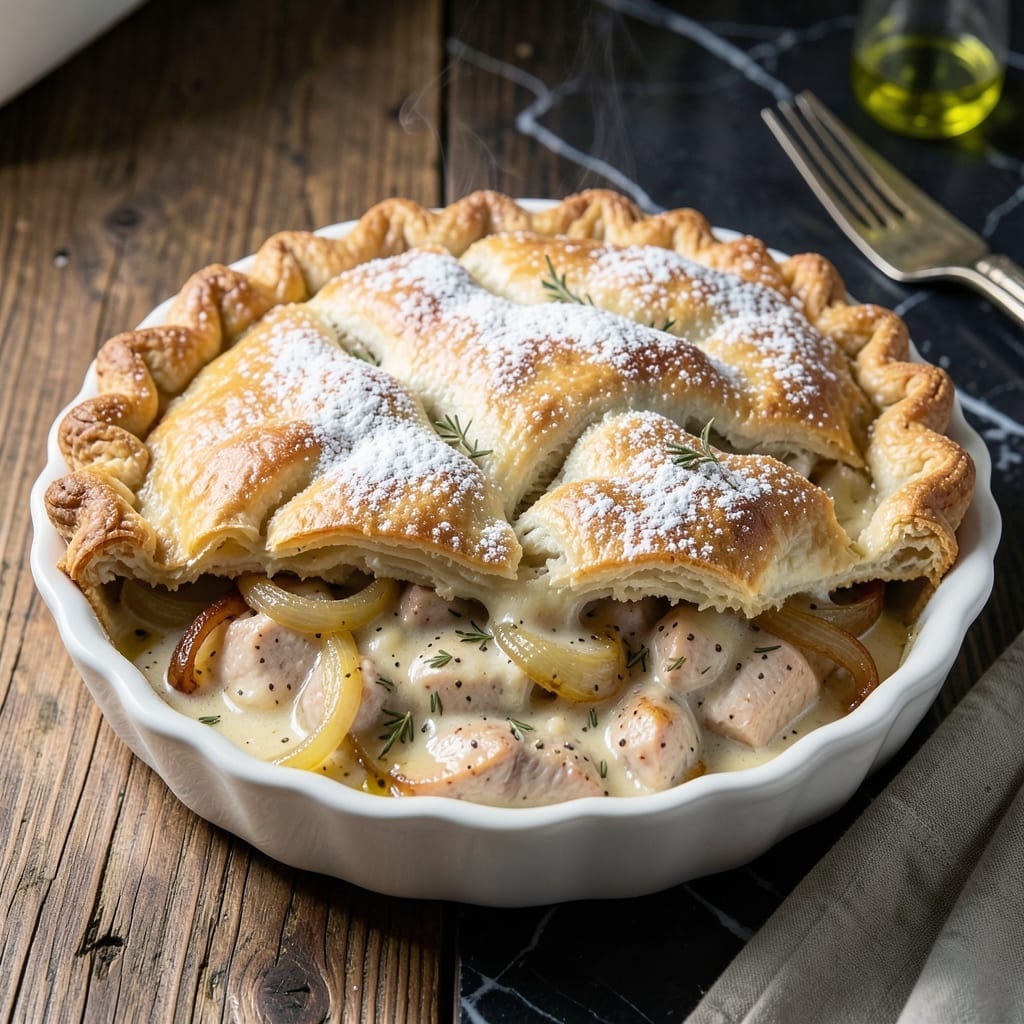
There’s nothing quite like a homemade chicken pot pie with its flaky golden crust enveloping a rich, creamy filling. I developed this version to capture that perfect balance of tender chicken, hearty vegetables, and velvety sauce.
The secret lies in the crust technique—using cold ingredients and minimal handling to achieve those coveted flaky layers. Meanwhile, the filling comes together with simple pantry staples and just 30 minutes of stovetop cooking.
What emerges from the oven is a beautiful, bubbling pie with a crust so delicate it shatters at the touch. The filling stays thick and creamy, with each bite delivering comfort in its purest form.
This dish transforms an ordinary dinner into something special, with leftovers that reheat beautifully. Let’s make this classic the right way.
Ingredients for Chivken Pot Pie
Cold butter and minimal handling create the flaky crust enveloping tender chicken and hearty vegetables.
| Ingredient | Amount | Notes |
|---|---|---|
| Chicken Breast 🍗 | 1 ½ lb | Boneless, skinless, diced |
| All-Purpose Flour 🌾 | 2 cups | Divided for crust and filling |
| Unsalted Butter 🧈 | 1 cup | Cold, cubed for crust |
| Ice Water 💧 | ⅓ cup | For crust dough |
| Salt 🧂 | 1 ½ tsp | Divided for crust and filling |
| Yellow Onion 🧅 | 1 whole | Medium, finely diced |
| Carrots 🥕 | 2 whole | Medium, diced |
| Celery Stalks 🌿 | 2 whole | Diced for filling |
| Frozen Peas 🌱 | 1 cup | No need to thaw |
| Garlic Cloves 🧄 | 3 cloves | Minced for filling |
| Chicken Stock 🥣 | 1 ½ cups | Low-sodium preferred |
| Whole Milk 🥛 | ¾ cup | For creamy filling |
| Heavy Cream 🥛 | ½ cup | For richness in filling |
| Fresh Thyme Leaves 🌿 | 2 tsp | Chopped, or 1 tsp dried |
| Black Pepper 🌶️ | ½ tsp | Freshly ground preferred |
The crust demands cold, high-quality butter—Plugrá or Kerrygold for superior flakiness. Use all-purpose flour with moderate protein content (10-12%) for optimal texture. For the filling, seek low-sodium chicken stock to control seasoning precisely. Fresh thyme, available at most supermarkets, provides brighter flavor than dried. Purchase boneless, skinless chicken breasts from a trusted butcher or Whole Foods for consistent quality.
No fresh thyme? Dried at one-third the amount works acceptably. Short on chicken stock? Vegetable stock with added bouillon can substitute in a pinch. For a richer filling, replace whole milk with half-and-half. The peas can be swapped for frozen corn or green beans. If avoiding dairy, use coconut milk and a vegan butter substitute, though flavor profiles will differ.
The assembled pie freezes beautifully for up to 3 months. Store wrapped tightly in plastic then foil to prevent freezer burn. Reheat from frozen, adding 10-15 minutes to baking time. Fresh crust dough keeps in the refrigerator for 2 days or can be frozen for 1 month.
Why You’ll Love This Recipe
- One-Bowl Wonder: I mix the flour, butter, and ice water right in the same bowl I use for the filling—minimal dishes, maximum flavor.
- Buttery Crust Love: That flaky, golden crust from the butter and flour combo? It’s the kind of comfort that turns a regular dinner into something special.
- Feeds and Freezes: I double the batch, bake one for tonight, and freeze the other for a busy night when I just can’t.
- Budget-Friendly Meal: Chicken breast stretches far with this recipe, and the basic pantry staples keep my grocery bill happy. Honestly, it’s a win-win.
Step-by-Step Instructions for Chicken Pot Pie
Achieve a golden crust and creamy filling with this professional technique for consistent results.
Step 1: Prepare the Flaky Pie Crust
In a food processor, pulse the 2 cups All-Purpose Flour with ½ tsp Salt to combine. Add the 1 cup Unsalted Butter, cubed and chilled, and pulse until the mixture resembles coarse crumbs with pea-sized butter pieces visible.
With the processor running, drizzle in the ⅓ cup Ice Water until the dough just begins to come together. Turn it out onto a lightly floured surface and gently shape into a disk. Wrap in plastic and refrigerate for 30 minutes—this resting period allows the gluten to relax, ensuring a tender, flaky crust.
Step 2: Cook the Chicken and Vegetables
In a large skillet over medium-high heat, cook the diced 1.5 lb Chicken Breast until no longer pink, about 6-8 minutes. Remove and set aside. In the same skillet, add the finely diced 1 whole Yellow Onion, 2 whole Carrots, and 2 whole Celery Stalks.
Sauté for 5-7 minutes until the vegetables soften and the onion becomes translucent. Add the minced 3 cloves Garlic Cloves and cook for 30 seconds until fragrant. Stir in the 1 cup Frozen Peas, 2 tsp Fresh Thyme Leaves, and ½ tsp Black Pepper.
Step 3: Create the Creamy Filling
Sprinkle ¼ cup of the All-Purpose Flour over the vegetable mixture and stir to coat. Gradually pour in the 1.5 cups Chicken Stock, ¾ cup Whole Milk, and ½ cup Heavy Cream, stirring constantly to prevent lumps.
Bring to a simmer and cook for 3-5 minutes until the mixture thickens enough to coat the back of a spoon. Return the cooked chicken to the skillet and stir to combine. Taste and adjust seasoning with the remaining 1 tsp Salt if needed.
Step 4: Assemble and Bake the Pot Pie
Roll out the chilled dough on a lightly floured surface to a 12-inch circle. Transfer the creamy chicken mixture to a 9-inch pie dish and cover with the rolled dough, crimping the edges to seal. Cut a few small slits in the top to allow steam to escape.
Bake in a preheated 375°F oven for 30-35 minutes until the crust is golden brown and the filling is bubbling. If the edges brown too quickly, cover them loosely with foil. Let the pot pie rest for 10 minutes before serving to allow the filling to set.
Pro Tips For Making Chivken Pot Pie
- Chill the Dough: After mixing the flour, butter, and ice water, refrigerate the dough for at least 30 minutes—I learned this the hard way when my first few pies had tough, shrunk crusts.
- Poach the Chicken: Simmer the chicken breast in salted water until just cooked (165°F internal temp), then shred it. This keeps the meat moist instead of dry like it gets when baked directly in the pie.
- Vent the Top: Cut a few small slits in the top crust before baking. Sounds simple, but without it, I’ve had fillings burst through the crust more times than I care to admit.
- Use Cold Butter: Keep your butter ice-cold when cutting it into the flour—it creates flaky layers. My grandmother swore by grating frozen butter, and she was right: the texture is unbeatable.
Best Sauces and Condiments for These Flavors
Classic Gravy Boost
I love drizzling 2 tbsp warm chicken gravy over each serving for extra richness. Use store-bought or make your own from pan drippings, 1 tbsp flour, and 1 cup chicken stock. It adds depth without overpowering the filling. 💛
Hot Sauce Kick
For those who enjoy heat, Frank’s RedHot or Crystal Hot Sauce adds a tangy spice that cuts through the creamy filling. Start with ½ tsp and adjust to taste. The vinegar base balances the dish beautifully.
Fresh Herb Garnish
Fresh herbs brighten up the rich flavors. I sprinkle 1 tbsp chopped parsley or 1 tsp fresh thyme leaves over the top just before serving. They add a pop of color and freshness.
Creamy Condiments
A dollop of sour cream or Greek yogurt on the side lets guests add creaminess as desired. I prefer Daisy brand sour cream for its thick texture and clean taste.
Acidic Balance
Pickled vegetables cut through the richness. Try 2 tbsp bread and butter pickles or 1 tbsp pickled jalapeños on the side. The acidity refreshes your palate between bites. ✨
Cheese Topping
For extra indulgence, sprinkle ¼ cup shredded cheddar over the crust during the last 5 minutes of baking. I use Cabot Sharp Cheddar for its bold flavor and meltability.
Nutrition Facts
Frequently Asked Questions
Can I use rotisserie chicken to save time?
Shred 3 cups of cooked rotisserie chicken to replace the raw chicken. Skip the cooking step and add it directly to the filling at the end.
How do I prevent a soggy bottom crust?
Two key tricks: pre-bake the crust for 10 minutes before adding filling, and ensure your filling is thick and bubbling hot when poured in. This creates a barrier against moisture.
Can I make this ahead of time?
Yes! Assemble the pie completely and refrigerate for up to 24 hours before baking. Add 5-10 minutes to the baking time if starting from cold.

- 4C Bread Crumbs Meatballs Recipe: Crispy Crust and Juicy Centers - September 25, 2026
- 6 Oz Chocolate Chip Cookie Recipe: Perfectly Balanced Crispy Edges and Chewy Hearts - September 25, 2026
- 6-Inch Coffee Cake Recipe: Vanilla Bean Swirls and Buttery Streusel Topping - September 25, 2026