
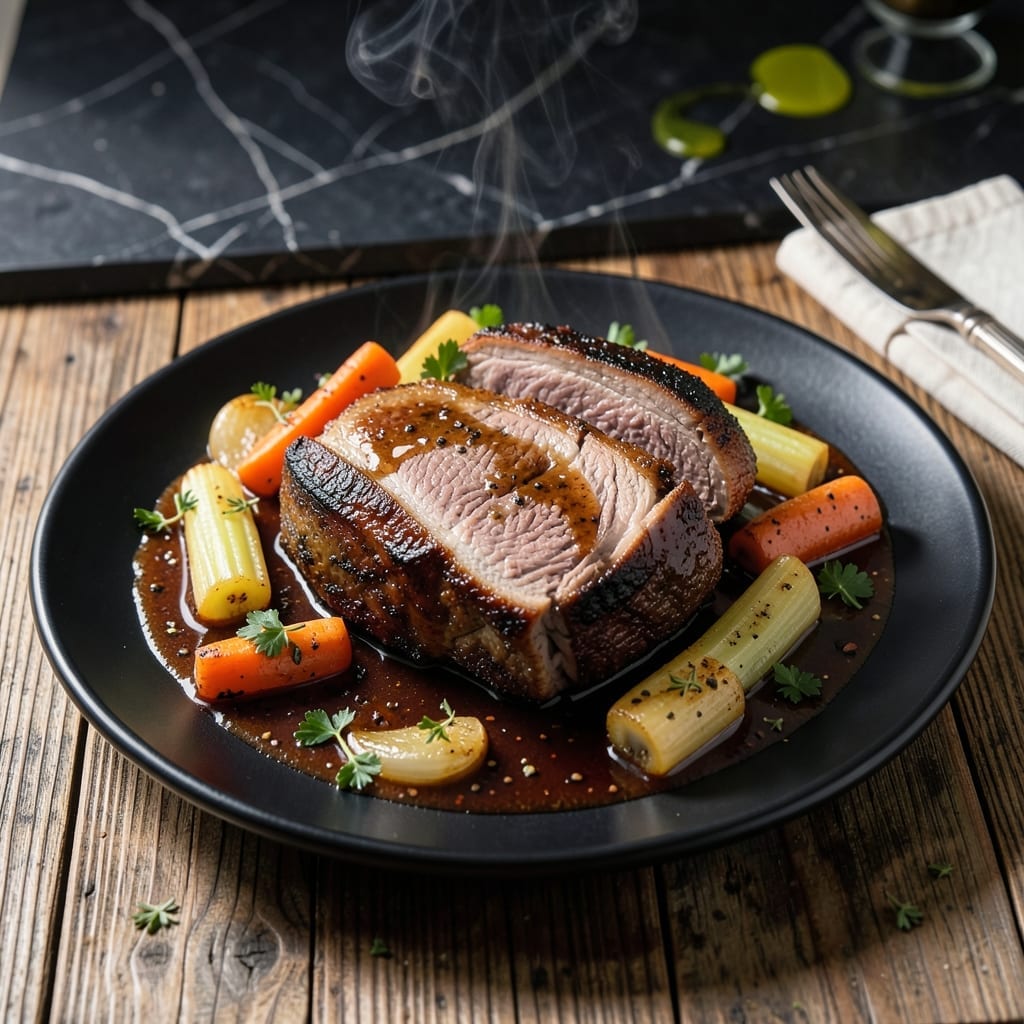
This pot roast redefines comfort food with an unexpected twist. The soda braise creates a deeply flavorful sauce that transforms tough cuts into fall-apart tender beef.
The key is using Dr Pepper to balance sweetness with the rich beef and aromatic vegetables. A long, slow cook at 325°F ensures every bite absorbs the complex flavors.
What emerges is melt-in-your-mouth meat with a glossy, caramelized gravy that clings to each piece. The soda’s caramel notes complement the natural beef richness perfectly.
Serve with mashed potatoes to soak up every drop of sauce. This method delivers restaurant-quality results with minimal hands-on time.
Ingredients for Dr Pepper Pot Roast
Transform tough beef into restaurant-quality comfort with these braising essentials and a can of soda.
| Ingredient | Amount | Notes |
|---|---|---|
| Chuck Roast 🥩 | 3 lb | Well-marbled, trimmed of excess fat |
| Dr Pepper 🥤 | 2 cups | Regular, not diet variety |
| Beef Stock 🍲 | 1 ½ cups | Low-sodium preferred for control |
| Yellow Onions 🧅 | 2 whole | Large, quartered through root |
| Carrots 🥕 | 4 whole | Peeled, cut into 2-inch chunks |
| Celery Stalks 🌿 | 3 whole | Cut into 2-inch pieces |
| Garlic Cloves 🧄 | 6 cloves | Smashed, peeled |
| Tomato Paste 🍅 | 2 tbsp | Double-concentrated for depth |
| Worcestershire Sauce 💧 | 2 tbsp | Anchovy-free if preferred |
| Dijon Mustard 🟡 | 1 tbsp | Smooth, not whole-grain |
| Dried Thyme 🌿 | 1 tsp | Rubbed between fingers to release oils |
| Dried Rosemary 🌿 | 1 tsp | Crushed lightly before adding |
| Bay Leaves 🍃 | 2 whole | Fresh or dried |
| Kosher Salt 🧂 | 1 ½ tsp | Diamond Crystal preferred |
| Freshly Ground Black Pepper 🌶️ | 1 tsp | Coarse grind for texture |
| Olive Oil 🫒 | 2 tbsp | Divided for searing and finishing |
The beef is critical here. Chuck roast with ample marbling delivers the fall-apart texture after long, slow cooking. Source from ButcherBox or a trusted local butcher for premium quality. Supermarket selections work too—just avoid lean cuts like round, which dry out. The Dr Pepper must be the original formula (not diet) for the right balance of sugar and spice that caramelizes into the gravy.
No Dr Pepper? Coca-Cola works in a pinch, though the flavor profile differs slightly. Swap beef stock for low-sodium chicken stock if that’s what you have. Fresh herbs can replace dried—use triple the amount. For a deeper umami note, add a splash of fish sauce (optional but recommended). The tomato paste can be replaced with 1 tablespoon ketchup, though the flavor will be slightly sweeter.
Store raw beef in the fridge for up to 3 days before cooking. Leftovers keep for 4-5 days refrigerated or freeze for up to 3 months. Reheat gently to preserve the sauce’s consistency and prevent the meat from drying out.
Why You’ll Love This Recipe
- Set and Forget: I toss everything into the slow cooker and walk away—no babysitting required.
- Unbeatable Depth: The Dr Pepper and beef stock blend into this rich, caramelized sauce that soaks into the chuck roast like a dream.
- Feeds the Crew: One batch makes enough for Sunday dinner and Monday’s leftovers—my family of four never complains.
- Budget Hero: A tough cut like chuck roast turns tender and luxurious with almost no extra cost. Honestly, it feels like stealing.
Step-by-Step Instructions for Soda-Braised Beef with Rich Depth
Master the technique for tender, fall-apart beef with a complex sauce built from caramelized soda.
Step 1: Sear the Chuck Roast for Maximum Flavor
Pat the 3 lb Chuck Roast completely dry with paper towels. This critical step ensures a proper sear rather than steaming. Season all sides aggressively with the 1.5 tsp Kosher Salt and 1 tsp Freshly Ground Black Pepper, pressing the seasoning into the meat so it adheres during cooking.
Heat 1 tbsp Olive Oil in a heavy Dutch oven over medium-high heat until shimmering. Add the chuck roast and sear undisturbed for 4-5 minutes per side until a deep mahogany crust forms. The meat should release easily from the pot when properly browned—don’t force it. Transfer to a plate and set aside.
Step 2: Build the Aromatic Foundation
In the same pot, add the remaining 1 tbsp Olive Oil if needed. Add the 2 whole Yellow Onions, 4 whole Carrots, and 3 whole Celery Stalks. Cook over medium heat for 8-10 minutes, stirring occasionally, until the vegetables soften and begin to caramelize at the edges.
Add the 6 cloves Garlic Cloves, 2 tbsp Tomato Paste, 2 tbsp Worcestershire Sauce, and 1 tbsp Dijon Mustard. Stir constantly for 1-2 minutes until the tomato paste darkens slightly and the mixture becomes fragrant. This step develops the base flavors that will transform during braising.
Step 3: Deglaze and Create the Braising Liquid
Pour in the 2 cups Dr Pepper and use a wooden spoon to scrape up all the browned bits from the bottom of the pot. These fond particles contain immense flavor that will dissolve into the liquid. Add the 1.5 cups Beef Stock, 1 tsp Dried Thyme, 1 tsp Dried Rosemary, and 2 whole Bay Leaves.
Return the seared chuck roast to the pot along with any accumulated juices. The liquid should come about halfway up the meat. If needed, add a splash more beef stock to maintain this level. This ratio ensures proper braising without diluting the concentrated soda flavor.
Step 4: Slow Braise to Perfection
Bring the liquid to a gentle simmer, then reduce heat to low. Cover the pot and maintain a bare simmer for 3-3.5 hours, turning the roast every 45 minutes to ensure even cooking and prevent sticking. The meat is done when it yields easily to a fork and shreds with minimal pressure.
During braising, the Dr Pepper will reduce and intensify, creating a rich, slightly sticky glaze. The natural caramelization of the soda sugars balances the acidity from the tomato paste and mustard, resulting in a deeply complex sauce that coats the beef beautifully.
Step 5: Rest and Serve
Carefully transfer the chuck roast to a cutting board and tent loosely with foil. Skim any excess fat from the surface of the braising liquid if desired, though much will have rendered into the sauce. The vegetables should be fork-tender and infused with the soda’s deep caramel notes.
Let the meat rest for 15-20 minutes before slicing or shredding. This resting period allows the muscle fibers to relax and reabsorb the juices, ensuring each serving is moist and flavorful. Serve the beef with the braised vegetables and a generous spoonful of the reduced sauce.
Pro Tips For Making Dr Pepper Pot Roast
- Sear the Chuck First: I learned this the hard way—browning the chuck roast in batches with 1 tablespoon of oil per piece creates a deep crust that turns the Dr Pepper braising liquid into a rich, glossy sauce.
- Use Flat Dr Pepper: After one too many foamy overflows, I now let the soda sit out for 30 minutes before adding it to the pot, which keeps the flavor bold without the fizz messing with the simmer.
- Don’t Drown the Roast: The liquid should only come halfway up the meat—about 2 cups total of Dr Pepper and beef stock—so it braises instead of boils, keeping the chuck tender instead of stringy.
- Add Carrots Late: Sounds weird, but it works: Toss the carrots in during the last 45 minutes so they soak up the Dr Pepper glaze without turning to mush.
Essential Equipment for This Dish
Dutch Oven Essentials
A heavy 5-7 quart Dutch oven is non-negotiable for even heat distribution. I use my Le Creuset—it retains heat perfectly for the 3-3.5 hour braise. The enameled cast iron also prevents the acidic Dr Pepper from reacting with the pot. 🔥
Wooden Spoon
Use a wooden spoon to scrape up those flavorful browned bits when deglazing. Unlike metal, it won’t scratch your Dutch oven’s surface. I keep a dedicated spoon just for braising—it’s absorbed the flavors of dozens of meals over the years.
Tongs for Turning
Invest in 12-inch locking tongs—I prefer OXO Good Grips—to safely turn the 3 lb chuck roast every 45 minutes. Long handles keep your hands away from the hot liquid, and the locking mechanism makes storage easy.
Instant-Read Thermometer
While not strictly necessary, a ThermoWorks Instant Read helps verify the internal temperature reaches at least 195°F for perfect tenderness. I check multiple spots since the thickest part can vary. This small tool prevents overcooking. 🌡️
Fat Separator
A gravity fat separator makes skimming the rendered fat from the finished sauce effortless. I pour the braising liquid through mine before reducing—it catches every bit of fat while letting the flavorful juices flow through.
Cutting Board
Use a large wood or plastic cutting board with a groove to catch juices when slicing the rested roast. I recommend John Boos maple boards—they’re gentle on knives and add a touch of warmth to your kitchen setup.
Nutrition Facts
Frequently Asked Questions
Can I use a different soda?
Coca-Cola works as a substitute, but the flavor differs slightly. Dr Pepper’s unique blend of 23 flavors creates the best depth. Avoid diet versions—the sugar content is crucial for caramelization.
How do I know when it’s done?
The meat should reach 195°F internally and shred easily with a fork. After 3-3.5 hours of braising, test a small piece—if it falls apart, it’s ready. Rest for 15-20 minutes before serving.
Can I make this in a slow cooker?
Yes! Sear the roast first, then transfer everything to a slow cooker. Cook on low for 8-10 hours or high for 5-6 hours. The result will be just as tender.

- 4C Bread Crumbs Meatballs Recipe: Crispy Crust and Juicy Centers - September 25, 2026
- 6 Oz Chocolate Chip Cookie Recipe: Perfectly Balanced Crispy Edges and Chewy Hearts - September 25, 2026
- 6-Inch Coffee Cake Recipe: Vanilla Bean Swirls and Buttery Streusel Topping - September 25, 2026