
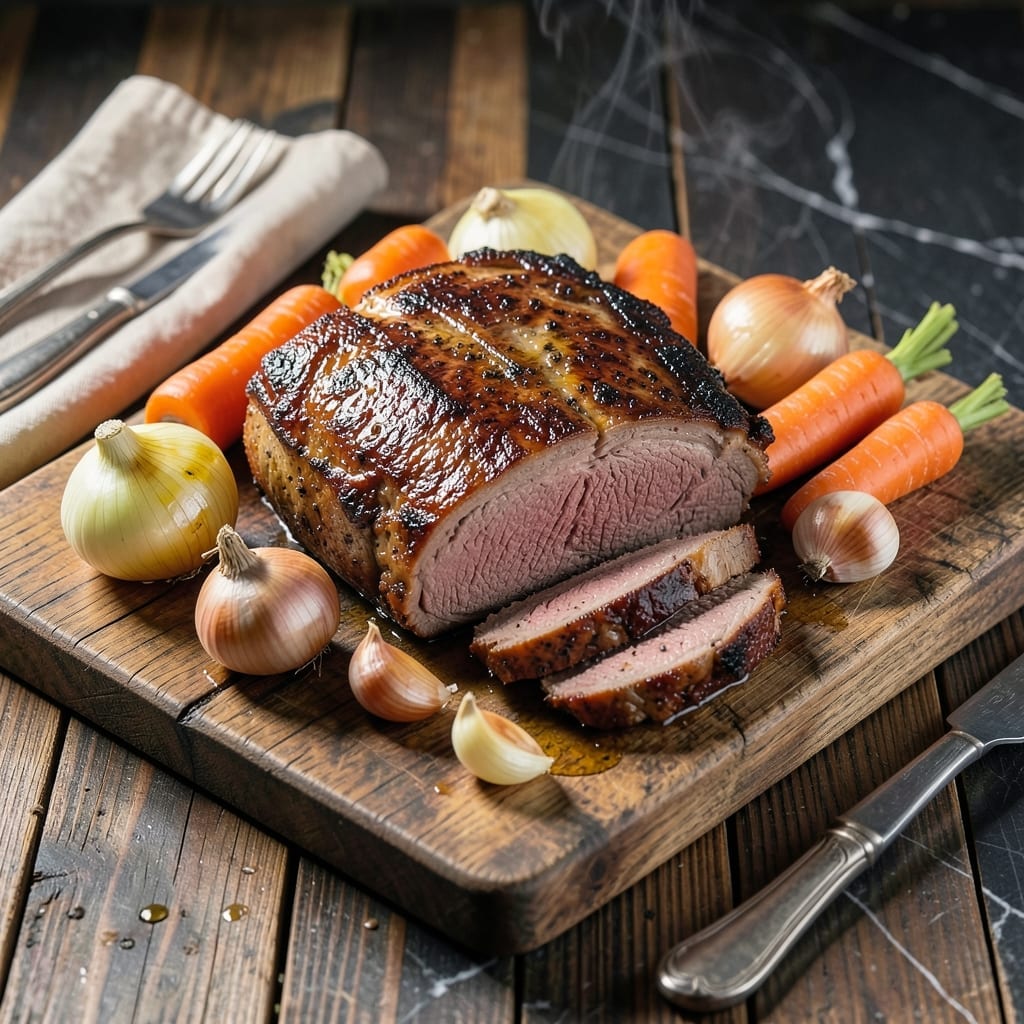
This dry pot roast delivers fork-tender beef with a rich, deeply flavored gravy that forms naturally as it cooks. No added liquids are needed—just the beef’s own juices and careful browning create an incredibly concentrated sauce.
The technique is simple but precise: sear the meat, then slow-roast it in a covered pot until perfectly tender. This method locks in moisture while building layers of flavor through caramelization and the Maillard reaction.
What emerges is beef so tender it falls apart at the touch of a fork, surrounded by a velvety gravy that begs to be soaked up with crusty bread. The meat develops a deep, savory crust while staying juicy inside.
Perfect for Sunday dinner or special occasions, this dish proves that less liquid means more flavor. The results speak for themselves.
Ingredients for Dry Pot Roast
A simple list of quality ingredients creates this deeply flavorful dish with fork-tender results.
| Ingredient | Amount | Notes |
|---|---|---|
| Beef Chuck Roast 🥩 | 3 lb | Well-marbled, boneless preferred |
| Kosher Salt 🧂 | 1 ½ tsp | Divided for seasoning and finishing |
| Black Pepper 🌶️ | 1 tsp | Freshly ground preferred |
| Garlic Cloves 🧄 | 6 cloves | Peeled and smashed |
| Yellow Onion 🧅 | 1 whole | Large, quartered |
| Carrots 🥕 | 3 whole | Large, cut into chunks |
| Celery Stalks 🌿 | 3 whole | Cut into large pieces |
| Dried Thyme 🍃 | 1 tsp | Or 1 tbsp fresh |
| Dried Rosemary 🍃 | 1 tsp | Crushed between fingers |
| Bay Leaves 🌿 | 2 whole | Dried, for depth |
| Olive Oil 🫒 | 2 tbsp | For searing roast |
| Red Wine 🍷 | ½ cup | Dry variety, optional deglazing |
| Beef Stock 🥘 | ½ cup | Optional for extra richness |
The beef is everything here. Chuck roast with good marbling ensures that fall-apart texture—Costco or Whole Foods have excellent options. Look for pieces with visible fat streaks throughout, which melt into the meat as it cooks. Avoid lean cuts like sirloin; they’ll stay tough. A 3-pound roast feeds four generously, with leftovers that reheat beautifully.
No red wine? Beef broth with a splash of vinegar adds similar acidity. Fresh herbs can replace dried at three times the amount. The vegetables are flexible—parsnips or potatoes work alongside carrots and celery. For extra richness, add a spoonful of tomato paste when searing. The stock is optional, but Better Than Bouillon makes a solid choice if using.
Store the roast uncovered in the fridge for up to 3 days before cooking (this dries the surface for better browning). Leftovers keep 4-5 days refrigerated or freeze for 3 months. The gravy thickens as it cools—reheat gently with a splash of water if needed.
Why You’ll Love This Recipe
- Set It and Forget: I toss the chuck roast with salt, pepper, garlic, and onion, then let the oven do the work—no babysitting required.
- Deep Beef Flavor: The dry rub of salt, pepper, and garlic turns the meat’s natural juices into a rich, savory crust that’s impossible to resist.
- Feeds a Hungry Crowd: Between us, this single pot roast stretches to feed six with hearty portions, and the leftovers taste even better the next day.
- Budget-Friendly Centerpiece: A chuck roast is one of the most affordable cuts, and with just five ingredients, I get a meal that feels like a weekend splurge.
Step-by-Step Instructions for Dry Pot Roast
Here’s the tested method I use for perfectly tender beef with rich, concentrated flavor.
Step 1: Season and Sear the Beef Chuck Roast
Pat the 3 lb Beef Chuck Roast completely dry with paper towels. This ensures a proper sear. Season all sides generously with 1.5 tsp Kosher Salt and 1 tsp Black Pepper, pressing the seasoning into the meat so it adheres well.
Heat 2 tbsp Olive Oil in a heavy pot with a tight-fitting lid over medium-high heat until shimmering. Add the roast and sear for 4-5 minutes per side until deeply browned. Don’t move it around—let it develop a rich crust. Transfer the seared roast to a plate and set aside.
Step 2: Build the Aromatic Base
In the same pot, add the 1 whole Yellow Onion, 3 whole Carrots, and 3 whole Celery Stalks. Cook over medium heat for 5-6 minutes, stirring occasionally, until the vegetables begin to soften and develop some color.
Add the 6 cloves Garlic Cloves, 1 tsp Dried Thyme, 1 tsp Dried Rosemary, and 2 whole Bay Leaves. Stir for 1 minute until fragrant. This aromatic base will infuse the meat with deep, savory flavor as it cooks.
Step 3: Braise the Roast Low and Slow
Return the seared roast to the pot, placing it directly on top of the vegetables. Pour in the 0.5 cup Red Wine and 0.5 cup Beef Stock. The liquid should come about 1/3 of the way up the roast—this is a dry pot roast, so we want minimal liquid.
Cover the pot tightly and transfer it to a preheated 325°F oven. Braise for 2.5 to 3 hours, checking occasionally to ensure the liquid hasn’t completely evaporated. The roast is done when it’s fork-tender and a meat thermometer inserted into the thickest part reads 195-200°F.
Step 4: Rest and Serve with Rich Pan Juices
Carefully transfer the roast to a cutting board, tent it loosely with foil, and let it rest for 15-20 minutes. This allows the juices to redistribute for maximum tenderness and flavor.
Skimming any excess fat from the surface, strain the pan juices into a small saucepan. Simmer for 3-4 minutes until slightly reduced and intensified in flavor. Slice the roast against the grain into thick pieces and serve with the rich, concentrated pan juices spooned over the top.
Pro Tips For Making Dry Pot Roast
- Sear Hard First: Crank the heat to high and sear the chuck roast until deeply browned on all sides—this builds flavor before the dry cooking begins. I learned this the hard way after my first few pot roasts tasted bland.
- Salt Generously: Use more kosher salt than you think, especially on the beef and onions. After burning three batches, I finally figured out that under-seasoning ruins the depth of flavor.
- Don’t Overcrowd: Skip packing the pot too tight with onions and garlic—leave room for air circulation to keep the roast dry and crispy. Sounds weird, but it works.
- Rest Before Carving: Give the roast a solid 10-15 minutes under foil after cooking—this keeps the juices inside where they belong. My grandmother swore by this, and she was right.
Essential Equipment for dry pot roast
Heavy Pot Requirement
You need a pot that can handle both stovetop searing and oven braising. I use my Le Creuset Dutch oven—its 5.5-quart capacity fits the 3 lb roast perfectly with room for vegetables. The enameled cast iron retains heat beautifully for even cooking.
Tight-Fitting Lid
A proper lid is non-negotiable for trapping steam and creating that dry braise environment. My Le Creuset lid seals tightly, preventing moisture loss. If using stainless steel, ensure the lid fits snugly—no gaps. This concentration of flavors is what makes this dish special. 🔥
Quality Tongs
For turning the roast during searing, use 12-inch locking tongs—I prefer OXO Good Grips. Long handles keep your hands safe from splatters, and the locking mechanism makes storage easy. Avoid forks, which pierce the meat and release precious juices.
Instant-Read Thermometer
A meat thermometer is essential for nailing that 195-200°F internal temperature. I swear by my ThermoWorks Mk4—it reads in 2-3 seconds and is accurate to ±0.7°F. Guessing leads to overcooked or undercooked results.
Wooden Spoon
For stirring the aromatic base and deglazing, a wooden spoon won’t scratch your pot’s surface. I keep a 12-inch one by my stove for this exact purpose. It’s also perfect for scraping up those flavorful browned bits from the bottom.
Heat-Resistant Mitts
Moving a heavy pot from stovetop to oven requires protection. I use silicone mitts rated to 500°F. They provide better grip than towels and protect against both heat and steam burns. Safety first when handling hot liquids. 💡
Nutrition Facts
Frequently Asked Questions
Why use minimal liquid in this method?
Less liquid creates a more concentrated, deeply flavored gravy. The meat’s own juices combine with caramelized bits from searing, producing a rich sauce without dilution.
Can I use a slow cooker instead?
Yes, but sear the roast first in a pan. Then transfer to the slow cooker with aromatics and cook on low for 8-10 hours or high for 5-6 hours until fork-tender.
How can I tell when it’s done?
Use a meat thermometer—it should read 195-200°F internally. The roast will also pull apart easily with a fork when fully cooked.
What if my gravy is too thin?
Simmer the strained pan juices uncovered for 5-7 minutes to reduce. For a quicker fix, mix 1 tsp cornstarch with 1 tbsp water, then stir into the gravy.

- 4C Bread Crumbs Meatballs Recipe: Crispy Crust and Juicy Centers - September 25, 2026
- 6 Oz Chocolate Chip Cookie Recipe: Perfectly Balanced Crispy Edges and Chewy Hearts - September 25, 2026
- 6-Inch Coffee Cake Recipe: Vanilla Bean Swirls and Buttery Streusel Topping - September 25, 2026