
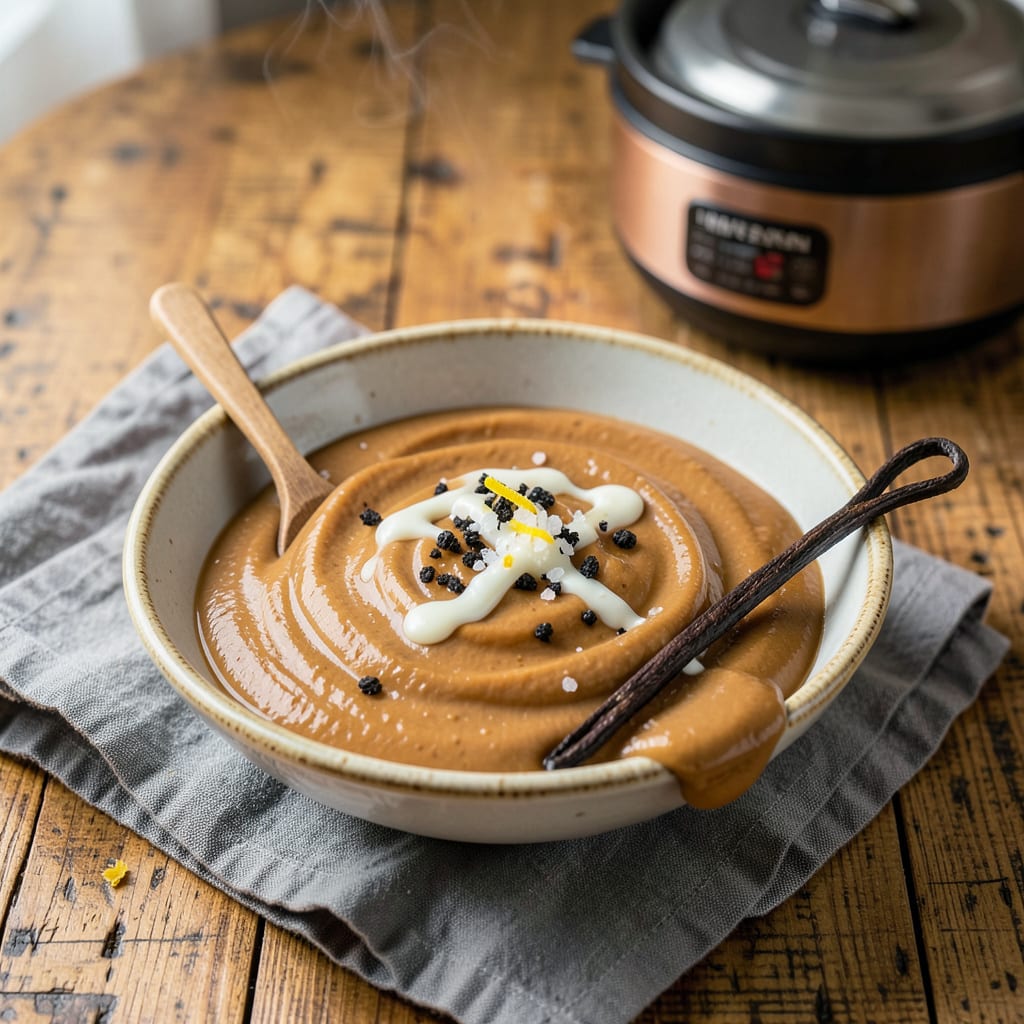
Transforming sweetened condensed milk into rich, velvety dulce de leche has never been simpler than with this Instant Pot method. Traditional stovetop techniques require constant attention and hours of simmering, but pressure cooking delivers the same luxurious results in a fraction of the time. The controlled environment prevents scorching while developing that signature caramelized depth.
This approach yields a perfectly thick, spreadable caramel with minimal effort—just pour, seal, and let the Instant Pot work its magic. The result is a versatile sauce that elevates everything from ice cream to pastries, with that classic Latin American sweetness and smooth texture. No advanced techniques required, just precise timing for foolproof results.
Ingredients for Dulce De Leche Recipe Instant Pot
Seven simple ingredients transform into luxurious dulce de leche with minimal effort and maximum flavor.
| Ingredient | Amount | Notes |
|---|---|---|
| Sweetened Condensed Milk 🥛 | 2 cans | 14-ounce cans, full-fat required |
| Vanilla Bean 🌱 | 1 whole | Split lengthwise, seeds scraped |
| Sea Salt 🧂 | ¼ tsp | Fine grain, for balance |
| Baking Soda 🧪 | 0.125 tsp | Optional, for deeper caramelization |
| Water 💧 | 1 cup | For Instant Pot pressure cooking |
| Heavy Cream 🥛 | 2 tbsp | Optional, for silkier texture |
| Unsalted Butter 🧈 | 1 tbsp | Optional, for richness |
[recipeingredientscaler]
The sweetened condensed milk is non-negotiable—full-fat cans only (Eagle Brand or Nestlé Carnation are reliable). Vanilla bean elevates the flavor profile significantly; if unavailable, pure vanilla extract (1 tsp) works, though the visual speckles are lost. Baking soda, while optional, creates a deeper caramel color and prevents graininess. For precision, weigh the cans to confirm 14 oz each—some brands vary slightly.
No vanilla bean? Vanilla bean paste (1 tbsp) offers similar depth. Heavy cream can be omitted, but the texture will be slightly less velvety. For a dairy-free version, coconut cream (full-fat, 1 tbsp) works well, though flavor shifts subtly. The baking soda is critical if your pressure cooker runs hot—it buffers the pH and prevents curdling. Water quantity must be exact—never exceed 1 cup or risk under-pressure conditions.
Unopened cans of sweetened condensed milk store for 1 year in a cool pantry. Once transformed into dulce de leche, refrigerate in an airtight container for up to 3 weeks, or freeze for 6 months (thaw overnight in the fridge). For gifting, use sterilized glass jars and process in a water bath for shelf stability. The vanilla bean pod can be rinsed, dried, and stored in sugar to create vanilla sugar for future use.
Why You’ll Love This Recipe
- That Vanilla Salt Magic: The scrape of a real vanilla bean into the finished dulce de leche? Worth every second. Then a pinch of flaky sea salt cuts through the sweetness—suddenly it’s not just caramel, it’s restaurant-quality caramel.
- Dessert Insurance Policy: I always keep a jar in the fridge because it turns ice cream into sundaes, brownies into masterpieces, and even saves sad store-bought cookies. Honestly, it’s my secret for looking like I put in way more effort than I did.
- Pantry Stunt Double: Five ingredients I already own (including that forgotten vanilla bean), and no last-minute grocery runs. Here’s what sold me—it costs less than store-bought dulce de leche and tastes twice as good, with zero weird preservatives.
Step-by-Step Instructions for Dulce de Leche in the Instant Pot
This pressure cooker method transforms simple ingredients into luxurious caramel with minimal effort and maximum precision.
Step 1: Prepare the Vanilla Bean and Cans
Begin by splitting the vanilla bean lengthwise with a sharp paring knife. Scrape out the seeds and reserve both the seeds and pod. Distribute the seeds evenly between the two cans of sweetened condensed milk, then add half of the sea salt to each can.
For those using baking soda, add 0.125 tsp to each can—this alkaline ingredient accelerates the Maillard reaction, creating a deeper caramel color and more complex flavor profile. Stir each can thoroughly with a clean spoon to incorporate the vanilla and salt completely. The mixture should appear uniform with visible vanilla specks throughout.
Step 2: Set Up the Instant Pot for Pressure Cooking
Pour the 1 cup of water into the Instant Pot inner pot. Place the trivet inside, ensuring it sits level. Position both cans of prepared sweetened condensed milk upright on the trivet, leaving space between them for even heat circulation.
Secure the lid, making certain the sealing ring is properly seated and the steam release valve is set to the “Sealing” position. The water creates steam that builds pressure, while the trivet elevates the cans above direct heat to prevent scorching. This setup maintains consistent temperature distribution throughout the cooking process.
Step 3: Pressure Cook to Caramel Perfection
Select the “Pressure Cook” or “Manual” setting and program for 40 minutes at high pressure. The Instant Pot will take approximately 10-15 minutes to come to pressure before the cooking time begins. During this process, the milk sugars undergo caramelization and Maillard reactions, transforming into rich, amber-colored dulce de leche.
Once the cooking cycle completes, allow the pressure to release naturally for 20 minutes. You’ll know the process is complete when the float valve drops. The gradual pressure release prevents sudden temperature changes that could cause the caramel to seize or develop a grainy texture. The finished product should have a deep golden-brown hue and thick, pourable consistency.
Step 4: Incorporate Optional Enrichments
Carefully remove the cans from the Instant Pot using tongs—they’ll be extremely hot. Let them cool to room temperature, about 1 hour. Once cooled, stir in the 2 tbsp of heavy cream if using, which adds a velvety smoothness to the texture. The cream should incorporate seamlessly without altering the caramel’s thickness.
For additional richness, whisk in the 1 tbsp of unsalted butter while the mixture is still warm. The butter should melt completely, creating a glossy sheen on the surface. These optional additions enhance mouthfeel without overpowering the pure caramel flavor. The final product should coat the back of a spoon and hold its shape briefly when drizzled.
Step 5: Store and Serve
Transfer the dulce de leche to clean, airtight containers. It will continue to thicken slightly as it cools completely. For immediate use, the caramel should be warm and pourable—ideal for drizzling over ice cream or filling pastries. When stored in the refrigerator, it becomes firmer but remains spreadable.
The dulce de leche will keep refrigerated for up to 3 weeks or can be frozen for 3 months. Before using chilled caramel, allow it to come to room temperature or gently warm it in a double boiler, stirring occasionally until it reaches your desired consistency. The flavor develops further over time, becoming more complex and nuanced.
Flavor Customization for This Dish
Classic Vanilla Bean
The vanilla bean version you’ve just made is the gold standard—those tiny black specks aren’t just beautiful, they pack serious flavor. For an even more pronounced vanilla presence, I like to add the scraped pod itself to the cans during cooking. Just
Salted Caramel Twist
To create a salted caramel variation, increase the sea salt to ½ tsp total (¼ tsp per can). I prefer Maldon flaky salt sprinkled on top after cooking for that satisfying crunch. The contrast between sweet caramel and salty crystals makes this version irresistible over brownies or as a dip for pretzels.
Spiced Chai Infusion
Add 1 cinnamon stick, 2 cardamom pods, and 1 star anise to the Instant Pot water. The spices will gently perfume the steam, infusing the dulce de leche with warm chai notes. Remove the spices after cooking. This version pairs beautifully with spiced cakes or churros.
Espresso Chocolate Depth
Stir in 1 tbsp instant espresso powder and 2 tbsp cocoa powder after cooking while the caramel is still warm. The espresso enhances the caramel’s natural bitterness, while cocoa adds richness. I use Medaglia d’Oro espresso for its robust flavor that doesn’t overpower.
Citrus Brightness
Zest 1 orange or 2 limes directly into the cans before cooking. The citrus oils cut through the sweetness beautifully. For lime, I recommend Key limes for their intense aroma. This variation shines in fruit tarts or as a glaze for citrus cakes.
Boozy Bourbon Kick
After cooking, stir in 1 tbsp bourbon while the caramel is still warm. The alcohol cooks off slightly but leaves behind vanilla and oak notes. I prefer Maker’s Mark for its smooth profile. This adult version elevates bread pudding or cheesecake toppings. ✨
Nutrition Facts
Frequently Asked Questions
Can I use evaporated milk instead of sweetened condensed?
No, evaporated milk lacks the sugar content needed for proper caramelization. Sweetened condensed milk’s sugar-to-milk ratio is crucial for achieving the right texture and flavor. Using evaporated milk would result in a thin, bland product that won’t thicken properly.
Why did my dulce de leche turn out grainy?
Graininess usually occurs from rapid temperature changes or insufficient cooking time. Always allow the Instant Pot to release pressure naturally for the full 20 minutes. Stirring too soon after cooking can also cause sugar crystals to form, creating that unwanted texture.
How do I adjust for high altitude cooking?
At elevations above 3,000 feet, increase cooking time by 5-10 minutes. The lower boiling point at high altitudes means the caramelization process takes longer. Monitor your first batch closely to determine the perfect timing for your location.
Can I double the recipe with more cans?
Yes, but never exceed 4 cans total in a standard 6-quart Instant Pot. Stack cans in a single layer with space between them for even heat circulation. Add 1.5 cups water for 4 cans, and increase cooking time to 45 minutes to ensure proper caramelization.
What’s the best way to clean caramelized cans?
Soak cans in hot, soapy water immediately after emptying. For stubborn residue, fill with water and bring to a boil on the stove—this dissolves remaining caramel. Never use abrasive pads that could damage the can’s interior coating or leave metallic particles.

- 8 Bean Soup Recipe Crock Pot: Hearty Vegetable Medley in One Pot - September 25, 2026
- 4C Bread Crumbs Meatballs Recipe: Crispy Crust and Juicy Centers - September 25, 2026
- 6 Oz Chocolate Chip Cookie Recipe: Perfectly Balanced Crispy Edges and Chewy Hearts - September 25, 2026