
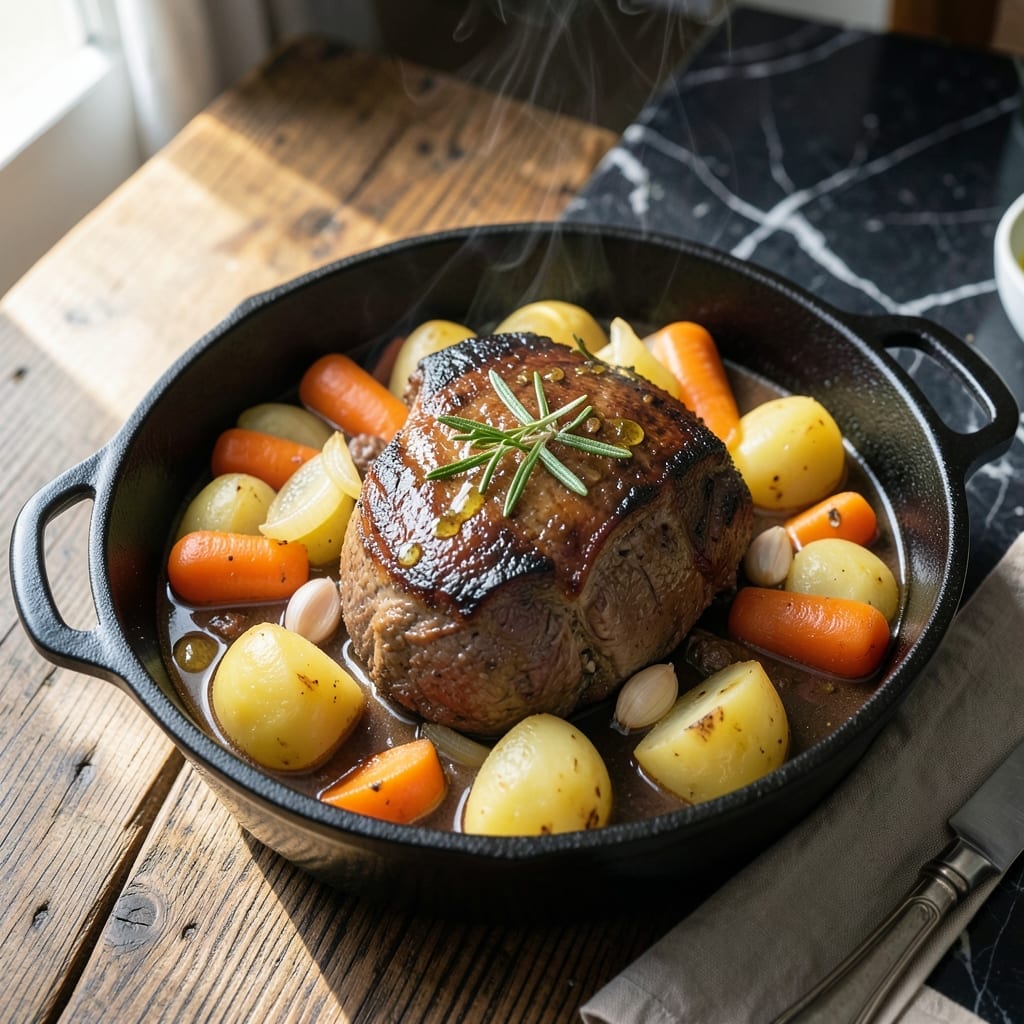
There’s nothing like a pot roast to fill your kitchen with fall comfort. 🍁 I’ve spent years perfecting this Dutch oven method, and the secret is low and slow cooking that turns tough beef into melt-in-your-mouth perfection.
What makes this special is how the vegetables soak up the rich, savory juices as everything simmers together. The beef becomes so tender it practically falls apart, while carrots and potatoes transform into flavor-packed bites.
By the time it comes out of the oven, you’ll have a meal that tastes like a Sunday supper at grandma’s. The gravy is thick and rich, perfect for soaking up with crusty bread or mashed potatoes.
This is the kind of dish that makes a house feel like a home. Here’s how to make it.
Ingredients for Fall Pot Roast
Nothing exotic here—just good stuff for a cozy, slow-cooked Sunday supper.
| Ingredient | Amount | Notes |
|---|---|---|
| Chuck Roast 🥩 | 3 lb | Well-marbled for tenderness |
| Carrots 🥕 | 4 whole | Peeled, cut into chunks |
| Yukon Gold Potatoes 🥔 | 1 ½ lb | Quartered, skin-on preferred |
| Yellow Onion 🧅 | 1 whole | Large, quartered |
| Garlic Cloves 🧄 | 6 cloves | Smashed, peeled |
| Beef Broth 🥣 | 2 cups | Low-sodium preferred |
| Red Wine 🍷 | 1 cup | Dry, bold variety |
| Tomato Paste 🍅 | 2 tbsp | For depth of flavor |
| Worcestershire Sauce 💧 | 1 tbsp | Adds umami richness |
| Dried Thyme 🌿 | 1 tsp | Crushed between fingers |
| Dried Rosemary 🍃 | 1 tsp | Crushed between fingers |
| Bay Leaves 🌿 | 2 pieces | Whole, removed before serving |
| Olive Oil 🫒 | 2 tbsp | For searing beef |
| Kosher Salt 🧂 | 1 ½ tsp | Adjust to taste |
| Black Pepper 🌶️ | 1 tsp | Freshly ground |
The beef is everything here. Chuck roast with good marbling breaks down beautifully—Costco or Whole Foods have great options. Look for pieces with visible fat streaks; that’s what turns into melt-in-your-mouth tenderness. The potatoes? Yukon Gold hold their shape better than russets (which can get mealy). If your butcher has a beef chuck on sale, grab it—just trim any large fat cap before cooking.
No red wine? Beef broth with a splash of balsamic vinegar works in a pinch. Fresh out of thyme or rosemary? Dried at half the amount, but add it earlier so the flavors bloom. The Worcestershire can be swapped for soy sauce (same umami kick). Baby carrots are fine if that’s what you’ve got, but full carrots cut into chunks hold up better. For the broth, Better Than Bouillon paste is my go-to—just dissolve it in hot water.
Leftovers taste even better the next day. Keeps 4-5 days in the fridge, freezes for 3 months. I always make extra gravy—it’s perfect for soaking into mashed potatoes or crusty bread later. Store the meat and veggies together, but reheat gently to keep it from drying out.
Why You’ll Love This Recipe
- One Pot Wonder: I toss in the chuck roast, carrots, potatoes, onion, and garlic—then the oven does the rest.
- Feeds a Crowd: Perfect for Sunday dinner, and the leftovers make Monday’s lunch jealousy-inducing.
- Budget Stretcher: A few pounds of chuck and pantry veggies turn into a hearty meal that lasts for days.
Step-by-Step Instructions for Dutch Oven Pot Roast
Here’s the method I use for melt-in-your-mouth results every single time.
🔥 Step 1: Sear the Chuck Roast
Pat the 3 lb Chuck Roast dry with paper towels—this ensures a good sear. Season generously with the 1.5 tsp Kosher Salt and 1 tsp Black Pepper on all sides. Heat the 2 tbsp Olive Oil in your Dutch oven over medium-high heat until it shimmers.
Sear the roast for 4-5 minutes per side until deeply browned. You’ll know it’s ready to flip when it releases easily from the pan. This creates a flavorful crust that will deepen as it braises. Don’t rush this step—it’s the foundation of your dish.
👨🍳 Step 2: Build the Flavor Base
Remove the roast and set aside. In the same pot, add the 4 whole Carrots, 1 whole Yellow Onion, and 6 cloves Garlic Cloves. Cook for 3-4 minutes until the onion starts to soften and the carrots pick up some color.
Stir in the 2 tbsp Tomato Paste, 1 tbsp Worcestershire Sauce, 1 tsp Dried Thyme, and 1 tsp Dried Rosemary. Cook for 1 minute until fragrant. This step builds layers of flavor that will infuse the entire dish.
🍳 Step 3: Deglaze and Add Liquids
Pour in the 1 cup Red Wine and scrape up all the browned bits from the bottom of the pot. Let it simmer for 2-3 minutes until reduced by half. This deglazing step captures all that concentrated beef flavor.
Add the 2 cups Beef Broth and 2 pieces Bay Leaves, then return the roast to the pot. The liquid should come about halfway up the meat. If it doesn’t, add a splash of water.
⏰ Step 4: Braise to Tenderness
Cover the Dutch oven and transfer to a preheated 325°F oven. Braise for 2.5-3 hours, turning the roast halfway through. The meat is done when it pulls apart easily with a fork.
Add the 1.5 lb Yukon Gold Potatoes during the last 45 minutes of cooking so they absorb all the flavor without turning to mush. The carrots will continue to soften beautifully in the braising liquid.
🥘 Step 5: Rest and Serve
Remove the bay leaves and discard. Transfer the roast to a cutting board and let it rest for 15 minutes before slicing or shredding. This resting period allows the juices to redistribute throughout the meat.
Serve the pot roast with the vegetables and plenty of the rich braising liquid spooned over the top. The carrots and potatoes should be tender and infused with all the savory flavors of the dish.
Pro Tips For Making Fall Pot Roast
- Sear the Chuck First: I learned this the hard way—browning the chuck roast in batches with 2 tablespoons of oil per side until deep brown (about 4-5 minutes) locks in flavor that simmering alone just can’t deliver.
- Cut Potatoes Even: Yukon Golds cook faster than carrots, so chop them into 1.5-inch chunks—any smaller and they’ll turn to mush before the meat gets tender.
- Skip the Cold Meat: Pull the chuck roast out 30 minutes before searing; a room-temp roast browns better and cooks more evenly than one straight from the fridge.
- Boost with Tomato Paste: Sounds weird, but stirring in 2 tablespoons of tomato paste with the onions and garlic adds a depth to the gravy that makes the whole dish taste richer.
Dietary Considerations for fall pot roast
Gluten-Free Friendly
This dish is naturally gluten-free as written, since it relies on whole ingredients like beef, vegetables, and broth. Just double-check your Worcestershire sauce—some brands contain wheat. I always use Lea & Perrins which is certified gluten-free. 💡
Low-Carb Adaptations
For a lower-carb version, simply reduce the potatoes or replace them with radishes or turnips. They soak up the braising liquid just as well. You can also add mushrooms for extra heartiness without adding many carbs.
Dairy-Free Naturally
There’s no dairy in this recipe, so it’s safe for those avoiding milk products. The richness comes from the beef and vegetables alone. If you’re serving it with mashed potatoes, use olive oil or dairy-free butter instead of regular butter.
Sodium Considerations
To reduce sodium, use low-sodium beef broth and skip the added salt initially. The Worcestershire sauce and natural beef flavors provide plenty of seasoning. Taste before adding extra salt at the end. ❤️
Vegetarian Modifications
While this is a beef-centric dish, you can make a hearty vegetarian version using portobello mushrooms or seitan in place of the chuck roast. Sear them well to develop deep flavor before braising.
Nutrition Facts
Frequently Asked Questions
What’s the best cut for this dish?
Chuck roast is ideal for its marbling and connective tissue. This breaks down into tender, flavorful meat during the 2.5-3 hour braise. Avoid lean cuts like sirloin, as they’ll dry out.
Can I cook it on the stovetop instead?
Yes! After searing, cover and simmer on low heat for the same 2.5-3 hours. Check liquid levels occasionally and add water if needed to prevent burning.
Why does the meat need to rest before serving?
Resting for 15 minutes lets juices redistribute. Skipping this step can result in dry meat, as the juices will spill out when sliced. The wait is worth it!

- 4C Bread Crumbs Meatballs Recipe: Crispy Crust and Juicy Centers - September 25, 2026
- 6 Oz Chocolate Chip Cookie Recipe: Perfectly Balanced Crispy Edges and Chewy Hearts - September 25, 2026
- 6-Inch Coffee Cake Recipe: Vanilla Bean Swirls and Buttery Streusel Topping - September 25, 2026