
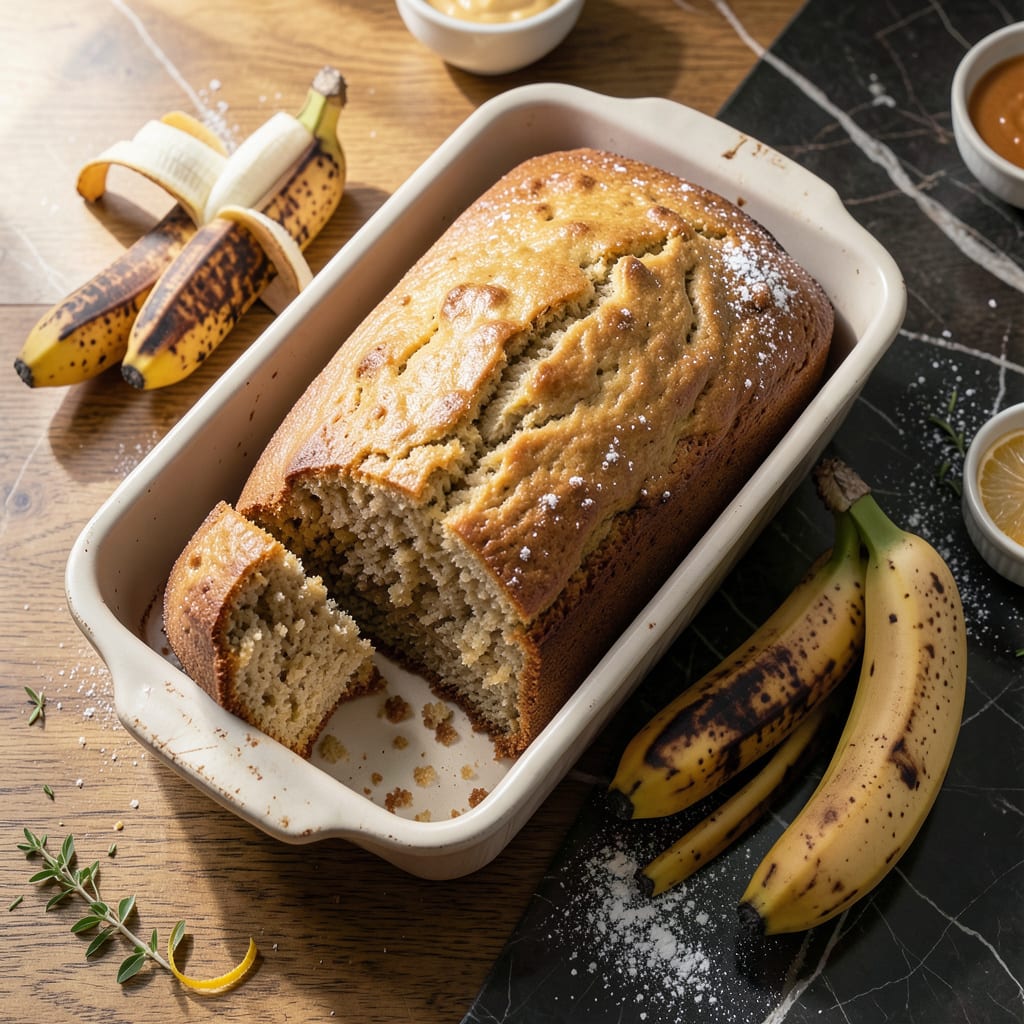
This naturally sweet loaf proves you don’t need fat for moist, tender results. Bananas provide all the richness, while a few simple tricks ensure perfect texture every time.
With no dairy, eggs, or added oils, this recipe delivers on flavor without compromise. The crumb stays soft for days, making it ideal for breakfast or snacks.
Ingredients for Fat Free Banana Loaf
A handful of pantry basics transforms into a perfectly moist, sweet loaf.
| Ingredient | Amount | Notes |
|---|---|---|
| Ripe Bananas 🍌 | 4 whole | Very ripe, black-spotted peels best |
| All-Purpose Flour 🌾 | 2 cups | Spoon and level for accuracy |
| Granulated Sugar 🍚 | ¾ cup | Or coconut sugar for depth |
| Baking Soda 🧂 | 1 tsp | Ensures proper rise |
| Baking Powder 🧂 | ½ tsp | For extra lift in batter |
| Salt 🧂 | ½ tsp | Balances sweetness |
| Ground Cinnamon 🌿 | 1 tsp | Warm spice for flavor |
| Vanilla Extract 💧 | 2 tsp | Pure extract for best flavor |
| Unsweetened Applesauce 🍏 | ½ cup | Replaces fat, adds moisture |
| Non-Dairy Milk 🥛 | ¼ cup | Almond or soy milk works |
| Apple Cider Vinegar 🍏 | 1 tbsp | Activates baking soda |
| Chopped Walnuts 🌰 | ½ cup | Optional for crunch |
Bananas are the key—wait until they’re covered in brown spots (the uglier, the better). I grab mine from Trader Joe’s or Whole Foods when they’re discounted for being overripe. The flour should be all-purpose, but white whole wheat works if you want extra fiber. Measure by spooning into cups to avoid packed flour, which can make the loaf dense.
No applesauce? Mashed avocado or pumpkin puree works in a pinch. Swap the non-dairy milk for any plant-based option—oat milk adds richness. For gluten-free, use a 1:1 baking blend like Bob’s Red Mill. The vinegar is subtle but crucial—don’t skip it (it reacts with the baking soda for lift).
This loaf stays fresh for 3-4 days wrapped at room temperature. Freeze slices in a ziplock for up to 3 months (thaw overnight). Best served slightly warm, but honestly, it disappears fast either way.
Why You’ll Love This Recipe
- Mix and Bake: I just mash the bananas, mix the dry ingredients, and it’s in the oven—no creaming butter or fancy steps.
- Naturally Sweet: The ripe bananas and sugar make it rich and moist without any added fat.
- Breakfast or Snack: Honestly, I slice it for breakfast, pack it for lunchboxes, or serve it with tea in the afternoon.
- Stays Fresh: It keeps well for days, so I bake one on Sunday and we’re set for the week.
Step-by-Step Instructions for Fat Free Banana Loaf
This method ensures a tender, moist loaf with perfect rise and rich banana flavor.
Step 1: Prepare the Banana Base and Wet Ingredients
In a large mixing bowl, mash the 4 whole Ripe Bananas until mostly smooth with a few small lumps remaining. I prefer very ripe bananas with black-spotted peels—they’re sweeter and mash more easily.
To the mashed bananas, add the 0.75 cup Granulated Sugar, 2 tsp Vanilla Extract, 0.5 cup Unsweetened Applesauce, 0.25 cup Non-Dairy Milk, and 1 tbsp Apple Cider Vinegar. Stir until fully combined. The vinegar reacts with the baking soda later, creating lift without added fat.
Step 2: Combine Dry Ingredients for Structure
In a separate bowl, whisk together the 2 cups All-Purpose Flour, 1 tsp Baking Soda, 0.5 tsp Baking Powder, 0.5 tsp Salt, and 1 tsp Ground Cinnamon. This ensures even distribution of leavening agents, which is critical for a uniform rise.
Spoon and level the flour for accuracy—packing it can lead to a dense loaf. The cinnamon adds warmth that complements the banana flavor beautifully, while the salt balances the natural sweetness.
Step 3: Mix Wet and Dry Ingredients Gently
Pour the dry ingredients into the bowl with the wet mixture. Using a spatula, fold everything together just until the flour disappears. Overmixing develops gluten, which can make the loaf tough instead of tender.
If using, fold in the 0.5 cup Chopped Walnuts at this stage. The batter will be thick but pourable. The applesauce keeps it moist without any added fat, so don’t be tempted to thin it out.
Step 4: Bake Until Golden and Springy
Transfer the batter to a greased 9×5-inch loaf pan and smooth the top. Bake in a preheated 350°F oven for 50-60 minutes, or until a toothpick inserted in the center comes out clean.
Check for doneness at the 50-minute mark. The loaf is ready when the top is golden brown and springs back when lightly pressed. If it browns too quickly, tent loosely with foil.
Step 5: Cool Completely Before Slicing
Remove the pan from the oven and let the loaf cool in the pan for 10 minutes. Then, transfer it to a wire rack to cool completely, about 1 hour. Slicing too soon can cause crumbling.
The texture improves as it cools, becoming wonderfully moist and sliceable. Store leftovers in an airtight container at room temperature for up to 3 days, or freeze for longer storage.
Pro Tips For Making Fat Free Banana Loaf
- Mash Bananas Well: I learned this the hard way—lumpy banana means uneven texture. Use a fork and press until smooth, about 2 minutes of good mashing.
- Check Your Leaveners: After a few flat loaves, I started testing my baking soda and powder first. Stir a teaspoon into hot water—if it fizzes strongly, it’s fresh.
- Don’t Overmix: Once the flour goes in, stir just until combined. I used to beat it like cake batter, and my loaves turned out dense and tough.
- Test with a Toothpick: Pull it out at 50 minutes—if it comes out clean or with a few moist crumbs, it’s done. I skip this and my loaf either dries out or stays gummy in the middle.
Troubleshooting This Recipe
Dense or Dry Loaf
If your loaf turns out dense, it’s likely from overmixing the batter or using too much flour. I always spoon and level my flour to avoid packing it. Also, ensure your bananas are very ripe—underripe ones lack the moisture and sweetness needed. 💡
Sinking Middle
A sunken center usually means the loaf wasn’t fully baked. Check with a toothpick at 50 minutes—if it comes out wet, bake for another 5-10 minutes. Opening the oven too early can also cause collapse, so resist peeking until the 40-minute mark.
Overly Brown Top
If the top browns too quickly, tent the pan loosely with aluminum foil after 30 minutes of baking. This prevents burning while allowing the center to cook through. I use heavy-duty foil for better coverage.
Bland Flavor
Boost flavor by using very ripe bananas and adding 1 extra tsp of cinnamon or a pinch of nutmeg. The applesauce should be unsweetened to avoid diluting the banana taste. I also recommend toasting the walnuts before adding them for extra depth.
Sticky or Wet Batter
If your batter seems too wet, let it rest for 10 minutes before baking—the flour will absorb some moisture. If it’s still loose, add 1-2 tbsp of flour and fold gently. Remember, the applesauce makes it thicker than traditional batters.
Uneven Baking
For even baking, ensure your oven is fully preheated to 350°F and the rack is centered. Rotate the pan 180 degrees halfway through baking if your oven has hot spots. I always check both sides with a toothpick to confirm doneness. 🔥
Nutrition Facts
Frequently Asked Questions
Can I use whole wheat flour instead?
Yes! Substitute with white whole wheat flour for similar texture. Regular whole wheat may make it denser, so add 1-2 tbsp extra liquid to compensate.
Why does the recipe include vinegar?
The apple cider vinegar reacts with baking soda, creating lift without fat. It’s subtle but crucial for a light, airy crumb.
How ripe should the bananas be?
Use bananas with black-spotted peels—the uglier, the better! They’re sweeter and provide maximum moisture for the loaf.
Can I skip the cooling time?
No—slicing too soon causes crumbling. Cool in the pan for 10 minutes, then transfer to a rack for 1 hour before cutting.

- 8 Bean Soup Recipe Crock Pot: Hearty Vegetable Medley in One Pot - September 25, 2026
- 4C Bread Crumbs Meatballs Recipe: Crispy Crust and Juicy Centers - September 25, 2026
- 6 Oz Chocolate Chip Cookie Recipe: Perfectly Balanced Crispy Edges and Chewy Hearts - September 25, 2026