
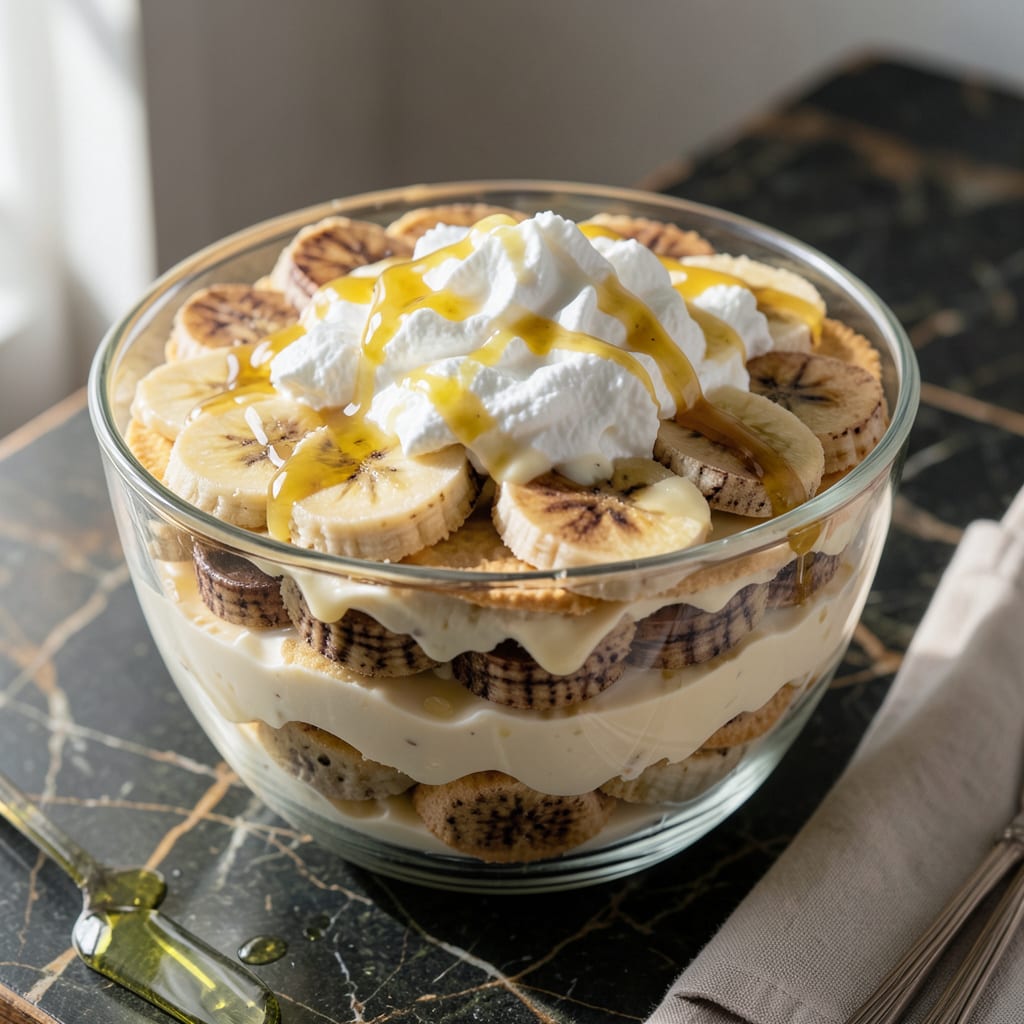
This lightened-up version delivers all the comfort of classic banana pudding without the guilt. The secret lies in using fat-free ingredients that maintain that creamy texture we all love.
Layers of ripe bananas, vanilla wafers, and smooth custard come together in perfect harmony. It’s proof that healthy desserts can still taste indulgent.
Ingredients for Fat Free Banana Pudding
Light, creamy, and guilt-free—these ingredients make magic happen without the fat.
| Ingredient | Amount | Notes |
|---|---|---|
| Ripe Bananas 🍌 | 4 whole | Uniformly sliced for layers |
| Fat-Free Vanilla Wafers 🍪 | 12 pieces | Low-fat variety acceptable |
| Fat-Free Milk 🥛 | 2 cups | Skim milk works best |
| Fat-Free Sweetened Condensed Milk 🥛 | 1 can | 14 oz can, essential for creaminess |
| Fat-Free Cool Whip 🥣 | 1 cup | Thawed before folding in |
| Instant Vanilla Pudding Mix 🍮 | 1 package | Sugar-free if preferred |
| Vanilla Extract 🌿 | 1 tsp | Pure extract for best flavor |
| Cornstarch 🌾 | 2 tbsp | For thickening custard |
| Granulated Sugar 🍚 | ¼ cup | Adjust to taste preference |
| Egg Whites 🥚 | 2 whole | For structure in custard |
| Salt 🧂 | ¼ tsp | Enhances sweetness balance |
The bananas need to be ripe—look for plenty of brown speckles (that’s when they’re sweetest). Fat-free sweetened condensed milk is the hero here; Eagle Brand makes a version that’s perfect. Most supermarkets stock it near the baking aisle. The vanilla wafers should be the low-fat kind—Nabisco or Keebler both have options that hold up well to soaking.
No fat-free Cool Whip? Whipped tofu or coconut whipped cream (if dairy isn’t a concern) can substitute, but texture will differ. Out of instant pudding? Cornstarch plus vanilla can thicken the custard, though it’ll need more time to set. For extra flavor, a pinch of cinnamon or nutmeg in the custard layer works wonders (don’t skip this).
Assemble this the day you plan to serve—wafer layers soften the longer it sits. Keeps in the fridge for 2-3 days, though it’s best fresh. Cover tightly with plastic wrap pressed directly on the surface to prevent a skin from forming.
Why You’ll Love This Recipe
- No-Bake Simplicity: I just layer the ingredients—no oven, no stress. The longest part is waiting for it to chill.
- Creamy Banana Bliss: Ripe bananas and fat-free condensed milk create this rich, dreamy texture that tastes indulgent.
- Potluck Ready: I bring this to every gathering. It feeds a crowd and no one guesses it’s fat-free.
- Budget-Friendly Treat: Five affordable ingredients, one bowl, and it lasts for days. Honestly, it’s my go-to dessert when I’m watching my wallet.
Step-by-Step Instructions for Fat Free Banana Pudding
Here’s how I layer this dreamy dessert with zero guilt and maximum flavor.
Step 1: Prepare the Custard Base
In a medium saucepan, whisk together the 2 cups Fat-Free Milk, 1 can Fat-Free Sweetened Condensed Milk, 2 tbsp Cornstarch, 0.25 cup Granulated Sugar, and 0.25 tsp Salt until no lumps remain. I always make sure the cornstarch is fully dissolved before turning on the heat—this prevents clumping.
Cook over medium heat while stirring constantly with a wooden spoon. You’ll notice the mixture thickening after about 5-7 minutes. Watch for it to reach a pudding-like consistency that coats the back of the spoon. This is your base, so don’t rush it—patience ensures a silky texture.
Step 2: Temper the Egg Whites and Finish the Custard
In a small bowl, lightly beat the 2 whole Egg Whites with the 1 tsp Vanilla Extract. Slowly ladle about ½ cup of the hot custard mixture into the egg whites while whisking constantly. This tempering step prevents the eggs from scrambling when added to the hot mixture.
Pour the tempered egg mixture back into the saucepan and cook for an additional 2-3 minutes, stirring constantly, until the custard is thick enough to mound slightly when dropped from a spoon. Remove from heat and let cool to room temperature, stirring occasionally to prevent a skin from forming.
Step 3: Fold in the Pudding Mix and Cool Whip
Once the custard has cooled, gently fold in the 1 package Instant Vanilla Pudding Mix. The pudding mix adds stability and enhances the vanilla flavor without adding fat. Stir for about 1 minute until fully incorporated and slightly thickened.
Next, fold in the 1 cup Fat-Free Cool Whip with a spatula, using gentle strokes to maintain the air in the whipped topping. This step lightens the custard and gives it that signature creamy texture. Make sure everything is evenly combined before moving to assembly.
Step 4: Layer with Bananas and Vanilla Wafers
Slice the 4 whole Ripe Bananas into ¼-inch thick rounds. In a serving dish or individual glasses, start with a layer of 12 pieces Fat-Free Vanilla Wafers, followed by half of the sliced bananas. Spoon half of the custard mixture over the bananas, spreading evenly.
Repeat with another layer of vanilla wafers, remaining bananas, and the rest of the custard. I like to finish with a final layer of crushed vanilla wafers on top for a little crunch. Cover and refrigerate for at least 4 hours, or until the wafers have softened and the flavors have melded together.
Pro Tips For Making Fat Free Banana Pudding
- Chill the Layers: After assembling each layer of vanilla wafers, bananas, and pudding mixture, refrigerate for at least 15 minutes before adding the next. I learned this the hard way—skipping this step makes the wafers soggy and the layers slide apart.
- Slice Bananas Thin: Cut the bananas into 1/4-inch slices so they distribute evenly and soften just enough without turning mushy. Sounds tedious, but it works.
- Whisk the Pudding: Mix the fat-free milk and sweetened condensed milk vigorously for a full 2 minutes to guarantee a smooth, lump-free pudding base. My grandmother swore by this, and she was right.
- Skip Early Mixing: Resist the urge to combine the Cool Whip with the pudding mixture until right before serving—folding it in too soon deflates the texture and thins the layers. I was skeptical until I tried it.
Essential Equipment for This Dish
Mixing Bowls
I always start with a set of nested stainless steel mixing bowls—they’re lightweight, durable, and won’t react with acidic ingredients. A 2-quart bowl is perfect for the custard base, while a 4-quart gives room to fold in the Cool Whip. I prefer Cuisinox for their grippy bases and pour spouts. 🥄
Whisk and Saucepan
For the custard, a balloon whisk is essential to prevent lumps in your mixture. Pair it with a 2-quart heavy-bottomed saucepan—I use All-Clad for even heat distribution. The heavy base prevents scorching, which is crucial when working with milk-based custards.
Measuring Tools
Precise measurements matter in pudding. I keep a set of stainless steel measuring cups and spoons from OXO on hand. The magnetic set stays organized, and the etched markings won’t wear off. Don’t forget a liquid measuring cup for the milk—Pyrex is my go-to brand.
Layering Dish
A clear glass trifle dish shows off the beautiful layers. An 8×8-inch or 9×13-inch works well for this quantity. I love Anchor Hocking glass dishes—they’re oven-safe and easy to clean. For individual servings, mason jars create cute, portable portions.
Cooling Rack
After cooking the custard, transfer it to a wire cooling rack to prevent overcooking. A simple stainless steel rack from Wilton works perfectly. This small step ensures your custard sets properly without forming a skin on the bottom.
Spatula
For folding in the Cool Whip, a silicone spatula is gentle on your mixture. I recommend GIR brand—they’re heat-resistant and have a comfortable grip. The flexible head gets every last bit out of the bowl, which matters when you’re making something this delicious. ✨
Nutrition Facts
Frequently Asked Questions
Can I make this ahead of time?
Yes, but assemble it the same day you plan to serve. The wafers soften the longer it sits.
What if I can’t find fat-free sweetened condensed milk?
You can make a substitute by simmering fat-free milk with 1/2 cup sugar until reduced by half. Cool completely before using.
Why did my custard turn lumpy?
Lumps usually mean the cornstarch wasn’t fully dissolved before heating. Whisk vigorously in cold liquid first, then heat gradually.
Can I use regular vanilla wafers?
Yes, but they’ll add fat. For best results, look for low-fat versions or reduce the quantity slightly.

- 8 Bean Soup Recipe Crock Pot: Hearty Vegetable Medley in One Pot - September 25, 2026
- 4C Bread Crumbs Meatballs Recipe: Crispy Crust and Juicy Centers - September 25, 2026
- 6 Oz Chocolate Chip Cookie Recipe: Perfectly Balanced Crispy Edges and Chewy Hearts - September 25, 2026