
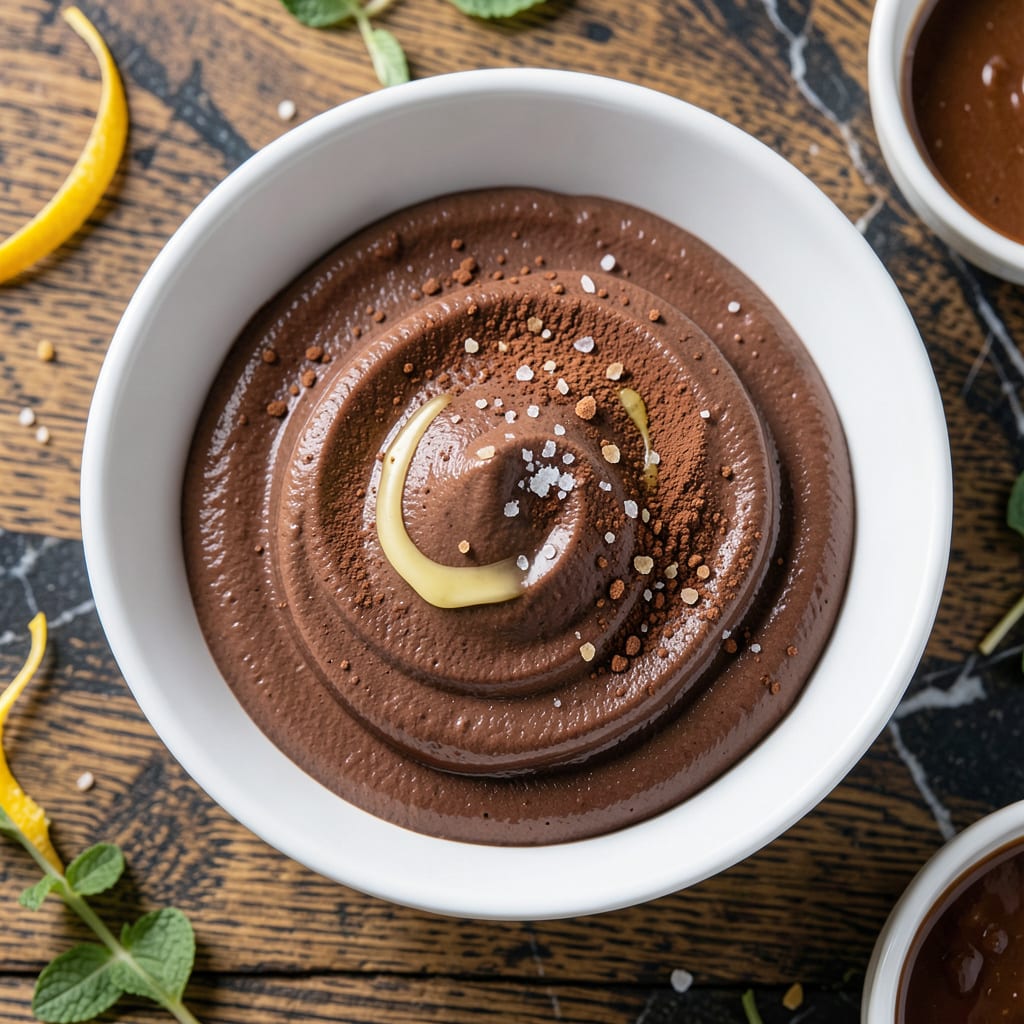
This chocolate mousse delivers decadent flavor without a trace of dairy or fat. The secret lies in aquafaba, which whips into airy peaks just like egg whites.
With simple ingredients and 10 minutes of effort, you create a dessert that’s light yet rich. Perfect for anyone seeking guilt-free indulgence.
Ingredients for Fat Free Chocolate Mousse
Decadent yet guilt-free, these simple ingredients transform into airy chocolate perfection using aquafaba magic.
| Ingredient | Amount | Notes |
|---|---|---|
| Aquafaba 🥫 | ¾ cup | Liquid from canned chickpeas, unsalted |
| Cream of Tartar 🧂 | ¼ tsp | Stabilizes whipped aquafaba |
| Granulated Sugar 🍚 | ½ cup | Add gradually while whipping |
| Unsweetened Cocoa Powder 🍫 | ½ cup | Dutch-processed preferred for smoother taste |
| Vanilla Extract 🌿 | 2 tsp | Pure vanilla for best flavor |
| Salt 🧂 | 0.125 tsp | Enhances chocolate flavor |
| Dark Chocolate 🍫 | 4 oz | At least 70% cocoa, finely chopped |
| Non-Dairy Milk 🥛 | 2 tbsp | Almond or oat milk recommended |
The aquafaba is the star here—use liquid from unsalted chickpeas (I prefer Goya or Eden Organic brands) for cleanest flavor. Cocoa powder quality matters: Hershey’s Special Dark or Rodelle Dutch-processed deliver that deep chocolate punch. Cream of tartar might seem niche, but most baking aisles stock it near the spices. Don’t skip it—it’s what makes the aquafaba whip up stable and tall.
No aquafaba on hand? Egg whites work too (though not vegan), but the magic of this recipe is its plant-based simplicity. Out of Dutch-processed cocoa? Natural cocoa works but may taste slightly sharper. Need to reduce sugar? Monk fruit sweetener at 1:1 ratio is my go-to. The dark chocolate can be swapped for semi-sweet, but avoid milk chocolate—it’s too sweet and contains dairy.
This keeps beautifully in the fridge for 3-4 days. Store in airtight containers with parchment paper pressed directly on the surface to prevent a skin from forming. Freezing isn’t recommended—it can separate. Best served chilled with fresh berries or a sprinkle of cocoa powder on top.
Why You’ll Love This Recipe
- I’ll be real: I always have a can of chickpeas, cocoa powder, and sugar on hand, so this comes together without a last-minute store run.
- 5-Minute Whip: I just dump aquafaba, cream of tartar, and sugar in a bowl, beat it, then fold in cocoa and vanilla—no cooking, no fuss.
- Rich Without Guilt: Honestly, the deep cocoa flavor with that airy, melt-in-your-mouth texture fools everyone into thinking it’s full of cream.
- Diet-Friendly Crowd Pleaser: Between us, it’s my go-to for potlucks since it’s vegan, fat-free, and even my picky nephew asks for seconds.
Step-by-Step Instructions for Fat Free Chocolate Mousse
This method transforms simple ingredients into a luxurious, airy dessert with professional results.
Step 1: Whip the Aquafaba to Stiff Peaks
In a clean, grease-free bowl, combine the 0.75 cup Aquafaba and 0.25 tsp Cream of Tartar. Using a hand mixer or stand mixer with the whisk attachment, beat on medium-high speed for 3-4 minutes until the mixture turns frothy and white.
Gradually increase the speed to high and continue whipping for another 5-7 minutes until you achieve stiff, glossy peaks. The aquafaba should hold its shape when the whisk is lifted, with the tip standing straight up. This structural foundation is critical for the mousse’s light texture.
Step 2: Incorporate Sugar and Flavorings
With the mixer running on medium speed, slowly add the 0.5 cup Granulated Sugar, about 1 tablespoon at a time, allowing each addition to fully dissolve before adding more. This gradual process prevents deflation and ensures a stable meringue.
Once all the sugar is incorporated, add the 2 tsp Vanilla Extract and 0.125 tsp Salt. Continue mixing for 1-2 minutes until the mixture is thick, glossy, and holds firm peaks. The bowl should feel cool to the touch, indicating proper aeration.
Step 3: Fold in Cocoa Powder
Sift the 0.5 cup Unsweetened Cocoa Powder over the whipped aquafaba to prevent lumps. Using a wide spatula, gently fold the cocoa into the meringue with a J-fold technique—scoop under the mixture and lift over the top, rotating the bowl as you work.
Fold just until no streaks of cocoa remain visible, being careful not to overmix. The mixture will deflate slightly but should retain most of its volume. The color will deepen to a rich chocolate hue, and the texture should remain light and airy.
Step 4: Melt and Fold in the Chocolate
Melt the 4 oz Dark Chocolate with the 2 tbsp Non-Dairy Milk in a microwave-safe bowl in 20-second intervals, stirring between each, until smooth and fully melted. Let cool for 2-3 minutes until just warm to the touch.
Pour the melted chocolate in a thin stream down the side of the bowl into the cocoa mixture. Gently fold until fully incorporated and no streaks remain. The chocolate adds depth and richness while maintaining the mousse’s fat-free profile.
The final mixture should be uniform in color, with a glossy sheen and a texture that holds soft peaks. Avoid overmixing, as this can cause the mousse to become dense.
Step 5: Chill and Serve
Divide the mousse into serving dishes, using a spoon or piping bag for an elegant presentation. Refrigerate for at least 2 hours, or until fully set. The mousse will firm up significantly as it chills, achieving a light yet creamy consistency.
Serve with fresh berries, a dusting of cocoa powder, or a sprinkle of chocolate shavings. This dessert keeps well in the refrigerator for up to 3 days, though it’s best enjoyed within 24 hours for optimal texture.
Pro Tips For Making Fat Free Chocolate Mousse
- Chill Your Aquafaba: I learned this the hard way—using room temperature aquafaba just doesn’t whip up as stiff. Pop the can in the fridge overnight, or at least 2 hours before starting.
- Sift the Cocoa: Sounds tedious, but it works: sifting the unsweetened cocoa powder prevents those pesky little lumps that ruin the silky texture.
- Beat to Stiff Peaks: Resist the urge to stop early—your aquafaba needs to reach stiff peaks, about 5-7 minutes on high, or the mousse will collapse.
- Fold Gently: After mixing in the sugar and cocoa, fold with a spatula using slow, deliberate strokes to keep the air in and avoid a dense result.
Wine and Beer Pairings for This Recipe
Dessert Wine Pairings
I love serving this with a glass of Moscato d’Asti—its light effervescence and notes of peach and apricot complement the chocolate beautifully. The sweetness of the wine balances the bitterness of the cocoa without overpowering it. 🍷
Port Wine Classic
A ruby port like Graham’s Six Grapes offers rich berry flavors that enhance the dark chocolate. Serve slightly chilled at 55-60°F to let the wine’s fruitiness shine through.
Coffee Stout Beer
For beer lovers, try a coffee stout such as Founders KBS. The roasted coffee notes mirror the chocolate while the beer’s carbonation cleanses your palate between bites. Serve at 45-50°F for best flavor. 🍺
Sparkling Rosé
A dry sparkling rosé like Whispering Angel provides a refreshing contrast with its crisp acidity and red berry notes. The bubbles cut through the mousse’s richness, making each bite feel lighter.
Chocolate-Friendly Tea
For a non-alcoholic option, Earl Grey tea with its bergamot citrus notes pairs surprisingly well. Brew it strong and serve iced for a sophisticated touch that enhances the vanilla in the recipe.
Nutrition Facts
Frequently Asked Questions
What can I use instead of aquafaba?
Egg whites work as a 1:1 substitute, though the recipe won’t be vegan. For plant-based options, try 1 cup whipped coconut cream (chilled overnight) for similar texture.
Why did my mousse collapse?
Overmixing after folding in cocoa or chocolate is the most common cause. Ensure your bowl and tools are grease-free, and fold gently to maintain air bubbles.
Can I make this in advance?
Yes! It keeps well in the fridge for 3-4 days. Store in an airtight container with parchment paper pressed on the surface to prevent a skin.
How do I get a smoother texture?
Sift the cocoa powder first to avoid lumps. Use Dutch-processed cocoa for a milder taste. Melting the chocolate with non-dairy milk also helps.

- 4C Bread Crumbs Meatballs Recipe: Crispy Crust and Juicy Centers - September 25, 2026
- 6 Oz Chocolate Chip Cookie Recipe: Perfectly Balanced Crispy Edges and Chewy Hearts - September 25, 2026
- 6-Inch Coffee Cake Recipe: Vanilla Bean Swirls and Buttery Streusel Topping - September 25, 2026