
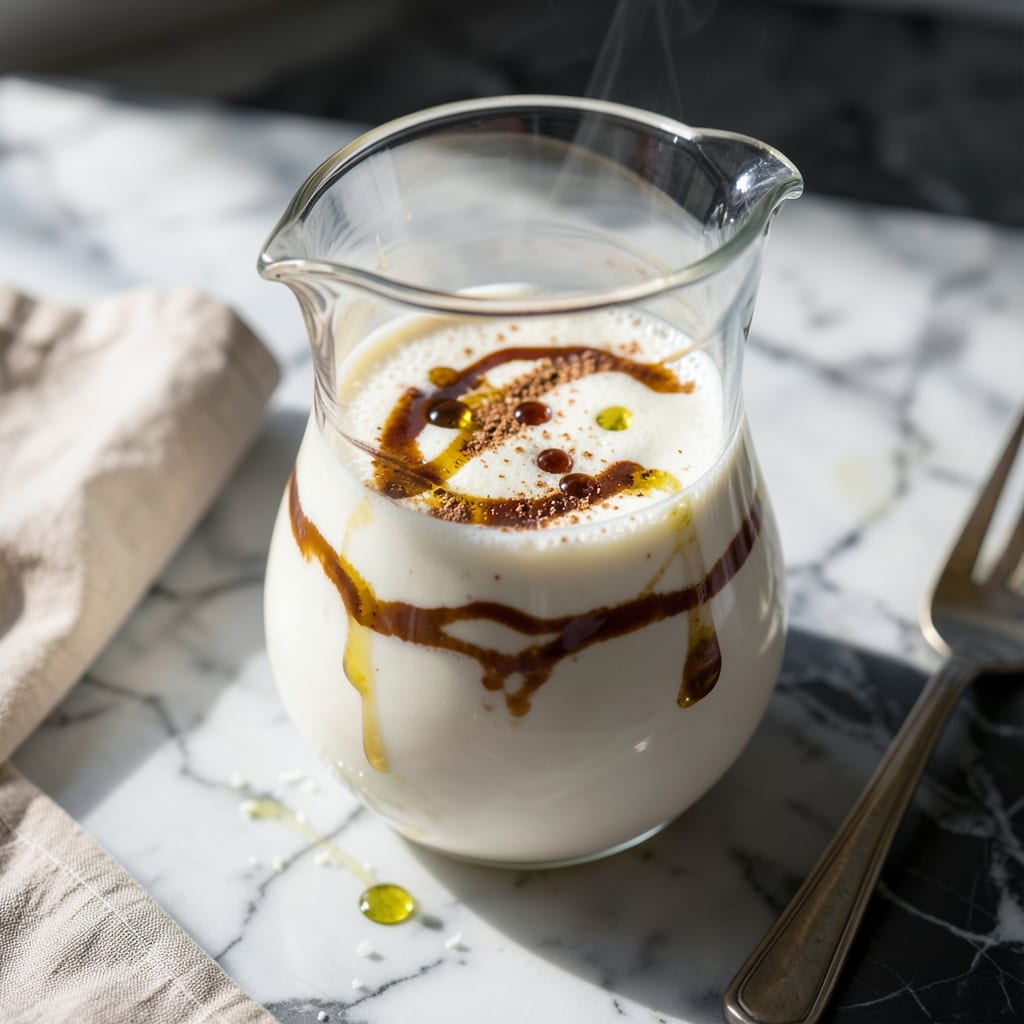
I developed this creamer to prove that dairy-free doesn’t mean flavor-free. This blend delivers rich, smooth results without any fat, using simple plant-based ingredients and natural sweeteners.
It keeps in the fridge for up to two weeks, making it perfect for daily use. The recipe is adaptable to any sweetness level or flavor preference, from vanilla to caramel.
Ingredients for Fat Free Coffee Creamer
Eight simple plant-based ingredients create a smooth, rich dairy-free coffee companion.
| Ingredient | Amount | Notes |
|---|---|---|
| Unsweetened Almond Milk 🥛 | 2 cups | Light or original variety |
| Coconut Milk Powder 🥥 | ¼ cup | Full-fat for creaminess |
| Pure Vanilla Extract 🌿 | 2 tsp | Alcohol-free if available |
| Maple Syrup 🍁 | 3 tbsp | Grade A for sweetness |
| Agave Nectar 🌵 | 2 tbsp | Light or amber variety |
| Xanthan Gum ⚗️ | ¼ tsp | For thickening consistency |
| Sea Salt 🧂 | 0.125 tsp | Fine grain preferred |
| Ground Cinnamon 🌿 | ¼ tsp | Optional for warmth |
The almond milk base is crucial—Silk or Califia Farms offer the most neutral flavors for this application. Coconut milk powder adds body without separation; Nativa or Anthony’s brands are widely available at Whole Foods or online. Vanilla extract quality matters—Nielsen-Massey delivers superior depth. Avoid imitation vanilla, as it can introduce artificial notes that clash with the natural profile.
Need to swap sweeteners? Date syrup or brown rice syrup work at a 1:1 ratio for the maple and agave. No xanthan gum? Arrowroot powder or cornstarch at double the amount can substitute, though texture may be slightly thinner. For a nut-free version, oat milk replaces almond milk seamlessly—just ensure it’s unsweetened to control the flavor balance.
Store in a sealed glass jar in the fridge for up to 2 weeks. Shake well before each use, as natural separation occurs. For longer storage, freeze in ice cube trays and thaw as needed. The flavor intensifies slightly after 24 hours as the ingredients meld.
Why You’ll Love This Recipe
- 5-Minute Mix: I just shake the ingredients in a jar—no cooking, no waiting. Honestly, it’s faster than running to the store.
- Vanilla-Kissed Sweetness: The pure vanilla extract with maple syrup gives that cozy, creamy taste without the dairy.
- Weeklong Staple: I make a big batch on Sunday and it stays fresh all week for my morning coffee.
- Pantry Savior: Coconut milk powder and almond milk mean I’m never out of creamer, and it’s way cheaper than store-bought.
Step-by-Step Instructions for Fat Free Coffee Creamer
Master this technique and you’ll create a silky, dairy-free creamer with professional consistency every time.
Step 1: Blend the Liquid Base
Pour the 2 cups Unsweetened Almond Milk into a high-speed blender. I always use a tamper with my blender to ensure complete incorporation of ingredients, especially when working with powders. The light variety works perfectly, though original almond milk will yield a slightly richer result.
Add the 3 tbsp Maple Syrup and 2 tbsp Agave Nectar to the blender. These natural sweeteners create a balanced flavor profile that complements coffee without overpowering it. Grade A maple syrup provides the ideal sweetness level for this application.
Step 2: Incorporate the Dry Components
Measure the 0.25 cup Coconut Milk Powder and add it to the blender. Full-fat coconut milk powder ensures a creamy texture without adding actual fat to the finished product. This is the secret to achieving that rich mouthfeel characteristic of traditional creamers.
Add the 0.25 tsp Xanthan Gum, 0.125 tsp Sea Salt, and 0.25 tsp Ground Cinnamon. Fine grain sea salt dissolves most effectively, while the xanthan gum acts as a stabilizer to prevent separation. The cinnamon adds subtle warmth that enhances the overall flavor complexity.
Step 3: Emulsify and Thicken the Mixture
Secure the blender lid and process on high speed for 45-60 seconds. The mixture should become completely smooth and slightly thickened. Watch for the texture to change from liquid to a creamy consistency that coats the sides of the blender jar.
If the mixture appears too thin after 1 minute, continue blending for additional 15-second intervals until desired thickness is achieved. The xanthan gum requires thorough blending to activate its thickening properties fully. Stop blending if the motor begins to overheat.
Step 4: Add Vanilla and Finish Processing
Remove the blender lid and add the 2 tsp Pure Vanilla Extract. Alcohol-free vanilla extract prevents any potential separation issues in the finished creamer. Replace the lid and pulse 3-4 times just until the vanilla is fully incorporated.
Over-blending at this stage can cause the mixture to become too thick. The final product should have the consistency of half-and-half, pouring easily but with noticeable body. Taste and adjust sweetness if needed, though the specified amounts typically yield perfect balance.
Step 5: Chill and Store for Optimal Consistency
Transfer the creamer to a clean, airtight container. I prefer glass jars for storage as they don’t absorb odors and allow you to see the creamer’s beautiful, uniform color. Let it chill in the refrigerator for at least 2 hours before using.
The resting period allows the xanthan gum to fully hydrate and the flavors to meld completely. The creamer will thicken slightly as it cools, achieving its final velvety texture. Use within 7 days for best quality, shaking well before each use as some natural separation may occur.
Pro Tips For Making Fat Free Coffee Creamer
- Warm the Almond Milk: Heat the unsweetened almond milk gently to just below simmering—around 160°F—so the coconut milk powder dissolves smoothly without clumping.
- Whisk the Powder First: Mix the coconut milk powder with a few tablespoons of warm almond milk into a paste before adding the rest, or you’ll end up with stubborn lumps no matter how hard you stir.
- Avoid Boiling: I learned this the hard way—let the mixture get too hot and the coconut milk powder can separate, leaving you with a greasy film on top.
- Sweeten After Cooling: Stir in the maple syrup or agave nectar after the creamer cools slightly, since heat can make the flavors taste flat and one-note.
Creative Variations of fat free coffee creamer
Vanilla Caramel Twist
Replace the maple syrup with 4 tbsp caramel syrup for a deeper, buttery note. I use Torani sugar-free caramel to keep it fat-free. Add ½ tsp caramel extract alongside the vanilla for extra depth. 💛
Chocolate Mocha Style
Stir in 2 tbsp unsweetened cocoa powder with the dry ingredients. For a richer version, add 1 tsp instant coffee granules. This creates a decadent mocha creamer perfect for iced coffee.
Spiced Chai Version
Add ½ tsp chai spice blend (cinnamon, cardamom, ginger, cloves) to the dry ingredients. I make my own mix with Equal parts of each spice. This pairs beautifully with strong black coffee.
Hazelnut Flavor
Swap 1 tbsp maple syrup for 1 tbsp hazelnut syrup and add ½ tsp hazelnut extract. Monin or Torani brands work well. This tastes remarkably like commercial hazelnut creamers.
Seasonal Pumpkin Spice
Add 2 tbsp pumpkin puree and ½ tsp pumpkin pie spice to the blender. Use canned pumpkin (not pie filling) for best results. This fall favorite keeps for 1 week in the fridge. 🌟
Coconut Dream
Increase coconut milk powder to ⅓ cup and add ½ tsp coconut extract. This creates a tropical-inspired creamer that’s especially good in cold brew.
Nutrition Facts
Frequently Asked Questions
Can I use oat milk instead of almond milk?
Yes, unsweetened oat milk works perfectly and creates a slightly creamier texture. Just ensure it’s plain with no added flavors that could clash with your coffee.
Why is xanthan gum needed?
It acts as a stabilizer to prevent separation and gives the creamer a smooth, consistent texture. Without it, the ingredients may separate over time, especially in the fridge.
How do I adjust the sweetness?
Start with 1 tbsp less sweetener than the recipe calls for, then taste and add more as needed. Maple syrup and agave can be adjusted to your preference.
Can I make this without a blender?
A whisk and bowl can work in a pinch, but the texture won’t be as smooth. For best results, use a high-speed blender to fully emulsify the ingredients.

- 8 Bean Soup Recipe Crock Pot: Hearty Vegetable Medley in One Pot - September 25, 2026
- 4C Bread Crumbs Meatballs Recipe: Crispy Crust and Juicy Centers - September 25, 2026
- 6 Oz Chocolate Chip Cookie Recipe: Perfectly Balanced Crispy Edges and Chewy Hearts - September 25, 2026