
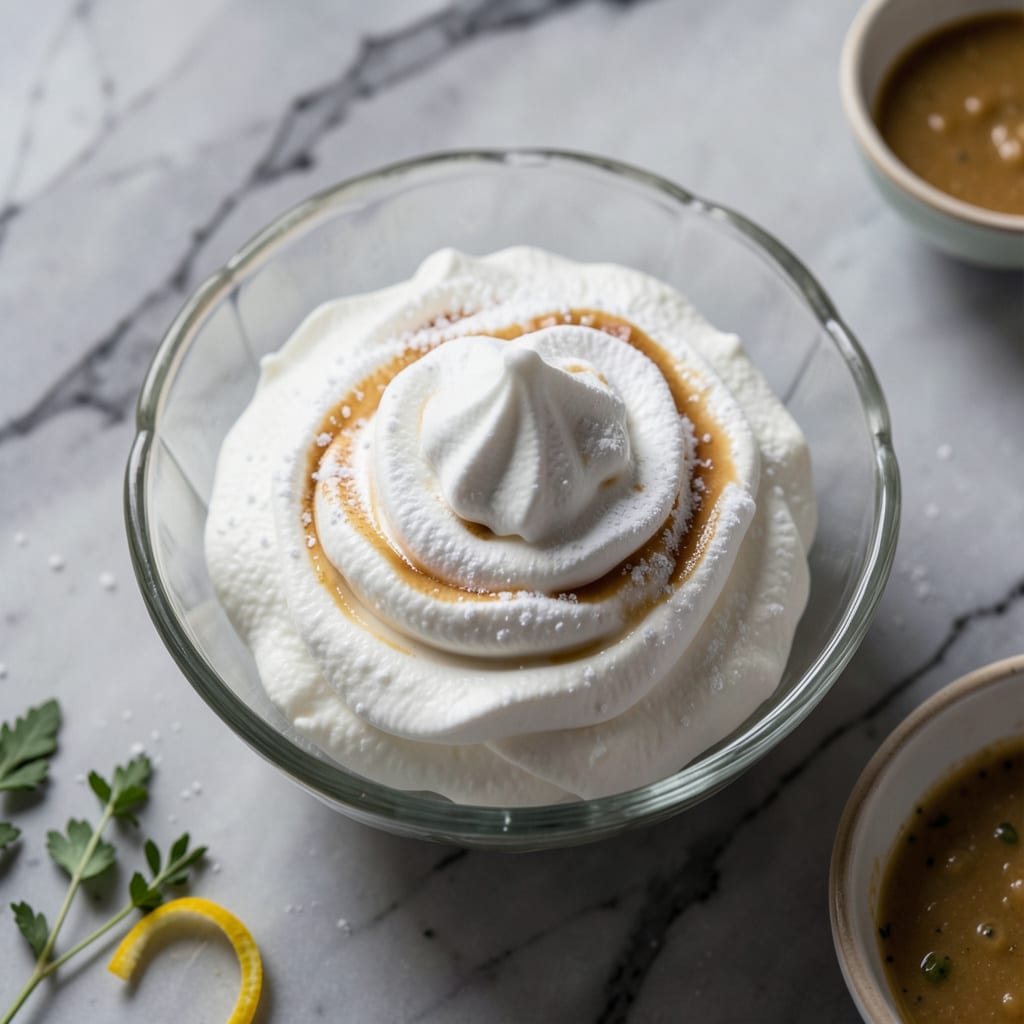
This light and airy topping delivers the classic whipped cream experience without the dairy or fat. The secret lies in using aquafaba, the liquid from canned chickpeas, which whips up beautifully with a touch of sweetener.
With just 3 ingredients and 5 minutes of whipping, you’ll have a stable, fluffy topping perfect for desserts, coffee, or fresh fruit. It holds its shape surprisingly well and stays fresh in the fridge for up to 3 days.
Ingredients for Fat Free Whipped Cream
Four simple ingredients transform into a light, fluffy dairy-free topping perfect for any dessert.
| Ingredient | Amount | Notes |
|---|---|---|
| Aquafaba 🥫 | ¾ cup | Liquid from canned chickpeas, unsalted |
| Powdered Sugar 🍚 | 3 tbsp | Adjust to taste preference |
| Vanilla Extract 🌿 | 1 tsp | Pure vanilla for best flavor |
| Cream of Tartar 🧂 | ¼ tsp | Stabilizes the foam |
Aquafaba quality is crucial here. Use the liquid from low-sodium or no-salt-added chickpea cans—brands like Goya or Eden Organic work reliably. The powdered sugar should be fine and free-flowing; organic brands dissolve more smoothly. Vanilla extract deepens the flavor profile, so opt for pure Madagascar bourbon vanilla if available.
No aquafaba on hand? Reserve the liquid next time you open a chickpea can. For sweetener, granulated sugar works at half the amount but may take longer to dissolve. Skip the cream of tartar if needed, though the topping may be less stable. For extra flavor, a pinch of almond extract complements the vanilla beautifully.
This keeps beautifully in an airtight container. Expect it to hold for 3 days in the fridge. Give it a quick rewhip before using if it separates slightly. Best used fresh for maximum volume and stability.
Why You’ll Love This Recipe
- One-Bowl Magic: I just dump aquafaba, sugar, vanilla, and cream of tartar in a bowl and whip—no fancy tools, no mess.
- Sweet Vanilla Cloud: Honestly, the vanilla shines through so bright it tastes like dessert all on its own.
- Diet-Friendly Star: I serve it over fruit, pancakes, or even coffee—no guilt, all satisfaction.
- Pantry Hero: Between us, I always have a can of chickpeas, so the liquid is free and ready when I need it.
Step-by-Step Instructions for Fat Free Whipped Cream
Achieve perfect peaks and airy texture with this straightforward, tested method.
Step 1: Prepare the Aquafaba Base
Drain and measure exactly 0.75 cup Aquafaba from a can of unsalted chickpeas. I pour it directly into the bowl of a stand mixer fitted with the whisk attachment. For best results, use the liquid from a can rather than homemade—it whips more reliably.
The aquafaba should look slightly viscous, like egg whites. If it appears thin or watery, reduce the liquid by simmering it in a saucepan for 5-7 minutes until it thickens slightly. This ensures you’ll achieve maximum volume when whipping.
Step 2: Add Stabilizers and Begin Whipping
Add 0.25 tsp Cream of Tartar to the aquafaba. This acid helps stabilize the foam by strengthening the protein structure, just as it does in traditional meringues. The cream of tartar also helps the aquafaba whip up faster and hold its shape longer.
Begin whipping on medium speed. After 1-2 minutes, you’ll notice the liquid starts to foam. Increase the speed to high and continue whipping. At this stage, the mixture will progress from large, bubbly foam to a more structured, white meringue-like consistency.
Step 3: Incorporate Sweetener and Flavor
Once the aquafaba reaches soft peaks (when you lift the whisk, the peaks flop over slightly), gradually add 3 tbsp Powdered Sugar, 1 tablespoon at a time. I sprinkle it in slowly while the mixer is running to prevent deflating the foam.
The powdered sugar dissolves more easily than granulated and adds sweetness without adding moisture. Continue whipping until the mixture holds stiff peaks and appears glossy. This usually takes an additional 3-5 minutes of whipping on high speed.
Step 4: Finish with Vanilla and Final Check
Add 1 tsp Vanilla Extract and whip for another 30-60 seconds until fully incorporated. The vanilla should be evenly distributed throughout the mixture, adding depth of flavor without altering the texture.
At this point, your creation should hold firm peaks that stand straight up when the whisk is lifted. If it still looks slightly soft, continue whipping for another 1-2 minutes. Be careful not to overwhip, as it can cause the mixture to become grainy or separate.
Step 5: Serve or Store Immediately
Use the whipped aquafaba immediately for best texture, or transfer it to an airtight container. It will keep in the refrigerator for up to 3 days, though it may weep slightly over time. To revive, simply rewhip briefly with the whisk attachment.
This light and airy topping works beautifully on desserts, fruits, or even as a filling for pastries. Each serving delivers the perfect balance of sweetness and stability without any of the fat found in traditional whipped cream.
Pro Tips For Making Fat Free Whipped Cream
- Chill the Aquafaba: Use cold aquafaba straight from the fridge—it whips faster and holds peaks better. I learned this the hard way after ending up with a sad, floppy mess using room temp liquid.
- Add Cream of Tartar Early: Sprinkle in the cream of tartar while the aquafaba is still foamy, not after it starts stiffening. It stabilizes the structure and prevents collapse.
- Skip the Overmixing: Stop whipping the moment glossy stiff peaks form—keep going and it’ll turn grainy. Sounds obvious, but I’ve ruined two batches by walking away for ten seconds.
- Sift the Sugar: Sift the powdered sugar first to avoid lumps that never fully dissolve. A fine mesh strainer takes 30 seconds and makes the texture silky smooth.
Perfect Pairings for This fat free whipped cream
Dessert Toppings
This topping works beautifully on fresh berries like strawberries or raspberries. I love it on a slice of angel food cake—the light sponge pairs perfectly with the airy texture. Try it with chocolate shavings for a decadent yet guilt-free treat. 🍓
Beverage Pairings
Dollop a spoonful into hot cocoa or coffee drinks for a frothy finish. It melts slightly but holds its shape better than traditional whipped cream. I also use it to top iced matcha lattes for a visually stunning presentation.
Breakfast Ideas
Spread it on whole wheat toast with a drizzle of honey for a sweet morning treat. It also elevates pancakes or waffles without the heaviness of butter. My kids love it on their weekend French toast.
Fruit Applications
Use it as a dip for apple slices or banana chunks. The subtle sweetness complements tart fruits especially well. I’ve even used it as a light filling for crepes with fresh peaches in summer. 🍌
Special Occasions
Pipe it onto cupcakes or mini tarts for a festive touch. It holds its shape when piped, making it ideal for decorative desserts. I’ve used it successfully for birthday cakes with zero guilt about the frosting.
Savory Twist
For an unexpected use, try it on sweet potato casserole instead of marshmallows. The lightness balances the dish’s richness. A sprinkle of cinnamon on top ties everything together beautifully.
Nutrition Facts
Frequently Asked Questions
Can I use granulated sugar instead of powdered?
Yes, but use half the amount and whip longer. Powdered sugar dissolves faster, but granulated works in a pinch. The texture may be slightly grainier.
Why did my mixture collapse?
Overwhipping or underwhipping can cause this. Stop at stiff peaks and avoid opening the mixer too soon. Adding sugar too quickly can also deflate the foam.
Can I make this ahead of time?
Store in an airtight container for up to 3 days. Rewhip briefly before serving if it separates slightly.
What can I use instead of cream of tartar?
Lemon juice or white vinegar (0.5 tsp) works as a substitute. These acids stabilize the foam similarly to cream of tartar.

- 4C Bread Crumbs Meatballs Recipe: Crispy Crust and Juicy Centers - September 25, 2026
- 6 Oz Chocolate Chip Cookie Recipe: Perfectly Balanced Crispy Edges and Chewy Hearts - September 25, 2026
- 6-Inch Coffee Cake Recipe: Vanilla Bean Swirls and Buttery Streusel Topping - September 25, 2026