
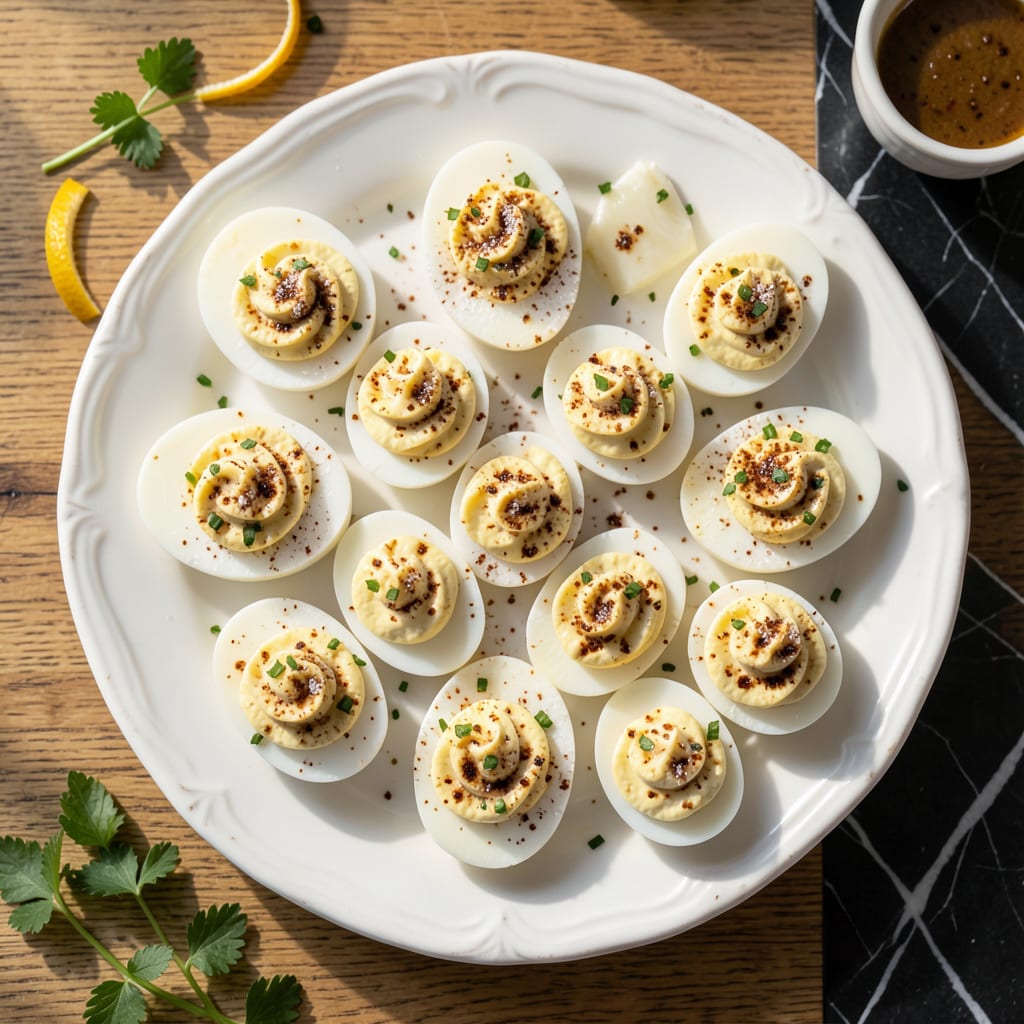
I’ve perfected a version of deviled eggs that keeps all the classic flavor while cutting the fat entirely. The secret is using Greek yogurt to replace mayonnaise, creating that same creamy texture without the guilt.
This method delivers the same tangy, rich filling you love, with a lighter finish. The result is a dish that’s just as satisfying as the original but far better for you.
Ingredients for Fat Free Deviled Eggs
A dozen eggs and a few pantry staples make these lighter deviled eggs sing.
| Ingredient | Amount | Notes |
|---|---|---|
| Large Eggs 🥚 | 12 whole | Hard-boiled and peeled |
| Plain Non-Fat Greek Yogurt 🥛 | ½ cup | Full fat works too |
| Dijon Mustard 🟡 | 2 tbsp | Or yellow mustard |
| White Vinegar 💧 | 1 tbsp | For tangy brightness |
| Sweet Relish 🥒 | 2 tbsp | Or diced pickles |
| Granulated Sugar 🍚 | ½ tsp | Optional for sweetness |
| Salt 🧂 | ½ tsp | Adjust to taste |
| Black Pepper 🌶️ | ¼ tsp | Freshly ground preferred |
| Paprika 🌶️ | 1 tsp | For garnish color |
| Fresh Dill 🌿 | 1 tbsp | Chopped, optional garnish |
| Fresh Chives 🌿 | 1 tbsp | Chopped, optional garnish |
The Greek yogurt is non-negotiable here—Chobani or Fage non-fat give that perfect creamy texture without any fat. Most grocery stores carry these brands in the dairy aisle. I always grab a big tub since it keeps for 2-3 weeks unopened. For the mustard, Dijon adds a nice depth, but any mustard you have on hand works fine (just avoid honey mustard—too sweet for this).
No Greek yogurt? Sour cream at half the amount works in a pinch, but it adds fat back in. Want more tang? Add an extra splash of vinegar or a squeeze of lemon juice. The relish can be swapped for finely diced bread and butter pickles if that’s what you’ve got. For garnish, smoked paprika instead of regular adds a nice smoky note.
These keep 3-4 days in the fridge in an airtight container. The filling might absorb some moisture, so give it a stir before serving. Best made the same day, but they’re still pretty great the next day (the flavors meld nicely).
Why You’ll Love This Recipe
- 10-Minute Assembly: I hard-boil the eggs ahead, then mix the Greek yogurt, mustard, and relish in the time it takes to peel and halve them.
- Tangy, Creamy Bite: The non-fat Greek yogurt gives that classic deviled egg creaminess, and the Dijon plus vinegar add a sharp kick I can’t get enough of.
- Potluck MVP: I bring these to picnics and family gatherings, and honestly, nobody believes they’re fat-free until they’ve had three.
- Budget Stretcher: A dozen eggs and a small tub of yogurt make a big batch, so I spend pennies per serving and still have leftovers for lunch.
Step-by-Step Instructions for Fat Free Deviled Eggs
Here’s my tested method for achieving that classic creamy texture without any of the guilt.
Step 1: Halve and Remove the Yolks
Slice all 12 Large Eggs in half lengthwise with a sharp knife. I find it easiest to do this on a slightly damp paper towel—it keeps the eggs from sliding around. Gently pop the yolks into a medium bowl, leaving the whites intact on your work surface.
Try to keep the egg white halves as clean as possible. Any yolk left in the whites will make your final presentation look messy. If some yolk does stick, I use the tip of my knife to carefully scrape it out. Set the whites aside on a serving platter.
Step 2: Create the Creamy Filling Base
Add the 0.5 cup Plain Non-Fat Greek Yogurt, 2 tbsp Dijon Mustard, 1 tbsp White Vinegar, 2 tbsp Sweet Relish, 0.5 tsp Granulated Sugar, 0.5 tsp Salt, and 0.25 tsp Black Pepper to the bowl with the yolks. The Greek yogurt is the secret here—it gives you that rich, creamy texture without any fat.
Mash everything together with a fork until completely smooth. I like to press the mixture against the side of the bowl to break up any stubborn yolk pieces. You want the filling to be uniform in color and texture, with no visible lumps. Taste and adjust the seasoning if needed.
Step 3: Fill the Egg Whites
Spoon the yolk mixture into a zip-top bag and snip off one corner to create a makeshift piping bag. This gives you more control than just using a spoon, and your eggs will look more professional. Pipe the filling into each egg white half, slightly overfilling them for that classic domed look.
If you don’t have a piping bag, you can use a spoon—just be prepared to do a little more cleanup. I find it helps to hold the egg white in one hand and spoon the filling in with the other, using the spoon to gently press the filling into place.
Step 4: Garnish and Chill
Sprinkle the filled eggs with 1 tsp Paprika for a pop of color and a subtle smoky flavor. Then, if you’re using them, add the 1 tbsp Fresh Dill and 1 tbsp Fresh Chives as a final garnish. The herbs add a fresh, vibrant touch that balances the richness of the filling.
Arrange the eggs on your serving platter and refrigerate for at least 30 minutes before serving. This chilling time lets the flavors meld together and makes the filling firmer, which makes them easier to handle. I often make them a few hours ahead—just cover the platter with plastic wrap until you’re ready to serve.
Pro Tips For Making Fat Free Deviled Eggs
- Boil Gently: I learned this the hard way—rolling boil cracks the eggs. Keep it at a steady simmer for 12 minutes, then plunge into ice water immediately to stop the cooking.
- Strain the Yogurt: Sounds weird, but it works: line a strainer with a coffee filter, add the Greek yogurt, and let it drain for 10 minutes to thicken it up before mixing.
- Skip the Overmixing: After peeling, resist the urge to mash the yolks into a paste. A quick fork mash with the yogurt and mustard keeps the filling light and fluffy.
- Chill Before Filling: Give the halved whites a solid 15 minutes in the fridge before piping—makes a real difference in keeping the filling neat and preventing soggy edges.
Make-Ahead Tips for Leftovers
Prep the Eggs Early
Hard-boil your 12 Large Eggs up to 2 days ahead and store them unpeeled in the fridge. The shells help protect the eggs from absorbing odors. I always make a big batch since they keep so well. 💡
Store the Filling Separately
Prepare the yolk mixture and keep it in an airtight container for up to 24 hours. The flavors deepen overnight, but don’t combine with whites until serving to prevent sogginess. A ziplock bag works perfectly for piping later.
Assemble Just Before Serving
Fill the egg whites no more than 4 hours before your event. Cover the platter with plastic wrap and refrigerate. This keeps the edges crisp and the filling from drying out.
Revival Trick
If the filling thickens in the fridge, stir in 1 tsp water or vinegar to restore creaminess. For garnishes like Fresh Dill or Fresh Chives, add them right before serving to keep them vibrant. ✨
Transporting Tips
Use a deviled egg carrier or line a shallow container with paper towels to prevent sliding. I’ve had success with a muffin tin—each egg half fits perfectly in a cup.
Freezing Not Recommended
Deviled eggs don’t freeze well—the texture becomes grainy. Stick to fridge storage for 3-4 days max. The filling may absorb some moisture, so give it a quick stir before serving.
Nutrition Facts
Frequently Asked Questions
Can I use regular yogurt instead of Greek?
Regular yogurt will work but may make the filling runny. Strain it in a cheesecloth for 10 minutes first to thicken. Greek yogurt’s thickness is key for that perfect texture.
Why do my eggs look watery after chilling?
This happens if the filling wasn’t thick enough or sat too long. Pat the egg whites dry before filling and chill no more than 4 hours before serving.
Can I add hot sauce to the filling?
Start with 1 tsp and adjust to taste. The tang pairs well with the yogurt base. Add it when mixing the yolks for even distribution.
How do I prevent the paprika from clumping?
Sift the paprika through a fine mesh strainer or sprinkle from higher up. Use 1 tsp and apply just before serving for best results.

- 8 Bean Soup Recipe Crock Pot: Hearty Vegetable Medley in One Pot - September 25, 2026
- 4C Bread Crumbs Meatballs Recipe: Crispy Crust and Juicy Centers - September 25, 2026
- 6 Oz Chocolate Chip Cookie Recipe: Perfectly Balanced Crispy Edges and Chewy Hearts - September 25, 2026