
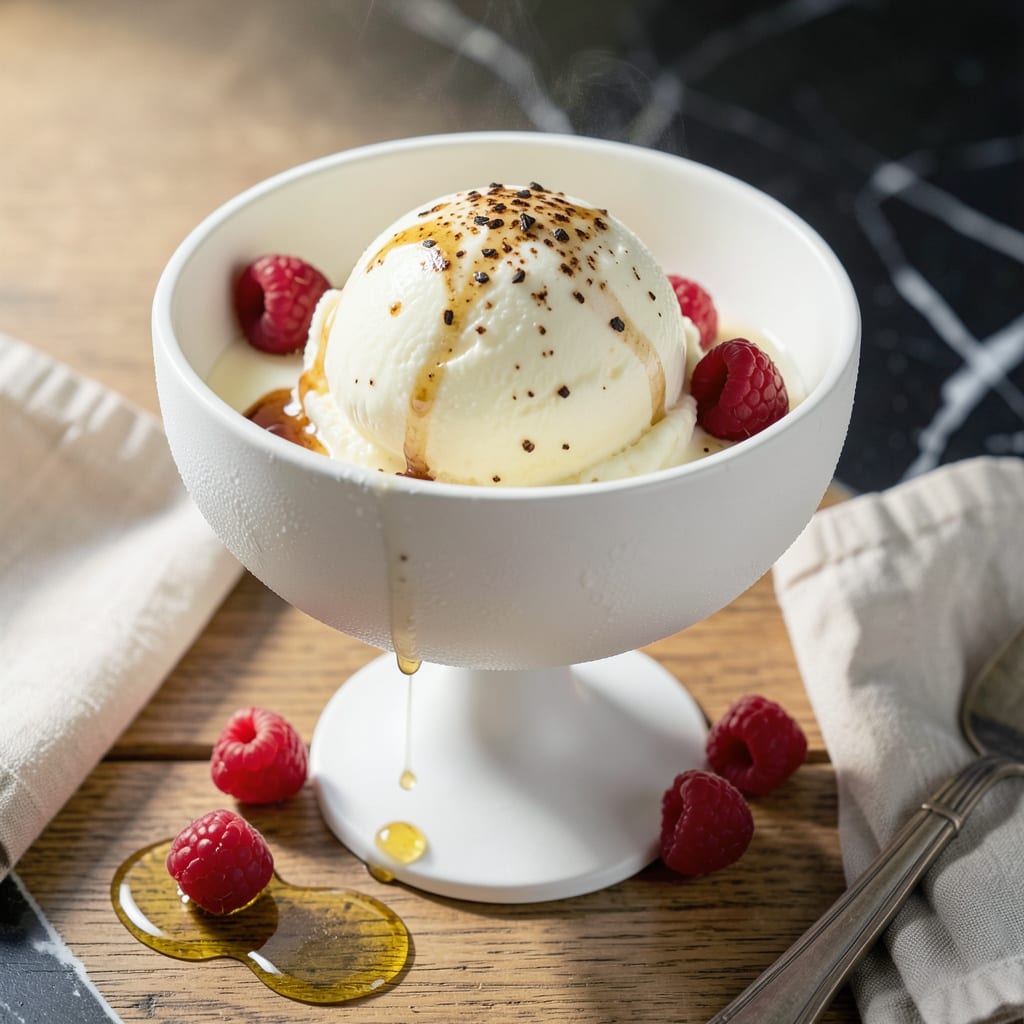
This fat-free ice cream delivers a silky texture without compromise. The secret lies in using fresh vanilla bean and a precise churning technique.
You’ll achieve creamy, dreamy results with just a few simple ingredients. No heavy cream, no guilt—just pure, velvety indulgence in every scoop.
Ingredients for Fat Free Ice Cream
These simple plant-based ingredients create a luscious ice cream with zero dairy or fat.
| Ingredient | Amount | Notes |
|---|---|---|
| Non-Fat Milk 🥛 | 4 cups | Cold, well-chilled for best texture |
| Granulated Sugar 🍚 | 1 ½ cups | Fine grain for smooth dissolution |
| Fresh Vanilla Bean 🌿 | 2 whole | Split and scraped for seeds |
| Cornstarch 🌾 | 3 tbsp | For thickening without fat |
| Pure Vanilla Extract 💧 | 2 tsp | Alcohol-free preferred for clarity |
| Salt 🧂 | ¼ tsp | Fine sea salt for balance |
| Lemon Juice 🍋 | 1 tbsp | Freshly squeezed for brightness |
| Xanthan Gum 🧪 | ½ tsp | Optional for extra creaminess |
| Coconut Milk 🥥 | 1 can | Light, for subtle richness |
| Agave Nectar 🍯 | 2 tbsp | Vegan sweetener alternative |
The vanilla bean is non-negotiable for that true vanilla flavor—look for plump, moist pods at Whole Foods or specialty spice shops. Nielsen-Massey offers excellent beans if you’re ordering online. Milk should be the coldest possible (straight from the fridge) for optimal churning. For the cornstarch, Bob’s Red Mill is reliable, but any pure cornstarch will work.
No vanilla bean? Use 3 tbsp of vanilla bean paste instead. Substitute agave with maple syrup or date syrup at a 1:1 ratio. For a nutty depth without fat, almond extract at 1/4 tsp pairs beautifully. If avoiding xanthan gum, 1 additional tbsp of cornstarch can help with texture, though results may be slightly less creamy.
Churn immediately after mixing for best results. Stores in an airtight container for up to 1 week in the freezer. For longer storage, press parchment directly on the surface to prevent ice crystals. Best consumed within 3 days for peak texture.
Why You’ll Love This Recipe
- One Bowl Wonder: I just mix everything in one pot—no fancy equipment, just non-fat milk, sugar, and a vanilla bean simmering away.
- Vanilla Bean Magic: That fresh vanilla bean and extract combo gives it a rich, deep flavor that doesn’t taste like it’s missing a thing.
- Kid Approved: My kids devour this, and I love that it’s a lighter treat I can feel good about serving after dinner.
- Budget Friendly: Non-fat milk and basic pantry staples keep the cost low, and it makes enough for leftovers that actually last.
Step-by-Step Instructions for Fat Free Ice Cream
Achieve a velvety texture with these precise techniques for a guilt-free frozen treat.
Step 1: Infuse the Milk with Vanilla Bean
In a saucepan, combine the 4 cups Non-Fat Milk with the seeds scraped from the 2 whole Fresh Vanilla Bean pods. Heat over medium-low heat for 5 minutes, stirring occasionally, until the milk reaches 180°F and small bubbles form at the edges. This gentle heating extracts the vanilla’s aromatic compounds without scorching.
Remove from heat and let the mixture steep for 15 minutes to intensify the vanilla flavor. The milk should take on a pale golden hue and a rich, floral aroma. This infusion step ensures every bite carries the complex, natural vanilla essence that defines this dish.
Step 2: Create the Thickening Slurry
While the milk infuses, whisk together the 3 tbsp Cornstarch and 0.5 tsp Xanthan Gum in a small bowl to create a smooth, lump-free slurry. The xanthan gum enhances creaminess without fat, while cornstarch provides the base thickening power.
In a separate bowl, combine the 1.5 cups Granulated Sugar, 0.25 tsp Salt, and 1 tbsp Lemon Juice. The lemon juice brightens the sweetness, while the salt balances the flavors. These dry ingredients will integrate seamlessly into the warm milk mixture.
Step 3: Cook the Base to Proper Consistency
Slowly whisk the cornstarch slurry and dry ingredients into the warm vanilla-infused milk. Return the saucepan to medium heat and cook, stirring constantly with a silicone spatula, for 8-10 minutes. The mixture should thicken to the consistency of pudding, coating the back of a spoon without running off.
Watch for the first gentle boil, then continue cooking for an additional 2 minutes to fully activate the thickening agents. The mixture should reach 200°F and appear glossy and smooth. This step ensures your creation will have the perfect scoopable texture after freezing.
Step 4: Finish and Chill the Ice Cream Base
Remove the saucepan from heat and stir in the 1 can Coconut Milk and 2 tsp Pure Vanilla Extract. The coconut milk adds subtle richness without fat, while the extract reinforces the vanilla flavor. For those preferring additional sweetness, incorporate the 2 tbsp Agave Nectar at this stage.
Pour the mixture into a clean bowl and press plastic wrap directly onto the surface to prevent a skin from forming. Refrigerate for at least 4 hours, or preferably overnight, until completely chilled. This resting period allows the flavors to meld and the base to reach the ideal temperature for churning.
Step 5: Churn and Freeze to Perfection
Pour the chilled base into your ice cream maker and churn according to the manufacturer’s instructions, typically 20-25 minutes. The mixture should transform into a soft, creamy consistency reminiscent of soft-serve ice cream.
Transfer to a lidded container and freeze for at least 4 hours until firm. The final texture should be smooth and scoopable, with a clean vanilla flavor that lingers on the palate. Serve immediately for the best experience, or store in the freezer for up to 2 weeks.
Pro Tips For Making Fat Free Ice Cream
- Temper the Eggs Slowly: I learned this the hard way—pour the hot milk mixture into the eggs in a thin stream while whisking constantly to avoid scrambled eggs in your ice cream base.
- Bloom the Cornstarch: Mix the cornstarch with a little cold milk first to make a slurry, then add it to the warm mixture—this prevents lumps and guarantees a smooth texture.
- Skip Boiling Milk: Resist the urge to boil the milk; heating it just until it’s steaming (around 180°F) is enough to dissolve the sugar and infuse the vanilla without curdling.
- Chill Overnight: After cooking the base, let it chill in the fridge for at least 4 hours or overnight—sounds tedious, but it actually changes the outcome by letting flavors meld and the mixture thicken properly.
Regional Styles of This Dish
Italian Gelato Style
For an Italian twist, replace 1 cup Non-Fat Milk with 1 cup unsweetened almond milk. This lightens the base while maintaining creaminess. Add 1 tsp almond extract to enhance the nutty profile, a nod to traditional Italian gelato flavors. 🗺️
French Sorbet Style
Omit the milk entirely and use 4 cups coconut water for a sorbet-like texture. Increase sugar to 2 cups for proper sweetness balance. Add zest of 1 lemon for brightness, mirroring classic French sorbet techniques.
American Frozen Custard
For a richer mouthfeel, use 2 cups Non-Fat Milk and 2 cups liquid egg whites. This creates a custard base without added fat. Cook to 170°F to properly set the eggs, then chill before churning.
Tropical Coconut Style
Use 2 cans light coconut milk instead of regular milk for a tropical flair. Reduce sugar to 1 cup since coconut milk is naturally sweeter. Add 1 tsp toasted coconut flakes after churning for texture. 🌴
Asian Pandan Style
Infuse the milk with 3 pandan leaves (tied in a knot) during the heating step. Add 1 tsp pandan extract for intense flavor. This Southeast Asian variation offers a unique floral note that pairs beautifully with vanilla.
Mexican Style
Add 1 tsp ground cinnamon and ½ tsp cayenne pepper to the base mixture. This creates a warm, spicy contrast to the sweet vanilla. Traditional Mexican ice cream often incorporates these bold flavors. 🔥
Nutrition Facts
Frequently Asked Questions
Can I make this without an ice cream maker?
Yes! Freeze the base in a shallow dish, stirring vigorously with a fork every 30 minutes for 3-4 hours to break up ice crystals. It won’t be as smooth but still delicious.
Why does my ice cream turn icy?
This usually happens if the base isn’t cold enough before churning or if it’s over-churned. Ensure it’s fully chilled to 40°F and follow your machine’s time guidelines.
Can I use a sugar substitute?
Replace granulated sugar with an equal amount of erythritol or monk fruit sweetener. Note that texture may vary slightly.

- 8 Bean Soup Recipe Crock Pot: Hearty Vegetable Medley in One Pot - September 25, 2026
- 4C Bread Crumbs Meatballs Recipe: Crispy Crust and Juicy Centers - September 25, 2026
- 6 Oz Chocolate Chip Cookie Recipe: Perfectly Balanced Crispy Edges and Chewy Hearts - September 25, 2026